
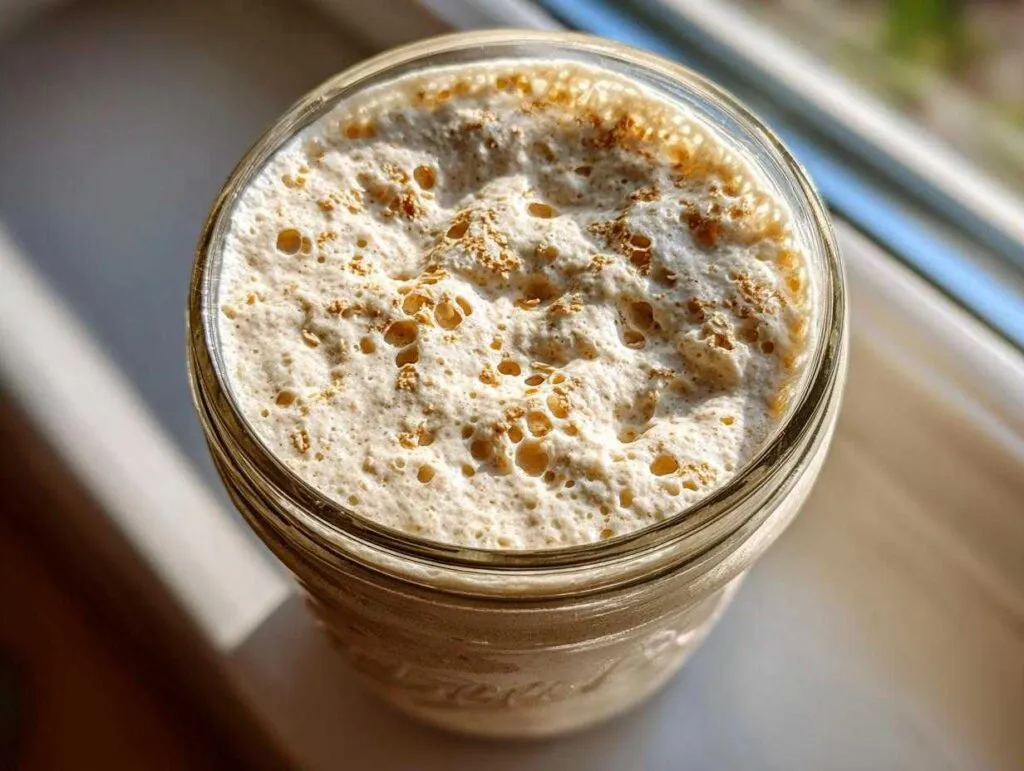
Oh goodness, there is nothing quite like pulling a loaf of truly homemade sourdough bread out of your oven. That crackle, that smell! It feels almost magical, right? If you’ve been dreaming about joining the artisan baking club but felt totally overwhelmed by the idea of cultivating your own culture, stop right there! I promise you, making your own sourdough starter from scratch is way easier than you think. I remember feeling like I needed chemistry equipment just to start! But really, all you need is a week, some patience, and the most basic ingredients. This simple, 7-day guide uses only flour and water to get your homemade wild yeast culture buzzing and ready to go. When you finally master it, you’ll feel like a wizard, ready to tackle anything—even making amazing homemade English muffins next!
- Why You Need Your Own Sourdough Starter From Scratch
- Gathering Supplies for Your Sourdough Starter
- Ingredients for Your Classic Sourdough Starter
- The Day by Day Sourdough Starter Instructions
- Sourdough Starter Tips for Guaranteed Success
- Sourdough Maintenance: Storing Your Mature Sourdough Starter
- What to Do With Sourdough Discard Use
- Troubleshooting Common Sourdough Starter Issues
- Nutritional Snapshot of Your Flour and Water Starter
- Ready to Bake? Next Steps in Your Sourdough Bread Journey
Why You Need Your Own Sourdough Starter From Scratch
Honestly, you could buy one online, but where is the fun—and the flavor—in that? Creating your own wild yeast culture means you are in total control from Day One. You get that deep, complex tang that store-bought yeast just can’t replicate. Plus, the sense of accomplishment when you see that first bubble? Unbeatable! It kicks off your whole artisan baking starter obsession.
The Joy of Cultivating Your Own Sourdough Starter
There is a deep satisfaction when you realize you’ve captured natural yeast from the air just using simple flour and water! It connects you to baking in a way I never expected. This isn’t just about bread; it’s about patience and watching something natural come to life right on your counter. Think of the bragging rights!
Why This is the Best Sourdough Base for Beginners
If you’re worried about complex ingredients, don’t be! This method relies only on a flour and water starter. It proves that you don’t need fancy additives to make beautiful bread. This basic combination sets the absolute best foundation for beginners tackling their first rustic loaves. It’s the perfect, low-stakes introduction!
Once you get this base going, you’ll have to try it out in my easy cast-iron cornbread—it adds a wonderful little zing!
Gathering Supplies for Your Sourdough Starter
Okay, before we jump into the daily routine, let’s talk gear. I want you to know right away that you don’t have to run out and buy a bunch of specialized baking equipment! That’s the beauty of starting off with just flour and water. The absolute most important thing here isn’t what you own, but how clean it is. We are nurturing a delicate wild yeast culture, so we need a safe, clean home for it while it develops.
Trust me, taking a little extra care here prevents a lot of headaches later on when you’re trying to keep things bubbly. If you’re feeling worried about having the right tools, don’t stress. Keep it simple, and it will work out perfectly. And while you’re thinking about perfect recipes, you might want to save my recipe for creamy vanilla buttercream for later decorating!
Essential Tools for Your Sourdough Starter Journey
Here is the short list of what you actually need. It’s short, I promise! First, grab a clean, clear jar. I love using a wide-mouthed quart-sized mason jar, so I can easily stir and see what’s happening. You only need a loose cover—a coffee filter or a lid placed lightly on top works wonders. Plastic wrap is too airtight; we need airflow for those beautiful wild microbes! Finally, for accuracy, which is key for consistent health, please use a digital kitchen scale. Weighing your flour and water instead of scooping makes all the difference in getting that perfect ratio for a healthy sourdough starter.
Ingredients for Your Classic Sourdough Starter
This is where we get down to business! Remember, this is a sourdough starter from scratch, so the ingredients are wonderfully simple. But simplicity demands quality, especially when it comes to the water. We are cultivating a living culture—we definitely don’t want chlorine interfering with our happy little yeast! I use specific flours for different stages to give the natural yeast the best start in life. When you’re ready to assemble these simple components, you’ll find the measurements below.
If you need a quick savory item while you wait for your culture to mature, go whip up my fast homemade teriyaki sauce—it’ll keep you busy!
- 100g Whole Wheat or Rye Flour (for initial days)
- 100g Unbleached All-Purpose Flour (for later days)
- 100g Unchlorinated Water (room temperature)
The Day by Day Sourdough Starter Instructions
Alright, this is the part that makes or breaks the whole operation! But honestly, if you follow this day by day sourdough starter routine, you’ll be amazed at how quickly you cultivate something wonderful. Remember, we are aiming for a robust active sourdough starter by the end of the week, and that takes consistent, loving attention.
Day 1 and Day 2: Starting the Sourdough Starter
For Day 1, we use that whole grain flour because it’s packed with the good stuff that feeds the wild yeast in the air. In your clean jar, mix exactly 50 grams of that rye or whole wheat flour with 50 grams of room-temperature water. Stir it until it looks like a thick, happy paste, not wet and not dry. Campa it loosely, and just wait 24 hours. Day 2 is super important: we do absolutely nothing! Don’t feed it. You might see a few tiny specks, or you might see nothing—both are perfect for beginning your wild yeast culture. It’s resting and waking up!
Day 3 and Day 4: Introducing the First Feeding Sourdough Starter
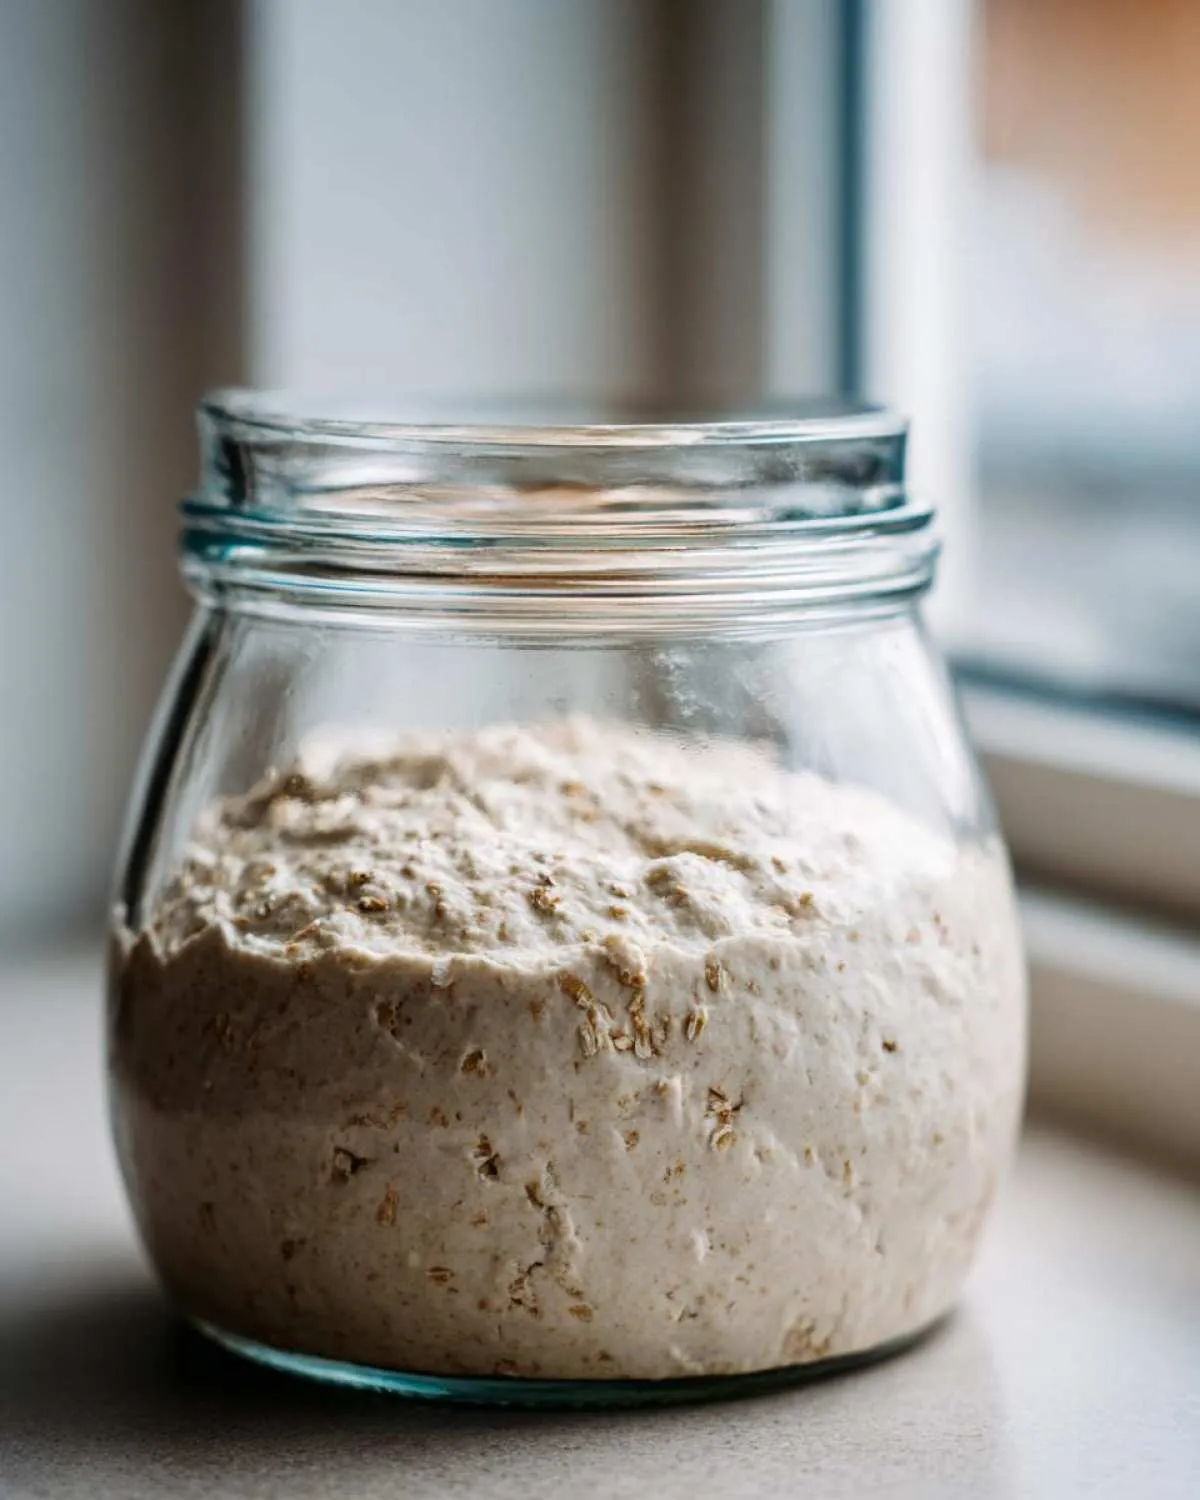
On Day 3, it’s time for our first discard. This seems dramatic, but we have to keep the volume manageable. Scrape out and toss about half of what’s left in the jar. Then, switch gears! Add 50 grams of your unbleached all-purpose flour and 50 grams of water to the remainder. Stir it up, cover it loosely, and check back in 24 hours. By Day 4, things should be looking lively! If they are, start doubling down on your attention: discard half again, feed 50g flour, 50g water. Then, and this is crucial for speed, repeat that whole discard-and-feed process about 12 hours later. This frequent feeding sourdough starter really encourages the beneficial bacteria to take over.
Day 5 to Day 7: Achieving an Active Sourdough Starter
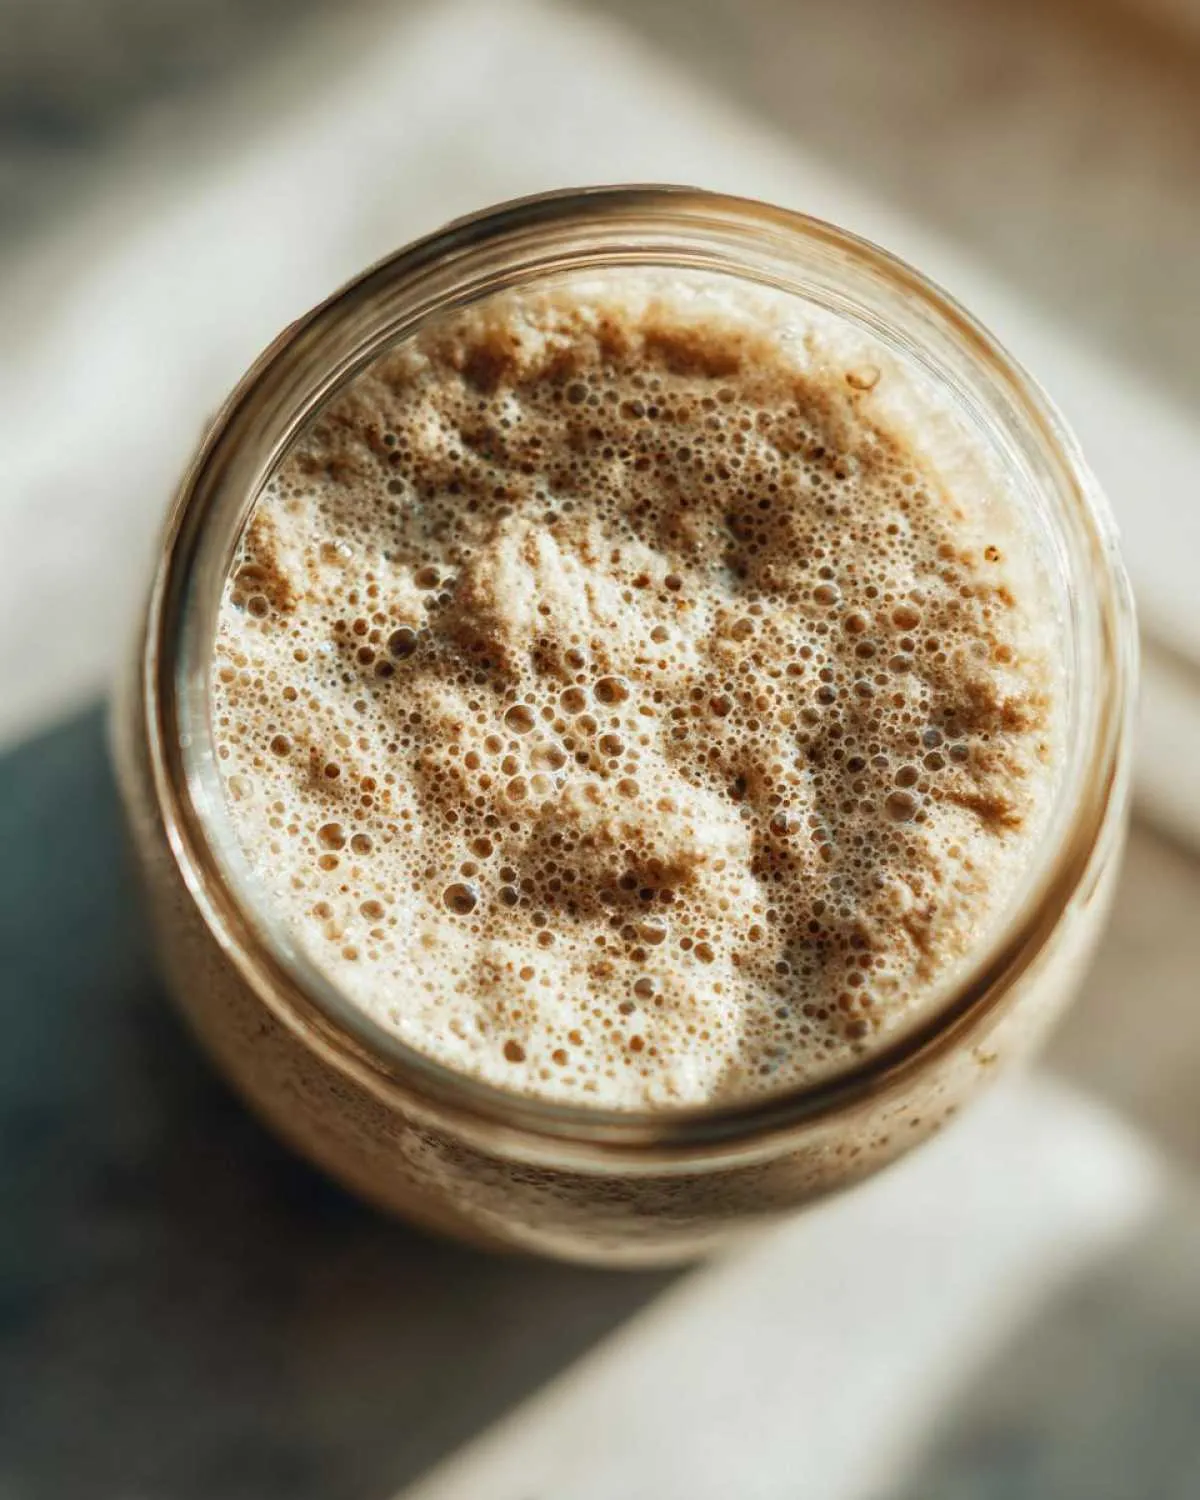
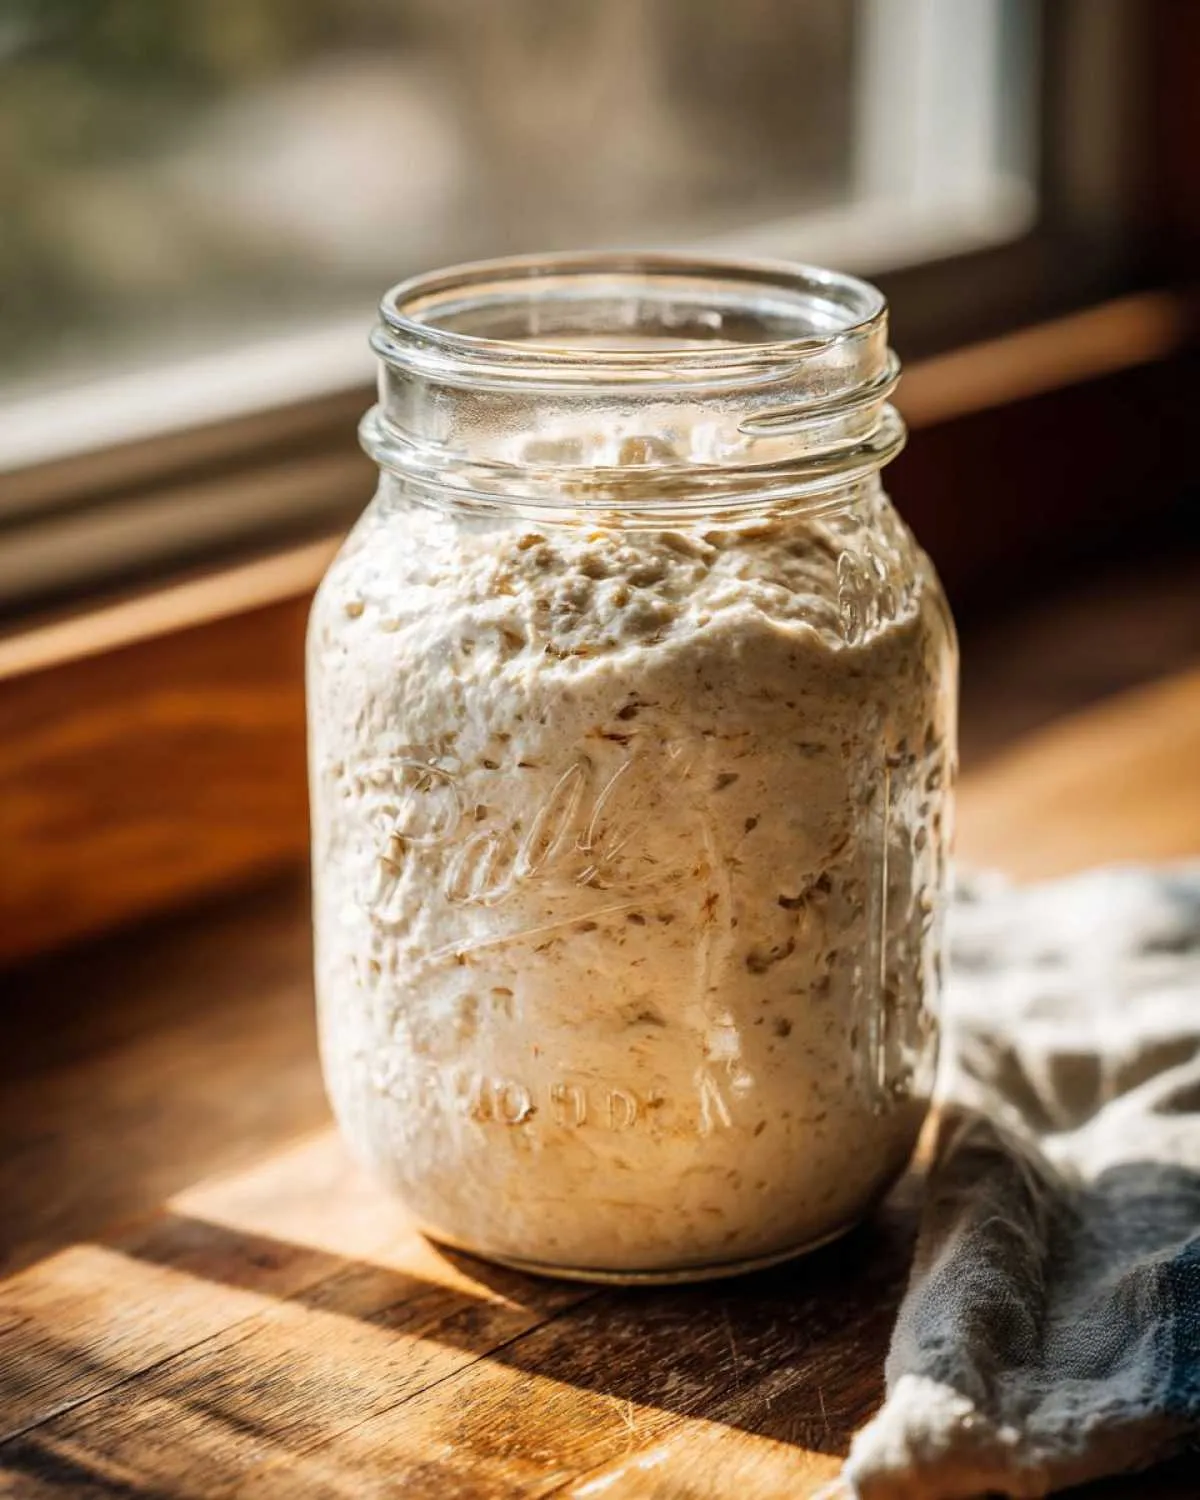
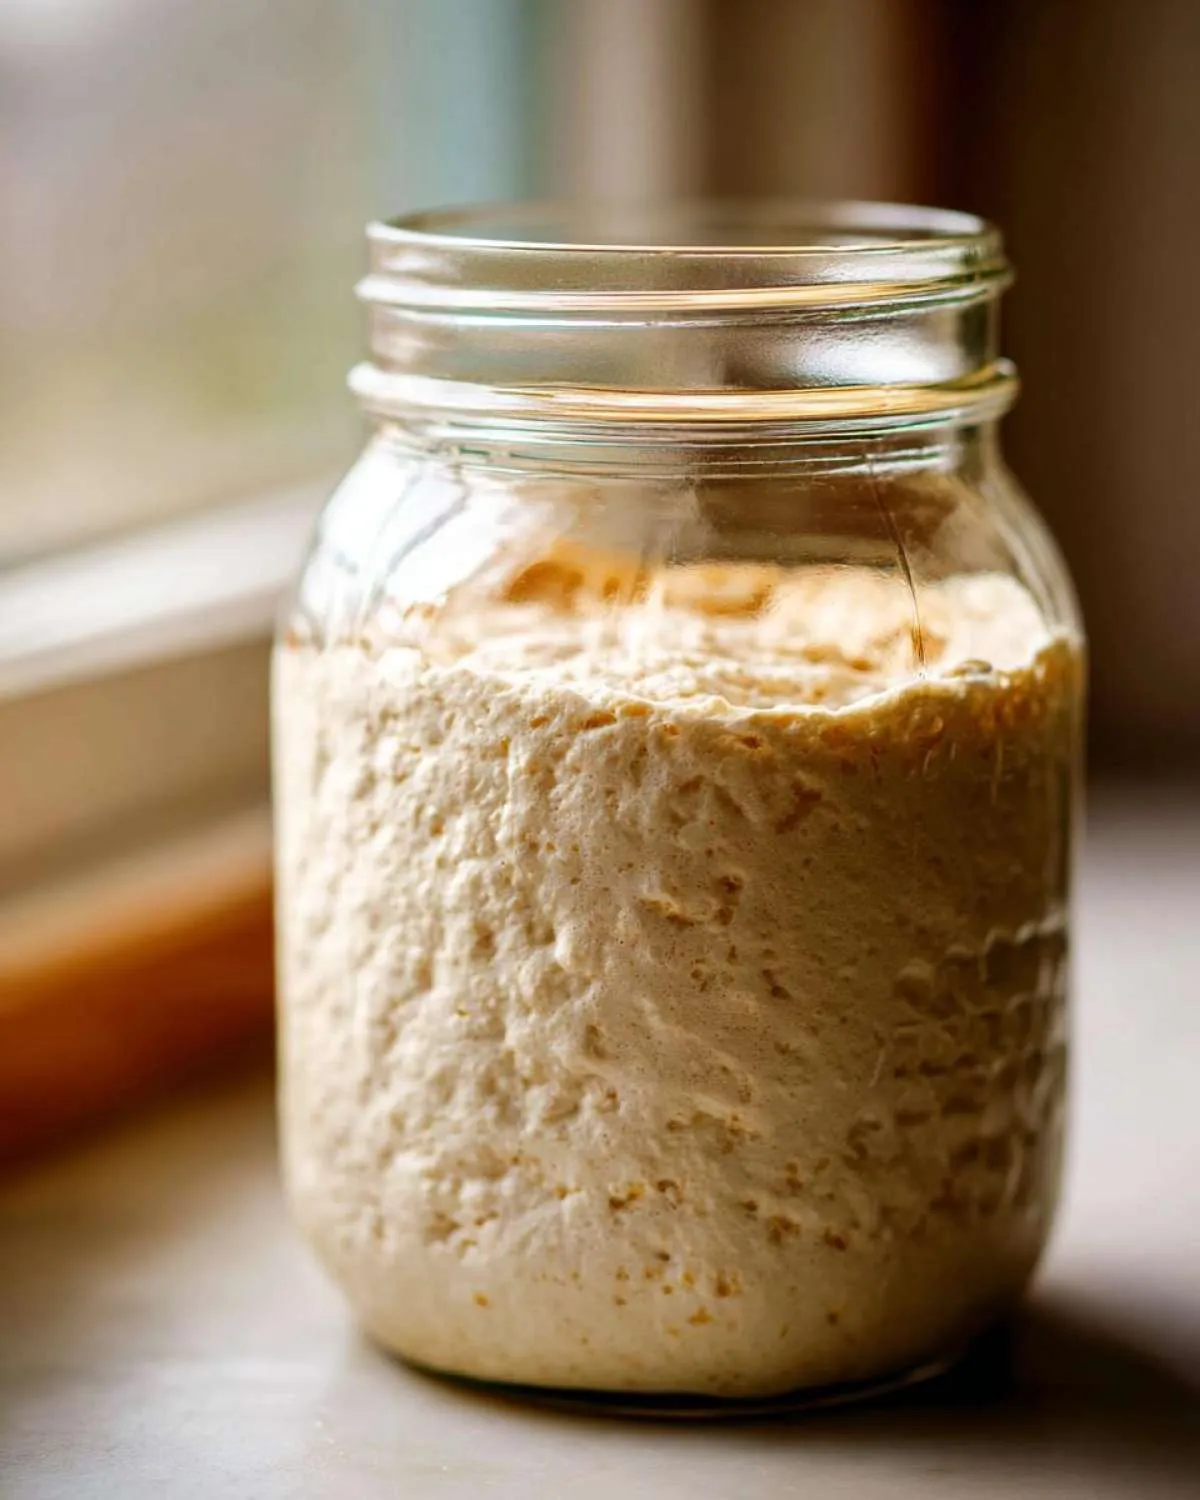
Days 5, 6, and 7 are all about consistency. Keep that twice-daily feeding schedule—discard half, feed 50g flour + 50g water—until we see reliable action. I always get nervous around Day 5. You are looking for the starter to double in volume completely within 4 to 8 hours after you feed it. If you see any pink, orange, or suspicious fuzzy spots on top, please, please throw it all out and start fresh. That’s just bad bacteria winning, and we don’t want that in bread! Once it’s consistently doubling on schedule, congratulate yourself! You have officially established an active sourdough starter that is ready to rock your world. You can even start looking up how to make some amazing sourdough discard pancakes!
Once you have a strong one, you can look at ideas for chewy homemade granola bars too! If you have questions, send them over, and I’ll check our Pinterest board at RecipesVault to see if others have asked something similar!
Sourdough Starter Tips for Guaranteed Success
Now that you know the day-by-day routine, let me share a few things I learned the hard way when I first tried cultivating my own sourdough starter a few years back. Mine was really sluggish around day four—I thought I’d killed it! It turns out, my kitchen was just a little too chilly, sitting right next to a drafty window. Once I moved the jar up onto the top of the fridge where it stays toasty, it doubled perfectly within six hours. See? Those small environmental factors make a huge difference in getting that powerful, happy wild yeast!
Temperature Control for Your Sourdough Starter
Yeast loves warmth, period. If your kitchen dips below 68°F, your feeding schedule might need to stretch out because the yeast goes into slow-motion. Aiming between 68°F and 75°F is that sweet spot where the microorganisms are active and hungry between feedings. If you can’t keep your room warm, just cover your jar with a tea towel for a little extra insulation!
Water Quality Matters for Your Sourdough Starter
I can’t stress this enough: chlorine is yeast’s nemesis! If your tap water smells strongly of bleach, you absolutely have to use something else. I keep a pitcher of filtered water specifically for my starter. If filtered isn’t an option, just let tap water sit out on the counter uncovered overnight. Much of that chlorine evaporates off by morning, giving you safer water for your precious culture.
Need a warm, comforting breakfast while you wait for your starter to peak? Try my recipe for stovetop apple cinnamon oatmeal!
Sourdough Maintenance: Storing Your Mature Sourdough Starter
Congratulations! You have a beautiful, active sourdough starter. Now the question is, how do we keep this fermentation pet alive without spending all day, every day, feeding it? That’s where sourdough maintenance comes into play, and luckily, you have two excellent options depending on how often you plan to bake. Storing it on the counter is great for frequent bakers, but the fridge is a total lifesaver for those of us who only bake on the weekends!
Countertop Feeding Schedule for Your Sourdough Starter
If you plan on baking nearly every day or every other day, keeping your starter on the counter (around 70°F) is perfect. It stays active and ready to go! However, because it’s warm, that yeast is hungry! You will need to feed it every 12 to 24 hours. Always use a decent discard amount—feed it a ratio that keeps it manageable, usually 1:1:1 (starter:flour:water) by weight for daily maintenance.
Refrigeration for Low-Maintenance Sourdough Starter
This is my favorite approach for busy weeks! Once your starter is strong and you’ve fed it, pop it into the fridge in a sealed jar. The cold temperature causes the yeast activity to slow way, way down. You only need to do a refresh feeding once a week. When you’re finally ready to bake, take it out the night before, give it a good stir, and feed it normally. Let it sit on the counter for about 6 to 12 hours until it reliably doubles again—then it’s ready to make incredible things, like my old-fashioned bread pudding!
What to Do With Sourdough Discard Use
Don’t let that leftover starter go to waste! Every time we do that initial feeding, we end up with what looks like pancake batter left behind. That’s your starter discard, and it’s just waiting to be included in something yummy. Using that discard is a fantastic way to reduce waste and boost flavor in quick bakes. Trust me, finding tasty sourdough discard use recipes makes the whole process feel less wasteful.
You can toss it right into quick breads, crackers, or yes—even pancakes! If you’re feeling ambitious, you can even use the discard as a base for my decadent homemade chocolate babka; it adds a subtle sour note that balances the sweetness perfectly. Keep an eye out for recipes that call for a small amount since the discard is often quite wet!
Troubleshooting Common Sourdough Starter Issues
Even with the best daily feeding schedule, sometimes your little culture decides it wants to throw a tantrum! Don’t panic! When I see weird stuff happening in my jar, I resist the urge to just dump the whole thing and start over. Usually, it’s a sign that the yeast is communicating what it needs. Building trust in your sourdough starter means learning the language of bubbles (or lack thereof!). Knowing these small fixes means you’ll keep that beautiful base going strong for years. If you ever feel like you need a guaranteed moist bake, check out my recipe for moist homemade chocolate cake—just to feel like you’re baking something successful while you work on the starter!
My Sourdough Starter Isn’t Bubbling
If you’re on Day 3 or 4 and your jar looks utterly flat, don’t despair! This often happens right before the real good guys take hold. The first thing I check is the temperature. Is it sitting somewhere cool? Yeast is lazy when it’s cold! Try moving your jar to a warmer spot—maybe on top of the fridge or near a pilot light if you have one (but safe, of course!). If the temperature is fine, just stick with the feeding schedule for another day or two. Sometimes it just needs a little extra encouragement to get moving.
Identifying and Treating Hooch on Your Sourdough Starter
If you see a layer of liquid floating on top of your starter, that’s what we affectionately call “Hooch.” It’s usually a grayish or brownish liquid. Hooch is really just alcohol produced by hungry yeast telling you, “Hey! I ate all my food! Feed me!” If it’s just a thin layer, go ahead and stir it right back in; it adds a nice tangy depth. If the layer is super thick, you can carefully pour some of it off before doing your regular discard and feeding. It’s a sign your starter is hungry, not dead!
Nutritional Snapshot of Your Flour and Water Starter
Now, before we get too deep into the science, I have to give you a tiny disclaimer about nutrition! Since this is a live culture in progress, the numbers below reflect what’s in the starter *before* the amazing fermentation process really changes things up. Think of this as the baseline nutrition from the raw flour and water we started with. Once it ferments, that profile gets much more interesting due to the acids created, but for tracking purposes, here is a snapshot based on the ingredients used in our main feeding!
If you want something truly wholesome and delicious that showcases real ingredients, you have to try my recipe for crispy roasted sweet potatoes sometime!
- Serving Size: 100g (Unbaked)
- Calories: 200
- Sugar: 0.5g
- Sodium: 1mg
- Fat: 0.5g
- Carbohydrates: 40g
- Protein: 5g
Ready to Bake? Next Steps in Your Sourdough Bread Journey
You did it! You nurtured that little flour-and-water mixture into a thriving, active powerhouse. That means the hard part is over, and now the fun begins! Don’t just stare at your beautiful sourdough starter; use it! Go find a fantastic recipe—maybe one for my easy pizza dough—and get baking. I want to see what you make! Please jump down to the comments below and let me know when your starter finally doubled for the first time. A rating helps others see this guide, too!
PrintThe Complete 7-Day Guide: How to Make a Sourdough Starter From Scratch
Start your artisan baking journey today! Follow this simple, day-by-day guide to cultivate your own active sourdough starter using only flour and water. This is the best sourdough base for beginners.
- Prep Time: 10 min per day
- Cook Time: 0 min
- Total Time: 7 days (active daily attention)
- Yield: About 100g active starter 1x
- Category: Baking Base
- Method: Culturing
- Cuisine: American
- Diet: Vegetarian
Ingredients
- 100g Whole Wheat or Rye Flour (for initial days)
- 100g Unbleached All-Purpose Flour (for later days)
- 100g Unchlorinated Water (room temperature)
Instructions
- Day 1: Initial Mix. Combine 50g of whole wheat or rye flour with 50g of room temperature water in a clean glass jar. Stir well until no dry flour remains. Cover loosely (a coffee filter or loose lid works) and let it sit at room temperature (68-75°F) for 24 hours.
- Day 2: Rest. Do not feed today. You might see a few small bubbles or nothing at all. This is normal for your new wild yeast culture.
- Day 3: First Feeding. Discard half of the mixture (about 50g). Add 50g of all-purpose flour and 50g of water to the remaining starter. Mix thoroughly, cover loosely, and wait 24 hours. You should see some activity now.
- Day 4: Twice Daily Feeding Begins. Discard half of the starter. Feed the remainder with 50g all-purpose flour and 50g water. Mix well. Repeat this discard and feed process again 12 hours later. Look for doubling in size.
- Day 5: Building Strength. Continue the twice-daily feeding schedule (discard half, feed 50g flour + 50g water). Activity should increase significantly. If you see mold or pink/orange streaks, discard the entire batch and start over.
- Day 6: Consistency Check. Feed twice today. Your active sourdough starter should consistently double in volume within 4-8 hours after feeding. If it is sluggish, continue the twice-daily feeding.
- Day 7: Ready to Bake. If your starter reliably doubles and shows many bubbles after feeding, it is ready to use for baking sourdough bread. You have successfully cultivated your homemade wild yeast!
Notes
- Use filtered or bottled water if your tap water is heavily chlorinated, as chlorine can inhibit yeast growth.
- A consistent room temperature helps the process; aim for 70°F if possible.
- Once mature, you can switch to feeding only once a day if storing on the counter, or move it to the refrigerator for weekly feeding (sourdough maintenance).
- If you have extra starter, look up recipes for sourdough discard use!
Nutrition
- Serving Size: 100g (Unbaked)
- Calories: 200
- Sugar: 0.5
- Sodium: 1
- Fat: 0.5
- Saturated Fat: 0.1
- Unsaturated Fat: 0.4
- Trans Fat: 0
- Carbohydrates: 40
- Fiber: 2
- Protein: 5
- Cholesterol: 0