
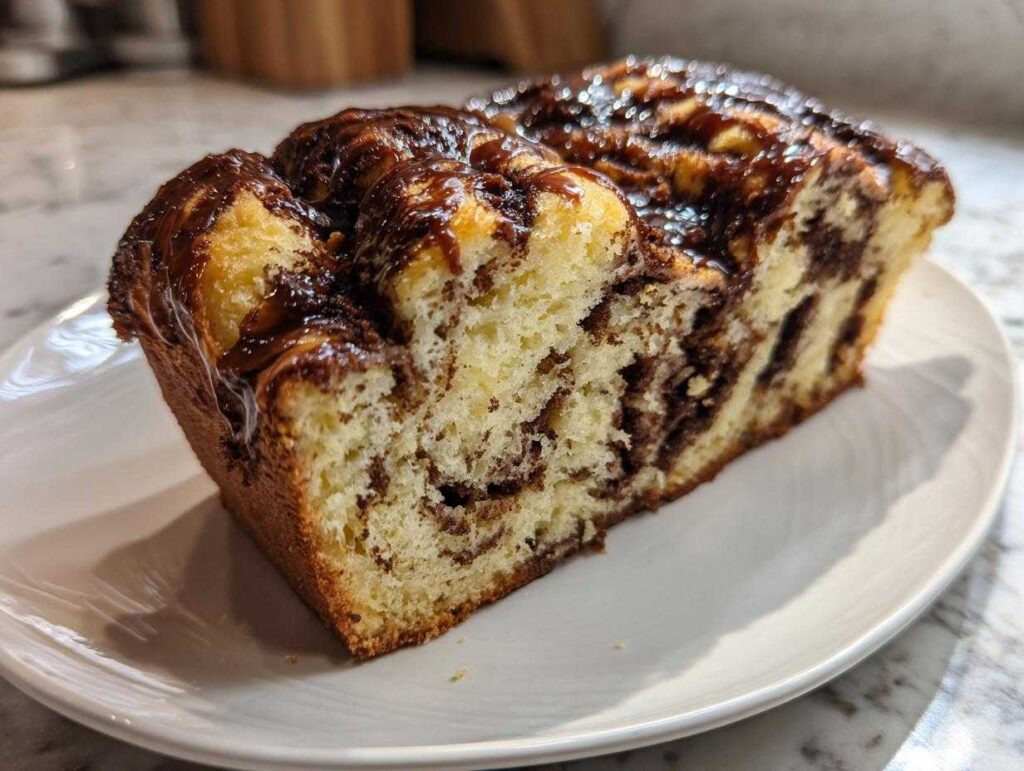
Oh my goodness, if there is one baked good that screams ‘weekend treat’ and ‘I love my family’ section loud and clear, it has to be chocolate babka! Forget those dry, sad loaves you sometimes see; we are aiming high today. We are creating bakery-style magic right on our own counters. I know, I know, yeasted dough feels intimidating, but trust me after years of perfecting this recipe, this step-by-step guide turns the challenge into pure joy. When you pull this out of the oven—rich, buttery, and sliced to reveal those perfect chocolate swirls—you’ll realize why this decadent pastry is worth every minute. You might even want to try making a loaf of soft fluffy homemade raisin bread next time! You are going to conquer the best homemade chocolate babka!
- Why This Homemade Chocolate Babka Recipe Is the Best
- Ingredients for Your Bakery Style Chocolate Babka
- Step by Step Babka Guide: How to Make Chocolate Babka
- Tips for Success with Your Chocolate Babka Recipe
- Serving Suggestions for This Impressive Chocolate Dessert
- Storage & Make-Ahead Tips for Your Chocolate Babka
- Frequently Asked Questions About Chocolate Babka
- Estimated Nutritional Data for Chocolate Lovers Sweet Bread
- Share Your Best Homemade Chocolate Babka Experience
Why This Homemade Chocolate Babka Recipe Is the Best
If you’ve ever felt disappointed by chocolate bread that tastes heavy or dry, I promise you this recipe fixes that! This is truly the Best Homemade Chocolate Babka because it marries the richness of a brioche with the explosive flavor of a Decadent Chocolate Pastry. We are focused on moisture development, so you never end up with a crumbly slice.
You can find more wonderful baking inspiration when you check out my guide on homemade chocolate chip cookies!
Achieving That Perfect Buttery Sweet Bread Recipe Texture
The texture is all about the fat content! We use a full cup of butter in the dough alone, which is why this is such a wonderfully rich Buttery Sweet Bread Recipe. Make sure your eggs are truly room temperature—when they are incorporated smoothly, they help create a soft network that cages in all that moisture later on.
The Secret to Beautifully Swirled Chocolate Bread
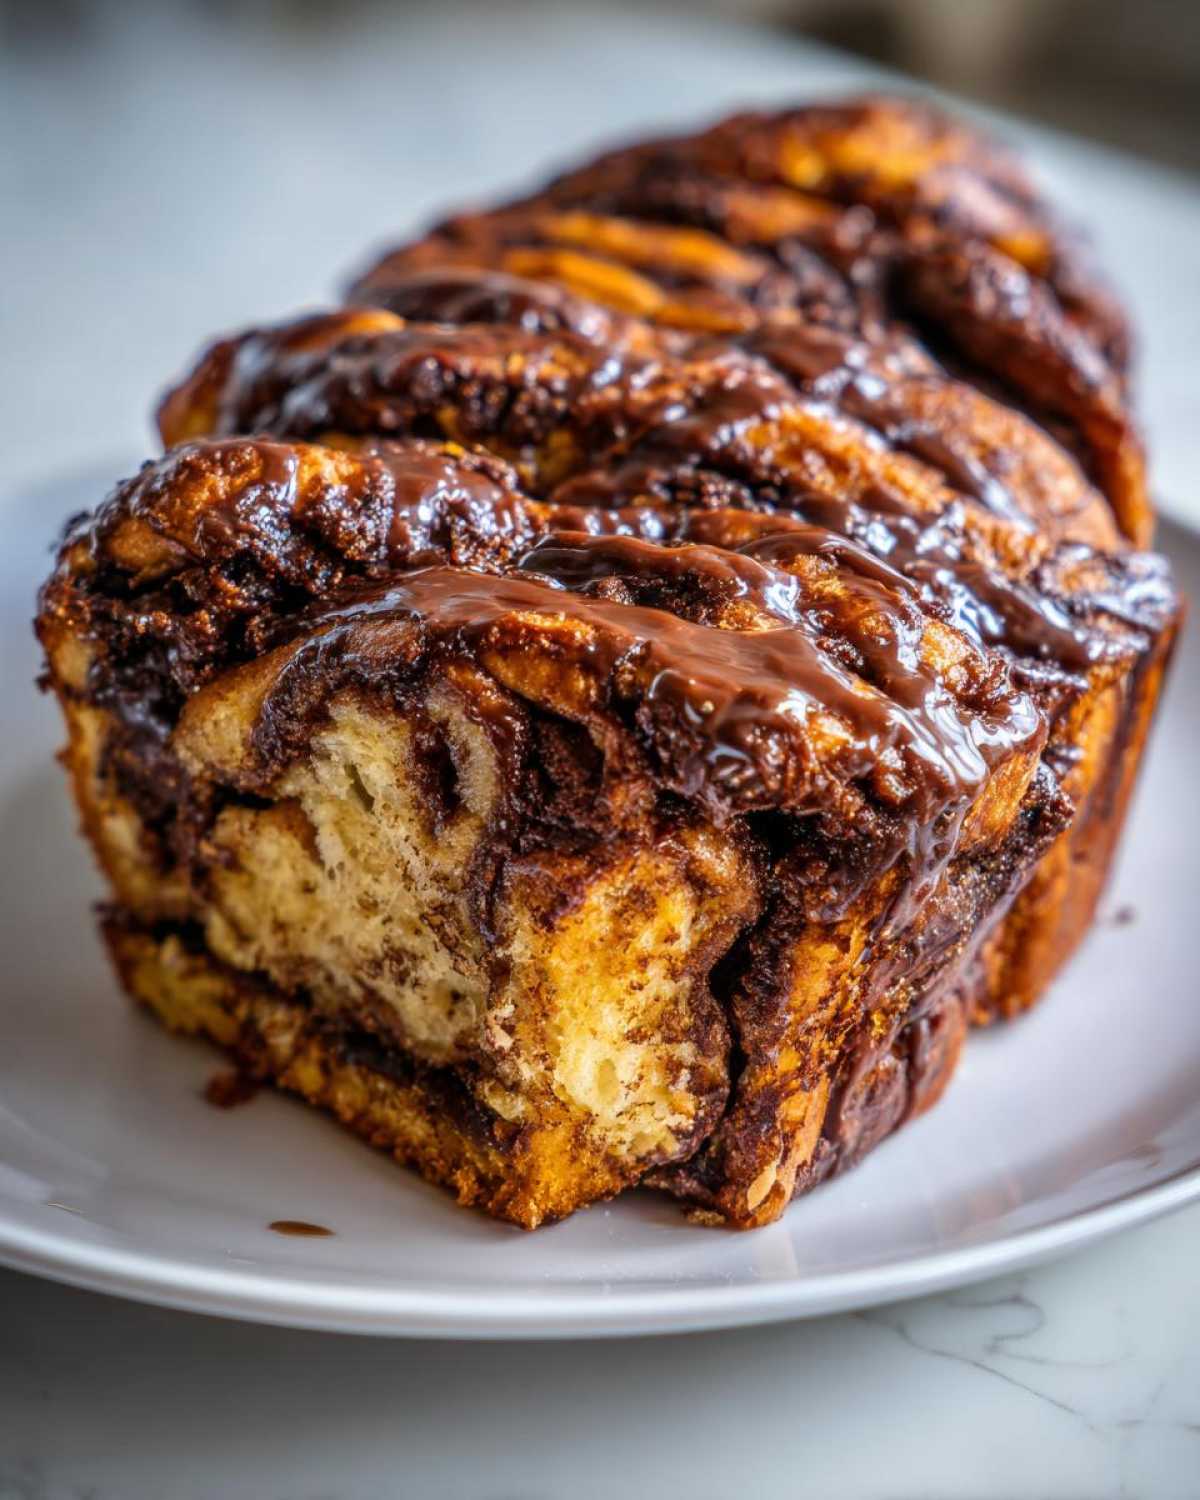
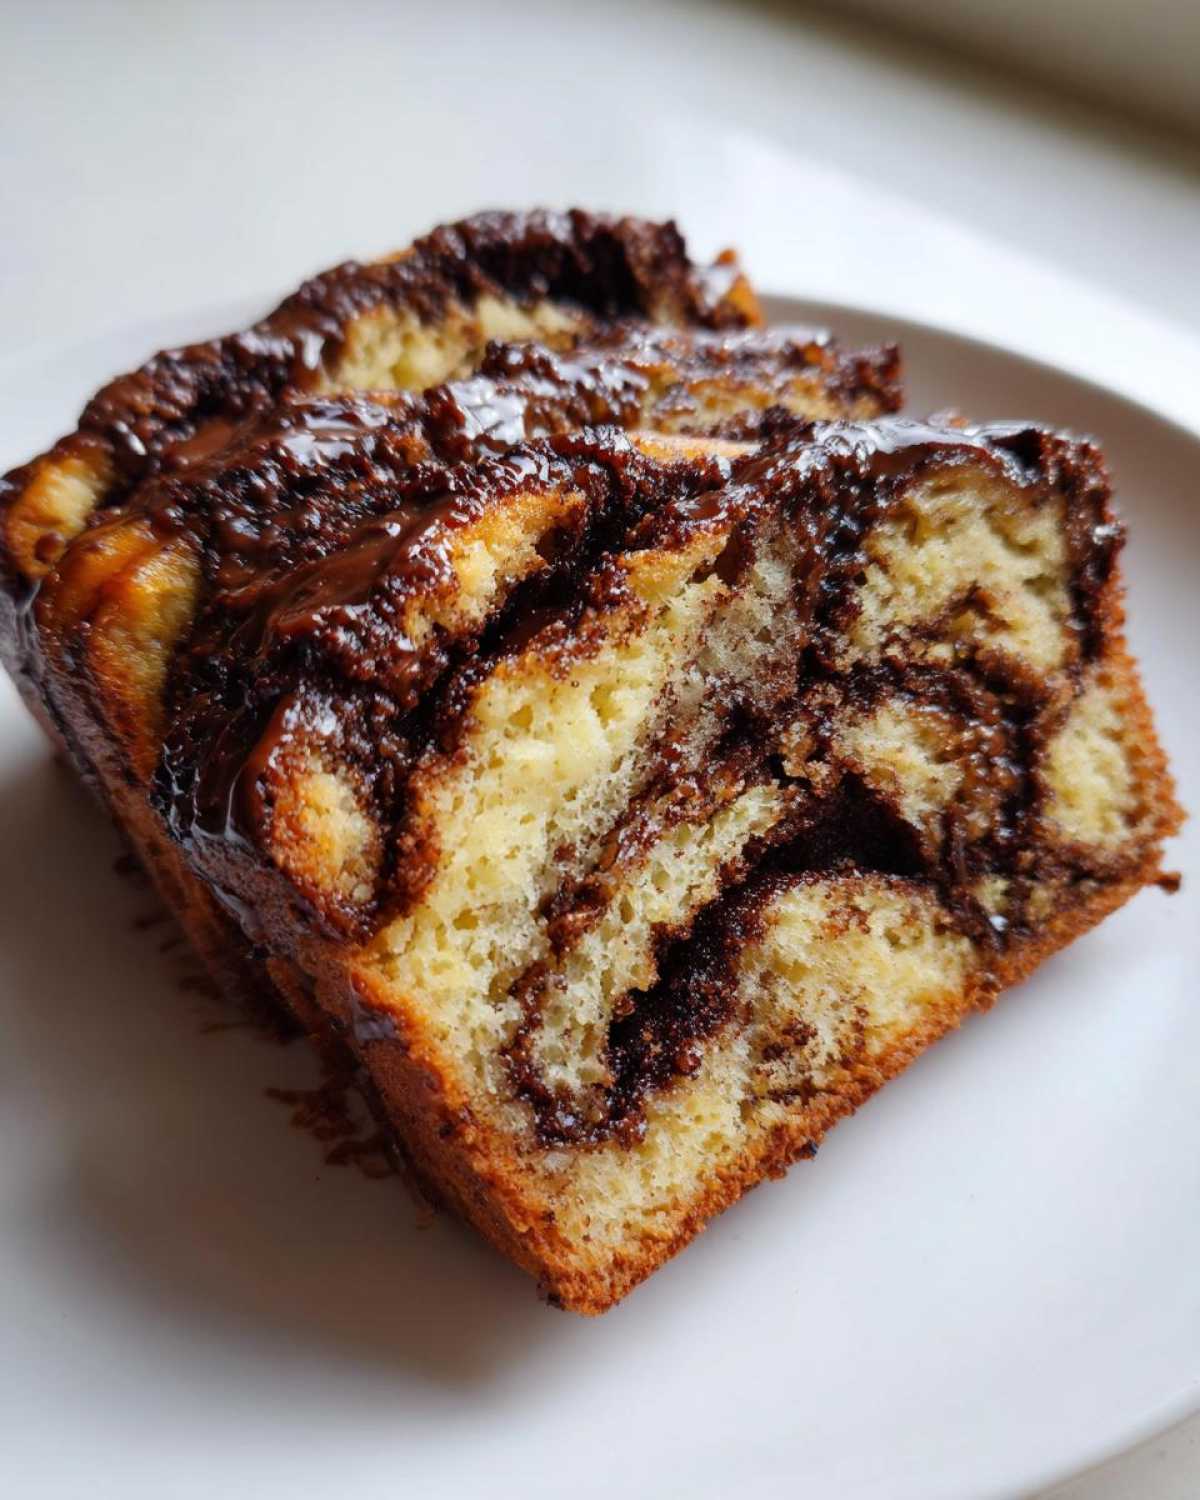
The visual factor isn’t hard, I swear! It’s all in the filling consistency and the final twist. The filling is kept thick so it doesn’t bleed out entirely during baking, and the technique of slicing the roll lengthwise before twisting is what guarantees those gorgeous, distinct layers. That’s what makes this look like a true Swirled Chocolate Bread when you slice into it.
Ingredients for Your Bakery Style Chocolate Babka
Whenever I share this recipe, people ask if they can simplify the ingredient list, but honestly, the magic of a great Bakery Style Babka lives in these specific components. We need balance so the yeasted sweet bread baking process works perfectly. Don’t skip the notes below—they are little treasures! If you want a different savory bake to try next, check out my recipe for cheesy garlic pull-apart bread while you gather your supplies.
For the Tender Chocolate Babka Dough
- 1 cup whole milk, warmed to that perfect 105–115°F zone—not too hot, or it kills the yeast!
- 2 1/4 teaspoons active dry yeast
- 1/2 cup granulated sugar, plus 1 teaspoon for waking up the yeast
- 3 large eggs, they absolutely must be at room temperature
- 1 teaspoon vanilla extract
- 1 teaspoon salt
- 4 1/2 cups all-purpose flour, plus more if your surface needs dusting
- 1 cup (2 sticks) unsalted butter, make sure this is softened but still cool, and cut into pieces
For the Gooey Chocolate Filling Bread
This filling is what makes this a true Gooey Chocolate Filling Bread experience! It spreads beautifully and sets up perfectly during the bake.
- 1 cup unsalted butter, melted perfectly
- 1 1/2 cups granulated sugar
- 3/4 cup unsweetened cocoa powder
- 1 teaspoon ground cinnamon (don’t skip this, it deepens the chocolate!)
- 1/4 teaspoon salt (for filling)
- 8 ounces bittersweet chocolate, this needs to be finely chopped so it melts evenly
For the Simple Syrup Glaze
This step is non-negotiable for keeping your chocolate babka moist for days!
- 1/2 cup powdered sugar (confectioners’ sugar)
- 1/4 cup water
Step by Step Babka Guide: How to Make Chocolate Babka
Okay, time to get serious! This Step by Step Babka Guide is what separates the good loaves from the *amazing* ones. Don’t rush the dough handling, and you’ll see those beautiful swirls pop out when you slice it later. This process is best done when you have a few hours free, making it the perfect Saturday or Sunday baking project! If you’ve mastered this, maybe next we tackle some fun appetizers like easy pizza pinwheels with puff pastry!
Preparing the Yeasted Sweet Bread Baking Base
First things first: we need happy yeast! Grab your small bowl and mix that warm milk (remember, warm, not hot!) with 1 teaspoon of sugar and your yeast. Give it a little stir and just let it be for about 5 to 10 minutes. If it gets foamy and happy, that means your yeast is alive and ready to help your chocolate babka dough rise beautifully. Once it looks like frothy beer, hop over to your stand mixer.
Into the mixer bowl go the rest of those sugars, your room-temp eggs, vanilla, salt, and the foamy yeast mixture. Give that a quick low-speed mix just to combine everything. Now, slowly add that flour until it looks like a messy, shaggy ball. That’s totally normal!
Kneading and First Rise for Chocolate Babka Dough
Time for serious kneading! Hook up that dough hook and kick the speed up just a notch. Let it run for about 5 minutes. Now for the trick to the rich texture: add the softened butter pieces one single piece at a time. Wait until one piece is mostly absorbed before dropping in the next—this takes patience, about 8 to 10 minutes total of kneading. When it’s done, the dough will be smooth, look elastic, and shouldn’t stick everywhere. That’s How to Make Babka Dough right!
Toss that gorgeous dough into a greased bowl, cover it up, and put it somewhere warm for 1 to 1.5 hours until it’s doubled. Pro-tip, and this is from my years of trial and error: if you have time, punch it down lightly after the first rise, put it in plastic wrap, and chill it overnight! It firms up and makes rolling so much easier, just like the notes suggest.
Rolling, Filling, and Shaping Your Chocolate Babka
Punch that risen dough down gently on a floured counter. Roll it out into a big rectangle—think about 12 by 18 inches. Now, make that filling—it should be spreadable but thick. Cover the entire surface, but leave a small 1-inch border along one of those long edges—that’s your sealing edge. Roll it up super tight, starting from the side *without* the border, and pinch the seam closed on the bottom.
This next part is dramatic, but so worth it for that incredible look of Layered Chocolate Bread! Take a sharp knife and slice that log straight down the middle lengthwise, exposing all those chocolate layers inside. Turn the cut sides up and gently twist the two halves around each other. Keep those cut parts facing the sky! Pinch the ends together and carefully place it into your greased loaf pan. It looks like abstract art before it even bakes!
Final Proofing and Baking the Tender Chocolate Swirl Loaf
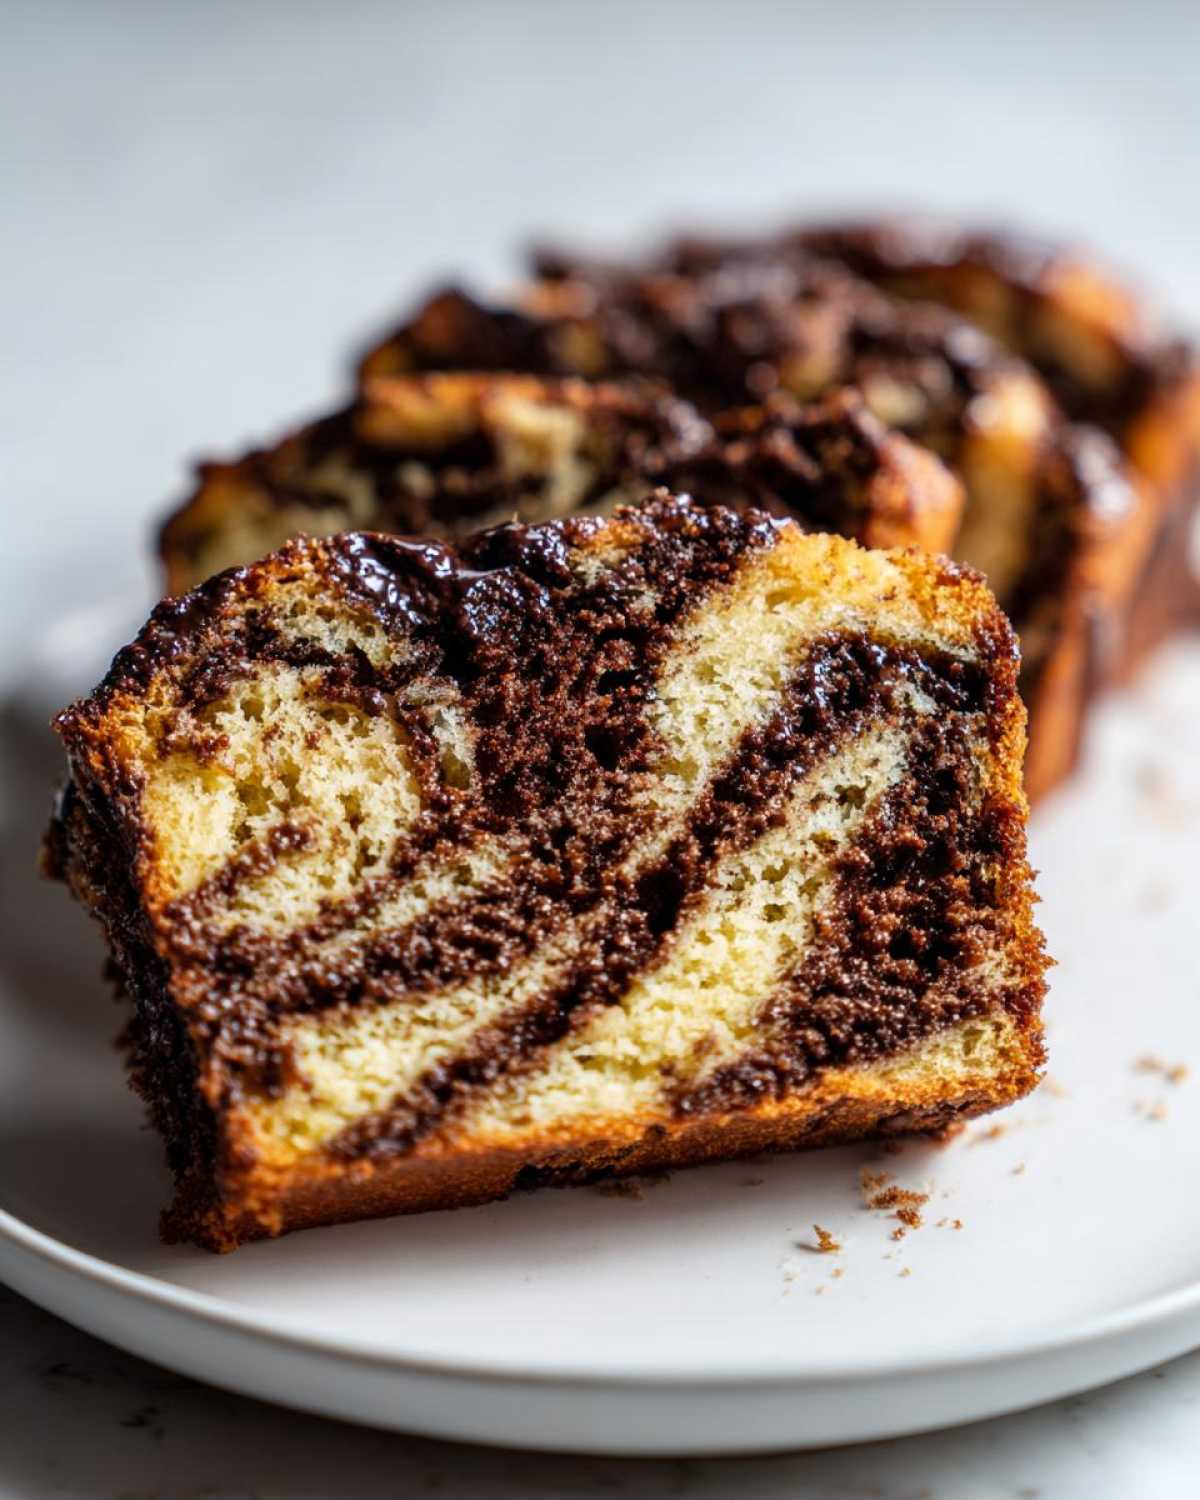
Cover the pan loosely and let this beauty rest for another 30 to 45 minutes until it looks puffy again. Preheat your oven to 350°F about 15 minutes before that time is up. Bake it for 35 to 45 minutes. Because it’s so dense, watch the top carefully—if it’s getting too dark too fast, just throw a bit of foil over it loosely. We want a golden brown top on our Tender Chocolate Swirl Loaf, but we don’t want to burn the prize!
Syrup Application for Ultimate Moisture
While it’s baking, whisk your simple syrup ingredients over low heat until that powdered sugar dissolves perfectly—no boiling needed! The second this babka comes *out* of the oven, grab a pastry brush and smother the entire top with that warm syrup. Seriously, don’t wait! This syrup soaks down and keeps your loaf unbelievably moist for days. Let it cool slightly in the pan before moving it to a rack. Don’t forget to share pictures of your beautiful swirls; you can see some of my bakes on Pinterest!
Tips for Success with Your Chocolate Babka Recipe
Baking this glorious chocolate babka is all about teamwork between patience and simple tricks! Don’t let the richness fool you; dealing with the dough is easier than you think if you follow a couple of key guidelines I learned trying to figure out How to Make Babka Dough look professional.
Handling Sticky Chocolate Babka Dough
Listen, when you roll out that chocolate-smeared layer, it’s going to want to stick to whatever counter you use. My best advice is this: go ahead and use parchment paper for the roll-out and filling stage instead of just flouring your surface—or use minimal flour and keep a bench scraper handy to gently loosen it. It gives you way more control when you finally roll it up tight!
Ensuring a Perfect Bake on Your Swirled Chocolate Bread
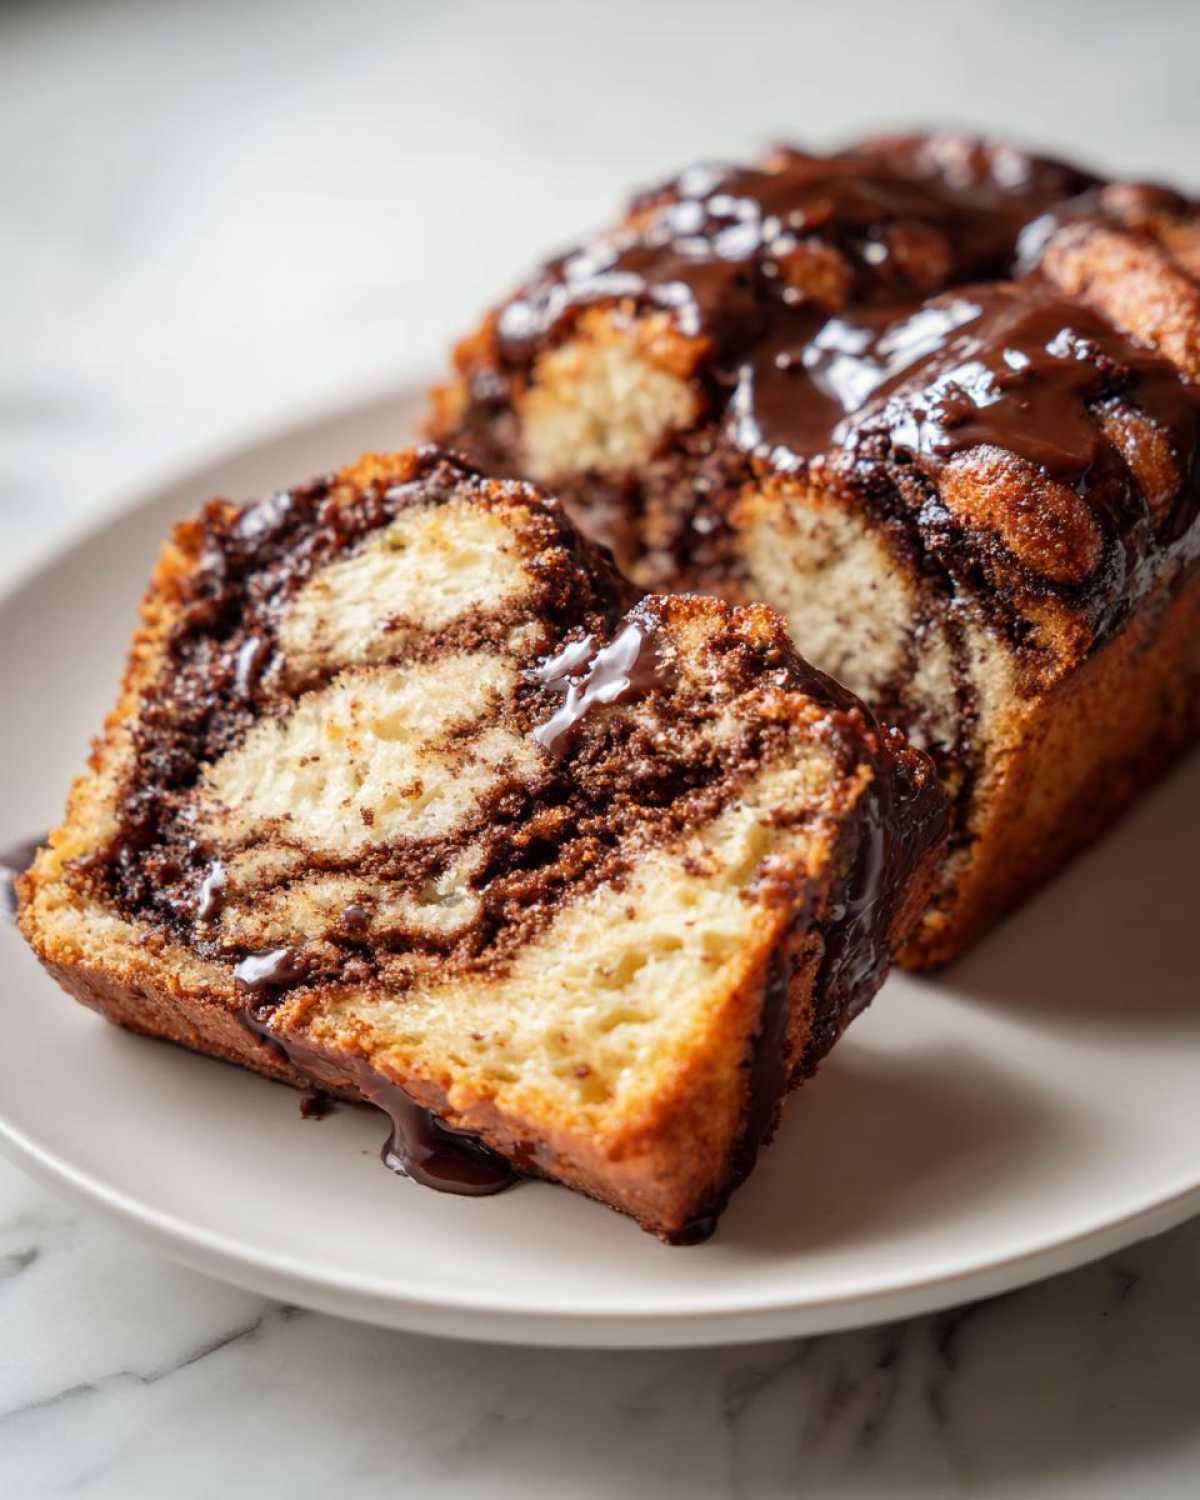
Because this bread is so buttery and dense, you can sometimes have a beautifully golden exterior but still have a raw patch right in the very center. Don’t just rely on the toothpick test here! I always go for the internal temperature if my oven is running hot; you’re looking for about 200°F in the very middle to guarantee that soft, cooked texture for your Swirled Chocolate Bread. If you want to check out another fantastic quick bake, my flaky buttermilk biscuits are simple and reliable!
Serving Suggestions for This Impressive Chocolate Dessert
Once your beautiful chocolate babka has cooled down enough to handle (and you’ve brushed on all that glorious syrup!), the hardest part is knowing when to dig in! Truthfully, there’s never a bad time, but I find it shines brightest during specific moments.
This totally fits the bill for amazing Brunch Dessert Ideas. It’s rich enough to feel special, but when sliced thinly, it pairs perfectly alongside eggs or fruit. For a truly cozy morning, I always serve a slice alongside a strong cup of coffee—the bitterness totally cuts through the sweetness of the glaze and the buttery dough.
When it comes to Holiday Braided Bread moments, leave it on the counter at room temperature for your guests. The tenderness stays put, and people love grabbing a slice whenever they want one. If you are serving it later in the day as a proper dessert, warming a thin slice for maybe 15 seconds in the microwave brings the chocolate filling back to that soft, gooey texture we worked so hard to achieve. If you’re looking for a fruit-based bake to balance out all this chocolate, you absolutely have to try my apple cobbler recipe!
Storage & Make-Ahead Tips for Your Chocolate Babka
Because this is such a wonderful Comfort Baking Recipe, I always try to bake it ahead of time, especially if I know brunch the next day is going to be chaotic! The great thing about the overnight chilling I mentioned earlier is that it solidifies the dough just perfectly, which prevents crumbling when you roll it for shaping—that counts as a fabulous make-ahead tip right out of the gate!
For room temperature storage, once your chocolate babka has completely cooled after the syrup sets, just wrap it up tightly in plastic wrap. If you leave it exposed, that lovely syrup glaze gets sticky and attracts kitchen dust, which we definitely don’t want. At room temperature, it stays fantastic for about three days. The butter in the dough keeps it soft!
However, if you’re like me and sometimes bake too much (it happens!), this bread freezes beautifully. My notes mentioned this, and I want to stress that freezing works wonders! Wrap the cooled loaf—whole or even sliced—super tightly in plastic wrap first, and then wrap it again in aluminum foil. This double wrap is your best defense against freezer burn. It keeps perfectly for up to three months, and when you want a slice, just unwrap it and let it thaw on the counter for an hour or two. Honestly, it still tastes fresh!
If you’re looking for a crunchy, different kind of treat to store alongside your soft bread, you absolutely must try my saltine cracker toffee recipe! It’s completely different, but addictive!
Frequently Asked Questions About Chocolate Babka
I get so many questions about this gorgeous loaf, and since hitting that perfect bake can sometimes be tricky with yeasted doughs, I wanted to clear up a few common spots where folks get stuck! We want everyone to succeed at making this chocolate babka! You can see some of my own results when you check out my Pinterest account if you search for Recipes Vault!
Can I use Nutella instead of the chocolate filling in this Easy Babka Tutorial?
Yes, you absolutely can! That’s a brilliant swap if you’re looking for a shortcut or just love hazelnut chocolate. The recipe notes mention this, but here’s the quick reminder for this Easy Babka Tutorial: Instead of the solid chocolate and cocoa mixture, use about one cup of Nutella. But, you need to stir in about 1/4 cup of flour to the Nutella first. Why? Nutella is oilier and it can melt right out of the dough during the bake. Adding flour stabilizes that filling so you still get those beautiful, defined swirls!
What is the difference between Babka and Challah?
This comes up a lot, especially when talking about Holiday Braided Bread! While both are often braided, the main difference is richness and filling. Traditional Challah is essentially a lean, egg-based bread, perfect for dipping or eating plain almost like a dinner roll. Chocolate Babka, on the other hand, is deeply enriched with butter (making it closer to a brioche), and is always folded or layered with a sweet filling—that’s the real game-changer! Babka is a sweeter, more decadent pastry experience.
Why is my chocolate babka dough not rising?
Oh, the tragedy of the flat dough! Nine times out of ten, this comes down to the yeast temperature. If your milk was too hot when you added the yeast, you probably killed the little guys before they could start working their magic. If the milk was too cold, they just didn’t wake up fast enough. Make sure you aren’t using yeast that’s been sitting in your pantry for two years, either! Always check that it foams up right after activation. If it doesn’t foam, toss it and start over with fresh yeast and slightly warmer milk.
If you’re looking for another cozy recipe that proves baking doesn’t have to be complicated, check out my recipe for creamy cajun sausage pasta—it’s a keeper, even though it’s savory!
Estimated Nutritional Data for Chocolate Lovers Sweet Bread
Okay, let’s talk about the fuel factor! Because this is such a rich, buttery, decadent treat—truly a recipe for the Chocolate Lovers Sweet Bread enthusiast—it does have some indulgence factored in. I’m happy to share the estimates below, but please remember these are just general guidelines!
Because we are making such a rich dough filled with butter and chocolate, the exact numbers can swing based on the brand of chocolate or the exact type of milk you use. This is definitely a weekend baking project staple, not an everyday snack, but goodness, is it worth it!
If you are looking for something a little lighter later in the week, you might want to give my recipe for creamy chicken tortellini soup a try!
Here is the estimated breakdown per slice (assuming 10 servings total):
- Serving Size: 1 slice
- Calories: 450
- Sugar: 35g
- Sodium: 250mg
- Fat: 25g
- Saturated Fat: 15g
- Unsaturated Fat: 10g
- Trans Fat: 0g
- Carbohydrates: 50g
- Fiber: 3g
- Protein: 7g
- Cholesterol: 80mg
Enjoy that incredible slice of chocolate babka knowing exactly what you’re eating! Just remember, these are estimates, so if you use extra dark chocolate or more syrup, those numbers will shift a tiny bit!
Share Your Best Homemade Chocolate Babka Experience
Wow, we made it! Now that you’ve got your stunning, bakery-worthy chocolate babka cooling down (or maybe you just couldn’t wait and devoured the end piece? I won’t judge!), I desperately want to hear about it!
This is the part of the baking journey I love the most—seeing what you all create in your kitchens. Did those swirls come out perfectly defined? Was the dough as tender and buttery as you hoped? Please take a minute to leave a comment below and tell me how your Best Homemade Chocolate Babka turned out. If you give this recipe 5 stars, let me know why it earned that score!
If you have any last-minute questions about chilling times or braiding techniques, drop those in the comments too! I always check back to help troubleshoot any issues. Happy baking, friends! And if you’re hungry again next week, you might want to check out my recipe for quick and easy potato soup—it’s the perfect savory follow-up to rich pastry!
PrintThe Best Homemade Chocolate Babka: Tender, Swirled, and Bakery-Style
Bake a bakery-style Chocolate Babka at home! This recipe gives you a soft, buttery, yeasted sweet bread loaded with rich chocolate swirls. It is perfect for brunch, dessert, or holiday gatherings.
- Prep Time: 45 min
- Cook Time: 45 min
- Total Time: 185 min
- Yield: 1 loaf (10 servings) 1x
- Category: Dessert
- Method: Baking
- Cuisine: Jewish/Eastern European
- Diet: Vegetarian
Ingredients
- 1 cup whole milk, warmed to 105-115°F
- 2 1/4 teaspoons active dry yeast
- 1/2 cup granulated sugar, plus 1 teaspoon for yeast
- 3 large eggs, room temperature
- 1 teaspoon vanilla extract
- 1 teaspoon salt
- 4 1/2 cups all-purpose flour, plus more for dusting
- 1 cup (2 sticks) unsalted butter, softened and cut into pieces
- 1/2 cup powdered sugar (for simple syrup)
- 1/4 cup water (for simple syrup)
- 1 cup unsalted butter, melted (for filling)
- 1 1/2 cups granulated sugar (for filling)
- 3/4 cup unsweetened cocoa powder
- 1 teaspoon ground cinnamon
- 1/4 teaspoon salt (for filling)
- 8 ounces bittersweet chocolate, finely chopped
Instructions
- Activate the yeast: In a small bowl, combine the warm milk, 1 teaspoon of sugar, and the yeast. Let it sit for 5 to 10 minutes until foamy.
- Make the dough: In the bowl of a stand mixer fitted with the dough hook, combine the remaining sugar, eggs, vanilla, salt, and the yeast mixture. Mix on low speed until combined. Gradually add the flour, mixing until a shaggy dough forms.
- Knead the dough: Increase the speed to medium-low and knead for 5 minutes. Add the softened butter pieces one at a time, waiting until each piece is incorporated before adding the next. Continue kneading for 8 to 10 minutes until the dough is smooth and elastic.
- First rise: Place the dough in a lightly oiled bowl, cover it, and let it rise in a warm place for 1 to 1.5 hours, or until doubled in size.
- Prepare the filling: While the dough rises, combine the melted butter, 1 1/2 cups sugar, cocoa powder, cinnamon, and 1/4 teaspoon salt in a medium bowl. Stir until smooth. Stir in the chopped bittersweet chocolate.
- Roll and fill: Punch down the risen dough. On a lightly floured surface, roll the dough into a large rectangle, about 12×18 inches. Spread the chocolate filling evenly over the dough, leaving a 1-inch border on one long side.
- Shape the loaf: Starting from the long side opposite the border, tightly roll the dough into a log. Pinch the seam closed.
- Braid the babka: Using a sharp knife, slice the log lengthwise down the center, exposing the layers. Turn the cut sides up. Twist the two halves around each other, keeping the cut sides facing up to show the chocolate swirls. Pinch the ends together.
- Second rise: Carefully transfer the twisted dough to a greased 9×5 inch loaf pan. Cover loosely and let it rise again for 30 to 45 minutes. Preheat your oven to 350°F (175°C) during the last 15 minutes of rising.
- Bake: Bake for 35 to 45 minutes, or until golden brown and cooked through. If the top browns too quickly, loosely tent it with foil.
- Make the syrup: While the babka bakes, combine the powdered sugar and water in a small saucepan. Heat gently until the sugar dissolves, stirring constantly. Do not boil.
- Glaze: Immediately upon removing the babka from the oven, brush the entire top generously with the simple syrup. Let the babka cool in the pan for 15 minutes before transferring it to a wire rack to cool completely.
Notes
- For a truly bakery-style result, chill the dough overnight after the first rise. This makes rolling and shaping much easier.
- If you prefer a Nutella swirl, substitute the chocolate filling ingredients with 1 cup of Nutella mixed with 1/4 cup of flour to help stabilize it.
- This decadent chocolate pastry freezes well once cooled. Wrap tightly in plastic wrap and foil.
Nutrition
- Serving Size: 1 slice
- Calories: 450
- Sugar: 35g
- Sodium: 250mg
- Fat: 25g
- Saturated Fat: 15g
- Unsaturated Fat: 10g
- Trans Fat: 0g
- Carbohydrates: 50g
- Fiber: 3g
- Protein: 7g
- Cholesterol: 80mg