
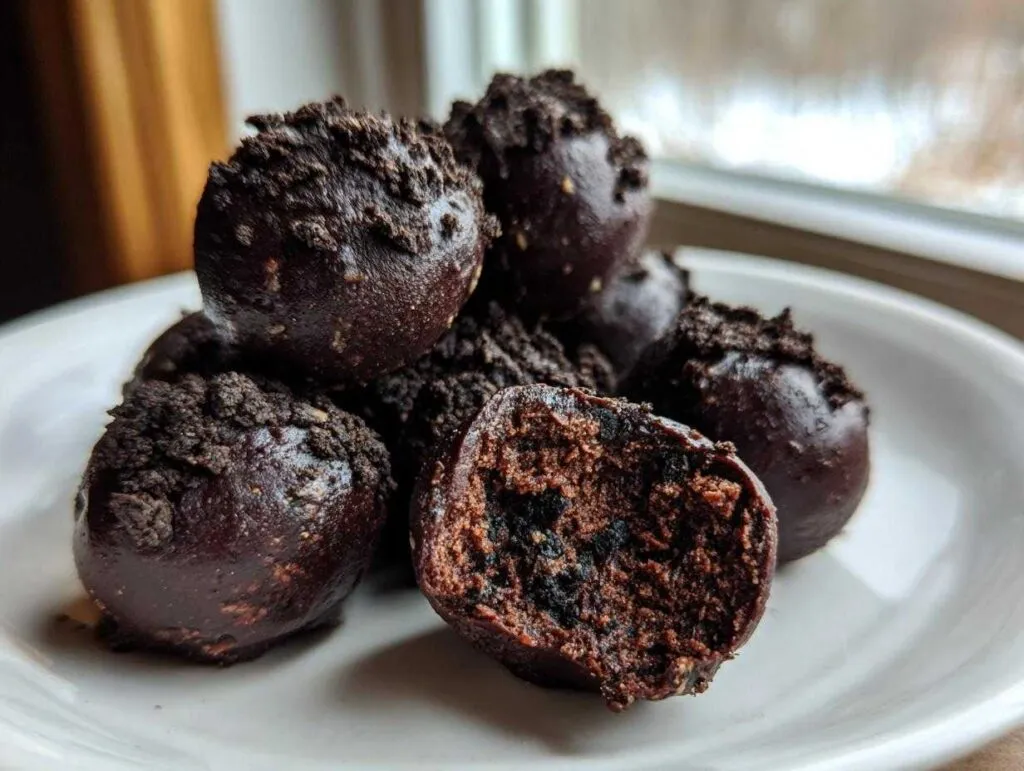
If you are anything like me, sometimes you just crave something outrageously chocolatey, totally decadent, but you absolutely do not have the time (or frankly, the energy) to follow a massive, ten-step recipe. That’s where my famous no-bake oreo balls come in! Seriously, these little spheres of happiness are magic. They are creamy, they melt in your mouth, and they only require three essential ingredients to come together. I swear by this recipe whenever I need a quick fix for a party or just a Tuesday afternoon treat. My grandmother always taught me that the best desserts often require the least fuss, and these fudgy little babies prove her right every single time. We are talking about the ultimate, easy cookie truffles here! Head over to our Pinterest board if you want to see what other lightning-fast treats we’re saving!
- Why This is the Best Oreo Balls Recipe You Will Ever Make
- Gathering Your Ingredients for Perfect Oreo Balls
- Step-by-Step Instructions for No Bake Oreo Balls
- Tips for Making Perfect Oreo Balls Every Time
- Storing and Serving Your Homemade Oreo Balls
- Creative Variations for Your Oreo Balls
- Frequently Asked Questions About Oreo Balls
- Understanding the Nutrition in These Oreo Balls
- Share Your Favorite Oreo Balls Creations
- Understanding the Nutrition in These Oreo Balls
- Share Your Favorite Oreo Balls Creations
Why This is the Best Oreo Balls Recipe You Will Ever Make
Honestly, I lose count of how many times I’ve whipped these up when the craving hits hard! The reason this recipe reigns supreme in my kitchen is its sheer simplicity. We’re talking a true 3-ingredient Oreo recipe in its core form. You don’t even need an oven, which makes this one of the best no bake Oreo desserts you can find.
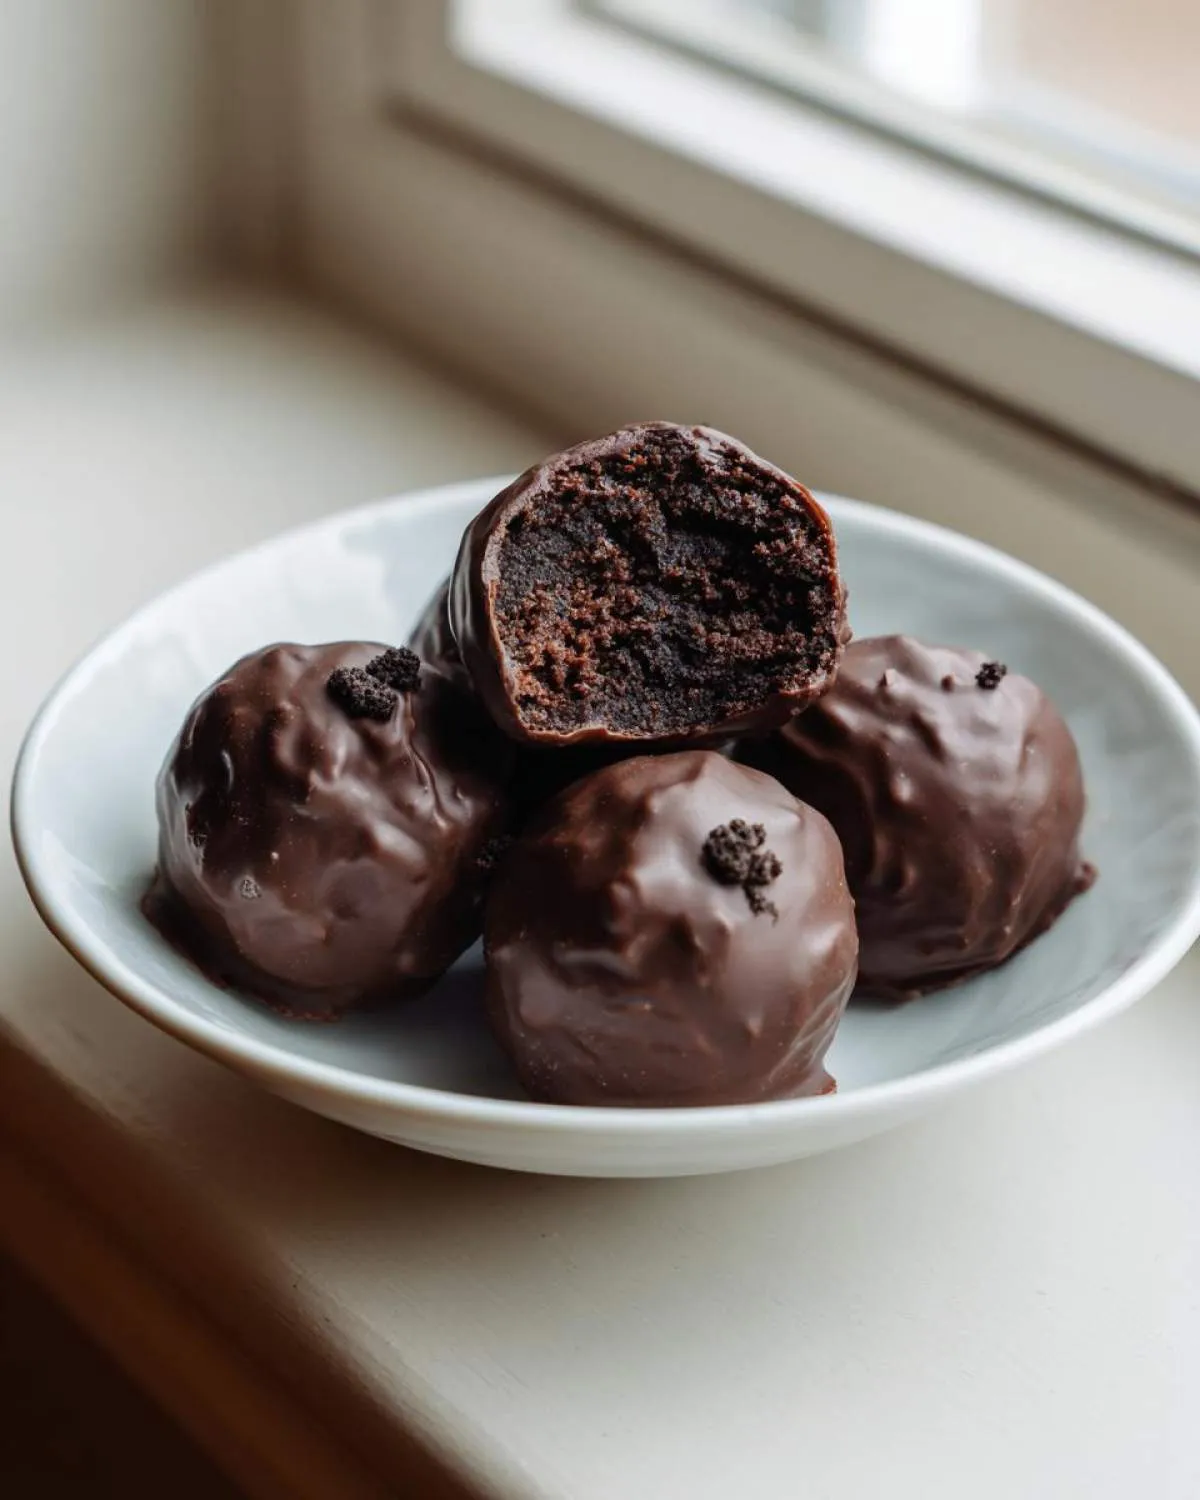
They come together in minutes, and even if you’re totally new to baking—or just terribly impatient, like me sometimes—you’ll nail these easy cookie truffles on the very first try. Forget complicated steps; this is pure, fudgy, chocolate-covered goodness that everyone, whether they are kids or serious dessert connoisseurs, attacks first on any snack table. If you want to see how I make other simple things, like my homemade pizza sauce, you can check that out too!
Gathering Your Ingredients for Perfect Oreo Balls
Okay, gathering your supplies for cream cheese Oreo balls is ridiculously easy, which is part of the fun, right? We are keeping this super tight since we only need three core things to make this happen. But, just because it’s simple doesn’t mean we can slack on quality! Trust me, the few items we do use make or break the final texture, so pay attention to the details on the package.
You absolutely need one full package of the standard Oreo cookies—and yes, I mean the whole thing, cookies and all that lovely white filling? That filling is key for richness! We’re using a full 8 ounces of cream cheese, and this is non-negotiable: it must be fully softened. Leave it on the counter for at least an hour before you even think about starting. Cold cream cheese will give you lumps, and we want smooth, fudgy dough, not chunky frustration!
Finally, for the coating, we need about 16 ounces of semi-sweet chocolate. I usually reach for good quality melting wafers when I can find them because they smooth out so creamy after melting. If you use standard chocolate chips, pop in a teaspoon of coconut oil or vegetable shortening when you melt them; this helps them stay liquid longer and gives the final ball a nicer shine. For more tips on making simple sides, check out my recipe for roasted broccolini!
Ingredient Notes and Substitutions for Your Oreo Balls
Let’s talk specifics, because this is where the magic is secured. First, crush those cookies finely. If you are using the food processor, pulse until it just looks like dark brown sand, but if you’re tackling this the old-fashioned way (bag and rolling pin, my favorite messy workout!), make sure you crush out all those big chunks. Every little bit of cookie needs to be pulverized before mixing.
That room-temperature cream cheese? It really needs to be soft. If it’s even slightly firm in the center when you start mixing, you’ll end up tugging that spoon or mixer around trying to break it up against the dry crumbs. If you accidentally melt your chocolate a bit too much while dipping later, just move it off the heat immediately! Overheated dipping chocolate can seize up or make your balls greasy. Don’t worry about getting a perfect shell right away; just get a quick dip, let the excess drip off on the fork, and place it back on the parchment. We fix the look during the chill time!
Step-by-Step Instructions for No Bake Oreo Balls
Now for the fun part! Even though these are no-bake, there’s a definite technique that turns them from a slightly messy blob into perfect, bite-sized delights that taste exactly like decadent chocolate truffles. Remember, we are making these cream cheese Oreo balls to be dipped, and that means texture consistency is everything. Read through these steps once, gather your tools, and get ready for the fastest dessert assembly line you’ve ever run!
Preparing the Oreo Truffle Base
First things first: we need crumbs! If you have a food processor, toss those whole Oreos right in—filling and all—and pulse until you have fine, even crumbs. If you’re using the classic zip-top bag and rolling pin dance, make sure you smash them good! No one wants crunchy chunks in their fudgy center, so make sure those cookies are pulverized.
Once you have your fine crumbs in a medium bowl, drop in that softened cream cheese. Now, you have to mix this thoroughly. Use a sturdy spoon or, if you have one, a hand mixer on low speed. You are looking for a sticky, uniform dough that pulls away from the sides of the bowl and clumps into one solid mass. If it’s too wet, just chill it a bit more before rolling. If it’s too dry and crumbly—which sometimes happens if your Oreos were a bit older—just add a tiny teaspoon of milk or a bit more cream cheese until it holds shape.
Rolling and Chilling the Oreo Balls
This is where patience pays off! Grab a small cookie scoop or use a measuring spoon to aim for uniform sizes, about one inch in diameter. You should end up with roughly 30 perfect little orbs. Try not to play with them too much; the warmth from your hands will make them soft fast, and we don’t want melty messes yet!
Place all your rolled balls neatly on a baking sheet lined with parchment paper. Now, this chilling step is absolutely crucial—do not skip it! We need them firm enough to handle the rolling wave of hot chocolate. Pop that tray into the refrigerator for a minimum of 30 minutes. If your kitchen is warm, aim for 45 minutes. They need to be cold and hard so they don’t disintegrate when they hit the melted coating.
Coating Your Oreo Balls in Chocolate
While those little guys are firming up, melt your chocolate. I usually prefer the microwave method because it’s so fast, but you must be mindful! Heat it in 30-second bursts, stirring well between each blast. If you overheat it, you’ll end up with seized, chunky chocolate, and that defeats the purpose of these luscious Decadent Chocolate Truffles.
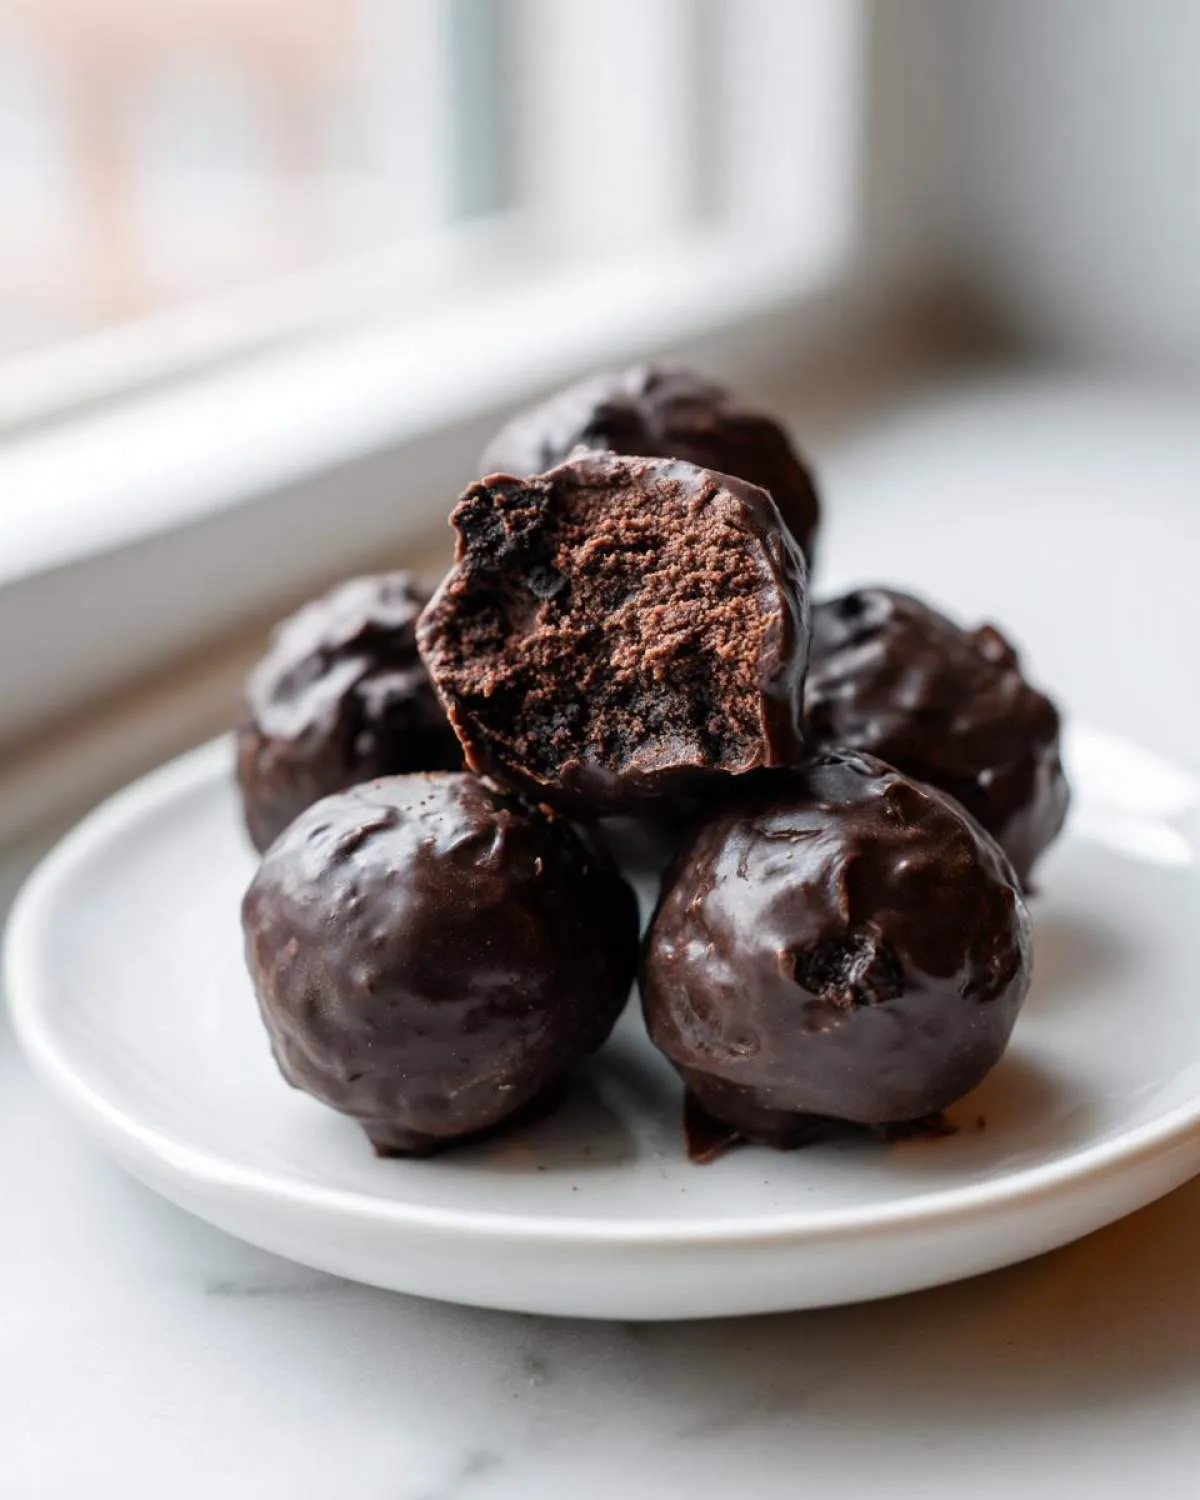
Once the chocolate is smooth and flowing nicely, it’s dipping time! Take one chilled ball out at a time—don’t leave the rest sitting on the counter, or they’ll soften too quickly. Drop the ball into the chocolate, use a dipping fork or even a basic dinner fork to gently roll it around until it’s fully covered. Lift it out, tap the tines gently against the side of the bowl to let the extra chocolate drip back in, and then slide that beauty back onto the parchment paper. This quick dip traps that creamy center perfectly. Then, if you’re feeling fancy, a quick sprinkle of something festive goes on right now before that chocolate shell sets!
If you’re working on making layered desserts, you might want to check out my guide for the best maple cookies while the chocolate sets. It’s another fun, low-bake treat!
Tips for Making Perfect Oreo Balls Every Time
Even though this recipe is famously simple—like, ridiculously simple—there are a few little golden rules I always follow to make sure my easy Oreo bites are perfect and photo-ready every single time. Troubleshooting the mixture is usually 90% of what people struggle with, so let’s just squash those problems right now before they start!
The most common issue I hear about is the mixture being too crumbly and just refusing to hold a ball shape, even after you think you’ve added enough cream cheese. Don’t panic! This usually happens if your Oreos were slightly drier than usual, or maybe you didn’t scrape out all the filling when you thought you did! If you’re adding more cream cheese, do it slowly, maybe a teaspoon at a time, and mix it in thoroughly before deciding you need more. You want it sticky, but not wet. If it’s already stuck together, just pop the whole bowl into the freezer for 15 minutes instead of the fridge; the cold really helps solidify it for rolling.
Conversely, if your dough feels too soft and mushy right out of the gate, it means your cream cheese was way too warm, or maybe you didn’t crush the cookies down enough. The solution here is easy: chill it! Put the whole bowl in the fridge for at least an hour. It firms right up, and then you can proceed with rolling as normal. These chilled, firm bases are what make the whole dipping process so simple.
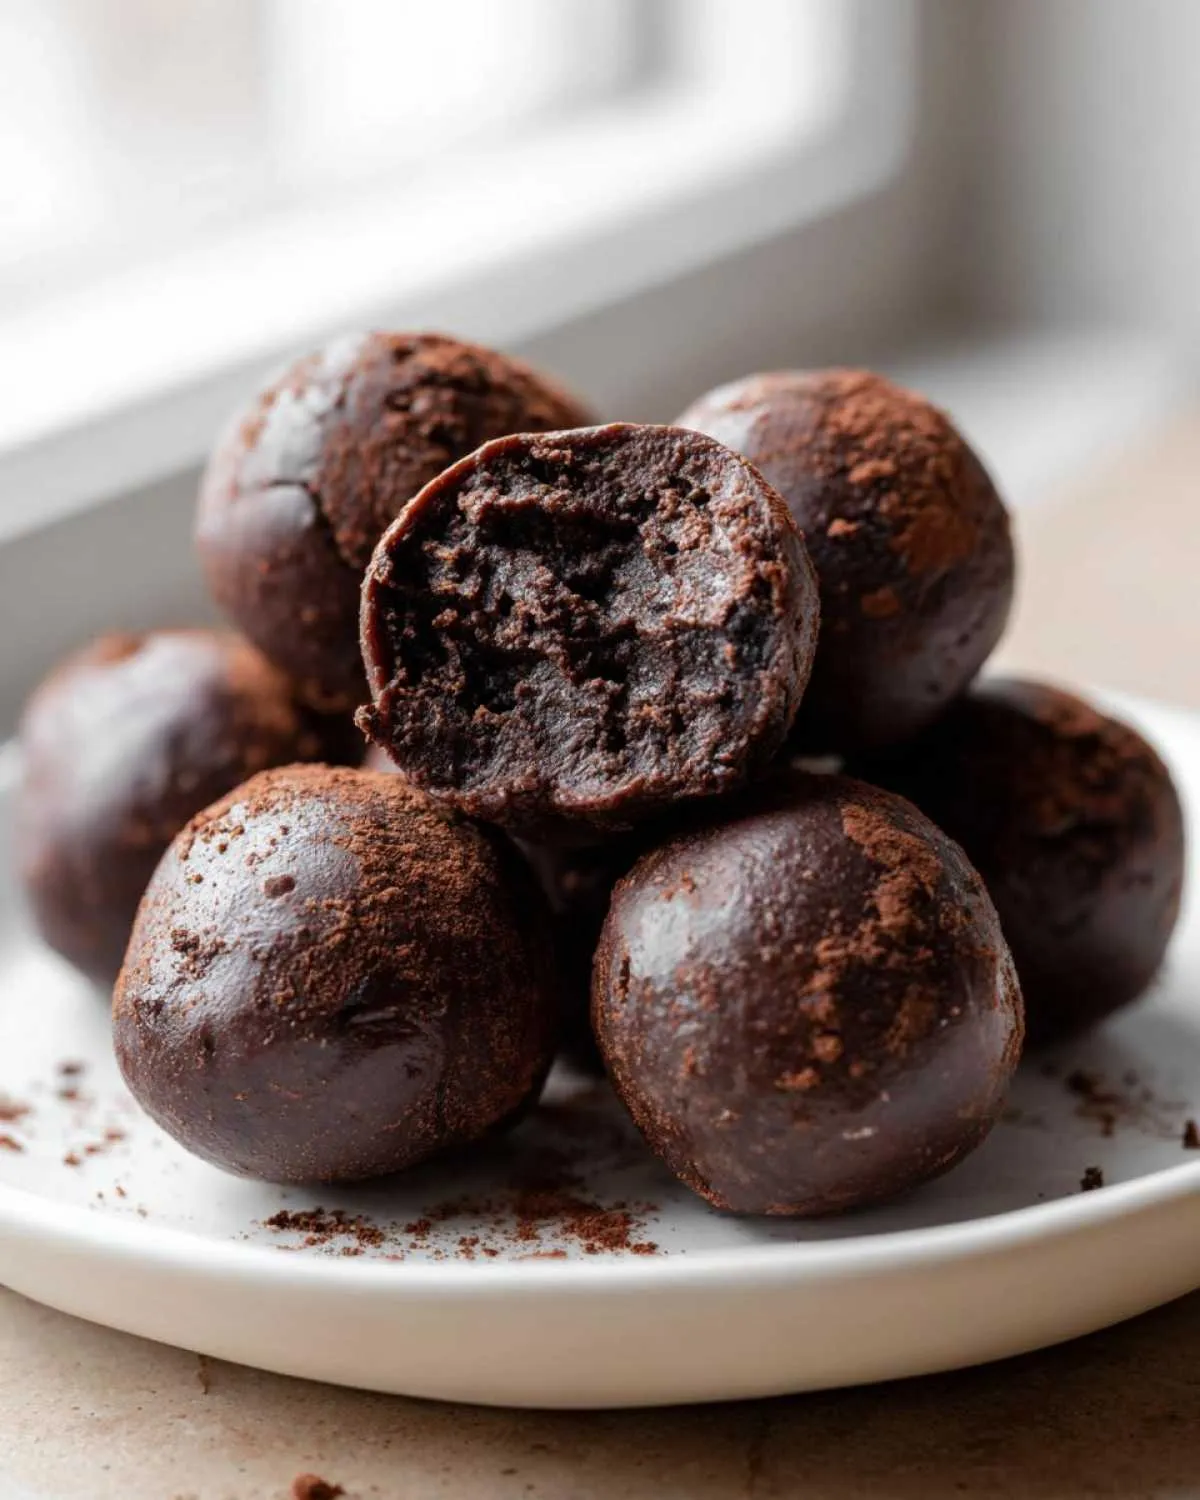
Speaking of dipping, remember those tips from earlier? If you’re trying out a different chocolate coating—maybe you want a pure white chocolate finish? Go for it! But remember that white chocolate can thicken much faster than semi-sweet. If you notice it getting sluggish while you’re still dipping, pop it in the microwave for 10 seconds to loosen it up again. Also, don’t forget the fun factor! If these are for a party or holiday gathering, drizzle a contrasting chocolate over the top once the base coat sets. Or, go old-school and throw on some festive sprinkles or even finely crushed cookie pieces right after dipping. It makes them feel so much more special than just a plain chocolate shell. If you love cheesecake vibes, try my recipe for turtle cheesecake—another amazing way to use that cream cheese!
Storing and Serving Your Homemade Oreo Balls
One of the absolute best things about these incredible oreo balls? They are the definition of a perfect make ahead dessert! You can totally get ahead of your holiday baking or party prep because they actually taste better after they’ve had a little time to sit and let those flavors meld inside their little chocolate shell.
For storage, these really thrive in the refrigerator. Keep yours in an airtight container, separated by layers of wax paper or parchment paper—you don’t want them sticking together into one giant, delicious chocolate brick! They stay perfectly good in the fridge for up to two weeks. I’ve tested this many times (for science, of course!), and they hold up beautifully because that chocolate coating seals in all the moisture.
Now, serving them is just as important as storing them. Since the centers are made with cream cheese and they are coated in chocolate, they can get a little too hard if they sit straight out of the fridge for too long, especially in the winter. If you pull them out 20 to 30 minutes before you plan on serving everyone, they reach that perfect texture—creamy, rich, and just soft enough to totally melt when you bite into them. No reheating needed here; these little gems are best served cool!
If you’re looking for other easy desserts where chilling is part of the process, you have to try my no-bake peanut butter pie. It has that wonderful cool, creamy texture just like these truffles!
Creative Variations for Your Oreo Balls
While the classic chocolate-covered, Oreo-filled ball is my all-time favorite, that three-ingredient base is just crying out for some fun customization! I love experimenting with these, especially around the holidays. Since the core recipe is so stable, you really can swap out the big players without ruining the texture. It’s all about having a little fun while keeping that addictive fudgy interior intact.
My absolute favorite switch-up is turning these into a delightful summer treat by swapping the classic chocolate coating for something zippier. Have you ever tried melting peanut butter chips? They melt down beautifully and create an amazing pairing with the dark cookie crumbs. You get this fantastic salty-sweet crunch when they firm up. It’s a game-changer for anyone who loves a Reese’s vibe!
Another huge crowd-pleaser is switching up the cookie itself! If you aren’t a huge fan of dark chocolate, try crushing Golden Oreos instead! They produce a lighter, almost buttery-tasting center. Coated in white chocolate, those become little cheesecake bites—seriously, just like cheesecake, but faster! For a totally seasonal twist, try substituting half of your vanilla extract in the base dough with peppermint extract before rolling. Dip those in white chocolate and top them with crushed candy canes. Those holiday Oreo Truffles Recipe versions disappear instantly at every party I take them to.
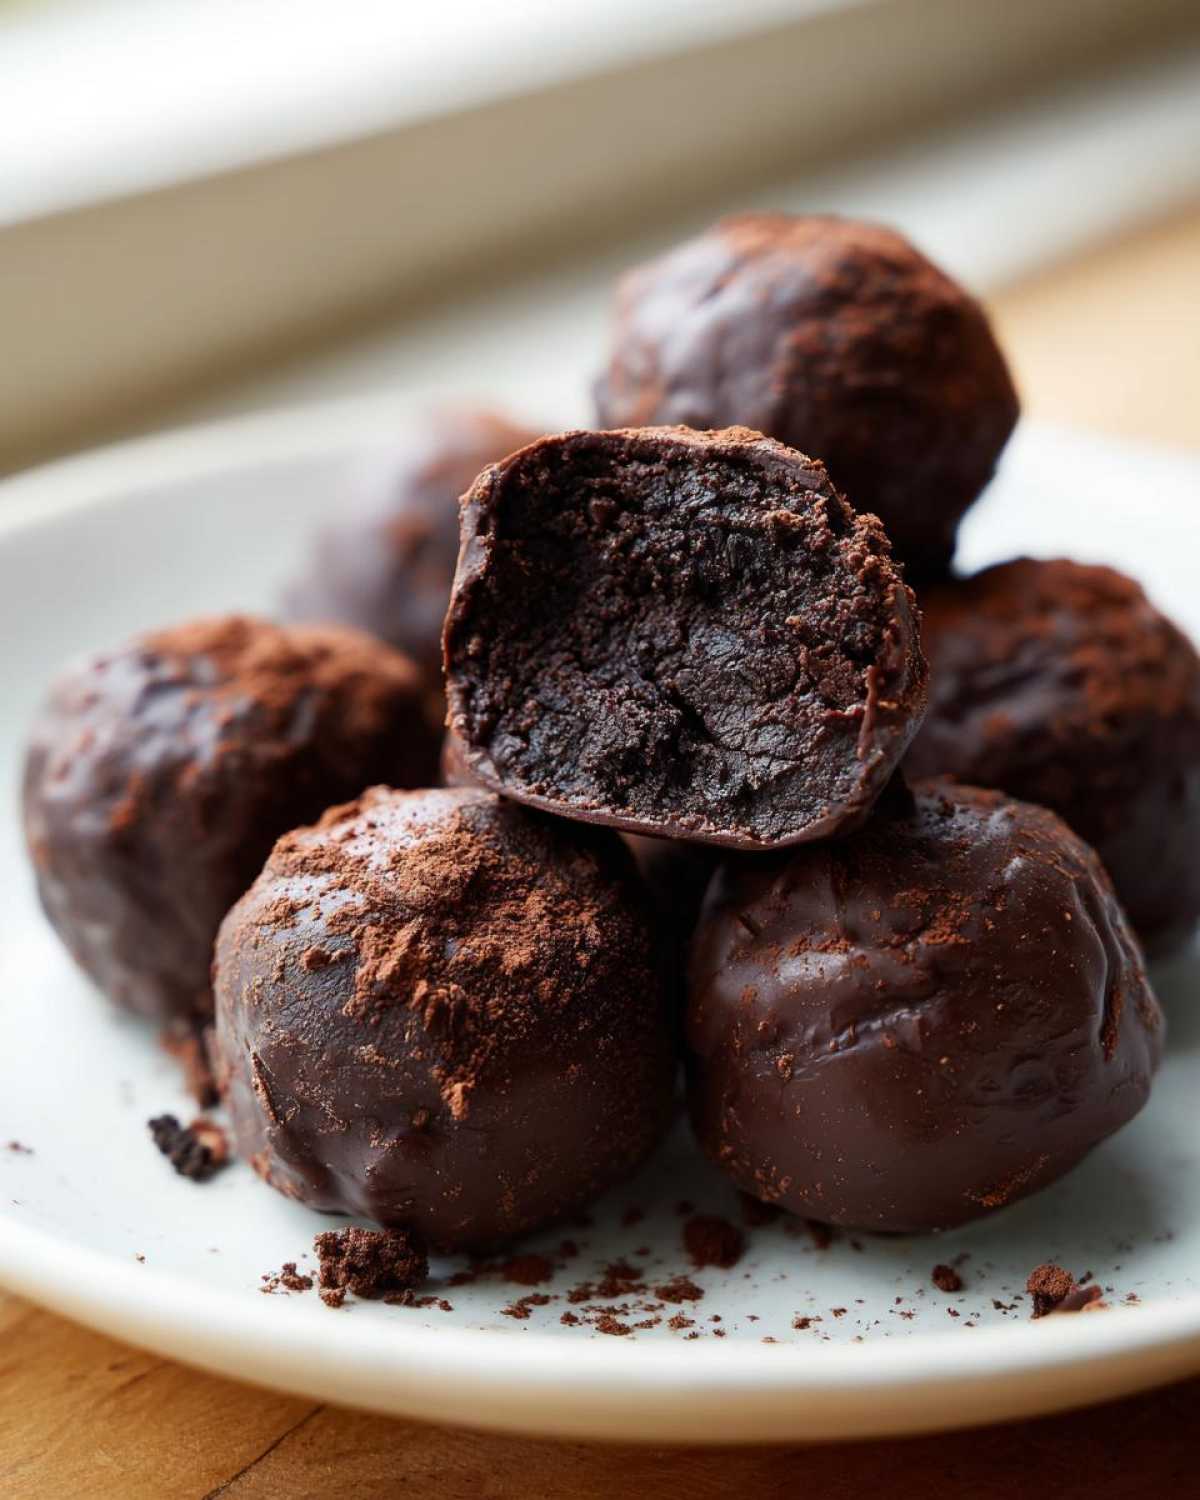
If you ever feel like those simple oreo balls need an extra little aromatic kick, try adding a tiny dash of espresso powder right into the cream cheese and Oreo crumb mixture. It doesn’t make the ball taste like coffee, but it really deepens and enhances that chocolate flavor. It’s subtle, but discerning guests always seem to notice! You can find tons of ways to play with delicious desserts, like my recipe for a no-bake chocolate mousse pie, if you’re looking for more easy wins!
Frequently Asked Questions About Oreo Balls
I get so many messages about these luscious oreo balls! You guys are asking the best questions, so I wanted to make sure I covered a few of the most common ones right here. Sometimes, when a recipe is this easy no bake dessert wonder, people worry about cutting corners or what happens when they sit for a few days. Not to worry, I’ve tested everything!
Can I skip the cream cheese in this Oreo Truffles Recipe?
Oh, honey, the cream cheese is the glue! Seriously, I wouldn’t try it. The cream cheese does two massive jobs here: it provides that essential tangy creaminess that balances the sweetness of the cookie and the chocolate coating, AND it acts as the binder. If you skip it, you will just end up with very dry, delicious, yet totally uncontrollable cookie crumbs. If you are avoiding dairy for some reason, you’d need to find a designated vegan block substitute, but for this specific recipe, the 8oz block of cream cheese is mandatory for getting that perfect Oreo Truffles Recipe texture.
Can I freeze these Simple Oreo Snacks?
Yes, absolutely! And this is one of my favorite secrets for holiday prep! These little guys freeze like a dream. You can roll them, chill them until they are firm, and then place them on a baking sheet in the freezer for about an hour until they are rock hard. Once they’re frozen solid, transfer them right into a heavy-duty freezer bag or an airtight container, separating layers with wax paper. They last great in the freezer for about two to three months. When you want to serve them, just pull out what you need and let them thaw on the counter for about an hour. They come out tasting almost as fresh as the day you made them!
What if I don’t have a food processor for crushing the cookies?
Don’t you stress if your kitchen counter is lacking a massive appliance! My first few batches of these simple Oreo snacks were made entirely without a food processor. You just need a heavy-duty zip-top freezer bag—the thicker ones work better! Toss those whole Oreos in there, making sure the bag isn’t too crammed full (you need room to smash!).
Lay that bag flat on a sturdy cutting board or counter, and grab your rolling pin. Start gently, just breaking them down, and then get a little more enthusiastic! It’s surprisingly therapeutic after a long day, I promise. You are aiming for that fine, sandy crumb consistency, so keep rolling until there aren’t any big chunks left sticking up. You might want to check out my guide on making amazing olive oil bread dip while you are waiting for your hands to recover from all that rolling!
Why is my chocolate coating cracking or getting chalky?
That’s usually one of two problems, both related to temperature shock! First, look at your chocolate coating. If it looks dull or has those weird white streaks, it means it “seized” or bloomed, usually because a tiny speck of water got into the melting chocolate. Always make sure your melting bowl and utensils are bone dry!
The second reason happens after dipping: if your oreo balls are rock hard straight from the freezer and hit warm chocolate, the coating sets instantly and can crack as the inside thaws slightly. That’s why I insist on chilling them until they are firm, but not letting them sit in the freezer for days before dipping. If you’re dipping a lot, bring the rolled balls out of the fridge about 15 minutes before you start dipping so they warm up just slightly. That little bit of warmth helps the chocolate adhere better without shrinking too much when it sets.
Understanding the Nutrition in These Oreo Balls
Now, let’s address the elephant in the room. Are these the healthiest things you’ll ever eat? No! But are they ridiculously tasty, satisfying, and fantastic for parties? Absolutely! Since these recipes are meant to be shared with loved ones, I always like to give a general idea of what you are getting into calories-wise, even if we don’t measure portions perfectly when we are just sneaking one or two!
Based on the amount of Oreos, cream cheese, and standard semi-sweet coating for about 30 balls, here’s a rough nutritional estimate per single oreo ball:
- Serving Size: 1 ball
- Calories: Around 150
- Fat: About 9 grams
- Carbohydrates: Roughy 16 grams
- Protein: About 2 grams
- Sugar: Around 15 grams
Keep in mind these numbers are estimates, especially depending on whether you use regular Oreos or use a dark chocolate versus white chocolate coating. They are mostly fat and sugar, as you’d expect from a decadent chocolate truffle, but you only eat one (or two, or three… I won’t tell!). It’s all about balance, right? If you need a break after indulging, you can check out my very reliable recipe for garlic herb olive oil dip!
Share Your Favorite Oreo Balls Creations
Seriously, once you try this recipe, you have to come back and tell me what you thought! These oreo balls are truly my comfort dessert, and seeing you all enjoy them makes my day. Did you stick to the three basic ingredients? Or did you get adventurous with peppermint or peanut butter chips?
Please leave a rating down below—seriously, if you loved how easy these were, hit that 5-star mark! And I absolutely adore seeing your creations! Tag me on social media when you make them. If you want to see what seasonal twists I’m rolling up this year, make sure you follow along with our official Pinterest account; we post new ideas there all the time!
Until the next time you need a fantastic, no-fuss treat, happy baking (even though it’s no-bake!). If you’re looking for another amazing, easy finish, my easy tiramisu recipe is always a winner when you need something to impress without the heat!
Understanding the Nutrition in These Oreo Balls
Now, let’s address the elephant in the room. Are these the healthiest things you’ll ever eat? No! But are they outrageously tasty, satisfying, and fantastic for parties? Absolutely! Since these recipes are meant to be shared with loved ones, I always like to give a general idea of what you are getting into calories-wise, even if we don’t measure portions perfectly when we are just sneaking one or two!
Keep in mind these numbers are estimates, especially depending on whether you use regular Oreos or use a dark chocolate versus white chocolate coating. They are mostly fat and sugar, as you’d expect from a decadent chocolate truffle, but you only eat one (or two, or three… I won’t tell!). It’s all about balance, right? If you need a break after indulging, you can check out my very reliable recipe for cheesy loaded meatloaf casserole!
Based on the amount of Oreos, cream cheese, and standard semi-sweet coating for about 30 balls, here’s a rough nutritional estimate per single oreo ball:
- Serving Size: 1 ball
- Calories: Around 150
- Fat: About 9 grams
- Carbohydrates: Roughy 16 grams
- Protein: About 2 grams
- Sugar: Around 15 grams
This information gives you a good benchmark, but remember that the joy of homemade treats is knowing exactly what went into them! And rest assured, you can always sneak an extra vegetable in somewhere else in your week!
Share Your Favorite Oreo Balls Creations
Seriously, once you try this recipe, you have to come back and tell me what you thought! These oreo balls are truly my comfort dessert, and seeing you all enjoy them makes my day. Did you stick to the three basic ingredients? Or did you get adventurous with peppermint or peanut butter chips?
Please leave a rating down below—seriously, if you loved how easy these were, hit that 5-star mark! I always check the comments because I want to know exactly how your batch turned out. And I absolutely adore seeing your creations! Tag me on social media when you make them; honestly, seeing photos of them all shiny and dipped is the best payoff!
If you want to see what seasonal twists I’m rolling up this year, make sure you follow along with our official Pinterest account; we post new ideas there all the time! We use it to keep track of all our favorite quick desserts, so you don’t want to miss out.
Until the next time you need a fantastic, no-fuss treat, happy dipping! If you’re looking for another amazing, easy finish that really wows people at potlucks, my recipe for the easy tiramisu recipe is always a winner when you need something to impress without turning on the oven!
PrintClassic 3-Ingredient No-Bake Oreo Balls (Oreo Truffles)

Make the best Oreo Balls with this incredibly easy, no-bake recipe. These rich, simple Oreo Truffles require minimal ingredients for maximum chocolatey flavor. They are perfect for parties or last-minute holiday treats.
- Prep Time: 20 min
- Cook Time: 5 min
- Total Time: 25 min
- Yield: 30 servings 1x
- Category: Dessert
- Method: No-Bake
- Cuisine: American
- Diet: Vegetarian
Ingredients
- 1 package (14.3 oz) Oreo cookies
- 8 oz cream cheese, softened
- 16 oz semi-sweet chocolate, melted (for coating)
Instructions
- Place the entire package of Oreo cookies into a food processor. Pulse until you have fine crumbs.
- Transfer the Oreo crumbs to a medium bowl. Add the softened cream cheese.
- Mix the crumbs and cream cheese together using a hand mixer or a sturdy spoon until fully combined and a dough forms.
- Roll the mixture into small balls, about 1 inch in diameter. You should get about 30 balls.
- Place the rolled balls on a baking sheet lined with parchment paper.
- Chill the Oreo balls in the refrigerator for at least 30 minutes until firm.
- Melt the semi-sweet chocolate according to package directions. You can use a double boiler or microwave in 30-second intervals, stirring in between.
- Dip each chilled Oreo ball into the melted chocolate, ensuring it is fully coated. Use a fork to lift the ball out, allowing excess chocolate to drip off.
- Return the coated balls to the parchment-lined sheet.
- Refrigerate the finished Oreo Truffles for about 15 minutes, or until the chocolate coating is set.
Notes
- For a festive look, sprinkle crushed Oreos or holiday sprinkles over the chocolate coating before it sets.
- If you prefer white chocolate Oreo balls, substitute the semi-sweet chocolate with white chocolate chips.
- If you do not have a food processor, place the cookies in a large zip-top bag and crush them thoroughly with a rolling pin.
Nutrition
- Serving Size: 1 ball
- Calories: 150
- Sugar: 15
- Sodium: 80
- Fat: 9
- Saturated Fat: 5
- Unsaturated Fat: 4
- Trans Fat: 0
- Carbohydrates: 16
- Fiber: 0
- Protein: 2
- Cholesterol: 10