
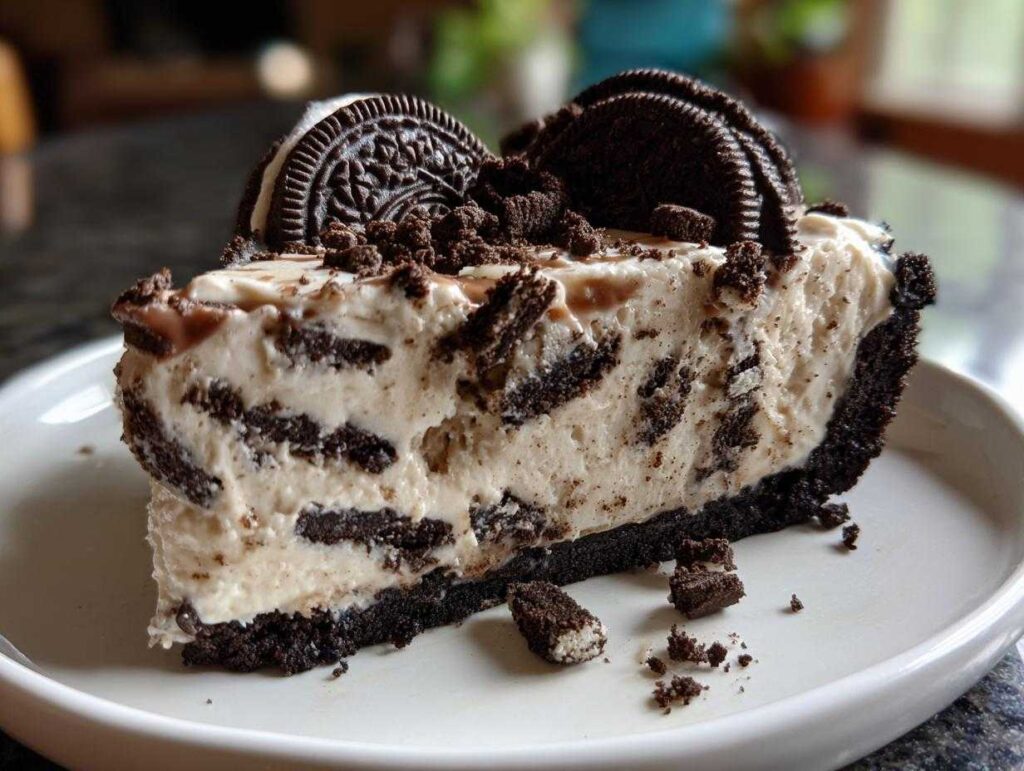
Listen, sometimes you need that amazing, crave-worthy dessert, but you absolutely cannot turn on the oven. I get it! When the craving for something rich, creamy, and chocolatey hits hard, I always turn to my ultimate no-bake Oreo pie. This recipe is my go-to because it follows my golden rule: maximum flavor with minimum fuss. Forget fussy layers or complicated fillings; this version comes together so fast, it practically qualifies as a snack!
Seriously, this is hands-down the easiest **no-bake 3-ingredient Oreo pie** recipe out there, even before we add our little flavor boosters. It’s the kind of treat that wins over every single person at a kid’s party or a grown-up potluck. If you want a decadent cookies and cream experience that tastes completely homemade but takes less than 20 minutes of active prep time, you are in the absolute right place. Trust me, you won’t believe how simple this creamy dream is to achieve!
- Why This No Bake Oreo Pie Recipe is Your New Favorite
- Gathering Ingredients for Your 3 Ingredient Oreo Pie
- Step-by-Step Instructions for the Easiest Oreo Pie
- Expert Tips for the Best Homemade Oreo Pie
- Serving Suggestions for Your Party Desserts with Oreos
- Storage and Reheating Instructions for Your Oreo Pie
- Frequently Asked Questions About Making an Oreo Pie
- Share Your Decadent Cookies and Cream Masterpiece
Why This No Bake Oreo Pie Recipe is Your New Favorite
When I tell people how easy this pie is, they usually don’t believe me! It’s pure magic, especially when you’re trying to keep the kitchen cool. This recipe proves that you don’t need hours of standing over a stove or a hot oven to create something truly show-stopping. It’s the definition of an easy Oreo dessert.
- It’s lightning fast! Prep time is under 20 minutes, making it ideal for sudden sweet cravings.
- It delivers that satisfying, rich chocolate flavor without heating up the house—hello, **no oven desserts**!
- The texture is spot-on: a snappy crust holding a cloud-like, ultra-creamy filling.
- It’s perfect for practically any event—from busy weeknights to last-minute holiday gatherings.
It’s the kind of **no bake Oreo pie recipe** you’ll keep on speed dial once you see how simple it is!
Gathering Ingredients for Your 3 Ingredient Oreo Pie
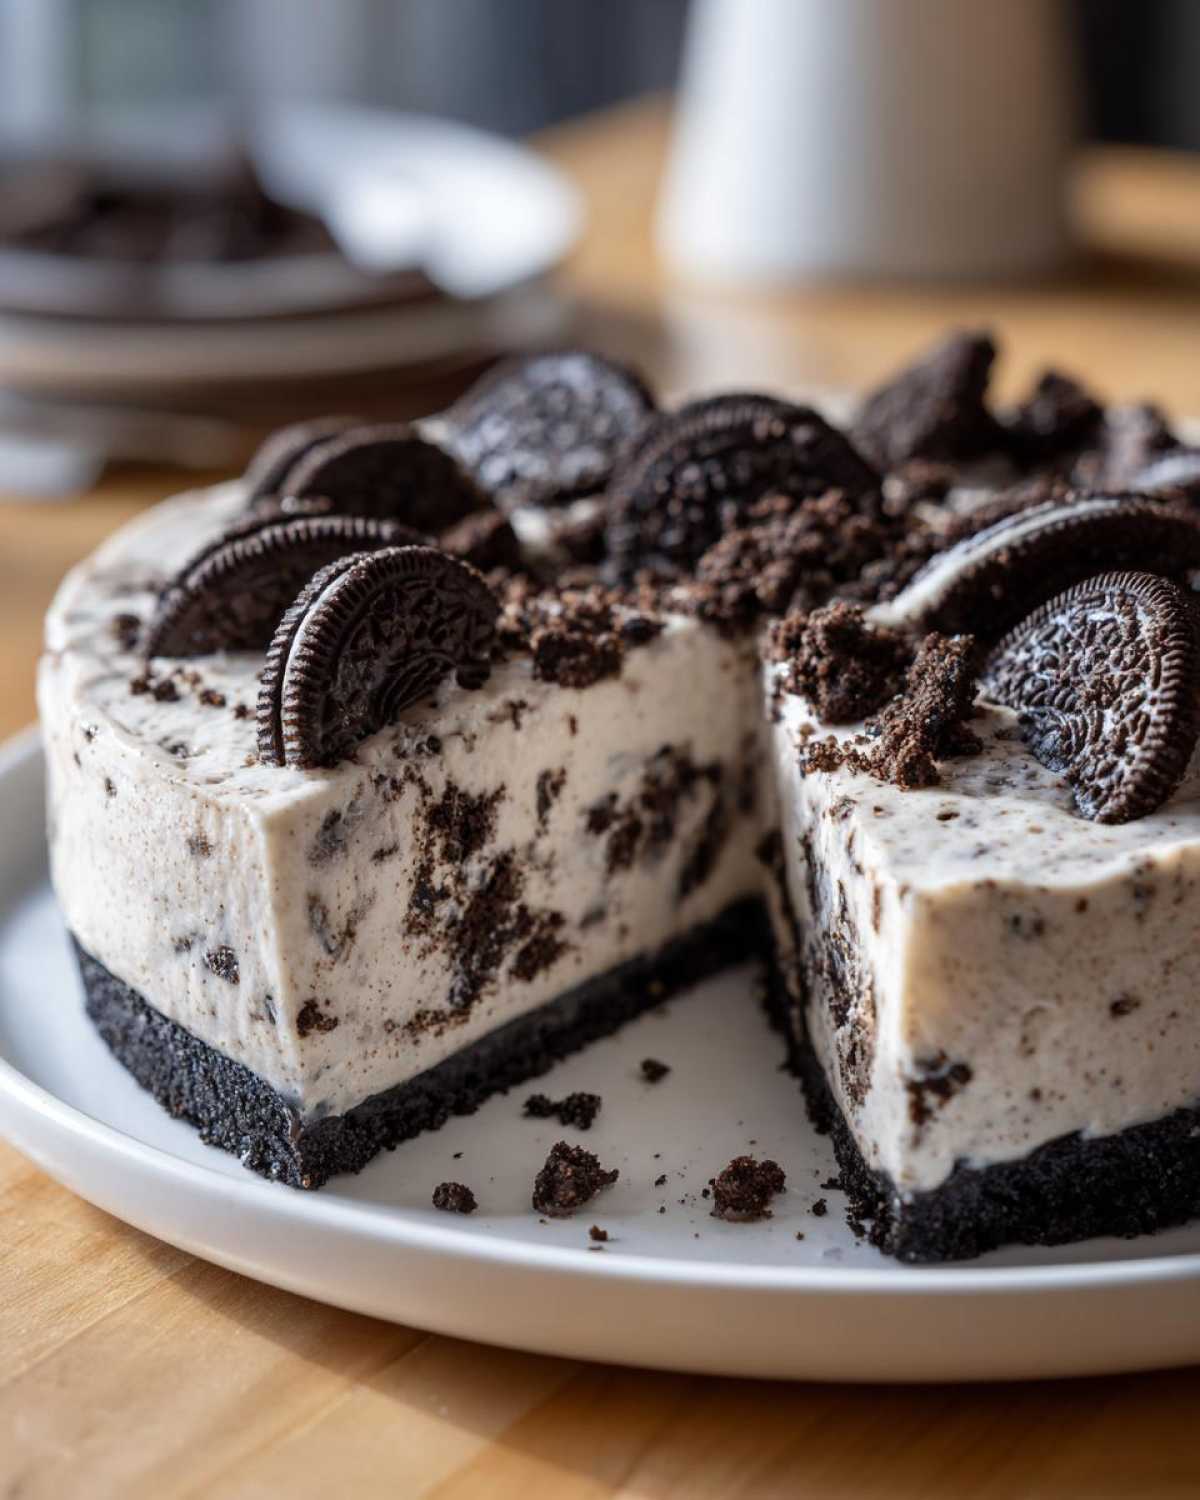
Okay, getting ready for this pie feels almost unfair because it’s so simple! For the absolute basic version, we are using just three main players, but I’m going to peek at my notes on the side because we can sneak in so much flavor here. Remember, keeping ingredients simple is my thing, but quality definitely still matters. You can find a few more fancy flavor boosts on my German chocolate pie post, but for now, let’s stick to the foundation of this incredible **chilled Oreo dessert**.
Essential Components for the Simple Oreo Crust
This crust sets up perfectly in the freezer, giving you that sturdy base needed to hold all that luxurious filling. Don’t skip pressing it firmly! Here’s what you need for that buttery crunch:
- 1 package (about 14.3 ounces) of Oreo cookies – yes, the whole package for the crust and the topping!
- 1/2 cup (that’s one full stick!) of unsalted butter, melted completely smooth.
Pulse them together until it looks like perfect, dark, wet sand. That’s your visual cue!
Creating the Creamy Oreo Pie Filling
This is where the cloud-like texture of our **creamy Oreo pie** comes from. The real secret weapon here is the instant pudding mix; it stabilizes everything so nicely! I usually stick with vanilla because it lets the Oreo flavor shine, but feel free to use chocolate if you want that extra depth, kind of like an Oreo ball.
- 1 package (3.4 ounces) of instant vanilla pudding mix (but chocolate works too!).
- 1 1/2 cups of very cold, whole milk. Make sure it’s cold!
- 1 container (8 ounces) of frozen whipped topping, like Cool Whip, thawed completely in the fridge. We want it super soft so it folds in nicely without deflating!
I’ll show you in the steps below how to fold that topping in perfectly to keep that light, airy body that makes this such a wonderful **fluffy Oreo dessert**.
Step-by-Step Instructions for the Easiest Oreo Pie
Now for the fun part where everything comes together! Since this is a **make ahead dessert**, getting the steps right ensures it sets up like a dream in the fridge. Don’t rush the chilling, that’s the hardest part, because standing back and waiting is tough when your kitchen smells like chocolate heaven! You can check out my German chocolate pie post for another amazing chilled recipe!
How to Make the Simple Oreo Crust
First up, we need those crumbs! For the absolute finest texture for your **simple Oreo crust**, I toss about half the package of Oreos into my food processor and pulse until they are like fine dust. Now, if you’re not using a processor, just throw them in a sturdy zip-top bag and use a rolling pin—that’s what I did when I first learned this trick!
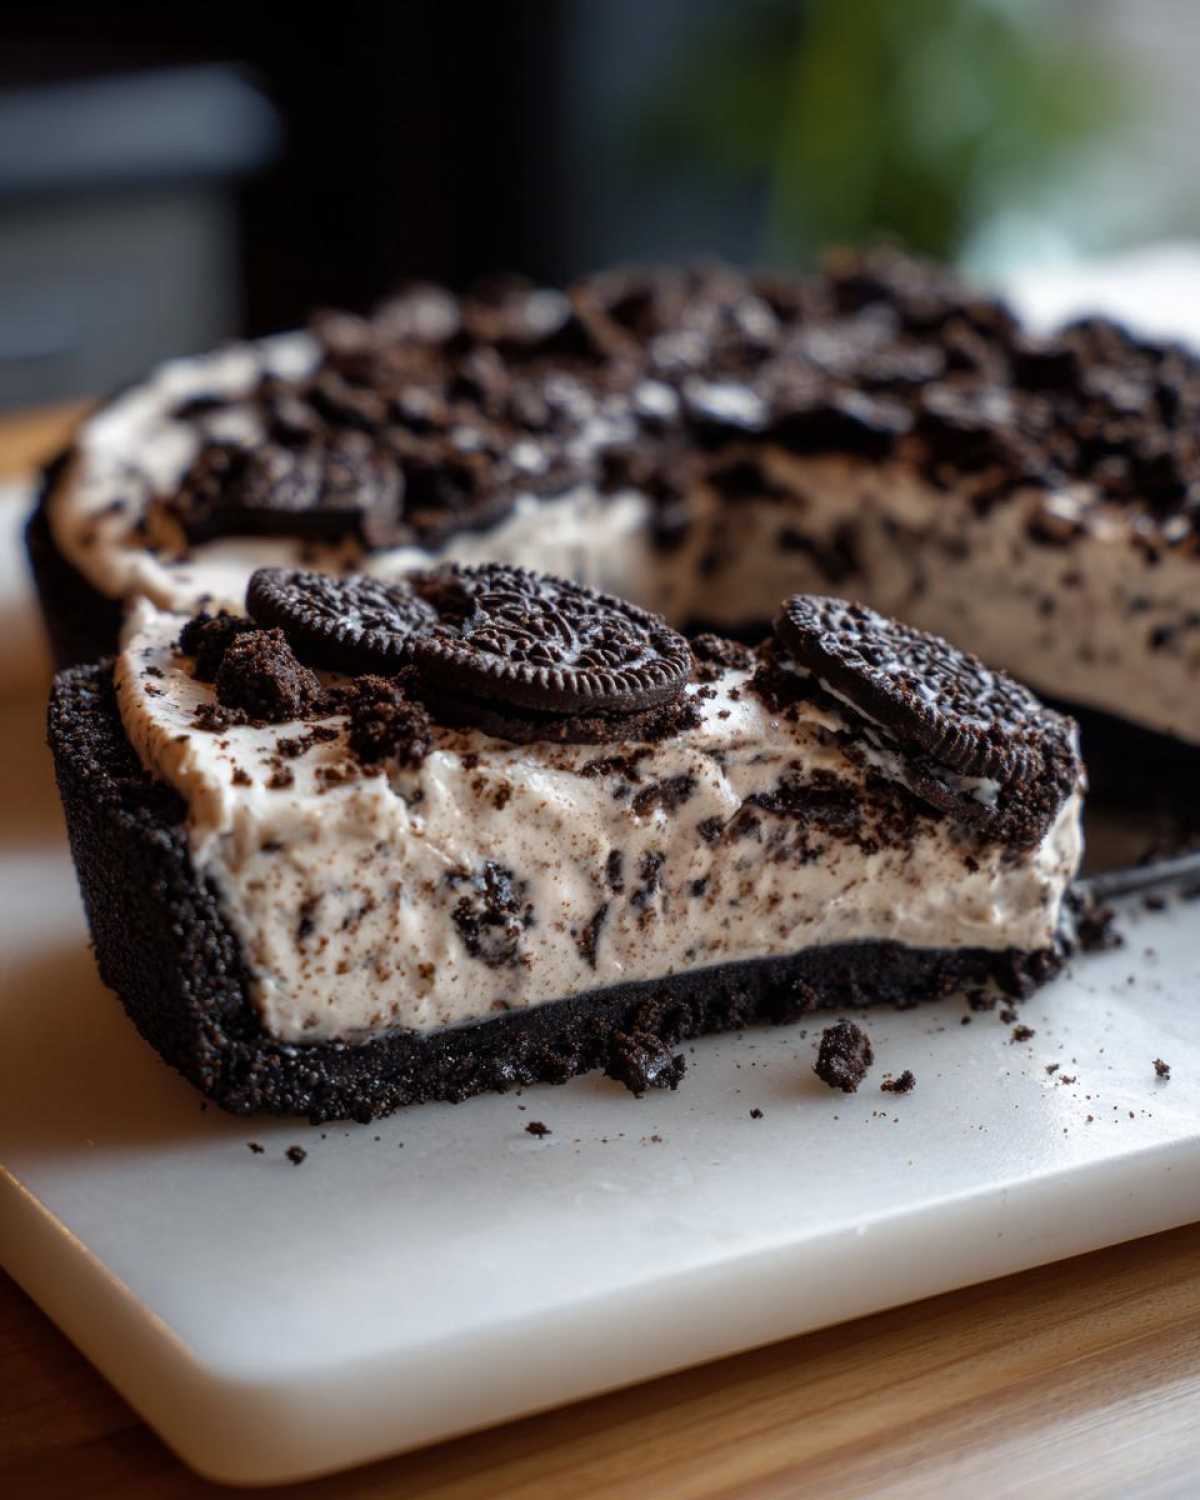
Pour that melted butter right over the crumbs and pulse again until it genuinely looks like dark, damp sand. That’s the look you’re aiming for! Take that buttery mixture and press it hard into the bottom and up the sides of your 9-inch pie dish. I mean, press it. Use the bottom of a measuring cup if you need extra leverage. Pop that crust into the freezer while you whip up that filling—about 10 minutes will do the trick to get it firm.
Assembling the Fluffy Oreo Dessert Filling
Moving on to the creamy part! Grab a medium bowl. Add your pudding mix and the cold milk. You need to whisk this vigorously—really get some air into it—for about two full minutes. It will start getting thick pretty fast, almost like a thick mousse base. Once it looks like soft-serve ice cream, grab your thawed whipped topping. This is crucial: you must gently fold the topping in, don’t stir! Use a rubber spatula and sweep around the sides, incorporating that whipped topping gently until just combined. We want to keep all that air in there so it stays a **fluffy Oreo dessert**!
Now, take the remaining Oreos and crush them coarsely—you want those nice, chunky bits of cookie, not more dust. Fold about one cup of those chunky cookies into your filling gently. Pour that entire gorgeous mixture into your chilly crust. Sprinkle the last few cookie chunks over the top for decoration!
Chilling Your Make Ahead Dessert
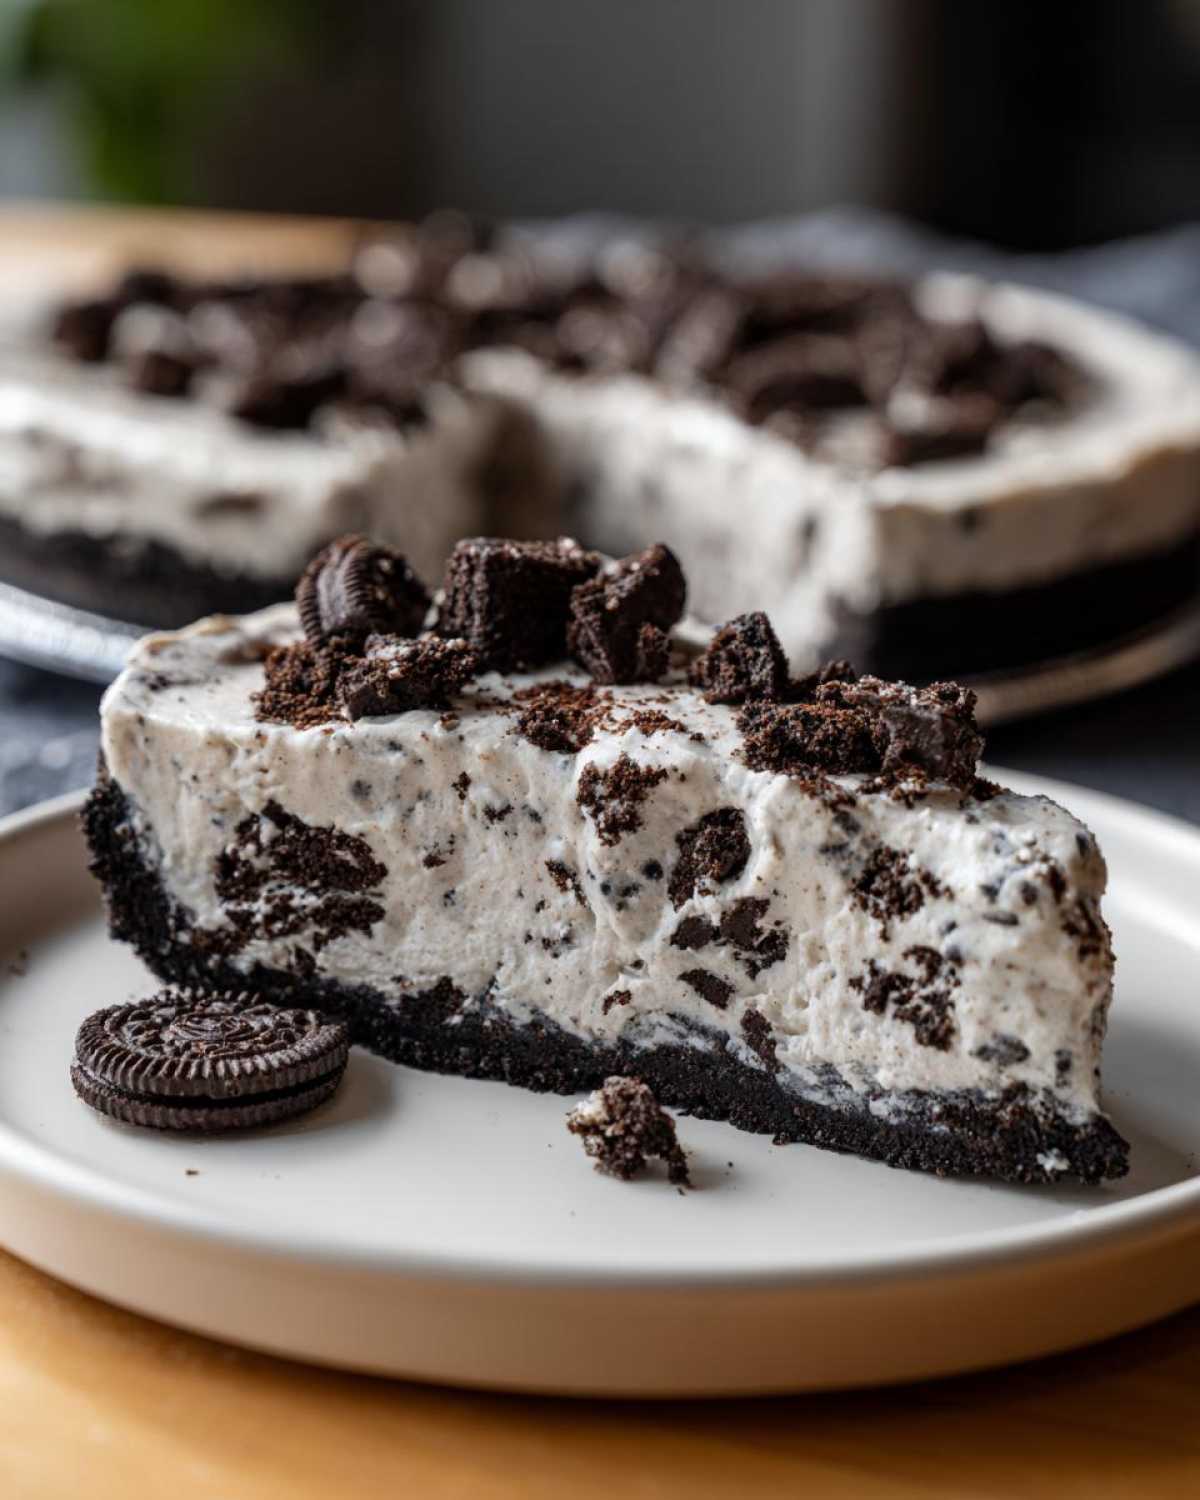
This is purely non-negotiable, folks! While the filling is technically set enough to eat in about an hour, we want that firm, sliceable, perfect texture for our **oreo pie**. You have to chill this pie for a minimum of 4 hours. But hey, if you’re making this for the next day’s party, chilling it overnight makes it even better, ensuring that **no bake Oreo pie** is perfectly solid.
When it comes out of the fridge, your **chilled Oreo dessert** will be perfectly set and ready to slice. Seriously, waiting is the only hard part of this whole easy recipe!
Expert Tips for the Best Homemade Oreo Pie
Now that you have the base recipe down, let’s talk about leveling up this **homemade Oreo pie**! Because even though this recipe is technically a base, it’s ready for some customization based on what I’ve learned over the years. If you want to move this from just a good **quick chocolate dessert** to a show-stopping, restaurant-quality treat, these little tweaks make all the difference. Check out my no-bake peanut butter pie post for more ideas on transforming simple fillings!
Variations on the Creamy Oreo Pie Filling
People always ask me if you can turn this into an actual **Oreo cheesecake pie**, and YES, you totally can! For that amazing tangy richness, take 8 ounces of cream cheese—make sure it’s fully softened at room temperature—and beat it until it’s completely smooth before you fold in that pudding mixture. It adds density, texture, and that lovely slight tanginess that cuts through the sweet cream.
If you want to skip the store-bought whipped topping and go ultra-rich, try the heavy cream swap! Instead of milk and whipped topping, use 1 1/2 cups of very cold heavy whipping cream. Whip it stiffly until you get soft peaks, then gently fold in the pudding mix and the crushed Oreos. That technique makes for the most incredibly **decadent cookies and cream** texture you can imagine. It’s worth the extra little bit of whipping, honestly!
Achieving the Perfect Simple Oreo Crust
I rely on the food processor 99% of the time now, but I remember those early days when I didn’t have one handy—it’s important for us busy cooks to have backups!
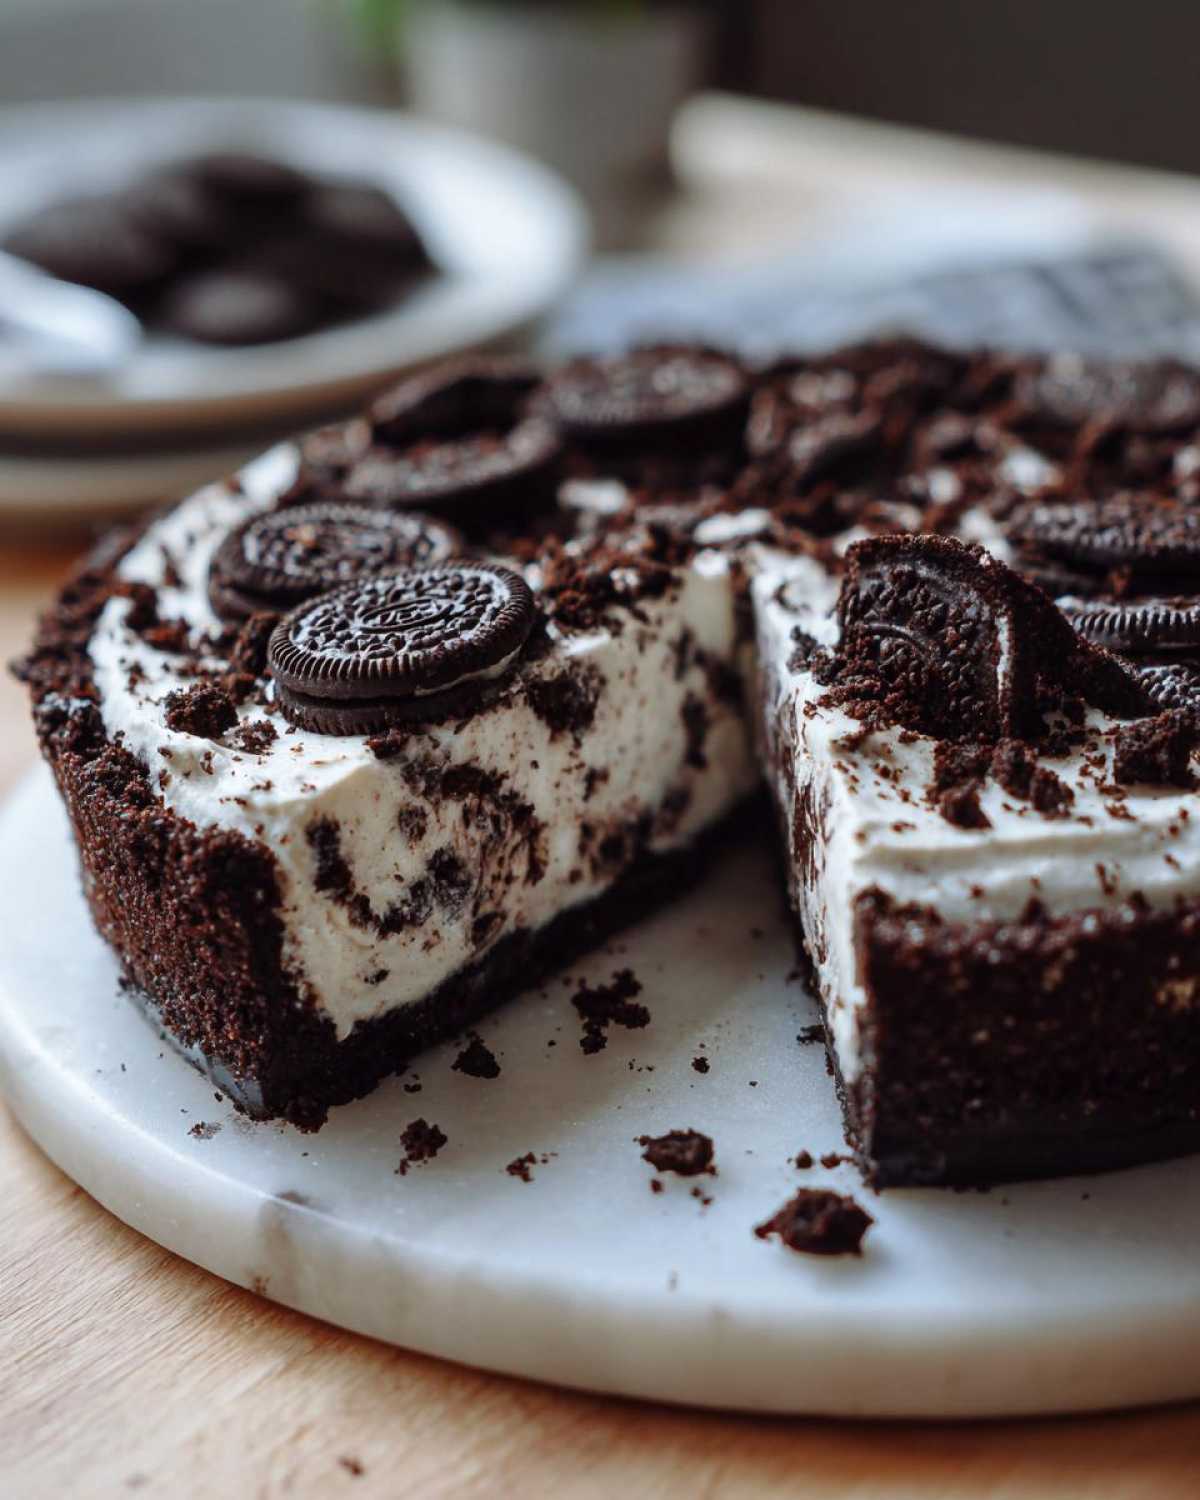
If you are crushing those Oreos by hand for your **simple Oreo crust**, you need a good heavy-duty zip-top bag—the freezer kind works best because they hold up to the beating! Put your cookies in, seal it almost completely, leaving just a tiny bit of air to escape so the bag doesn’t explode. Then, use a rolling pin or even the bottom of a heavy saucepan and roll over them. The trick here is that you want fine crumbs, but you don’t want to pulverize them into powder. If you crush them too fine, they can feel dusty in the mouth.
You want plenty of textural variation—some fine dust to fill the gaps, and some medium-sized pieces to give that satisfying snap when you take a bite. Mix that melted butter in by hand or with a fork once they are crushed, and you’ll feel exactly when the mixture is ready to be pressed into that pie dish.
Serving Suggestions for Your Party Desserts with Oreos
So, you’ve managed the magical feat of perfectly chilling your **creamy Oreo pie**! Congratulations! But for parties, weddings, or even just a nice family dinner, presentation matters, doesn’t it? I mean, we eat with our eyes first! Even though this pie is so ridiculously easy, we can dress it up to look like something straight out of a bakery display. Forget just sprinkling a few extra crumbs on top; we are going for knockout status here!
This style of pie, being so sturdy and chocolate-heavy, pairs beautifully with anything tart or bright. Think about what you’re serving alongside it. If you’re trying to balance out the richness (and trust me, this pie is rich!), I always lean into fruit. You can find some great ideas on fruit flavors over at my strawberry shortcake cupcakes post, because the flavor profiles cross over nicely.
Here are a few of my absolute favorite ways to top this **party dessert with Oreos** when it comes out of the fridge:
- The Caramel Drizzle: If you have some good quality caramel sauce lying around, just warm it slightly so it drizzles beautifully, then zig-zag it generously over the top of the pie right before serving. It adds a wonderful salty-sweet dimension.
- A Light Dusting of Color: If I’ve used vanilla pudding in the filling, sometimes I like to add a subtle color pop. A very light dusting of cocoa powder is nice, but for true party flair, try finely grating some dark chocolate curls over the top. That looks so professional!
- Mini Topping Buffet: For the ultimate casual gathering, put the whole (unadorned) pie on the table, and set out small bowls of toppings. Think mini chocolate chips, crushed pecans, maybe some extra whipped topping in a bowl, and even some whipped cream for people to dollop on their own slice. This way, everyone gets exactly what they want!
Remember, this **no bake Oreo pie** is served cold, so apply any drizzles or soft toppings immediately before you bring it out to the table so they look their absolute best!
Storage and Reheating Instructions for Your Oreo Pie
The great news about this stunning **no bake Oreo pie** is that it is truly built to last—or at least last long enough until everyone gets a slice! Because we are dealing with a chilled dessert that relies on pudding and whipped topping for its structure, thankfully, there’s no reheating involved whatsoever. In fact, colder is usually better for this kind of texture!
Since this is designed to be the ultimate **make ahead dessert**, planning storage is key. You want that creamy filling to be firm when you slice into it, right? Never leave this pie sitting out on the counter. The dairy and the whipped topping need to stay cool to maintain that beautiful, fluffy texture.
Here is how I handle storage—and honestly, mine rarely lasts long enough to need freezing!
- Refrigerator Life: Always keep this pie covered tightly in the fridge. I usually use a pie carrier or just wrap the top very loosely with plastic wrap, being careful not to smash the cookies on top. When stored correctly, this **creamy Oreo pie** stays absolutely delicious for about 3 to 4 days. Any longer than that, and the crust starts to absorb too much moisture and can get a little soggy, which we definitely don’t want!
- Freezing for Later: Yes, you can freeze remnants of this pie! If you know you won’t finish it within four days, wrap the entire pie (or individual slices) tightly in a double layer of plastic wrap, followed by a layer of aluminum foil. Pop it right in the freezer. It should keep well for up to a month.
- Thawing Out: If you freeze it, you need patience. Thaw the pie slowly overnight in the refrigerator before you plan to serve it. Do not try to rush this on the counter or in the microwave—that will turn your beautiful, firm filling into soupy sadness! Let the fridge do the slow work to bring it back to that perfect chilled state.
The beauty of a **chilled Oreo dessert** like this is that it just gets firmer the longer it sits in the cold, which is exactly what we want for clean slices!
Frequently Asked Questions About Making an Oreo Pie
I know you’re probably eager to get this **quick chocolate dessert** in the fridge, but let’s address a few quick questions that always pop up when people make my **No Bake Oreo Pie recipes** for the first time. Don’t worry about things being perfect; that’s why I’m here! We want delicious, not stressful, right?
Can I use different cookies besides Oreos in this oreo pie?
Oh, absolutely! While the classic black-and-white cookie is what gives us that signature look and taste, this base recipe is super flexible. If you want to mix it up for your next **party desserts with Oreos**, try swapping half of the standard Oreos for Golden Oreos. You get the same great crust structure, but the flavor is a little less intensely chocolatey—it’s surprisingly good!
You could also use other popular sandwich cookies, but just be aware that if they have a different cream filling (like mint or peanut butter), the flavor profile of your overall **creamy Oreo pie** will definitely change. Stick to the vanilla or chocolate cream for the closest resemblance to the classic **cookies and cream pie filling**!
How do I make this an Oreo icebox cake style dessert?
That is such a great question that gets into the actual structure of these chilled desserts! An **Oreo icebox cake** usually relies on softer layers where the cookies absorb moisture from the whipped cream or pudding over several hours and soften completely, almost dissolving into a cake-like texture. Our pie, on the other hand, is built for slicing, meaning we want the crust firm and the filling set.
If you really love that icebox texture, ditch the pie dish! You can definitely layer this up. Grab a loaf pan or a small square dish. Spread a thin layer of the creamy filling, top with a layer of broken cookies, another layer of filling, and repeat until the dish is full. Cover it and chill. That will give you more of that soft, melt-in-your-mouth **Oreo icebox cake** feel rather than a true sliceable pie!
Is the pudding mix necessary for this 3 ingredient pie?
If you are going for the absolute barebones, three-ingredient version (Oreos, butter, and whipped topping), you could technically skip the pudding mix, but you’d need to whip your topping much stiffer, and you’d risk the whole thing turning into a mushy mess after a day in the fridge. The pudding mix is the essential stabilizer here. It acts like a gentle setting agent that binds the whipped topping and the milk together.
Think of the pudding mix as the backbone for that amazing, firm yet fluffy texture. If you omit it, you lose the structure that lets you get such a clean slice required for a great **homemade Oreo pie**. I actually referenced how to make a super moist cake with a stabilized structure over on my post about a moist homemade chocolate cake, and the principle is the same: structure is key when you aren’t using the oven to bake things rigid!
For this recipe to yield that perfect, sliceable **no bake Oreo pie**, the pudding mix is a must-have component!
Share Your Decadent Cookies and Cream Masterpiece
Well, that’s it! You have officially conquered the quickest, creamiest, most crowd-pleasing **oreo pie** known to humankind. I am so proud of you for making this stunning **no oven dessert**!
Now, my absolute favorite thing about sharing these recipes is seeing what *you* all do in your kitchens! Did you go for the vanilla pudding, or did you sneak in that cream cheese for an **oreo cheesecake pie** swirl? I want to know everything! When you share your photos, please tag me on your favorite social platforms. I love seeing your beautiful creations and getting tips from fellow bakers.
Speaking of sharing, if you loved this simplicity, you have to check out my recipe for Cookies and Cream Puppy Chow—it uses those same addictive flavors but in a totally different, snackable format!
If you made this pie and it was the easiest dessert achievement of your year, please come back and leave a quick rating! It truly helps other cooks know they’re in the right place for the **best no bake pie**.
And hey, while you’re out there pinning deliciousness, don’t forget to swing by my Pinterest profile. I’m always finding new inspiration and ideas for **party desserts with Oreos** over there at our official Pinterest board. Happy baking (or, well, *not* baking)! Let me know how it goes!
PrintEasiest No-Bake 3-Ingredient Oreo Pie

You need this incredibly easy, no-bake Oreo pie recipe. It features a simple Oreo crust and a light, creamy cookies and cream filling. This is the best no bake pie for quick family treats or parties.
- Prep Time: 20 min
- Cook Time: 0 min
- Total Time: 4 hr 20 min
- Yield: 8 servings 1x
- Category: Dessert
- Method: No Bake
- Cuisine: American
- Diet: Vegetarian
Ingredients
- 1 package (14.3 ounces) Oreo cookies, divided
- 1/2 cup (1 stick) unsalted butter, melted
- 1 container (8 ounces) frozen whipped topping (like Cool Whip), thawed
- 1 package (3.4 ounces) instant vanilla or chocolate pudding mix
- 1 1/2 cups cold milk
Instructions
- Prepare the crust: Place 24 Oreo cookies (about half the package) in a food processor and pulse until you have fine crumbs. You can also crush them in a zip-top bag using a rolling pin.
- Mix the crust: Pour the melted butter over the Oreo crumbs and pulse until the mixture resembles wet sand. Press the crumb mixture firmly into the bottom and up the sides of a 9-inch pie dish. Place the crust in the freezer while you prepare the filling.
- Make the creamy filling: In a medium bowl, whisk together the instant pudding mix and cold milk for two minutes until it starts to thicken.
- Fold in the topping: Gently fold the thawed whipped topping into the pudding mixture until just combined. This creates your fluffy Oreo dessert filling.
- Add cookies: Crush the remaining Oreo cookies into medium chunks. Fold about 1 cup of these chunks into the creamy filling.
- Assemble the pie: Pour the filling into the chilled Oreo crust. Sprinkle the remaining cookie pieces over the top for decoration.
- Chill: Refrigerate the pie for at least 4 hours, or until the filling is set. For the best results, chill overnight. This make ahead dessert is ready when firm.
Notes
- If you want a richer chocolate flavor, use chocolate pudding mix instead of vanilla.
- For a decadent cookies and cream pie filling, use 1 1/2 cups of cold heavy cream instead of milk and whip it until soft peaks form before folding in the pudding mix.
- This recipe is a great base for an Oreo cheesecake pie; simply add 8 ounces of softened cream cheese to the pudding mixture before folding in the whipped topping.
Nutrition
- Serving Size: 1 slice
- Calories: 380
- Sugar: 35
- Sodium: 310
- Fat: 23
- Saturated Fat: 12
- Unsaturated Fat: 8
- Trans Fat: 0.5
- Carbohydrates: 42
- Fiber: 1
- Protein: 4
- Cholesterol: 15