
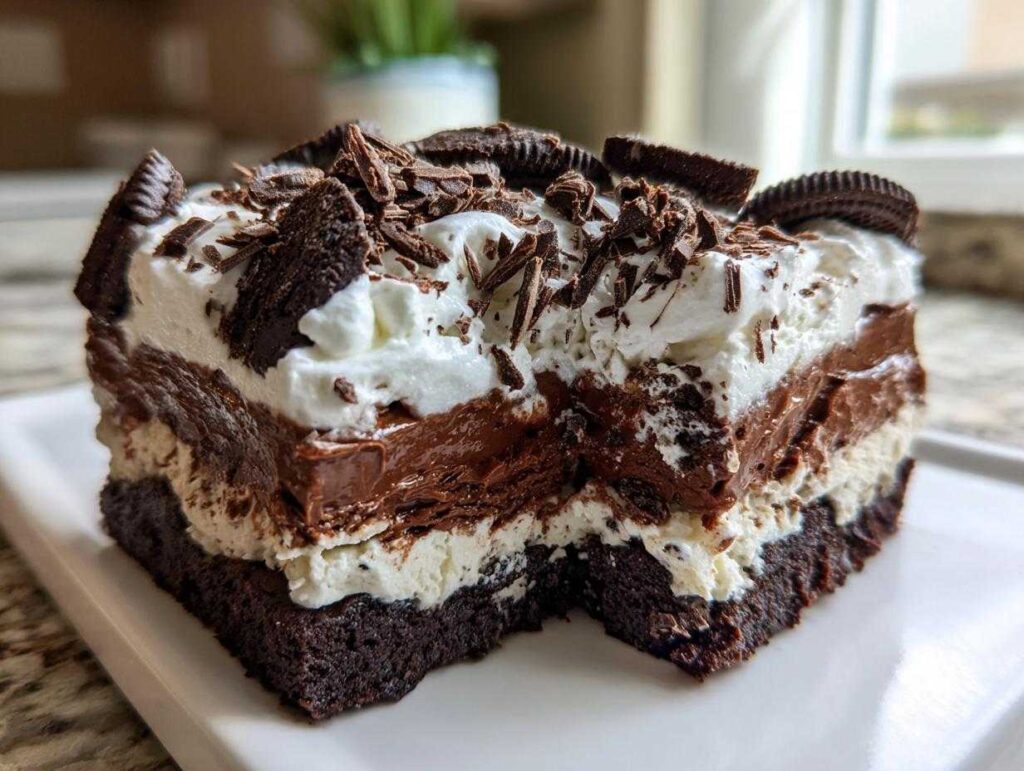
Oh, chocolate lovers, gather ’round! If you’ve ever craved something intensely fudgy and decadent but the thought of turning on the oven makes you sweat, then I have found your soulmate dessert. Seriously, this **brownie refrigerator cake** is my absolute favorite go-to for birthdays, holidays, or just an intense Tuesday chocolate emergency. It’s totally layered, super creamy, and the best part? You literally assemble it cold and let the fridge do all the heavy lifting. Forget fussy baking; we are focusing on chilling magic here!
- Why You Need This Ultimate Brownie Refrigerator Cake
- Gather Your Ingredients for the Brownie Refrigerator Cake
- Step-by-Step Assembly of Your Brownie Refrigerator Cake
- Tips for the Best Brownie Refrigerator Cake Results
- Ingredient Notes and Substitutions
- Serving Suggestions for Your Quick Party Dessert
- Storage and Reheating Instructions
- Frequently Asked Questions About No Oven Desserts
- Nutritional Estimates for Your Decadent Treat
Why You Need This Ultimate Brownie Refrigerator Cake
I know you’re busy, just like me! That’s why this particular dessert sits proudly at the top of my favorites list. It checks every single box for a crowd-pleasing, low-effort masterpiece. Trust me, once you see how simple this is, you’ll be making it constantly!
- A True No Bake Brownie Cake Experience: We are talking about zero oven time for the assembly phase! It’s the ultimate comfort food that transforms into an **Easy Refrigerator Dessert** just by chilling. No sweat, pure chocolate bliss.
- Perfect Make Ahead Chocolate Dessert Layers: The distinct layers—fudgy brownies, that tangy cream cheese layer, and the smooth pudding—meld together beautifully as they chill. This means it’s the ultimate **Make Ahead Chocolate Dessert**; pull it out when your guests arrive and watch the smiles appear!
Gather Your Ingredients for the Brownie Refrigerator Cake
Okay, let’s talk about the building blocks! The beauty of using a box mix for the base is that we save so much time, but we still get that deep, fudgy chocolate flavor we crave. Just make sure whatever you use—boxed or homemade—it cools completely before we start slicing! Planning ahead is everything for this dish, and having everything lined up makes assembly a breeze.
If you want to bake your own base from scratch and control that shine, I love following the steps in my guide for ultimate fudgy brownies with a shiny top. If you opt for that, remember to cool them for at least two hours before moving on!
For the Fudgy Brownie Base and Layers
This is the hearty, chocolatey foundation of our **No Bake Brownie Cake**! We need enough to make two distinct layers, so hang onto those brownie squares:
- 1 (18.3 ounce) package of your favorite fudgy brownies (baked according to package directions, cooled, and cut into 1-inch squares)
For the Creamy Brownie Pudding Cake Fillings
Now for the heavenly parts! This combination gives us that signature richness found in a great **Creamy Brownie Pudding Cake**:
- 1 (8 ounce) package cream cheese, softened (this has to be truly soft!)
- 1 cup powdered sugar
- 1 teaspoon vanilla extract
- 1 (8 ounce) container frozen whipped topping (thawed gently, do not whip it!)
- 1 (3.9 ounce) package instant chocolate pudding mix
- 2 cups cold milk
We also need ingredients for the fluffy top layer, which we’ll tackle later when we get to assembly!
Step-by-Step Assembly of Your Brownie Refrigerator Cake
This is where the real fun begins! Because we aren’t baking during assembly, we need to focus on layering up those beautiful, distinct textures. Remember, the whole point of this **Layered Chocolate Dessert** is that the moisture from the fillings sinks just slightly into those brownie pieces, making them incredibly soft without getting soggy. Take your time here, and let the fridge do all the heavy lifting! You need everything ready before you start building.
Preparing the Layers for the Fudgy Brownie Icebox Cake
Before we start layering in the dish, we need three separate mixtures ready to go. First, make sure those brownies are perfectly cool and cut into those 1-inch squares we discussed—this is the base for our **Fudgy Brownie Icebox Cake**! Next, whip up that sweet cream cheese mixture; your bowl should have a smooth, fluffy base, and fold in *half* of your thawed whipped topping. Don’t overmix it! Then, whisk your chocolate pudding and cold milk together quickly; you’ll see it thicken up fast. If you’ve made my easy Oreo ice cream pie, the process for the filling layers is very similar, just chocolatey! You can check out the recipe steps for those similar no-bake layers in my ultimate no-bake Oreo pie guide.
Building and Chilling the Decadent Layered Cake
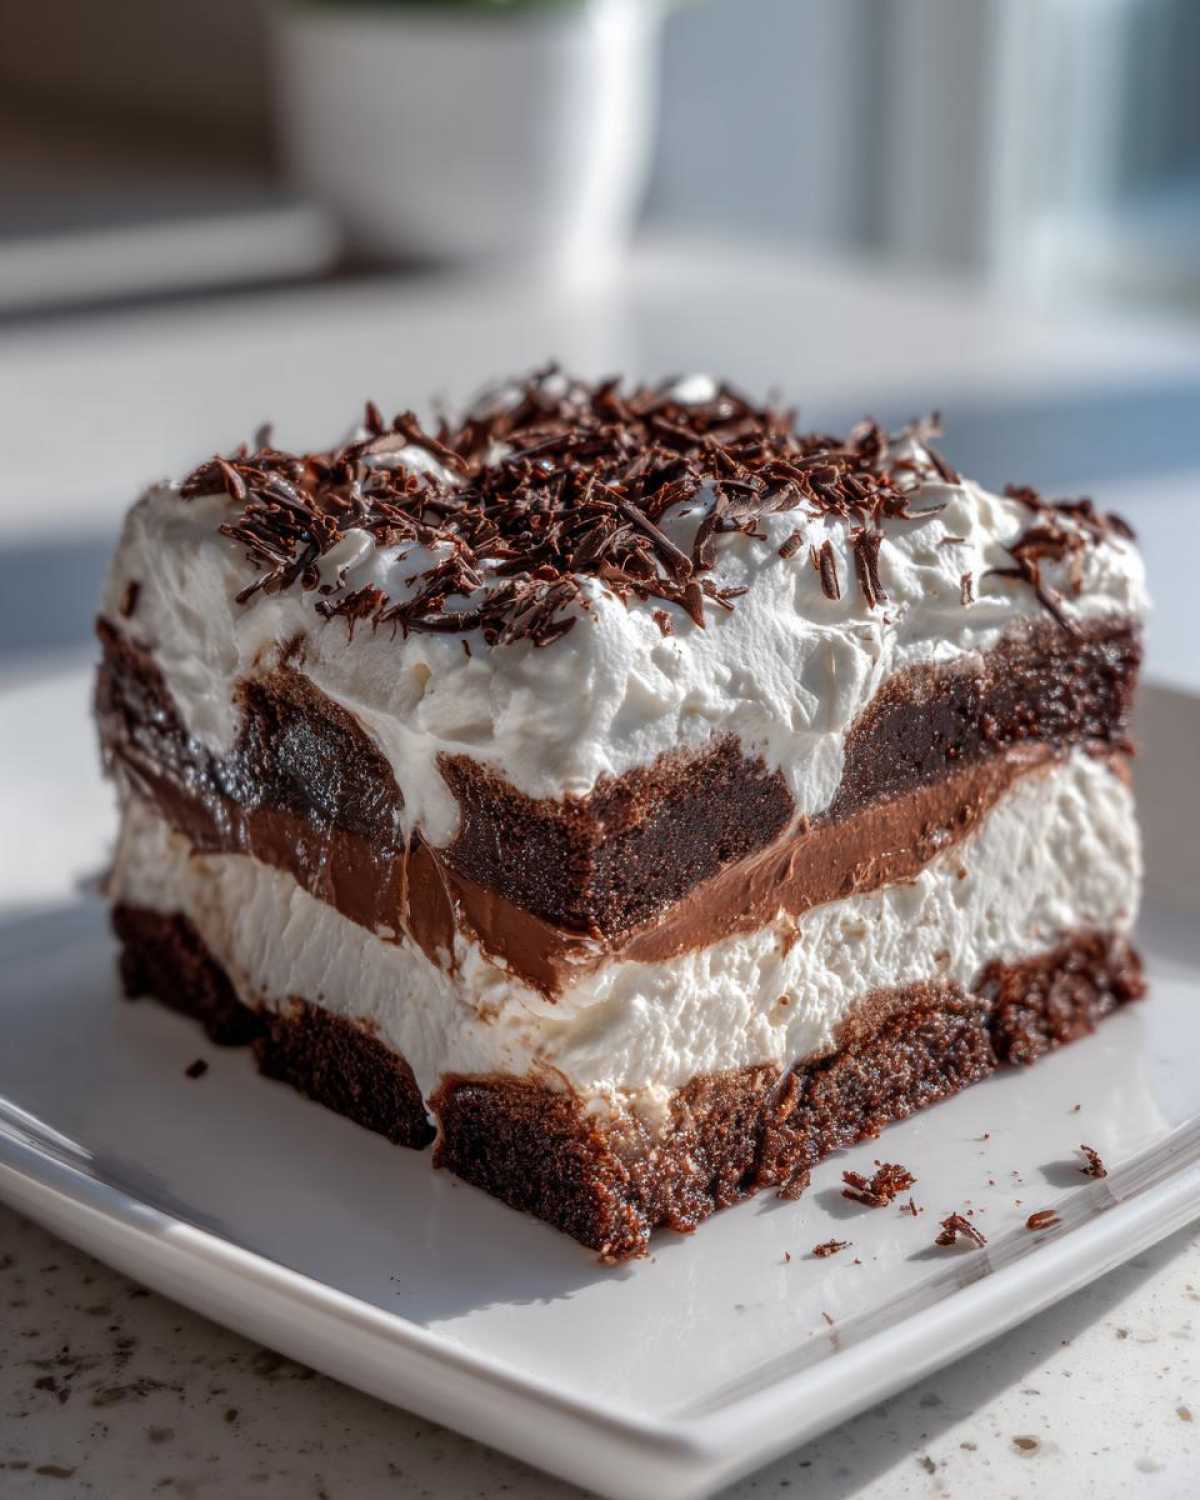
Okay, line that dish with plastic wrap first—this is a non-negotiable trick for easy lifting later! Arrange half of your brownie squares along the bottom. Spread that lovely cream cheese mixture right over the top, smoothing it out. Next, gently pour that chocolate pudding layer over the cream cheese. Now, arrange the *rest* of your brownies on top of the pudding. Cover it up, and put it in the fridge for at least six hours. But listen, if you want a truly perfect slice of this **Decadent Layered Cake**, leave it overnight. Seriously, don’t rush the chill!
Tips for the Best Brownie Refrigerator Cake Results
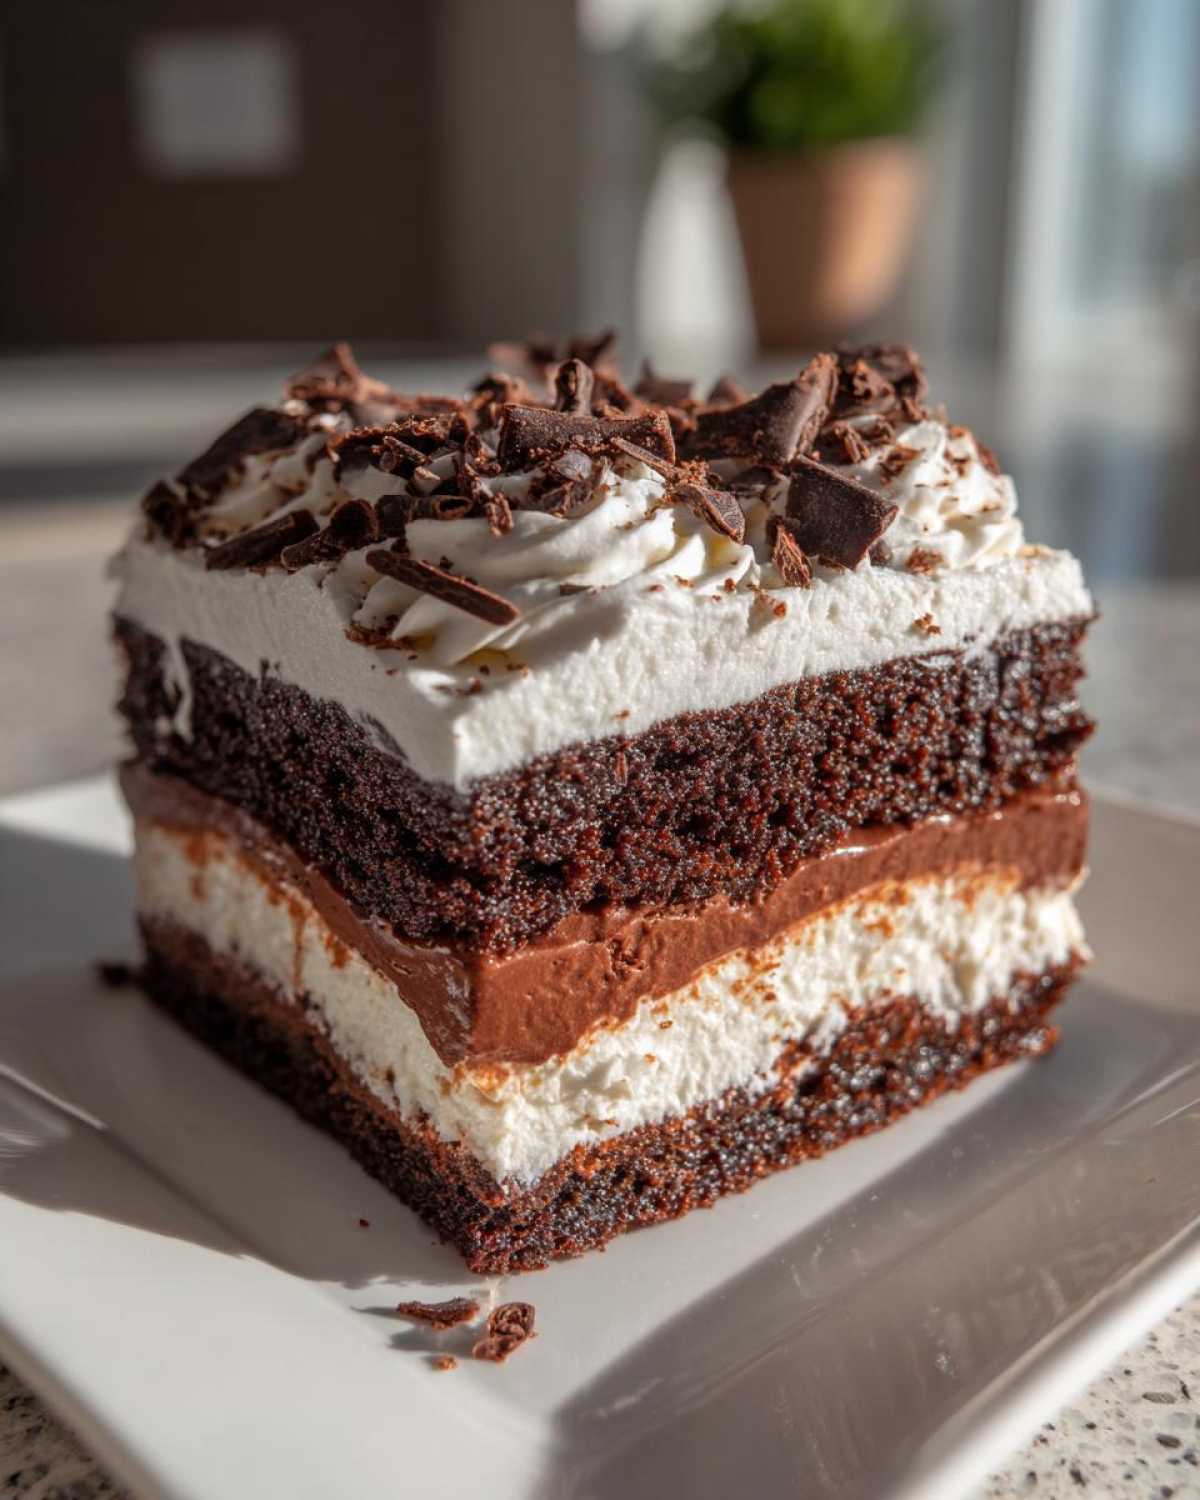
Even though it’s a no-bake recipe, technique still matters hugely for structure! We want clean slices of this incredible **brownie refrigerator cake**, and that doesn’t happen if we rush the temperatures or the chilling time. I’ve learned a few tricks over the years (especially when testing for those Pinterest shots!) that make this layered beauty set up perfectly every time.
Ingredient Temperature and Consistency Checks
The absolute biggest thing you need to nail is temperature. That cream cheese? It needs to be room temperature, almost squishy, so it blends into a smooth sauce without any lumps fighting you. If you try to mix cold cream cheese, you’ll just end up with grainy filling!
Conversely, for the whipped topping layer? Make sure your heavy cream is ice-cold when you go to whip it with the powdered sugar. Warm cream just won’t whip up to those stiff peaks we need to hold the top layer together. If you’re looking for tips on getting perfect stiff peaks in general, check out how I make my whipped topping for my favorite cookies—the principle is the same!
Achieving Perfect Setting in This Chilled Chocolate Dessert
I know the recipe says six hours minimum, but honestly, do yourself a favor: make it the day before! Six hours gets it firm, sure, but overnight chilling allows the moisture from the pudding and cream cheese mixtures to fully soak into those brownie squares just enough. This guarantees that when you lift it out using that plastic wrap sling, you get beautifully clean layers in every slice of this magnificent **Chilled Chocolate Dessert**.
Ingredient Notes and Substitutions
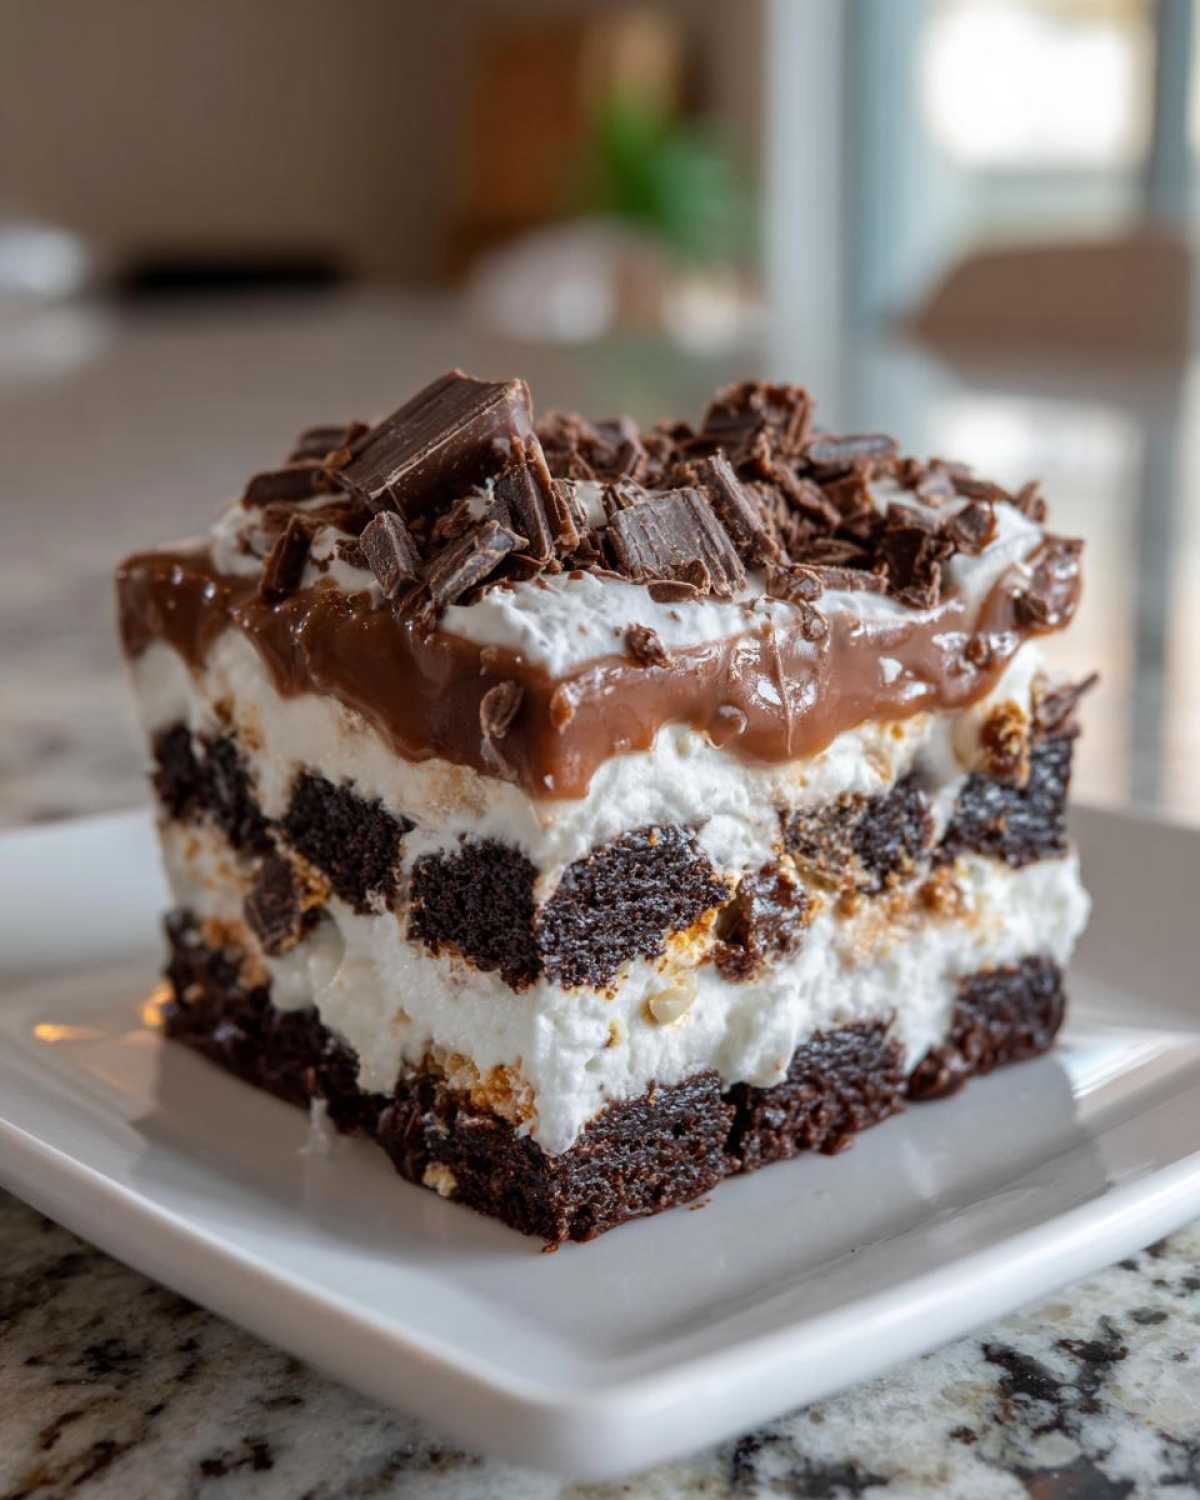
When crafting a stunning **brownie refrigerator cake**, you have a little wiggle room, but understanding the non-negotiables helps keep everything fudgy and set properly. You’ll see in the main recipe, I suggested using a good quality box mix for simplicity, but hey, I love making things from scratch too! If you use homemade brownies, just ensure they are perfectly cooled—we don’t want warm brownies melting our delicate fillings!
For the pudding layer, instant pudding is key because it thickens up super fast in the fridge without needing the stove. If you are aiming for a different flavor profile, you *could* swap the chocolate pudding for vanilla, but then you lose that intense chocolate experience we’re aiming for in this **Chocolate Lover Dessert**.
If you’re craving a deeper homemade chocolate flavor in the filling, feel free to swap out the instant pudding for my recipe for moist homemade chocolate cake components, just ensure that pastry cream is cooled completely before folding it into your cream cheese mix! That extra step takes patience, but wow, is the payoff worth it!
Serving Suggestions for Your Quick Party Dessert
Even though this **brownie refrigerator cake** is incredibly rich and satisfying all on its own—seriously, it’s a showstopper—sometimes you want to dress it up just a little extra when you’re serving it at a party or bringing it to a potluck. Because this is such a fantastic **Quick Party Dessert**, you want the finishing touches to be easy but elegant!
My absolute favorite thing to pair with something this intensely chocolatey is a contrast in temperature or flavor. Coffee is essential! A strong, piping hot cup of black coffee or a rich, creamy latte cuts through the sweetness perfectly. It truly brings out the fudgy notes in the brownie layers.
If you want to add color and a bit of tartness to balance all that richness, fresh raspberries or strawberries are perfection. Just scatter a few over the top right before serving. Don’t worry about fancy piping; a simple dusting of powdered sugar (or those chocolate shavings we already used!) and a few berries make it look like you spent hours on it, even though the fridge did the hard part!
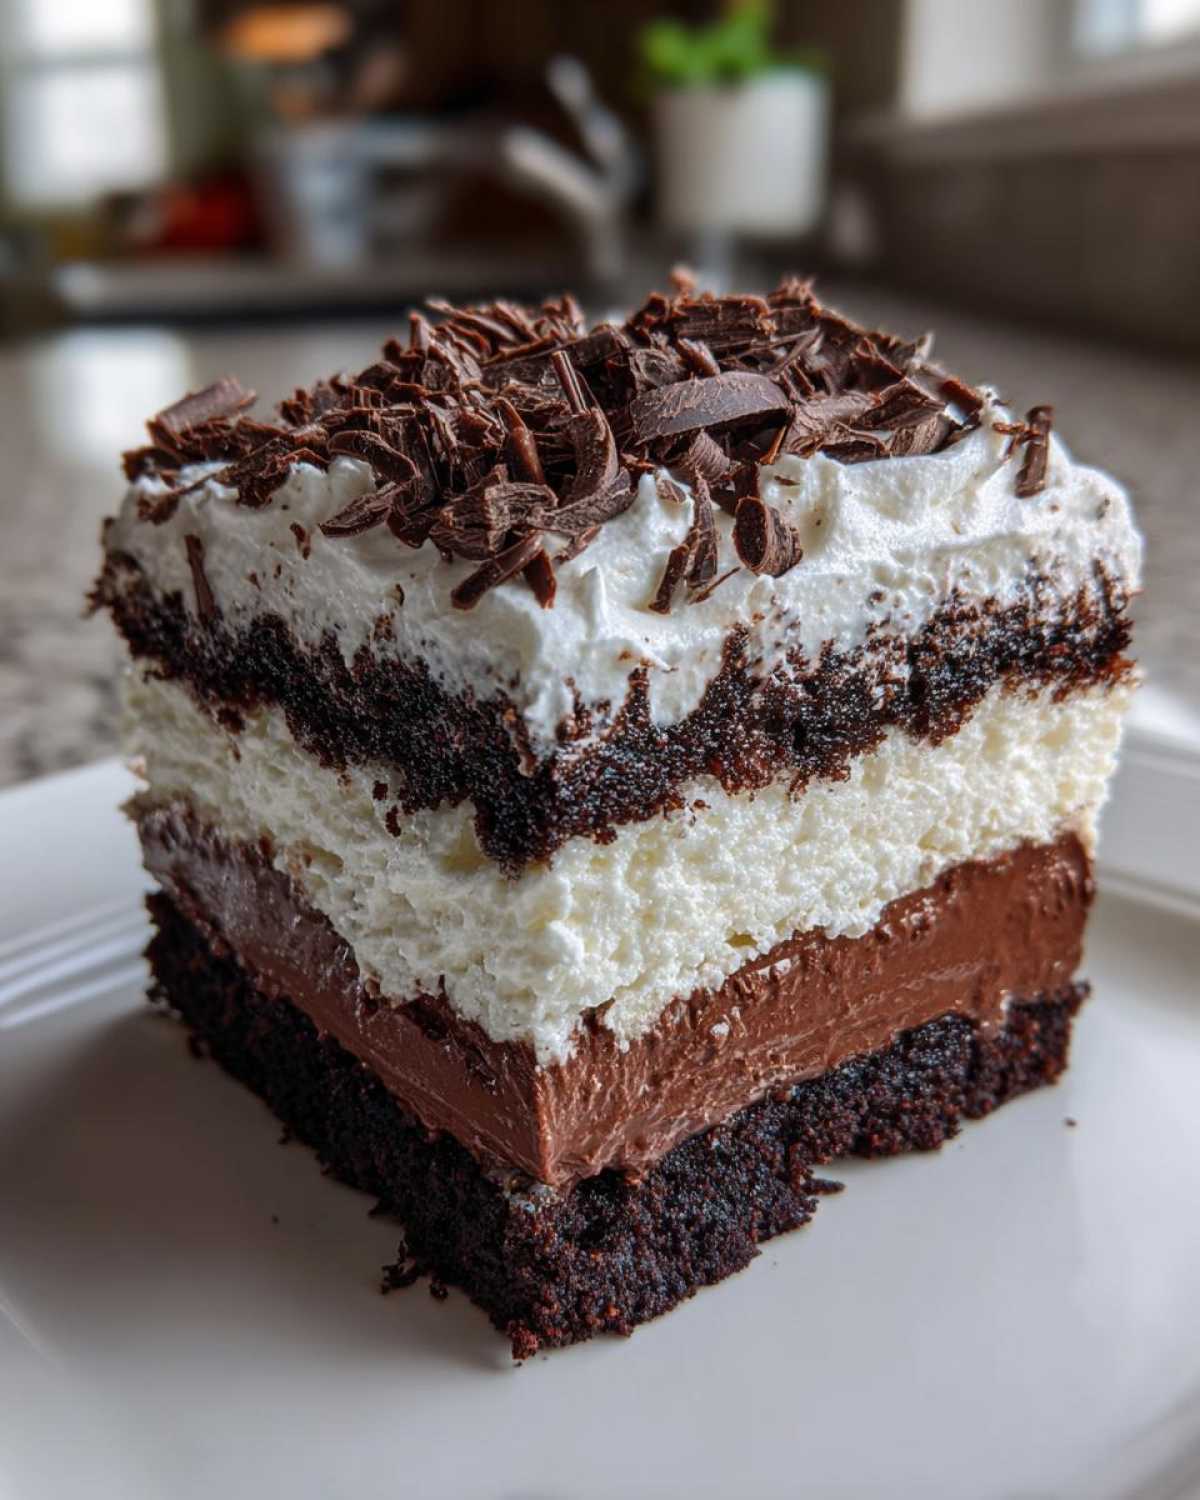
If, for some reason, you find yourself with leftovers and want something sweeter on the side—maybe you’re making this for a special weekend dessert—you can always serve a small dollop of my super easy vanilla buttercream on the plate. That light, buttery frosting contrasts beautifully with the cold, dense cake. Enjoy every glorious, chilled moment!
Storage and Reheating Instructions
This **brownie refrigerator cake** is actually one of the very best **Easy Refrigerator Desserts** you can keep on hand because it stores so wonderfully! The magic of the cold environment is that it keeps the cream cheese and pudding layers firm and fresh, almost like a delicious, layered chocolate lasagna.
You must keep this covered tightly while it’s in the fridge, of course. I usually use the plastic wrap overhang method we used for assembly to lift the whole thing out onto a serving plate, cover that plate tightly with foil or plastic wrap, and then pop it back in. It stays perfectly delicious for three to four days. Honestly, if you can resist eating it, it’s truly the best make-ahead recipe.
Now, about reheating? Forget it! This dessert lives for the cold. If you tried to heat this up, you’d end up with a soupy, separated mess of melted cream cheese and lukewarm pudding. We want this served straight from the chill—that dense, cool texture is what makes it so divine!
I have successfully frozen this if I’ve made a huge batch for a crowd, though! If you decide to freeze it, make sure you only freeze the layers *before* you top it with the final whipped cream layer. Wrap the entire dish extremely well—I mean, double or triple wrap it in plastic wrap and then foil—to prevent any freezer burn. It keeps well in the freezer for about two months. When you want to serve it, you must transfer it to the refrigerator overnight to thaw slowly. Once fully thawed (which takes about 12 hours), then you can top it with your fresh whipped cream and serve it cold. It holds up beautifully!
Frequently Asked Questions About No Oven Desserts
I always get so many questions when people try this **brownie refrigerator cake** for the first time! It sits in that wonderful category of **No Oven Desserts**, but chilling time is still crucial, so let’s tackle the most common worries right here. If you’ve got more questions, feel free to hop over to our Pinterest page and ask there—I respond whenever I’m whipping up treats!
Can I use homemade brownies instead of a mix for this cake?
Absolutely, you can! If you prefer total control over your chocolate goodness, go right ahead and use your favorite homemade recipe. The only, and I mean only, caveat for this recipe is that those homemade brownies must be completely, totally, 100 percent cooled before you cut them into squares and start layering. If they are even the tiniest bit warm, they will soften and essentially melt the cream cheese layer we placed above them, and we certainly don’t want to ruin that beautiful structure!
What happens if I don’t chill the Creamy Brownie Pudding Cake long enough?
Oh, this is the biggest mistake I see people make with icebox cakes! If you don’t give it the designated minimum of six hours—but really overnight—your layers won’t set properly. When you try to slice into it, the cream cheese layer and the pudding layer will just smear together, creating a lovely bowl of chocolatey swamp instead of those beautiful, distinct layers we worked so hard to build. It will still taste fantastic, but it won’t slice cleanly like a true **Layered Chocolate Dessert**.
Can I make this in a different dish size?
That’s a great question about adjusting for crowds! The recipe is perfectly portioned for an 8×8 inch pan. If you switch to a 9×13 inch pan, you’ll definitely need to double the recipe, or you’ll end up with a very thin, sad-looking single layer of brownies and filling. If you want a super tall cake, use a smaller dish, like a 6×6 inch pan, and you might need an extra hour or two of chilling time since the layers will be thicker.
Is this considered a tart or a pie?
Nope! We call this a **Fudgy Brownie Icebox Cake** because the term “icebox cake” historically refers to desserts built layer-by-layer that rely entirely on refrigeration (the old icebox!) to set. You aren’t baking the final structure, unlike a true pie or tart crust. It’s all about that chilled, dense, creamy texture!
Nutritional Estimates for Your Decadent Treat
Now, I know when we are diving headfirst into a rich, creamy, chocolatey **brownie refrigerator cake**, we aren’t usually tracking macros, but sometimes it’s just good to have an idea of what we’re indulging in! Since this is already such a satisfying **Chocolate Lover Dessert**, a little bit goes a long way, and the recipe makes a great yield.
Based on serving 9 generous slices, here are the general estimates for one piece of this **Decadent Layered Cake**. Please remember, this is just an educated guess based on the main ingredients—if you swap in a different brand of brownie mix or use full-fat vs. low-fat cream cheese, those numbers will shift!
- Calories: 410
- Total Fat: 22g
- Saturated Fat: 12g
- Total Carbohydrates: 52g
- Sugar: 45g
- Protein: 5g
See? Totally worth it! It’s a holiday treat or a celebration dessert, not an everyday staple, so enjoy it guilt-free. If you’re looking for something a little lighter on the sugar but still comforting, you might want to check out my recipe for sweet potato pound cake, which has a different, earthy sweetness going on!
PrintUltimate No-Bake Brownie Refrigerator Cake: Rich, Creamy, and Ready for the Fridge
You will love this decadent, layered chocolate dessert that requires no oven time. This easy refrigerator cake uses fudgy brownies and creamy fillings to create a perfect make-ahead treat for any gathering.
- Prep Time: 25 min
- Cook Time: 0 min
- Total Time: 6 hr 25 min
- Yield: 9 servings 1x
- Category: Dessert
- Method: No-Bake/Chilling
- Cuisine: American
- Diet: Vegetarian
Ingredients
- 1 (18.3 ounce) package of your favorite fudgy brownies (baked according to package directions, cooled, and cut into 1-inch squares)
- 1 (8 ounce) package cream cheese, softened
- 1 cup powdered sugar
- 1 teaspoon vanilla extract
- 1 (8 ounce) container frozen whipped topping (thawed)
- 1 (3.9 ounce) package instant chocolate pudding mix
- 2 cups cold milk
- 1 cup cold heavy cream
- 1/4 cup powdered sugar (for whipped cream layer)
- 1 teaspoon vanilla extract (for whipped cream layer)
- 1/2 cup chocolate shavings or mini chocolate chips, for topping
Instructions
- Prepare your brownies: Bake your preferred fudgy brownies according to the package directions. Cool them completely, then cut them into uniform 1-inch squares. Set aside.
- Prepare the cream cheese layer: In a medium bowl, beat the softened cream cheese, 1 cup of powdered sugar, and 1 teaspoon of vanilla extract until the mixture is smooth and creamy. Gently fold in half of the thawed whipped topping until just combined.
- Prepare the pudding layer: In a separate bowl, whisk together the instant chocolate pudding mix and 2 cups of cold milk until the mixture thickens, about 2 minutes. Let it sit for 5 minutes.
- Prepare the final topping: In a chilled bowl, beat the heavy cream with 1/4 cup of powdered sugar and 1 teaspoon of vanilla extract until stiff peaks form. Fold in the remaining half of the thawed whipped topping gently.
- Assemble the cake: Line an 8×8 inch baking dish with plastic wrap, leaving an overhang for easy removal later. Arrange half of the cooled brownie squares in a single layer on the bottom of the dish.
- Layer the fillings: Spread the cream cheese mixture evenly over the first layer of brownies. Top the cream cheese layer with the chocolate pudding mixture. Arrange the remaining brownie squares over the pudding layer.
- Chill: Cover the dish loosely with plastic wrap and refrigerate for at least 6 hours, or preferably overnight, to allow the layers to set firmly. This chilling magic is key for a perfect icebox cake.
- Finish and serve: Before serving, carefully remove the cake from the dish using the plastic wrap overhang. Spread the prepared whipped cream topping over the top layer. Sprinkle generously with chocolate shavings. Slice and serve this quick party dessert cold.
Notes
- For a quicker assembly, you can use store-bought fudge brownies, just ensure they are fully cooled before cutting.
- This is a fantastic make-ahead chocolate dessert; it tastes even better on the second day!
- If you prefer a richer filling, substitute the instant pudding with a homemade chocolate pastry cream.
- If you are looking for gluten free brownie swaps, check the baking aisle for certified gluten free brownie mixes.
Nutrition
- Serving Size: 1 slice
- Calories: 410
- Sugar: 45
- Sodium: 280
- Fat: 22
- Saturated Fat: 12
- Unsaturated Fat: 10
- Trans Fat: 0.5
- Carbohydrates: 52
- Fiber: 2
- Protein: 5
- Cholesterol: 35