
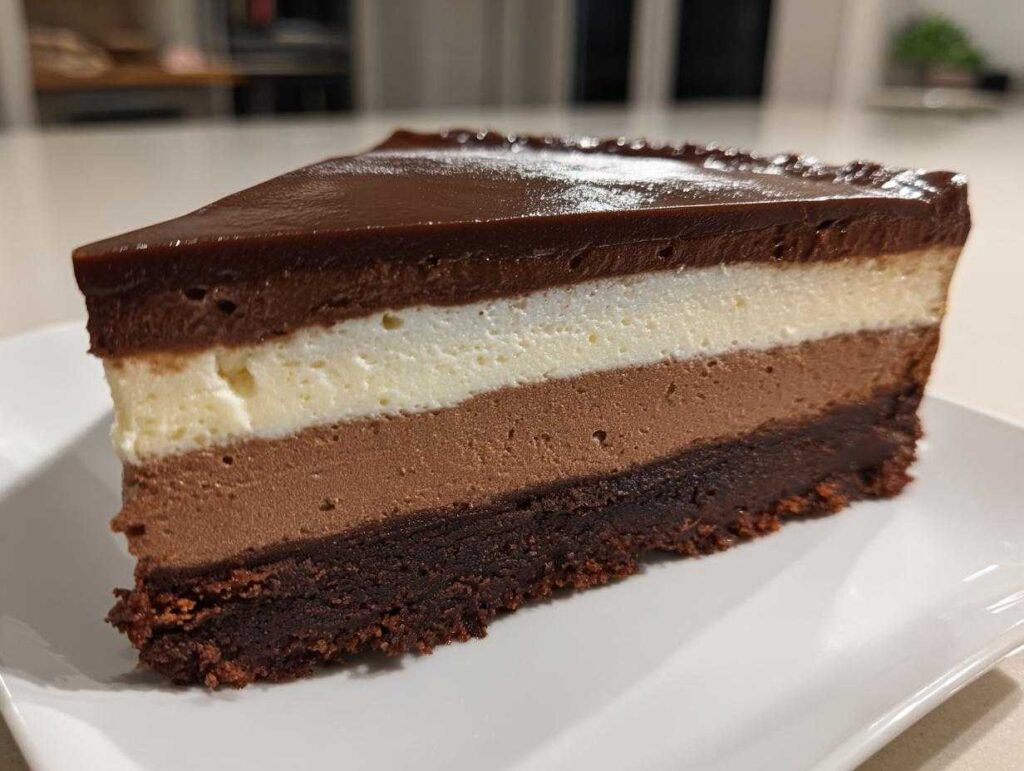
Oh my goodness, get ready to enter a different dimension of dessert heaven! If you’ve ever dreamed of the most indulgent, show-stopping chocolate creation imaginable, this is it. Forget single-note chocolate; we are diving headfirst into the ultimate triple chocolate mousse cake!
This magnificent dessert stacks rich, contrasting layers—deep dark, creamy milk, and sweet white chocolate mousse—all sitting atop a delicate, slightly crisp base. I live for finding those special recipes that make you feel like a professional pastry chef, and this cake is my go-to for birthdays, anniversaries, or just when the week feels long. Trust me, making something this gorgeous is easier than you think, and the payoff is absolutely spectacular! If you love deep flavor, perhaps check out my recipe for a moist homemade chocolate cake while you plan your next bake!
- Why This is the Ultimate triple chocolate mousse cake Experience
- Gathering Your Ingredients for the triple chocolate mousse cake
- Essential Equipment for Your Layered mousse cake Recipe
- Step-by-Step Instructions for the triple chocolate mousse cake
- Tips for the Best triple chocolate mousse cake Texture
- Variations on this Rich chocolate cream cake
- Serving Suggestions for Your Gourmet layered cake instructions
- Storing Your triple chocolate mousse cake Leftovers
- Frequently Asked Questions About the Best triple chocolate dessert
- Share Your Decadent Chocolate Dessert Creation
Why This is the Ultimate triple chocolate mousse cake Experience
Honestly, when I pull this beauty out of the fridge, I know I’ve created something special. This isn’t just cake; it’s an experience! This layered mousse cake recipe is my secret weapon for baking when I want maximum impact with minimum stress. It lets you hit every chocolate note you could possibly crave in one slice. You get the intense depth of dark, the comforting sweetness of milk, and the velvety finish of white chocolate. It truly stands above everything else on the dessert table.
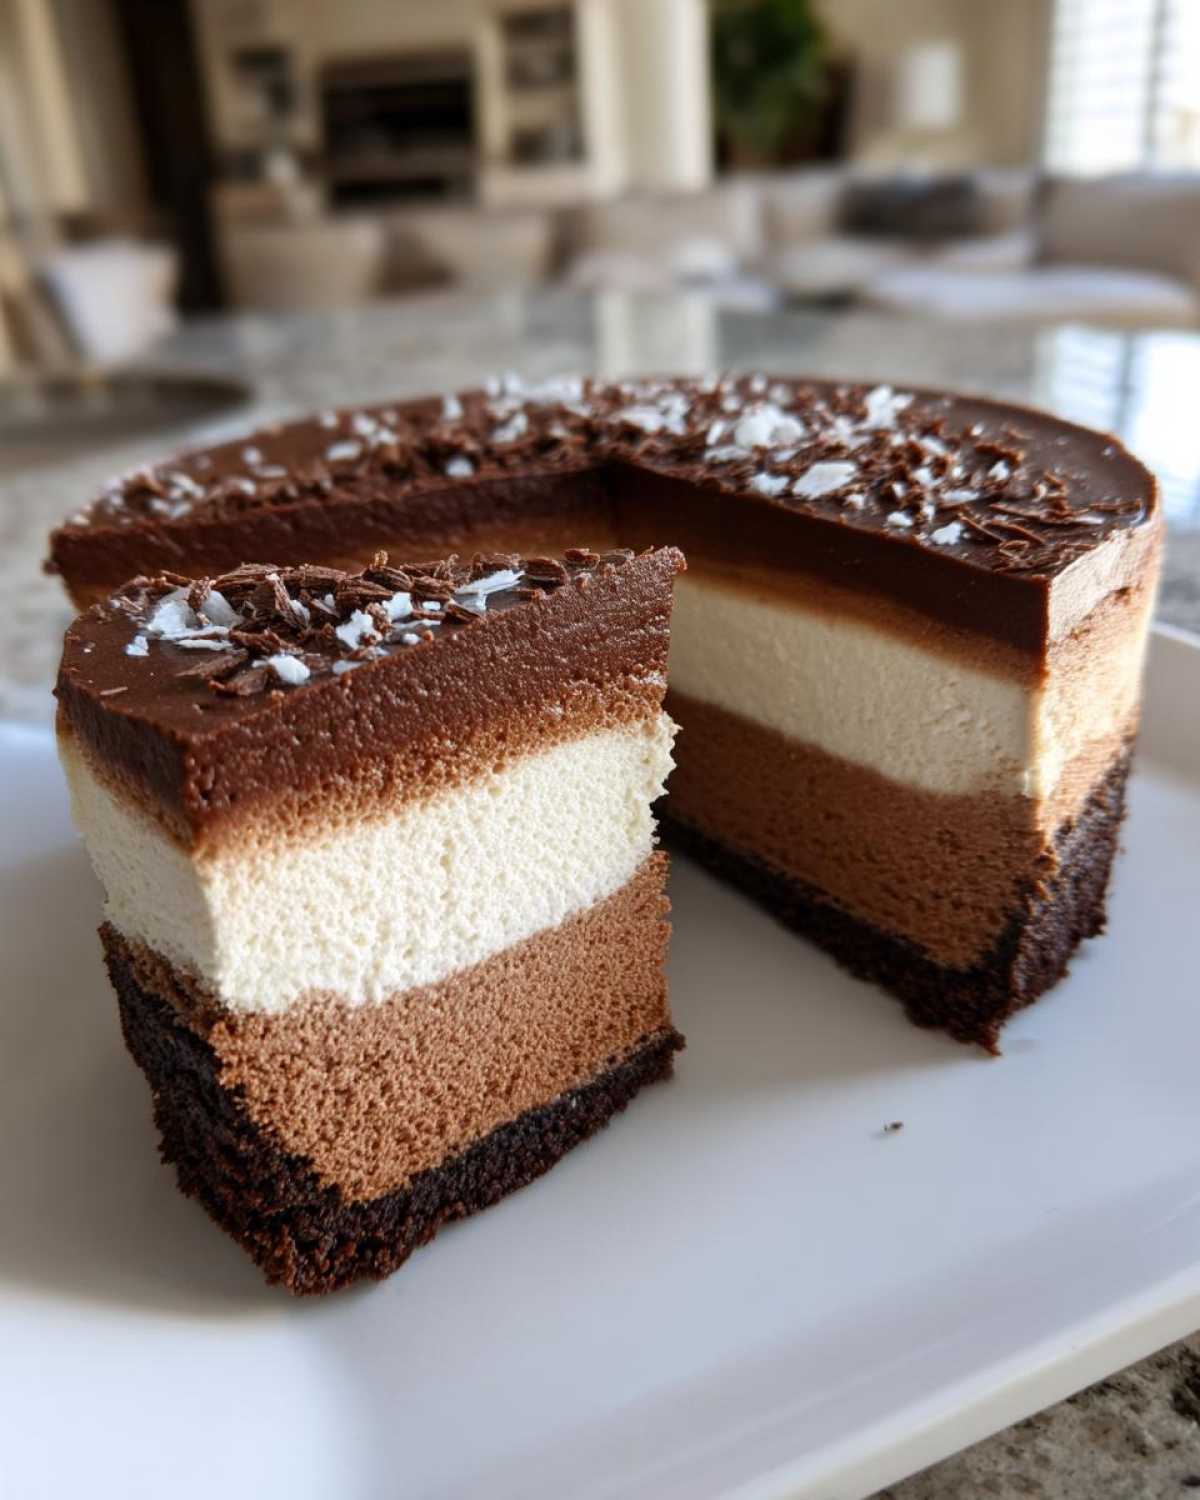
Three Layers of Chocolate Perfection
The magic really lies in how different those layers are! We’re not just using the same base recipe three times; nope! The dark layer hits you with that bold, slightly bitter punch that keeps you coming back for more. Then, the milk layer swoops in, acting like a smooth, familiar hug. Finally, the white chocolate layer finishes everything off with that luxurious, almost vanilla-like sweetness. It’s a flavor rollercoaster, and honestly, it’s addictive!
A Showstopping triple chocolate mousse cake Centerpiece
Forget those flat, boring single-layer brownies for your next big party—this cake is what you need! It looks so incredibly fancy, like something you’d pay a fortune for at a fancy bakery, but you made it yourself! This is truly an Impressive chocolate centerpiece that disappears fast. If you need other showstoppers, maybe check out how I make my amazing chocolate babka sometime too!
Gathering Your Ingredients for the triple chocolate mousse cake
Alright, let’s talk supplies! Since this is such a majorly Decadent chocolate dessert, the quality of your chocolate really, truly matters. I can’t stress this enough. We need good, good chocolate because it is the star of the show in every single layer. When you use better chocolate, your mousses will set up richer, taste smoother, and frankly, they just won’t deflate as easily. If you’re looking for inspiration for other sweet toppings later on, I have a fantastic recipe for creamy smooth vanilla buttercream, but for this cake, focus on the chocolate!
We need ingredients for our base and then three separate sets for the three distinct mousses. Don’t worry if it looks like a lot; we are just prepping in stages, which keeps things organized!
Ingredients for the Chocolate Base
This layer is quick and bakes up fast, giving us a nice sturdy foundation for all that light mousse on top. You’ll need:
- 1 cup all-purpose flour
- 1/2 cup unsweetened cocoa powder
- 1/2 cup granulated sugar
- 1/4 teaspoon salt
- 1/2 cup (1 stick) unsalted butter, melted
- 1 large egg
Ingredients for the Dark Chocolate Mousse Layer
This is the intense foundation layer. Use a good quality dark chocolate here—I prefer at least 70% cacao for a nice contrast.
- 6 ounces dark chocolate (70% cacao), chopped
- 1 cup heavy cream, divided
- 2 large egg yolks
- 1/4 cup granulated sugar
- 1 teaspoon vanilla extract
Ingredients for the Milk Chocolate Mousse Layer
This layer brings the middle ground—that perfectly familiar, comforting milk chocolate flavor.
- 6 ounces milk chocolate, chopped
- 1 cup heavy cream, divided
- 2 large egg yolks
- 1/4 cup granulated sugar
- 1 teaspoon vanilla extract
Ingredients for the White Chocolate Mousse Layer
And finally, the crowning glory! White chocolate is a bit sweeter, so it works perfectly as the top note.
- 8 ounces white chocolate, chopped
- 1 cup heavy cream, divided
- 2 large egg yolks
- 1/4 cup granulated sugar
- 1 teaspoon vanilla extract
Make sure you have all your chocolate chopped before you start heating any cream. Trust me, that part moves fast, and you don’t want your cream getting too hot while you’re still grating chocolate!
Essential Equipment for Your Layered mousse cake Recipe
Okay, while this triple chocolate mousse cake sounds fancy, the good news is that we don’t need any super specialized, single-use gadgets for this! Most of this equipment you probably already have kicking around. Having everything ready before you start your first layer makes the whole process flow so much better, especially when you have three different components happening.
First things first, you absolutely *have* to have an 8-inch springform pan. This is crucial! Since we are building this cake layer by layer without baking them all together, we need that removable side so we can get perfectly straight edges when we serve it. Don’t even try to substitute that—it won’t work with this structure!
Next up, you’ll need several sets of mixing bowls. I generally use one medium bowl for melting the chocolate/cream mixture, a slightly larger bowl for whisking the yolks and sugar, and then a bowl—ideally a large metal one—for whipping your heavy cream until it’s singing medium peaks. Organization here is everything!
For stirring and combining, make sure your whisks are clean and ready. You’ll also want a sturdy rubber spatula. This is your absolute best friend for gently folding that perfectly whipped cream into the chocolate base without deflating all those gorgeous air bubbles we just worked so hard to create. Seriously, that spatula does 90% of the gentle folding work!
Finally, don’t forget parchment paper for lining the base, measuring cups and spoons for accuracy (especially with the sugar and cream), and a small saucepan for gently heating the cream for the ganache step. That’s it! No stand mixer required, though it certainly speeds things up if you have one!
Step-by-Step Instructions for the triple chocolate mousse cake
Okay, time to roll up our sleeves! While this looks like a masterpiece of baking, we’re actually dividing the work up into manageable chunks. This keeps everything neat, and more importantly, it ensures each layer sets up perfectly before we add the next. Remember, patience is the secret ingredient in any gourmet layered cake instructions!
Preparing and Baking the Chocolate Base
First, pop your oven on to preheat to 350°F (175°C)—we need it nice and hot. Take your 8-inch springform pan, line that bottom with parchment paper, and let’s mix the base. In a bowl, whisk together the flour, cocoa powder, sugar, and salt. Now, pour in that melted butter and the one egg. Oops, don’t overmix here! Just stir until everything is barely combined into a crumbly dough.
Press this mixture firmly and evenly right into the bottom of your prepared pan. Pop it into the oven and let it bake for about 12 to 15 minutes. You’ll know it’s done when it smells wonderfully chocolatey! Once baked, pull it out and let it cool completely on a wire rack while we tackle the first layer of mousse. It needs to be totally cool before mousse goes near it!
Creating the Dark Chocolate Mousse Layer
This is where the fun starts! Take your chopped dark chocolate (the 70% stuff!) and put it in a nice heatproof bowl. Heat up half a cup of heavy cream in a small saucepan just until it simmers—don’t let it boil over! Pour that hot cream right over your chocolate and just let it sit for two minutes. Then, whisk gently until it melts into a silky smooth liquid. While that cools slightly, whisk your egg yolks and sugar until they get pale and creamy. Then, temper those yolks—spoon a little warm chocolate mixture into the yolks while whisking fast, then pour the yolk mixture back into the bowl of chocolate. Whisk until everything is glorious and uniform. Stir in the vanilla.
Cool this chocolate base to room temperature—this is vital! Then, whip the other half-cup of cream to medium peaks. Now, using your rubber spatula, gently fold that whipped cream into the cooled chocolate mixture. Cut down the middle and scrape up, folding gently until it looks fluffy. Pour this dark mousse over your completely cooled base and smooth the top. Pop it into the fridge for at least an hour until it’s totally set!
Assembling the Milk Chocolate Mousse Layer
Time for round two! We repeat the whole process, but this time with the milk chocolate. Mix the milk chocolate and cream, let it sit, whisk it smooth. Whisk your yolks and sugar. Temper them, mix them back in, and let that concoction cool down completely—seriously, totally room temperature!
Whip the second batch of heavy cream to medium peaks. And again, gently fold that whipped cream into the cooled milk chocolate mixture. You should be getting really good at this folding technique by now! Once incorporated, carefully spoon this milk chocolate mousse right over the top of the set dark layer. Try to keep your spatula away from the edges if you can! Back into the fridge it goes for another hour (at least!) to firm up.
Finishing with the White Chocolate Mousse Layer
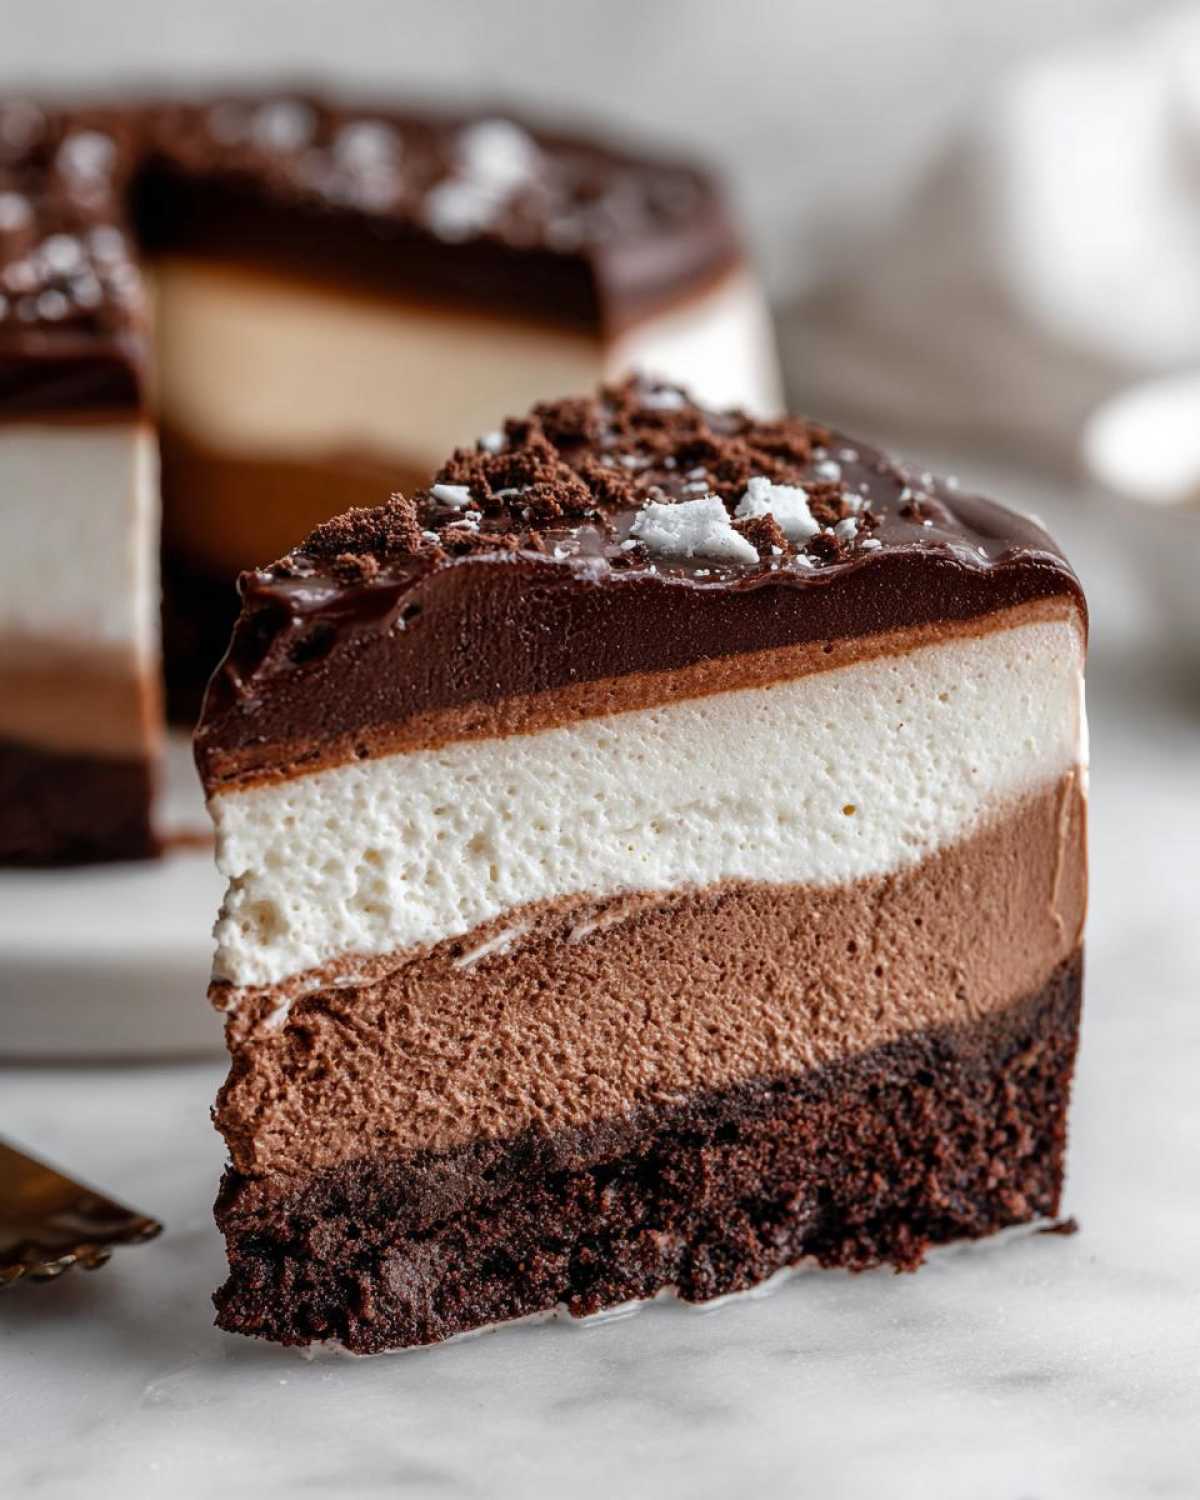
Last mousse layer, hooray! If you’re using white chocolate, be extra careful when heating the cream—white chocolate is much more sensitive than dark or milk and can seize up if it gets too hot. Follow the exact same procedure: melt the white chocolate with the warm cream, handle the yolks, cool the base mixture until it’s not warm at all, then gently fold in your newly whipped cream.
Spread this beautiful white layer evenly over the set milk chocolate. Now, this whole cake needs a serious rest period. We need all three layers to solidify completely so they act like structure supports for each other.
Chilling and Presenting Your Professional looking cake recipe
Cover the cake loosely—you don’t want it picking up any fridge smells—and chill it for a minimum of 4 hours. Honestly, if you can let it chill overnight, you will get the absolute best texture and easiest release. When it’s time to serve this Professional looking cake recipe, carefully release the springform latch. Be patient; sometimes you need to run a thin offset spatula around the inside edge before the ring releases cleanly.
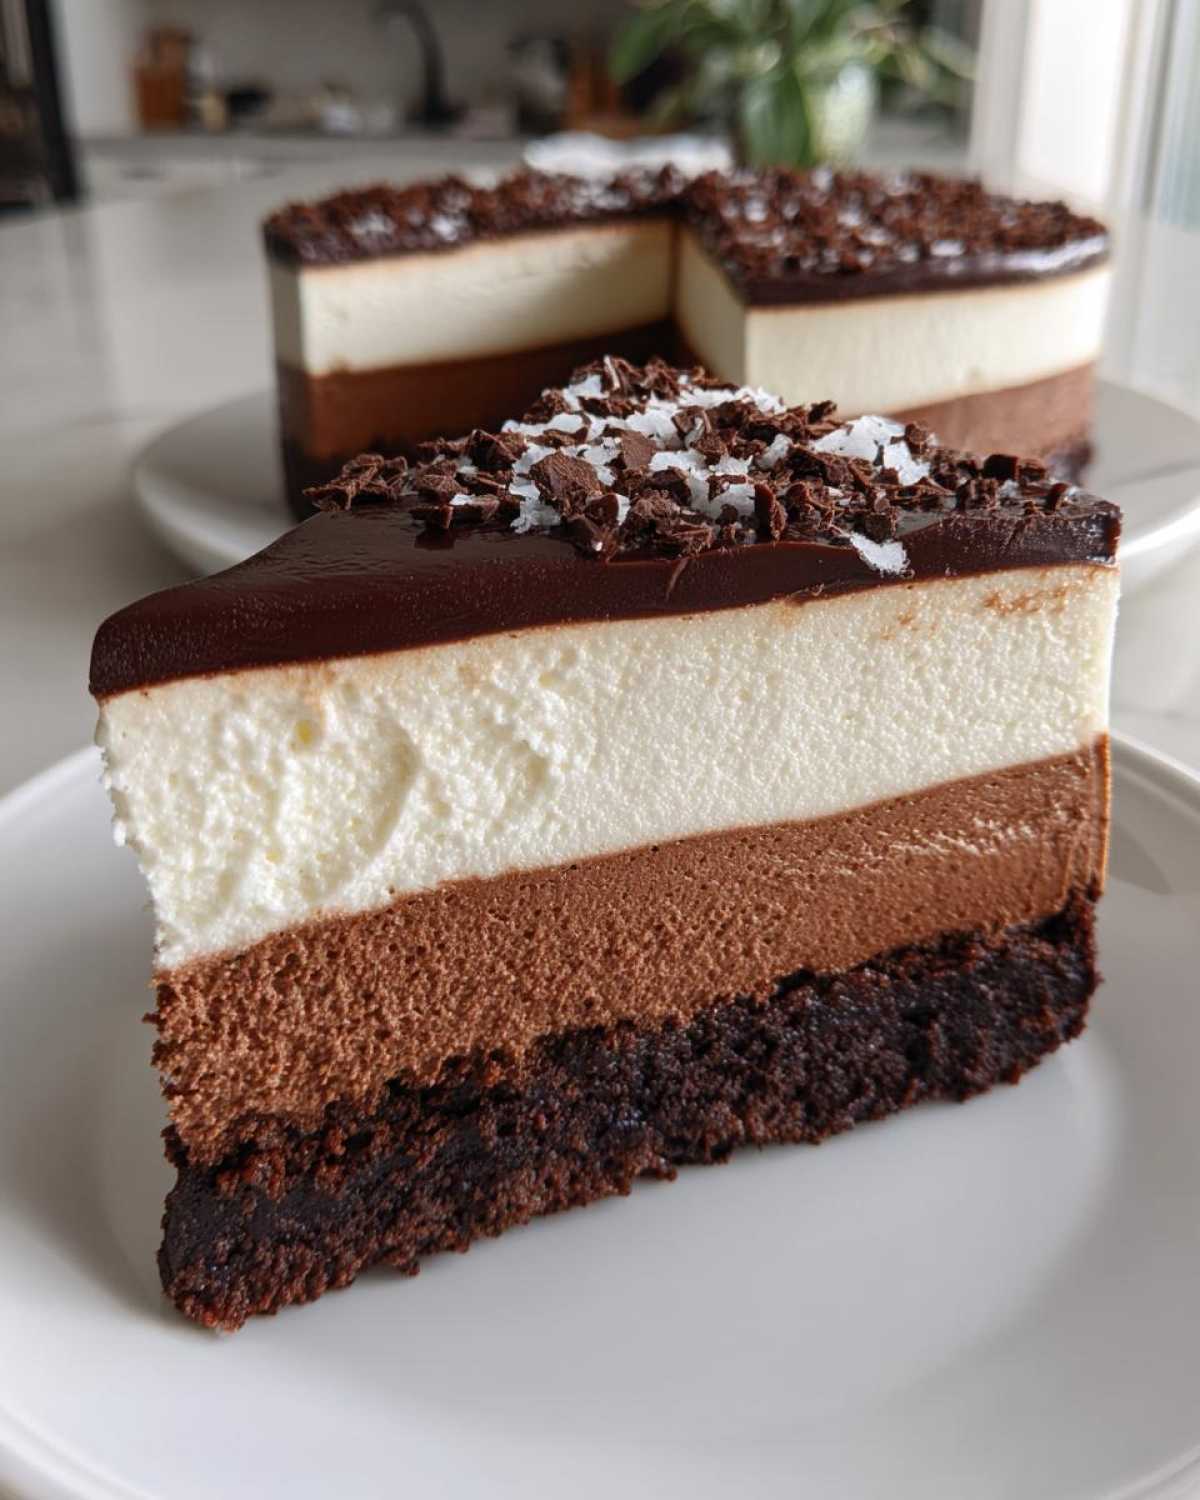
The final touch is the garnish! I love topping mine with simple, thin curls of dark chocolate or just a generous, dusting of cocoa powder right before serving. Look how beautiful that looks—three distinct bands of chocolate perfection!
This technique reminds me of how I build my no-bake Oreo pie!
Tips for the Best triple chocolate mousse cake Texture
Phew! We made it through the layering process, but now we need to chat about structure! Even though this is a spectacularly Decadent chocolate dessert, we absolutely want it to hold those beautiful lines when we slice it. If your mousse collapses or gets sloppy, the whole visual effect is ruined, and that’s just sad! Luckily, my notes from past baking adventures taught me a few non-negotiable rules for keeping these layers light yet stable.
First, a quick note for those looking for true no bake chocolate dessert ideas: If you decide to skip baking the base entirely, you can press a mixture of crushed chocolate cookies and melted butter onto the pan bottom instead. It sets up beautifully in the fridge!
Ingredient Quality and Temperature Control
If you take one thing away from this whole post, let it be this: use high-quality chocolate. Seriously! I put a note on the ingredient list saying for a stable mousse, use high-quality chocolate. Why? Because the fat content in those better bars is what gives your mousse its structural integrity once it chills. Cheap chocolate often has stabilizers and fillers that melt strangely or result in a gritty texture.
The other HUGE temperature rule is cooling! You *must* let your melted chocolate/yolk mixture cool completely—down to room temperature, feeling slightly thick—before you even think about folding in your freshly whipped cream. If the chocolate is even a tiny bit warm, it will melt those delicate air bubbles right out of your whipped cream, and you’ll end up with soup instead of mousse! It’s amazing how much temperature control matters in this recipe.
Achieving Perfect Mousse Folding
Folding is an art form, and I used to stress about it so much! The goal is to incorporate the light cream into the dense chocolate base without stirring out all the air. You need to mimic the movement of the rain falling, not stirring soup!
Here’s the trick I learned: use a large, flexible rubber spatula. Take about one-third of the whipped cream and gently mix it into your cooled chocolate base until it’s *just* combined—this lightens up the base chocolate, making the next fold easier. Then, add the remaining whipped cream. Start in the middle of the bowl, cutting straight down to the bottom. Then, scrape your spatula up the side of the bowl, bringing the bottom mixture up and over the top. Rotate the bowl a quarter turn and repeat: cut down, scrape up and over. Keep doing that slow, rhythmic motion until you see no more white streaks, but stop immediately after! It’s better to stop slightly too soon than to overmix and deflate your beautiful mousse.
Variations on this Rich chocolate cream cake
While this Rich chocolate cream cake is utterly perfect as written—a true symphony of the three chocolates—I always encourage you to make my recipes your own! Baking should be fun, and sometimes a little tweak can take a great dessert and make it uniquely yours. Think of the layers as wonderful, blank canvases ready for your personal flair.
Because we have three distinct layers, you have three unique opportunities to layer in extra flavor! My favorite adjustment, especially when I’m craving something really sophisticated, is adding instant espresso powder to the dark chocolate mousse layer. Seriously, just a half teaspoon dissolved into that hot cream before melting? It deepens the chocolate flavor dramatically without making the mousse taste like coffee—it just makes it taste *more* chocolatey. You can find a base that works for you too; if you have a favorite ultimate fudgy brownie recipe, use that instead of baking the shortbread base!
You can also play around with liqueur additions! For the milk chocolate layer, a tiny splash of good quality orange liqueur (like Cointreau) can brighten things up beautifully. For the white chocolate layer, vanilla is key, but sometimes I swap in a teaspoon of almond extract instead—it pairs surprisingly well with the sweetness.
One final thought on texture: to incorporate a little crunch throughout the mousse itself, try folding in finely chopped, toasted hazelnuts right before you spread the layer on the cake. Just be mindful that any added crunchy bit might slightly affect the overall softness, but trust me, the texture contrast is worth it for a really fun bite!
Serving Suggestions for Your Gourmet layered cake instructions
Now that you’ve poured your heart—and three layers of gorgeous mousse—into this cake, figuring out what to serve alongside it can feel stressful. But here’s the fun part: because this triple chocolate mousse cake is so incredibly rich and decadent, the best pairings are actually the simplest ones! You don’t want anything competing with that pure chocolate symphony we just created.
My absolute go-to suggestion when I present this kind of Gourmet layered cake recipe is fresh fruit. Think bright red raspberries, tart sliced strawberries, or perhaps a medley of beautiful mixed berries like blueberries and blackberries. The slight acidity and freshness cut right through the richness of the mousse, cleansing your palate between bites. It just makes everything taste brighter!
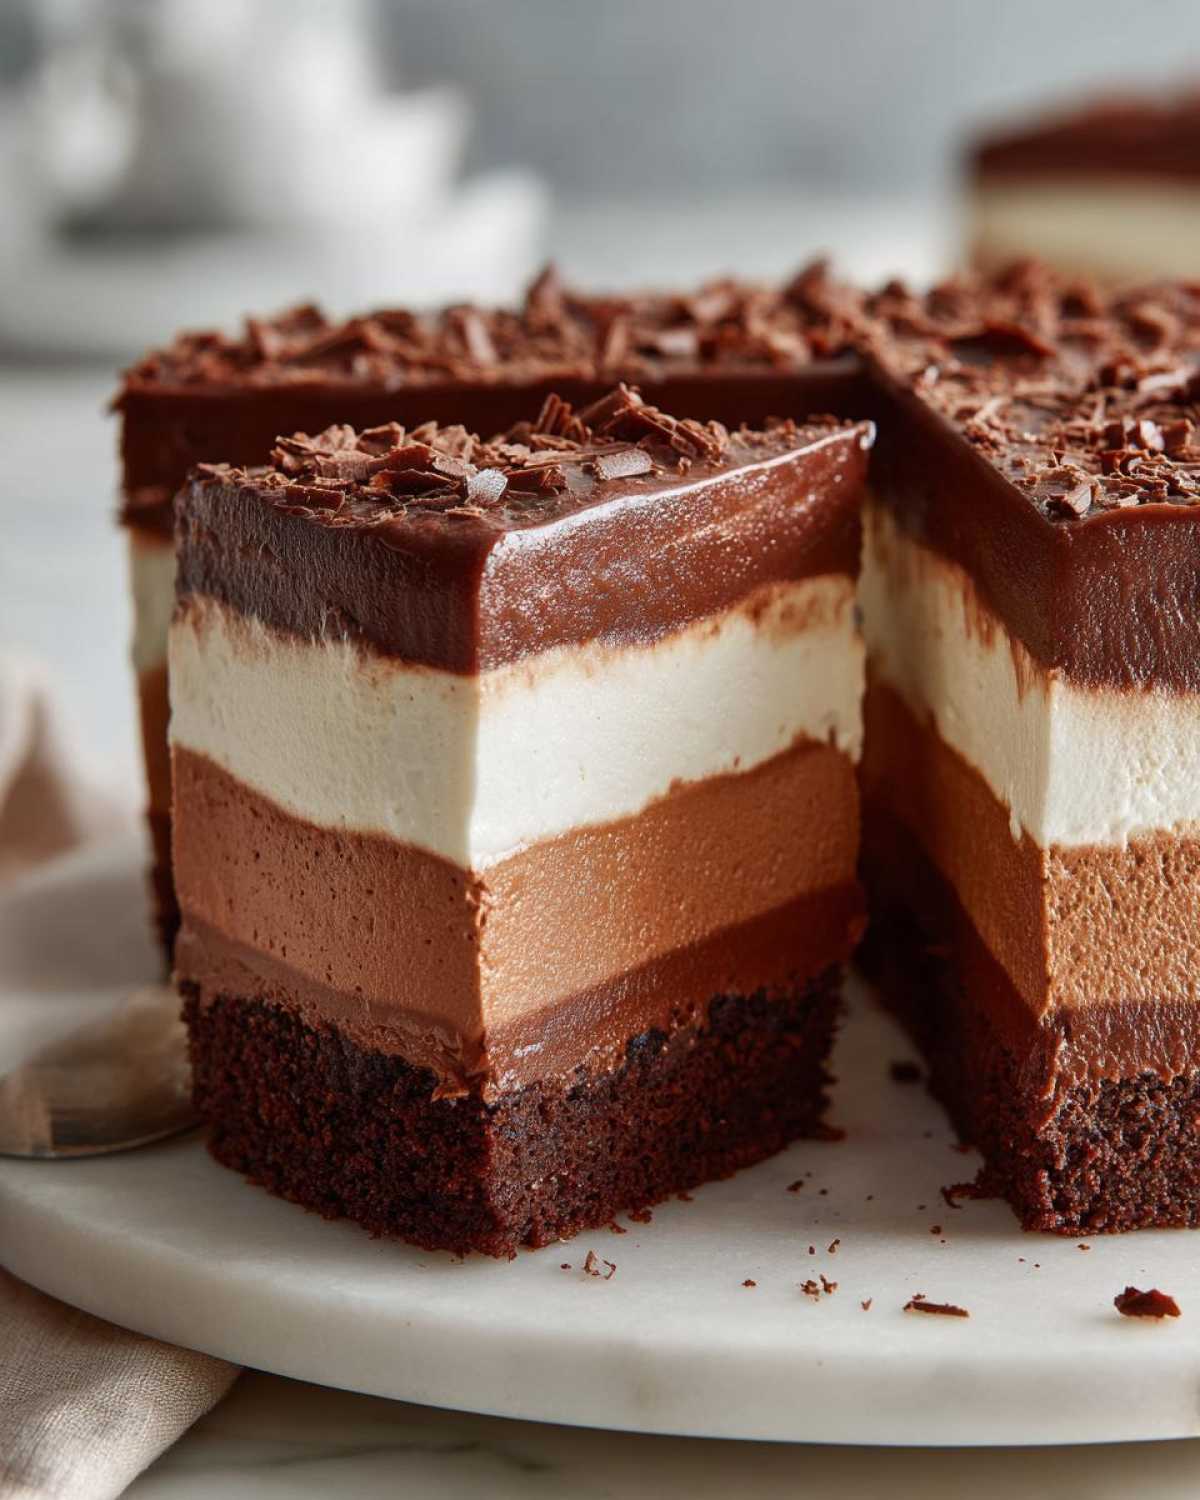
If you’re serving this after a big dinner, a simple cup of really strong, excellent coffee or an espresso is the perfect partner. The slight bitterness of the coffee complements the dark chocolate layer so well. If you want something a little fun and bubbly, look for a dry Prosecco or even a nice raspberry cordial on the side. It keeps the indulgence elevated but light.
Speaking of light and lovely, if you happen to be looking for other ways to serve up delicate desserts, I have a recipe for amazing strawberry shortcake cupcakes that are the total opposite of this heavy chocolate bomb, but equally delicious for a different mood! But for this beauty, keep the sides simple, let those three chocolate layers shine, and prepare for applause!
Storing Your triple chocolate mousse cake Leftovers
Okay, let’s be real: do you think there will be leftovers of this triple chocolate mousse cake? Probably not! But in the unlikely event that you manage to save a slice or two of this amazing creation, we need to treat it right. Mousse cakes are delicate, especially these three-layer beauties, so proper storage is key to making sure that slice you save for tomorrow lives up to the spectacular one you eat today.
The most important thing you need to remember about this cake is that it *must* stay cold. Since the structure relies almost entirely on chilled fat and set gelatin (from the egg yolks, though we aren’t using added gelatin here), heat is the enemy. Do not leave this cake sitting on the counter, even if you think it’s just for an hour or two while you watch a movie. That warmth will quickly turn those beautiful mousse layers sad and soupy!
When you’re done serving, cover the remaining cake tightly, but softly. I find that gently resting a large piece of plastic wrap over the top works best, or use a cake dome if you have one that fits over your serving plate. If you press plastic wrap directly onto the mousse layers, you might cause condensation or even smudge the top layer, which is no good for such an elegant dessert!
Refrigeration is your best friend here. It will keep beautifully for 3 to 4 days when stored correctly in the fridge. You’ll notice the base might get slightly softer over time, but the mousse layers should remain perfectly stable and decadent. If, by some miracle, you have so much left over that you decide to freeze it—yes, you *can*!
If you choose to freeze it, make sure to wrap the entire cake very tightly first in plastic wrap, and then wrap it again in foil. This double protection prevents those sneaky freezer burn crystals from forming on the pristine mousse surfaces. When you are ready to eat it, you must thaw it slowly in the refrigerator overnight. Do **not** try to microwave mousse, ever! That is guaranteed to result in a warm, chocolatey puddle instead of the incredible Decadent chocolate dessert you expect!
Frequently Asked Questions About the Best triple chocolate dessert
I know when you tackle something this impressive—a genuine Best triple chocolate dessert experience—you’re going to have questions! Building three distinct layers gets people nervous, which is totally normal. I’ve rounded up the most common things people ask me when they’re ready to make this cake so you can bake with total confidence!
Can I make this triple chocolate mousse cake without eggs?
That is a great question, especially if you’re concerned about using raw egg yolks! Because our mousse structure relies heavily on the egg yolks emulsifying with the chocolate and then being stabilized by the whipped cream, removing them does change the chemistry a bit. If you absolutely need to avoid eggs, you’ll need a stabilizer to replace that structure.
The best substitutes here would be either unflavored powdered gelatin or a commercial egg replacer specifically designed for baking. If you use gelatin, you’ll typically bloom it in a little cold water, then gently whisk it into the warm (but not hot!) chocolate mixture before you fold in the cream. Just make sure you follow the directions on your specific product closely, as gelatin strength can vary wildly. I’ve had great success with it, but remember, texture is key for this Rich chocolate cream cake!
How do I prevent the mousse layers from bleeding together?
This is the secret handshake of making any **layered mousse cake recipe**! If you add your second layer before the first one is firm, they will inevitably merge, and you lose those beautiful visual lines. We don’t want mud; we want distinct architecture!
The absolute critical step here is chilling time. After you pour in the dark mousse, it needs a full hour in the fridge—minimum! It should feel set to the touch, not jiggly at all. When you pour the milk mousse on top, use a spoon held just above the surface and pour slowly onto the back of the spoon. This disperses the weight of the new layer, preventing it from digging a trench into the layer below. Then, repeat the hour chill before the final white layer goes on. Patience really pays off!
What is the best way to get clean slices of this layered cake?
Serving this gorgeous cake without messing up the sides is almost as important as baking it well! You’ve spent hours on this, so don’t ruin the presentation when serving. Everyone struggles with this, but I have a trick that never fails me when I’m serving up a showstopper like this.
You need hot water and a very sharp, thin knife. It doesn’t have to be giant, just tall enough to go through the entire cake profile. Before you make your first cut, fill a tall glass with boiling water. Dip the knife blade completely into the hot water for about 10 seconds—let it get good and hot. Wipe the blade completely dry with a clean towel. Now, make one clean, downward cut through the entire cake. Before you pull the knife out, wipe it clean again, dip it back in the hot water, and repeat for the next slice. That hot, clean blade glides through the dense mousse layers like butter, leaving you with those picture-perfect cross-sections every single time! If you want more tips on making beautiful baked goods, take a look at my guide on simple rich moist chocolate cake, which has some great knife tips too!
Share Your Decadent Chocolate Dessert Creation
Wow, if you actually followed along and made this incredible Decadent chocolate dessert, I am bursting with excitement for you! Seriously, this triple chocolate mousse cake takes some dedication, but the payoff is truly worth every minute spent whipping that cream and layering those beautiful mousses. I hope it was the showstopper you needed for your special occasion!
When you finish decorating your masterpiece, I absolutely have to see it! Snap a picture and tag me on social media so I can admire your handiwork. Seeing your creations is genuinely the best part of running Kitchen User. Finding inspiration for your next amazing project is easy—you can always check out my guide on the best homemade chocolate chip cookies for something a little different!
If you loved this recipe, please do me a huge favor and leave a rating below! Five stars make my whole week! And don’t forget to follow along for more kitchen adventures—you can find me sharing fun decorating ideas and behind-the-scenes chaos over on Pinterest at our Pinterest page. Happy baking, my friends—may your chocolate always be rich and your layers perfectly set!
PrintUltimate Triple Chocolate Mousse Cake
Make this decadent, layered triple chocolate mousse cake featuring dark, milk, and white chocolate mousse on a simple chocolate base. This impressive dessert is perfect for special occasions.
- Prep Time: 45 min
- Cook Time: 15 min
- Total Time: 5 hours 0 minutes
- Yield: 10 servings 1x
- Category: Dessert
- Method: Chilling/No Bake (Base is baked)
- Cuisine: American
- Diet: Vegetarian
Ingredients
- For the Base: 1 cup all-purpose flour
- 1/2 cup unsweetened cocoa powder
- 1/2 cup granulated sugar
- 1/4 teaspoon salt
- 1/2 cup (1 stick) unsalted butter, melted
- 1 large egg
- For the Dark Chocolate Mousse: 6 ounces dark chocolate (70% cacao), chopped
- 1 cup heavy cream, divided
- 2 large egg yolks
- 1/4 cup granulated sugar
- 1 teaspoon vanilla extract
- For the Milk Chocolate Mousse: 6 ounces milk chocolate, chopped
- 1 cup heavy cream, divided
- 2 large egg yolks
- 1/4 cup granulated sugar
- 1 teaspoon vanilla extract
- For the White Chocolate Mousse: 8 ounces white chocolate, chopped
- 1 cup heavy cream, divided
- 2 large egg yolks
- 1/4 cup granulated sugar
- 1 teaspoon vanilla extract
- For Garnish: Chocolate shavings or cocoa powder
Instructions
- Prepare the Base: Preheat your oven to 350°F (175°C). Line the bottom of an 8-inch springform pan with parchment paper. In a bowl, mix the flour, cocoa powder, sugar, and salt. Stir in the melted butter and egg until just combined. Press the mixture evenly into the bottom of the prepared pan. Bake for 12-15 minutes. Let the base cool completely on a wire rack.
- Make the Dark Chocolate Mousse: Place the chopped dark chocolate in a heatproof bowl. In a small saucepan, heat 1/2 cup of heavy cream until simmering. Pour the hot cream over the chocolate and let it sit for 2 minutes, then whisk until smooth. In a separate bowl, whisk the egg yolks and sugar until pale. Temper the yolks by slowly whisking in a small amount of the warm chocolate mixture, then pour the tempered yolks back into the main chocolate bowl, whisking constantly. Stir in vanilla. Let the mixture cool to room temperature. Whip the remaining 1/2 cup of heavy cream to medium peaks. Gently fold the whipped cream into the cooled dark chocolate mixture until uniform. Pour this mousse over the cooled base and spread evenly. Chill in the refrigerator for at least 1 hour until set.
- Make the Milk Chocolate Mousse: Repeat the process above using the milk chocolate instead of dark chocolate. Ensure the milk chocolate mixture cools to room temperature before folding in the freshly whipped heavy cream. Carefully spoon the milk chocolate mousse over the set dark chocolate layer. Return the cake to the refrigerator for at least 1 hour.
- Make the White Chocolate Mousse: Repeat the process using the white chocolate. White chocolate can be sensitive, so heat the cream gently. Once smooth, cool the mixture, then fold in the freshly whipped heavy cream. Spread the white chocolate mousse over the milk chocolate layer.
- Chill and Serve: Cover the cake loosely and chill for a minimum of 4 hours, or preferably overnight, to allow all layers to firm up properly. Before serving, carefully release the springform side. Garnish the top with chocolate shavings or a dusting of cocoa powder.
Notes
- For a stable mousse, use high-quality chocolate. The fat content helps the structure.
- If you want a no-bake option, you can skip baking the base and press a mixture of crushed chocolate cookies and melted butter onto the bottom of the pan instead.
- To prevent deflation when folding in the whipped cream, use a rubber spatula and cut down through the center, scraping up the side of the bowl.
Nutrition
- Serving Size: 1 slice
- Calories: 450
- Sugar: 35g
- Sodium: 120mg
- Fat: 30g
- Saturated Fat: 18g
- Unsaturated Fat: 12g
- Trans Fat: 0.5g
- Carbohydrates: 40g
- Fiber: 3g
- Protein: 7g
- Cholesterol: 110mg