
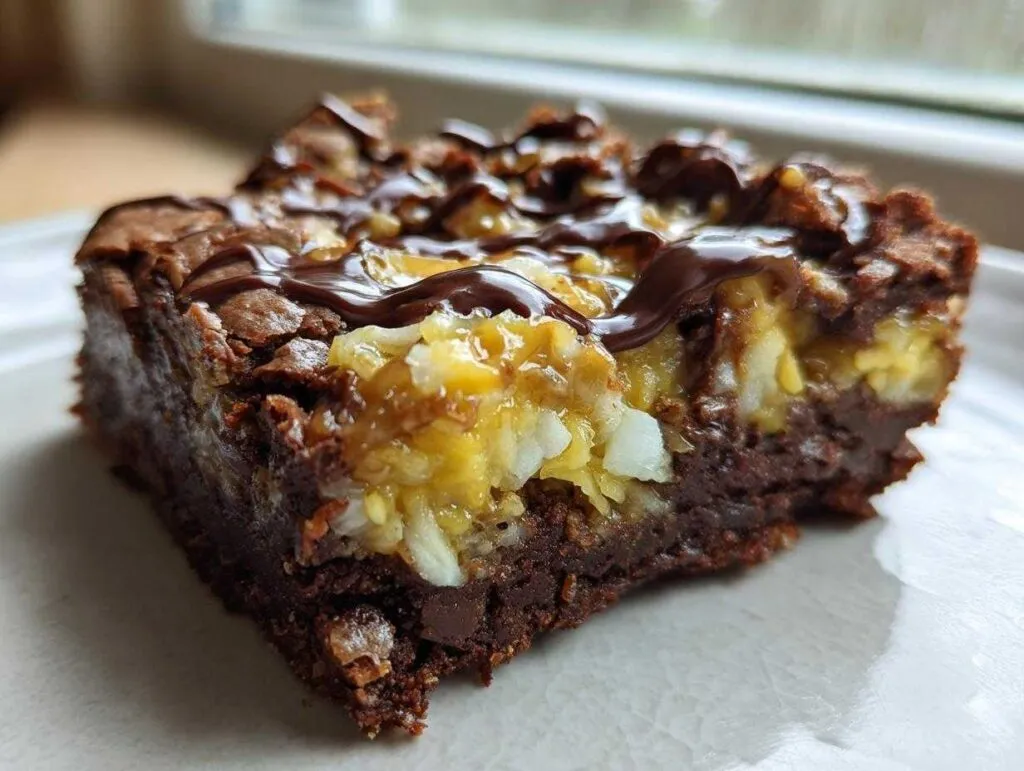
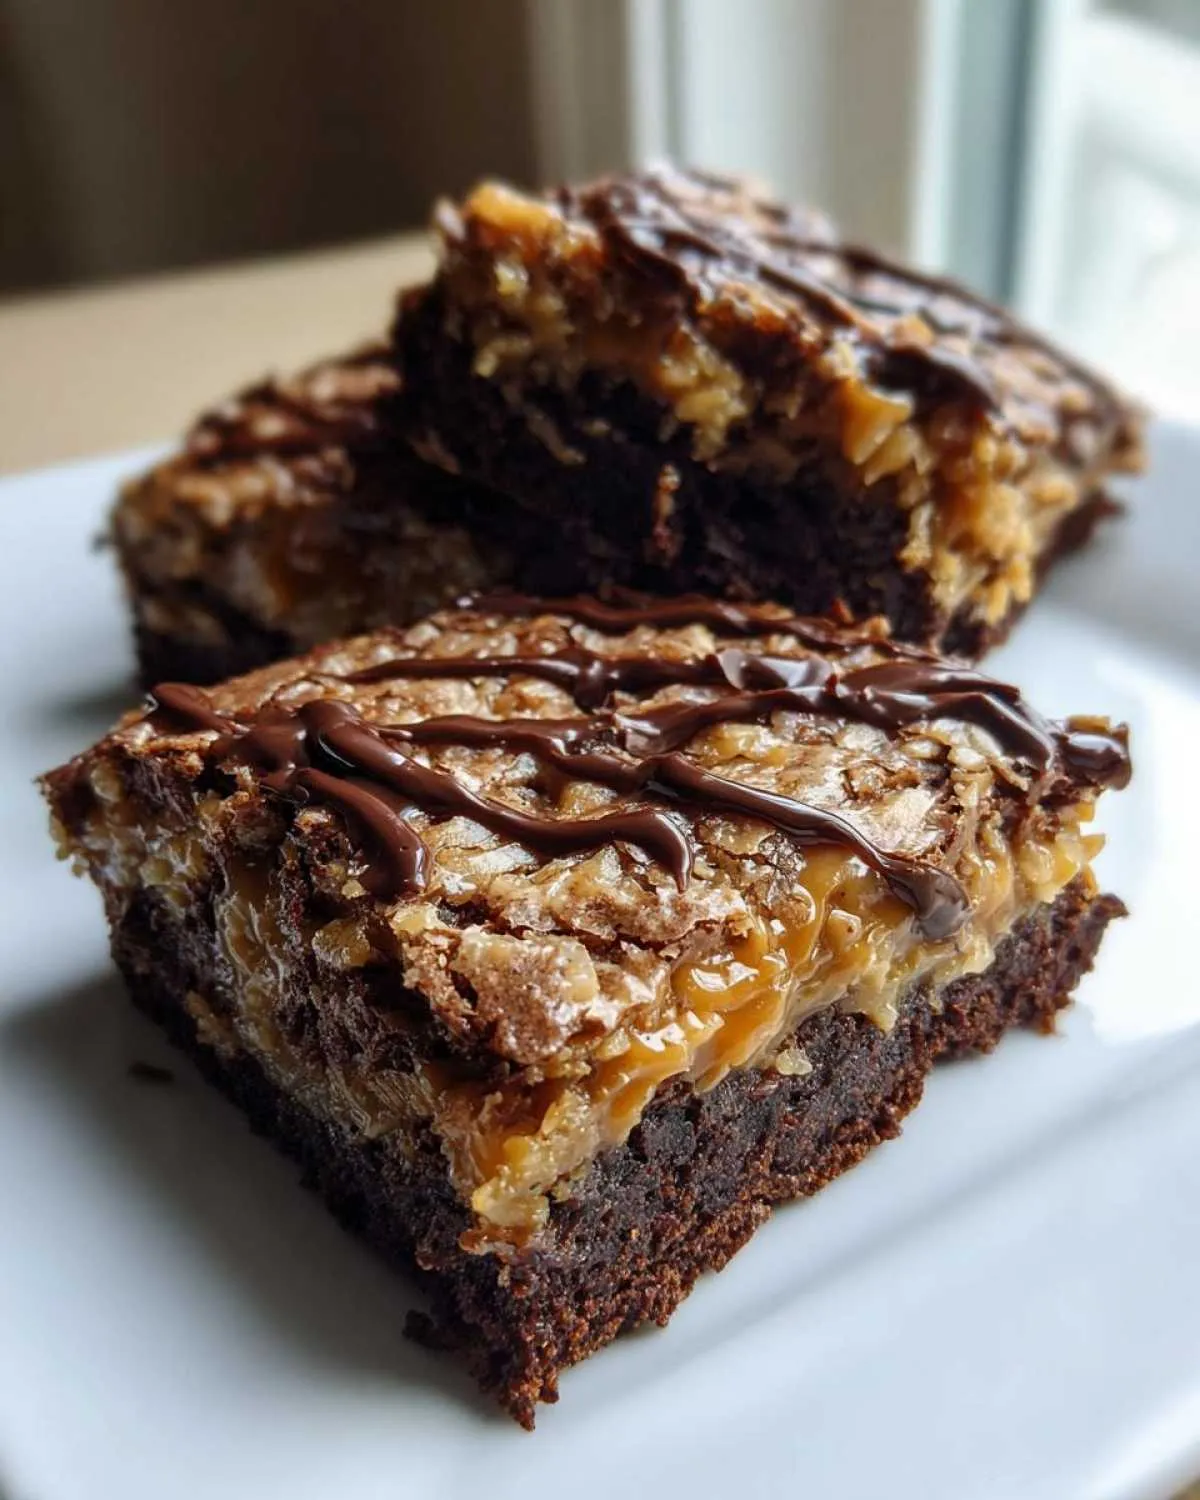
Oh my goodness, friends, you simply have to stop what you are doing right now because I’ve cracked the code on the ultimate dessert mashup! We all adore those iconic Girl Scout cookies—the ones with the chewy caramel, the toasted coconut, and that perfect ring of chocolate? Well, guess what? I took that magic and slammed it straight into my favorite fudgy brownie recipe. Get ready for the most incredible, decadent samoa brownies you’ll ever bake!
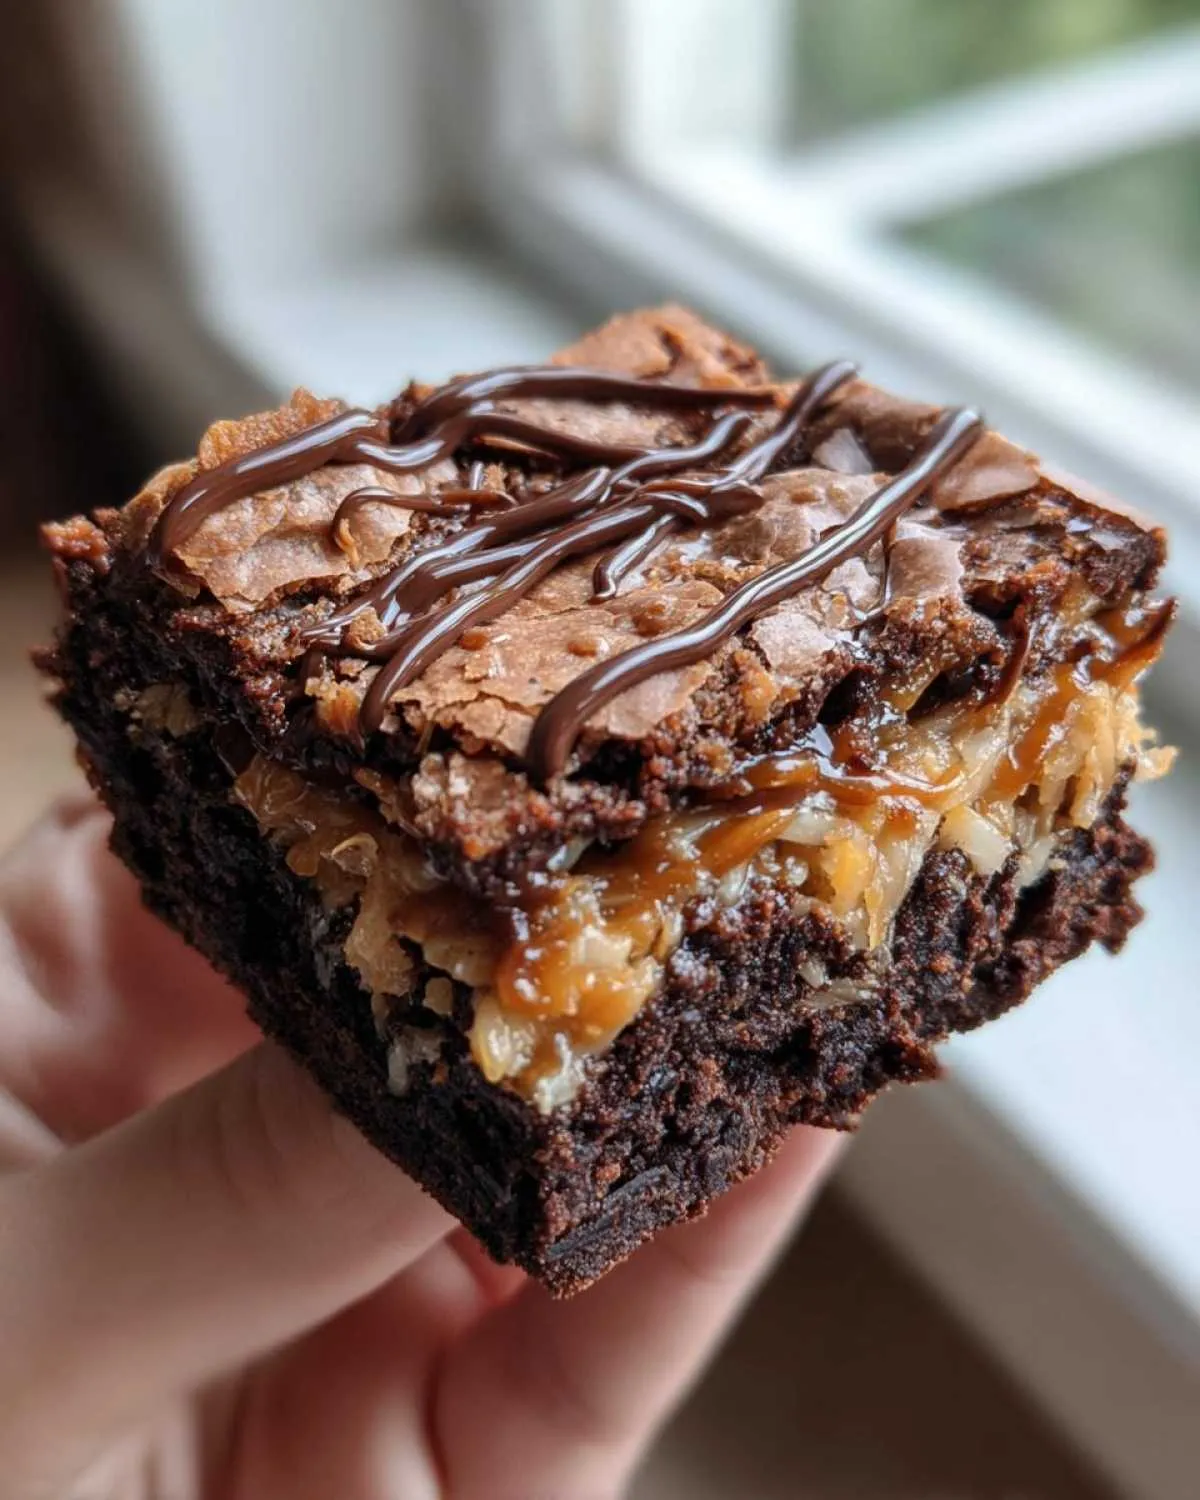
Seriously, these bars have everything: a rich, almost impossibly fudgy chocolate base that melts in your mouth, layered with gooey caramel, sprinkled with crunchy toasted coconut, and finished with a pretty chocolate drizzle. This recipe is pure happiness baked into a 9×13 pan. I worked overtime to make sure the texture was absolutely spot-on, and trust me, this is the superior way to enjoy that famous cookie flavor. You’re going to be making these every single week!
- Why You Will Make These Samoa Brownies Again and Again
- Gathering Ingredients for Your Samoa Brownies Recipe
- Step-by-Step Instructions for Perfect Samoa Brownies
- Tips for Making the Best Chewy Coconut Caramel Chocolate Bars
- Ingredient Notes and Substitutions for Your Samoa Brownies
- Serving Suggestions for These Inspired Brownie Dessert Ideas
- Storage and Reheating Instructions for Samoa Brownies
- Frequently Asked Questions About Making Samoa Brownies
- Share Your Ultimate Cookie Bar Mashup Creations
- Share Your Ultimate Cookie Bar Mashup Creations
Why You Will Make These Samoa Brownies Again and Again
I know, I know, there are a million brownie recipes out there, but these samoa brownies are something else entirely. They are my go-to when I need a showstopper dessert that’s surprisingly manageable! They hit every texture note perfectly. You’ll be addicted, I promise!
- The Ultimate Texture Contrast: You get that intensely rich, dense, fudgy brownie base hugging a layer of warm, gooey caramel. It’s heaven!
- True Samoa Flavor: We’ve captured that classic cookie profile so perfectly that I barely reach for the actual cookies anymore. These Caramel Coconut Brownies Recipe favorites are simply better!
- That Toasted Crunch: The toasted coconut isn’t just sprinkled on top; it gets baked slightly into the caramel, adding a warm, nutty crunch that makes every bite satisfying.
- Easy Assembly: Even though you get three complex layers, the assembly process is remarkably fast once the base is par-baked. It’s easier than making cookies!
- Perfect for Sharing (or Not!): Since they cut into beautiful squares, these are fantastic for parties, but honestly, I hide half the pan just for myself. They are the Best Caramel Drizzle Brownies!
- They Transport Beautifully: Unlike delicate layer cakes, these bars hold their shape beautifully, making them the perfect decadent treat to bring to potlucks or gatherings.
Gathering Ingredients for Your Samoa Brownies Recipe
Okay, gathering supplies is half the battle, but trust me, these measurements are crucial for getting that perfect layering and chewiness! We need a few things for the base, the gooey middle, and the final chocolate touch. I always like to make sure my butter is room temperature if the recipe called for creaming, but for our Rich Fudgy Chocolate Base, we’re starting with it melted, which is so much easier! Check out the list below—this makes about 24 glorious bars.
And hey, if you’re interested in learning more about getting that incredible, shiny top on the brownie layer, you should definitely check out my ultimate fudgy brownies technique later!
- For the Brownie Base: 1 cup (2 sticks) unsalted butter, melted, 2 cups granulated sugar, 4 large eggs, 1 teaspoon vanilla extract, 3/4 cup unsweetened cocoa powder, 1 cup all-purpose flour, 1/2 teaspoon salt, and 1/2 cup semi-sweet chocolate chips.
- For the Gooey Topping: 1 (14 ounce) can sweetened condensed milk, 1 cup caramel sauce (store-bought is fine, but homemade is divine!), and 1 1/2 cups shredded sweetened coconut, which you absolutely must toast first!
- For the Finish: 1/2 cup semi-sweet chocolate, for drizzling (this is where the final cookie flare comes in!).
Step-by-Step Instructions for Perfect Samoa Brownies
Alright, this is where the magic truly happens! Don’t panic when you see multiple steps; we’re taking this slow and steady to ensure those layers set up beautifully. We are essentially making a sturdy brownie, topping it while it’s hot, and then baking that topping until it’s gloriously bubbly. Remember, patience in the cooling stage is the secret to clean bars!
If you’ve ever struggled with layers sticking together, this method of partial baking and immediate topping is your best friend. For more layered deliciousness, I highly recommend checking out my graham cracker toffee bars next!
- First things first, crank that oven up to 350°F (175°C). Make sure you’ve lined that 9×13 inch pan with parchment paper, leaving a nice overhang on the sides—that overhang is your handle for lifting the whole creation out later!
- Move right into the brownie base. Whisk that melted butter and all that sugar together enthusiastically. Then, beat in those four eggs, one at a time, followed by the vanilla. Don’t rush this part!
- In a separate bowl, just mix your dry ingredients: cocoa powder, flour, and salt. I always tap the sides of the bowl to make sure everything is incorporated.
- Now, add the dry stuff gradually to the wet mixture. Mix only until you *just* don’t see streaks of flour anymore. Overmixing these brownies is the fastest way to lose that fudgy texture! Fold in those initial chocolate chips.
- Spread that beautiful batter evenly into your waiting pan and pop it into the oven for about 20 to 25 minutes. You want it mostly set, but still gooey in the middle.
- While that’s baking, get your caramel topping ready. In a small saucepan over low heat, gently warm up the sweetened condensed milk and the caramel sauce until they are super smooth and pourable. Seriously, low and slow here!
- When that timer goes off, pull the brownies out—they should look set but still moist in the center. Immediately pour that warm caramel topping evenly over the hot base, and then sprinkle the toasted coconut all over the top of that caramel.
- Back into the oven it goes! Bake for another 10 to 12 minutes. You are just looking for the caramel to get bubbly around the edges and look set.
- This next step is the hardest, but you MUST let those samoa brownies cool completely in the pan on a wire rack. This sets the layers together!
- Once totally cool—and I mean totally cool—melt that last 1/2 cup of chocolate. Drizzle it back and forth artistically across the top. Wait for that drizzle to firm up, and then lift your masterpiece out using those parchment handles! Cut into squares and try not to eat them all yourself!
Creating the Rich Fudgy Brownie Base for Your Samoa Brownies
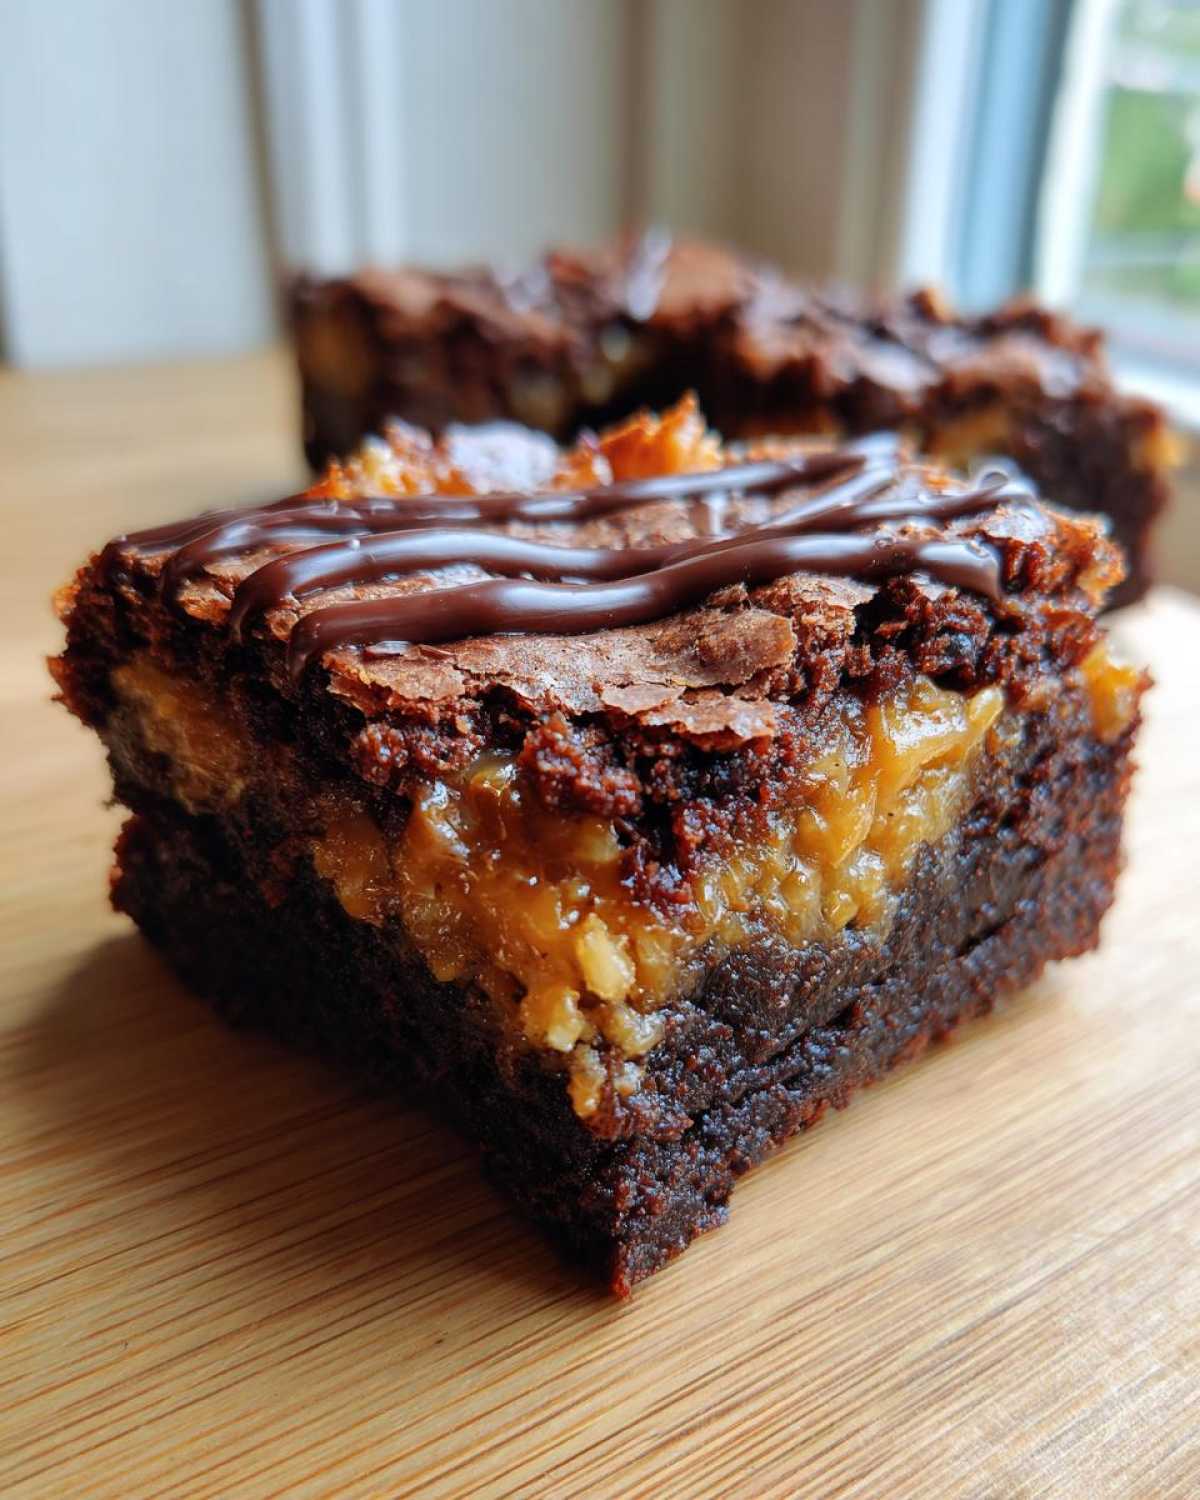
The whole dessert hinges on this base being perfect! We’re intentionally keeping the flour low here because we want that dense, almost truffle-like chew, not a cakey structure. When you’re whisking the melted butter and sugar, you’re creating the structure right there. When you add the eggs, make sure each one is fully incorporated before plopping in the next one—they emulsify the batter. The most crucial thing? When you finally add the flour and cocoa, stop mixing as soon as you see things come together. This ensures we keep that beautiful, Rich Fudgy Chocolate Base we’re aiming for. Seriously, a few dry spots left are better than an overworked batter!
Layering Caramel, Coconut, and Baking the Samoa Brownies
Okay, pull those brownies out after that first bake—they’ll look slightly unfinished, and that’s exactly right! The heat retained in the warm brownie base is what helps that caramel layer set up perfectly when you pour it over. Immediately pour that warmed caramel mixture right over the top, spreading it gently to the edges. Then comes my favorite part: showering the entire surface with the toasted coconut. I toast mine on a sheet pan at 350°F for about 5 to 8 minutes—keep a close eye on it because coconut goes from golden to charcoal FAST! Put the pan back in the oven so the caramel gets nice and bubbly. This creates those amazing Layered Dessert Brownies where the coconut slightly sinks into the goo.
The Essential Cooling and Chocolate Drizzle Finish for Samoa Brownies
You absolutely cannot run before you can walk here! If you try to drizzle chocolate or cut these bars while they are warm, you’ll end up with a messy, flowing river of caramel mingling with melted chocolate. We need patience! Let them chill out completely—a few hours on the counter works, or pop them in the fridge for about an hour if you’re impatient like me. Once firm, melt your final chocolate and drizzle it beautifully across the top. This finishing touch turns them into the Best Caramel Drizzle Brownies because those thick ribbons of chocolate contrast so nicely with the coconut texture.
Tips for Making the Best Chewy Coconut Caramel Chocolate Bars
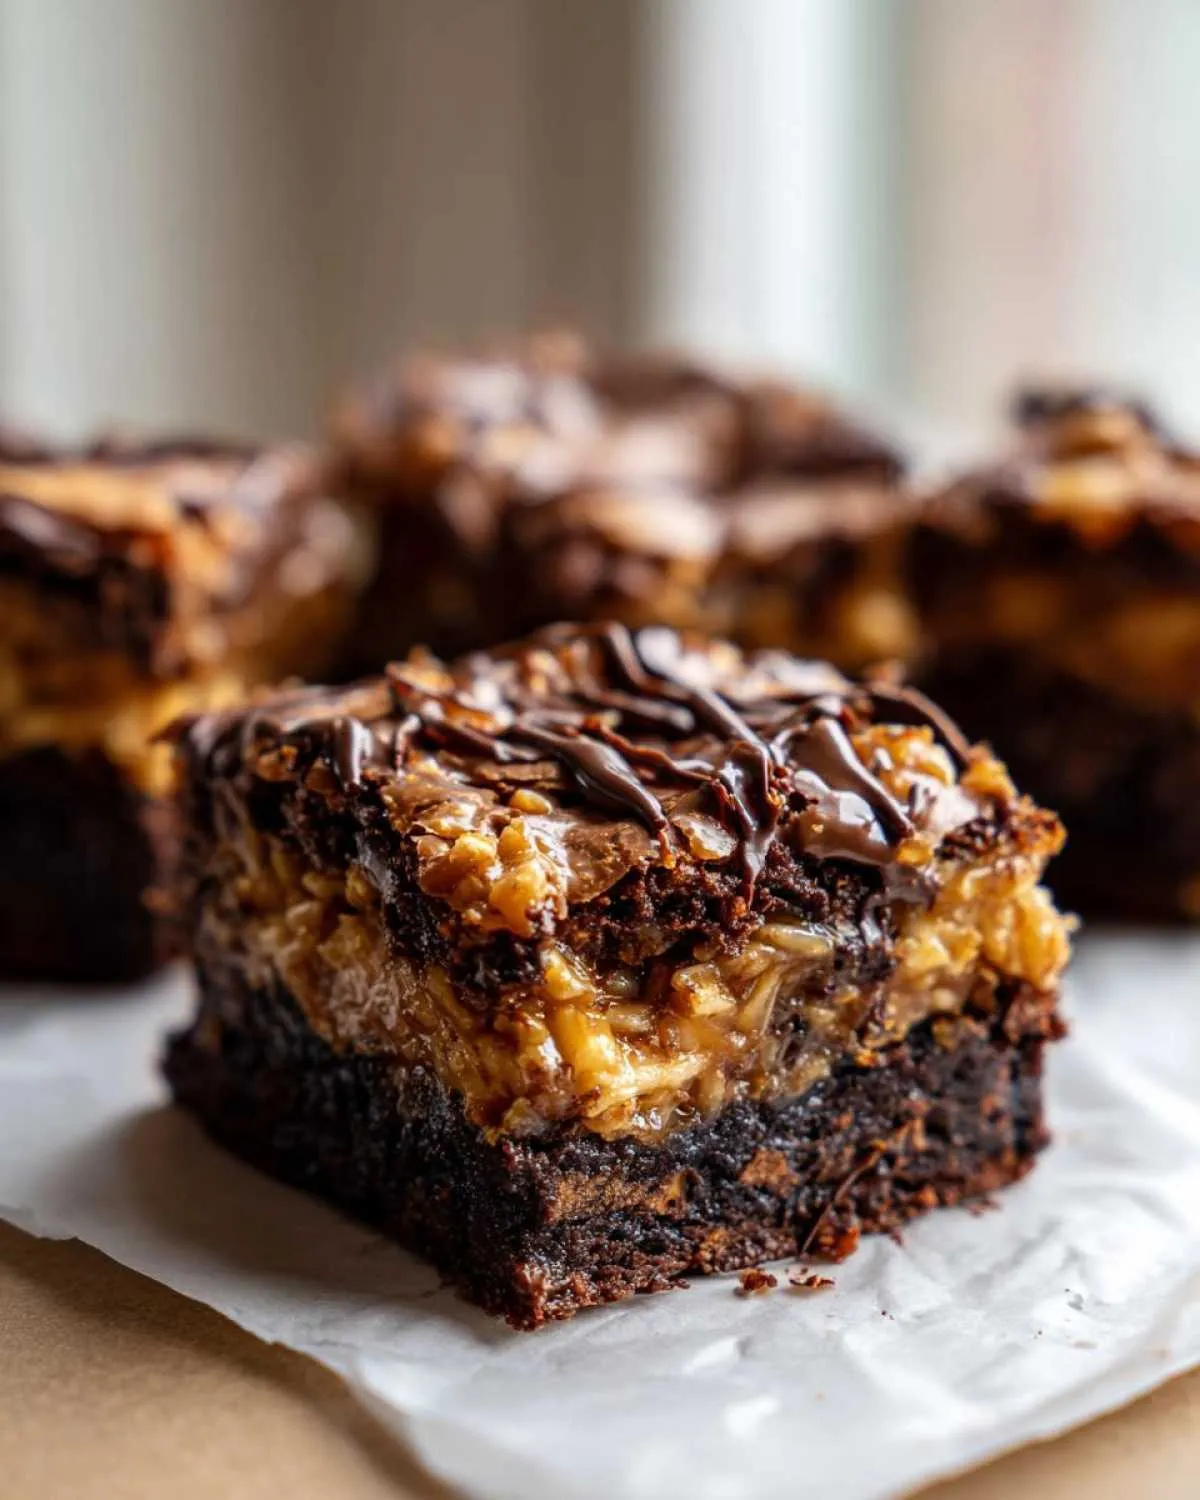
Achieving that perfect textural trifecta—fudgy, gooey, crunchy—is what separates a good dessert from an amazing one! My biggest tip here, especially if you’re aiming for Fudgy Brownies with Caramel Topping that stays put, is to stop thinking of this as one baked item; it’s three components that need individual attention. First, for the fudginess, remember what I said about not overmixing the flour. That’s non-negotiable! If you want that beautiful dense texture, under-mix the dry ingredients slightly over the wet.
Second, if you are worried about runny caramel, using sweetened condensed milk in the mix (as we did!) really sets that layer firm once it cools. If you try to simply melt down store-bought caramels without the milk, you end up with a lovely sauce, not a sturdy bar layer. Always ensure your brownie base is fully set before you top it, too, otherwise, the second bake just steams the bottom layer instead of setting the topping.
And one last thing: whenever I’m testing out new recipes, I always refer back to my notes on getting that perfect shiny top on my regular brownies—you can find those secrets right here. Sometimes those little tricks, like weighing the sugar accurately, translate beautifully to these layered bars too!
Ingredient Notes and Substitutions for Your Samoa Brownies
I want you to feel completely confident tackling these samoa brownies, so let’s talk through a couple of key ingredient decisions, especially those in the caramel layer. Using the whole can of sweetened condensed milk might seem like a lot, but trust me, this is what transforms a runny caramel sauce into a sliceable, gooey layer that sticks perfectly to the brownie rather than sliding off! It’s the secret to getting that classic cookie bar structure.
When it comes to the chocolate, you have a little flexibility. I prefer semi-sweet chocolate chips for the base because they hold their shape slightly better during the initial bake, giving you those wonderful little pockets of melted bliss. For the drizzle, you can absolutely use dark chocolate if you love a more intense cocoa flavor—it cuts through the richness of the caramel beautifully. If you’re making these for a crowd that loves sweeter things, milk chocolate chips work fine for both!
What about coconut? You must use sweetened shredded coconut here! Unsweetened coconut just doesn’t have the structure or the flavor needed to mimic that familiar cookie topping. If you happen to be out of sweetened condensed milk and need a substitute for the caramel blend, you could try a very thick, high-quality store-bought caramel sauce mixed with a bit of cream cheese to help it stabilize, but it won’t be quite the same. Honestly, though, the condensed milk is worth the trip to the store for these Chocolate Toasted Coconut Bars!
Serving Suggestions for These Inspired Brownie Dessert Ideas
These samoa brownies are intensely decadent, you guys. They are rich, they are gooey, and honestly, they barely need anything else to shine! Because we’ve packed so much flavor—chocolate, caramel, and coconut—into one little bar, the best pairings are often the simplest ones. Don’t feel like you need a huge complicated topping, because these bars are already the star of the show!
They are absolutely perfect for parties, potlucks, or just that moment when you absolutely need a special treat. When you bring these out, everyone knows they’ve hit the jackpot on Girl Scout Cookie Brownie Bars!
- A Scoop of Ice Cream: You cannot go wrong with a simple scoop of high-quality vanilla bean ice cream melting right next to a warm (or room temperature!) square. The coolness of the ice cream cuts through the richness of the caramel beautifully. If you ever want to make your own amazing vanilla base, I have a recipe for creamy, smooth vanilla buttercream that translates well into great ice cream flavorings!
- The Perfect Coffee Date: If you’re enjoying one of these bars mid-afternoon, the complementary bitterness of a strong cup of black coffee, or even a slightly sweet latte, really balances out the extreme sweetness from the caramel and condensed milk.
- Keep it Simple: Sometimes I just serve them exactly as they are, maybe slightly chilled. If they’ve been in the fridge, the caramel sets up firmer, making them easier to handle while still offering that satisfying chew.
- For the True Chocolate Lover: Try drizzling a little extra melted dark chocolate over the finished bars just before serving for an added layer of complexity.
Storage and Reheating Instructions for Samoa Brownies
Now that you’ve made these stunning, multi-layered samoa brownies, you need to know how to keep them perfect until you devour them all! Because we have that fantastic gooey caramel layer and the chocolate drizzle on top, storage is a little different than just stashing a regular batch of brownies. I always recommend storing them cut or uncut, but there are optimum conditions depending on how soon you plan to eat the next one!
Personally, I find that storing them at room temperature is best for texture consistency, especially if your kitchen isn’t too warm. We want that brownie base to stay chewy and the caramel to stay soft, not rock hard!
Storing Uncut Slabs vs. Cut Squares
If you managed to keep the entire slab together, wrap it very tightly in plastic wrap first, and then cover that with a layer of aluminum foil. This double wrapping keeps out any unwanted kitchen smells and stops the edges from drying out. Store this tightly wrapped slab at cool room temperature for up to three days. If your house is super warm, like mine gets in the summer, you might need to use the fridge.
When storing them already cut into your beautiful squares, you definitely need an airtight container. Layer them with wax paper or parchment sheets between the layers so that sticky caramel doesn’t fuse everything into one giant dessert monolith! If refrigerated, they last longer—up to a week—but you need to remember to let them come to room temperature for about 30 minutes before serving for the best texture.
Do I Need to Refrigerate These Layered Dessert Brownies?
Honestly, it depends on your climate! If you live somewhere cool and dry, room temperature is my go-to for these Layered Dessert Brownies. This keeps the texture soft. However, if you are making these ahead of time for a party, or if your kitchen thermometer is reading above 72°F, the fridge is your friend. Refrigeration helps stabilize that gooey caramel layer and keeps the chocolate drizzle crisp, preventing any melting or sweating.
If you do refrigerate them, just make sure they have that essential 30-minute rest on the counter before digging in. Cold brownies tend to mute the rich chocolate flavor of the base, and nobody wants muted chocolate when they are eating samoa brownies!
The Right Way to Reheat for Maximum Gooeyness
These bars truly shine at room temperature or slightly chilled, so aggressive reheating isn’t usually necessary or even recommended, as it can cause the caramel to run everywhere. However, if you want to bring that fudgy base back to life for just a moment, I have a little trick!
For individual squares, wrap one bar very loosely in a small piece of damp paper towel (just damp, not soaking!) and microwave it on 50% power for about 5 to 10 seconds. This gentle blast warms the brownie, softening the caramel slightly without turning the whole thing into soup. Be careful with the caramel, though; it gets scorching hot very quickly!
Frequently Asked Questions About Making Samoa Brownies
I know when you’re staring down a recipe this amazing, you always have a few little questions swimming around! Believe me, I did too when I first whipped these up. Getting that balance right between the fudgy base and the gooey topping is key to making these the ultimate cookie bar mashup. Here are the things I get asked most often about these glorious samoa brownies!
Can I skip toasting the coconut?
Oh, boy, I really, really hope you don’t skip this step! I know it adds an extra minute or two, but toasting the coconut completely changes the game for these Chewy Coconut Caramel Chocolate Bars. Untoasted coconut tastes bland and a little chewy in a boring way. Toasting it brings out this deep, nutty, almost sweet flavor that works perfectly against the dark chocolate and the caramel. If you’re short on time, you can spread it on a baking sheet and bake it at 350°F for just 5 to 8 minutes, but you have to watch constantly, or it burns in seconds!
Can I make the caramel from scratch instead of using two-part sauce?
That’s a fantastic question! Yes, you absolutely *can* make your own caramel sauce if you prefer, which lets you control the saltiness or the richness. However, the caramel layer in this recipe is specifically constructed to set up firm enough to slice but soft enough to be gooey—and that structure largely comes from mixing the spoonful of caramel sauce with the entire can of sweetened condensed milk and baking it slightly. If you use a homemade caramel that’s already set, it might become too hard once baked a second time. For these Fudgy Brownies with Caramel Topping, I highly recommend using good quality jarred caramel sauce mixed with the condensed milk for guaranteed success!
How thick should the brownie layer be before I add the caramel?
This is important for texture control! You want the brownie to be *almost* done, leaning towards slightly underbaked. When you pull it out after the initial 20–25 minutes, a toothpick inserted near the center should come out with moist crumbs clinging to it—not wet batter, but definitely not clean! If your layer is too baked at this stage, the second bake will dry it out, and you’ll end up with a cakey brownie instead of a rich, fudgy layer beneath all that caramel goodness. We are aiming for density here, my friend!
Do I have to use chocolate chips for the base?
I include the chocolate chips in the batter because I find they create those lovely, molten pockets of chocolate throughout the Rich Fudgy Chocolate Base, which contrasts nicely with the caramel. If you don’t have chips, using another half-cup of high-quality chopped semi-sweet bar chocolate works just as well! The one thing I’d suggest looking into if you love baking chocolate intensely is my guide on making chocolate chip cookies—understanding chocolate quality really helps everywhere in the kitchen!
Share Your Ultimate Cookie Bar Mashup Creations
I am just so thrilled you’re taking the plunge and making these incredible samoa brownies! This recipe is one of my true pride and joys, combining two perfect desserts into one show-stopping bar. I absolutely live to see your creations! When you pull these gorgeous Homemade Samoa Inspired Treats out of the oven, please let me know how they turned out for you in the comments below. Did the caramel set perfectly? Was the base fudgy enough?
Don’t forget to snap a picture! I truly love seeing how everyone styles their bakes. If you want even more fun, decadent ideas and recipes like this, you should definitely follow along on my Pinterest account—I post tons of inspiration there every week!
Share Your Ultimate Cookie Bar Mashup Creations
I am just so thrilled you’re taking the plunge and making these incredible samoa brownies! This recipe is one of my true pride and joys, combining two perfect desserts into one show-stopping bar. I absolutely live to see your creations! When you pull these gorgeous Homemade Samoa Inspired Treats out of the oven, please let me know how they turned out for you in the comments below. Did the caramel set perfectly? Was the base fudgy enough?
Don’t forget to snap a picture! I truly love seeing how everyone styles their bakes. If you want even more fun, decadent ideas and recipes like this, you should definitely follow along on my Pinterest account—I post tons of inspiration there every week! You can find us over at Pinterest for more mouthwatering ideas.
PrintUltimate Samoa Brownies: Caramel Coconut Cookie Bar Mashup
Make these decadent Samoa Brownies, a rich, fudgy base topped with gooey caramel, toasted coconut, and a chocolate drizzle, inspired by the famous Girl Scout cookie.
- Prep Time: 20 min
- Cook Time: 40 min
- Total Time: 60 min
- Yield: 24 bars 1x
- Category: Dessert
- Method: Baking
- Cuisine: American
- Diet: Vegetarian
Ingredients
- 1 cup (2 sticks) unsalted butter, melted
- 2 cups granulated sugar
- 4 large eggs
- 1 teaspoon vanilla extract
- 3/4 cup unsweetened cocoa powder
- 1 cup all-purpose flour
- 1/2 teaspoon salt
- 1/2 cup semi-sweet chocolate chips
- 1 (14 ounce) can sweetened condensed milk
- 1 cup caramel sauce (store-bought or homemade)
- 1 1/2 cups shredded sweetened coconut, toasted
- 1/2 cup semi-sweet chocolate, for drizzling
Instructions
- Preheat your oven to 350°F (175°C). Line a 9×13 inch baking pan with parchment paper, leaving an overhang for easy removal.
- Prepare the brownie base: In a large bowl, whisk the melted butter and sugar together until combined. Beat in the eggs one at a time, then stir in the vanilla extract.
- In a separate bowl, whisk together the cocoa powder, flour, and salt. Gradually add the dry ingredients to the wet ingredients, mixing until just combined. Do not overmix. Fold in the 1/2 cup of chocolate chips.
- Spread the brownie batter evenly into the prepared pan. Bake for 20 to 25 minutes, or until a toothpick inserted near the center comes out with moist crumbs attached.
- While the brownies bake, prepare the topping. In a small saucepan over low heat, gently warm the sweetened condensed milk and caramel sauce together until smooth and easily pourable. Stir well.
- Remove the partially baked brownies from the oven. Immediately pour the warm caramel mixture evenly over the hot brownie base. Sprinkle the toasted coconut evenly over the caramel layer.
- Return the pan to the oven and bake for an additional 10 to 12 minutes, or until the caramel is bubbly around the edges.
- Let the brownies cool completely in the pan on a wire rack. This cooling time is essential for setting the layers.
- Once cool, melt the remaining 1/2 cup of chocolate. Drizzle the melted chocolate back and forth across the top of the cooled bars.
- Once the chocolate drizzle is set, use the parchment paper overhang to lift the entire slab out of the pan. Cut into squares to serve these ultimate cookie bar mashup treats.
Notes
- To toast coconut quickly, spread it on a baking sheet and bake at 350°F (175°C) for 5-8 minutes, watching closely to prevent burning.
- For a fudgier brownie base, reduce the flour by 1 tablespoon.
- If you prefer a thicker caramel layer, use 1 1/4 cups of caramel sauce.
- Follow us on Pinterest for more layered dessert brownies and baking inspiration.
Nutrition
- Serving Size: 1 bar
- Calories: 310
- Sugar: 35
- Sodium: 120
- Fat: 17
- Saturated Fat: 10
- Unsaturated Fat: 7
- Trans Fat: 0.5
- Carbohydrates: 38
- Fiber: 2
- Protein: 4
- Cholesterol: 55