Ultimate No-Bake Brownie Refrigerator Cake: Rich, Creamy, and Ready for the Fridge
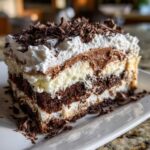
You will love this decadent, layered chocolate dessert that requires no oven time. This easy refrigerator cake uses fudgy brownies and creamy fillings to create a perfect make-ahead treat for any gathering.
- Prep Time: 25 min
- Cook Time: 0 min
- Total Time: 6 hr 25 min
- Yield: 9 servings 1x
- Category: Dessert
- Method: No-Bake/Chilling
- Cuisine: American
- Diet: Vegetarian
Ingredients
Scale
- 1 (18.3 ounce) package of your favorite fudgy brownies (baked according to package directions, cooled, and cut into 1-inch squares)
- 1 (8 ounce) package cream cheese, softened
- 1 cup powdered sugar
- 1 teaspoon vanilla extract
- 1 (8 ounce) container frozen whipped topping (thawed)
- 1 (3.9 ounce) package instant chocolate pudding mix
- 2 cups cold milk
- 1 cup cold heavy cream
- 1/4 cup powdered sugar (for whipped cream layer)
- 1 teaspoon vanilla extract (for whipped cream layer)
- 1/2 cup chocolate shavings or mini chocolate chips, for topping
Instructions
- Prepare your brownies: Bake your preferred fudgy brownies according to the package directions. Cool them completely, then cut them into uniform 1-inch squares. Set aside.
- Prepare the cream cheese layer: In a medium bowl, beat the softened cream cheese, 1 cup of powdered sugar, and 1 teaspoon of vanilla extract until the mixture is smooth and creamy. Gently fold in half of the thawed whipped topping until just combined.
- Prepare the pudding layer: In a separate bowl, whisk together the instant chocolate pudding mix and 2 cups of cold milk until the mixture thickens, about 2 minutes. Let it sit for 5 minutes.
- Prepare the final topping: In a chilled bowl, beat the heavy cream with 1/4 cup of powdered sugar and 1 teaspoon of vanilla extract until stiff peaks form. Fold in the remaining half of the thawed whipped topping gently.
- Assemble the cake: Line an 8×8 inch baking dish with plastic wrap, leaving an overhang for easy removal later. Arrange half of the cooled brownie squares in a single layer on the bottom of the dish.
- Layer the fillings: Spread the cream cheese mixture evenly over the first layer of brownies. Top the cream cheese layer with the chocolate pudding mixture. Arrange the remaining brownie squares over the pudding layer.
- Chill: Cover the dish loosely with plastic wrap and refrigerate for at least 6 hours, or preferably overnight, to allow the layers to set firmly. This chilling magic is key for a perfect icebox cake.
- Finish and serve: Before serving, carefully remove the cake from the dish using the plastic wrap overhang. Spread the prepared whipped cream topping over the top layer. Sprinkle generously with chocolate shavings. Slice and serve this quick party dessert cold.
Notes
- For a quicker assembly, you can use store-bought fudge brownies, just ensure they are fully cooled before cutting.
- This is a fantastic make-ahead chocolate dessert; it tastes even better on the second day!
- If you prefer a richer filling, substitute the instant pudding with a homemade chocolate pastry cream.
- If you are looking for gluten free brownie swaps, check the baking aisle for certified gluten free brownie mixes.
Nutrition
- Serving Size: 1 slice
- Calories: 410
- Sugar: 45
- Sodium: 280
- Fat: 22
- Saturated Fat: 12
- Unsaturated Fat: 10
- Trans Fat: 0.5
- Carbohydrates: 52
- Fiber: 2
- Protein: 5
- Cholesterol: 35
Find it online: https://kitchenuser.net/brownie-refrigerator-cake/