
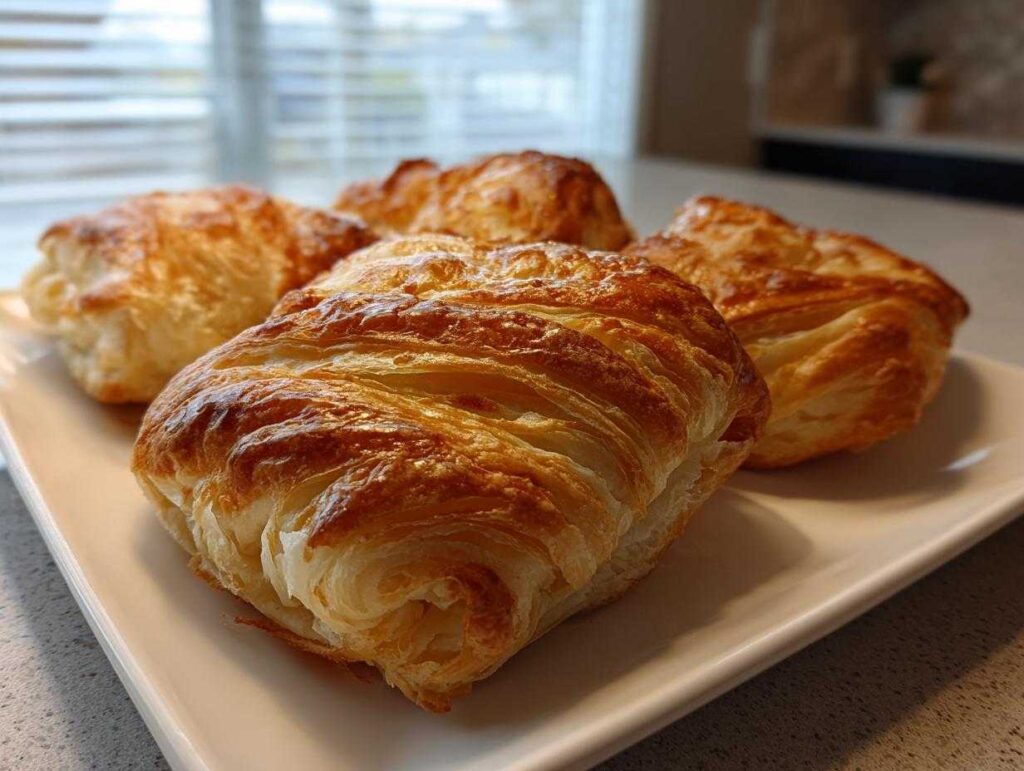
Oh, friends, can we just talk about texture for a second? I am absolutely obsessed right now with that perfect combination: a shatteringly crisp exterior that gives way to the softest, fluffiest interior. You know, that almost potato-chip-like crunch you get from really well-made things? Well, for my AAPI Heritage Month celebration this year, I dove headfirst into mastering just that feeling, and I found the holy grail: the Thousand layer mo! These aren’t your average dinner rolls, trust me. They are the ultimate flaky Chinese buns, and learning these laminated dough recipes has brought me so much joy. While I love a good, quick weeknight meal, there is nothing more satisfying than conquering a technique that looks complicated but results in pure edible magic. Get ready to be impressed!
- Why You Need to Master the Thousand Layer Mo Today
- Essential Ingredients for Authentic Thousand Layer Mo
- Step-by-Step: Crafting Your Thousand Layer Mo Dough
- The Lamination Technique: Creating Layers in Thousand Layer Mo
- Cooking Your Perfect Thousand Layer Mo
- Serving Suggestions: Beyond Plain Thousand Layer Mo
- Tips for Success with Laminated Dough Recipes
- Storage and Reheating for Crispy Thousand Layer Mo
- Frequently Asked Questions About Thousand Layer Mo
Why You Need to Master the Thousand Layer Mo Today
If you’re feeling like your weekly baking routine needs a little jolt of excitement, this is it! Conquering the technique behind these buns feels like earning a culinary badge of honor. I truly believe everyone should try mastering at least one difficult laminated dough recipe in their life, and this is the perfect way to start. Forget those dull weeknight breads; these are showstoppers!
The Ultimate Texture Economy Experience
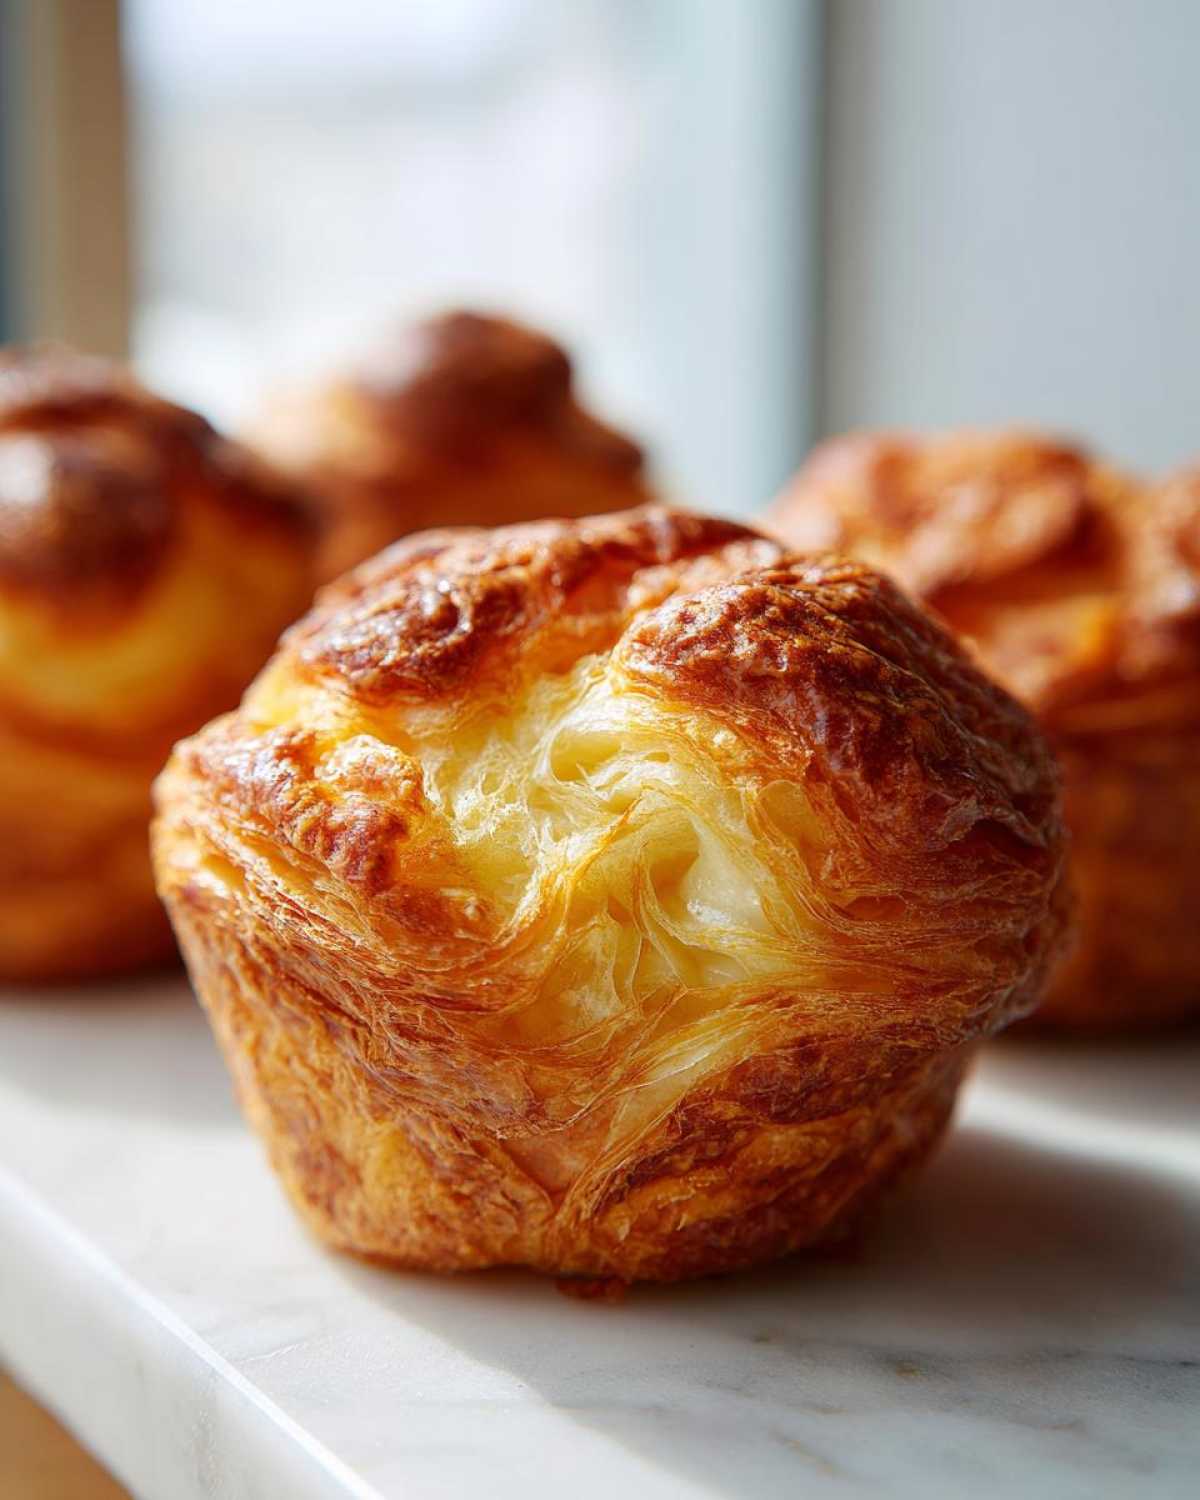
Seriously, this is what sets the food world on fire right now! You get that incredible, audible crackle when you bite in—just like a perfect potato chip, but it’s bread! Right behind that initial crunch, the inside is unbelievably tender and pillowy. It’s a textural journey, and that’s why this pan-fried bread is so addictive.
Perfect for Savory Sliders and Showcasing Skill
These aren’t just pretty; they are functional! Because they hold their shape so well, they make the most amazing little vessels for savory sliders. Think spicy grilled chicken or saucy pork filling—they soak up the flavor without falling apart. Plus, when you present these beauties at a gathering, everyone gasps. It’s homemade art, and you did it!
If you loved the technique in these, check out my guide on scoring those perfect nooks in homemade English muffins; it uses a similar principle of building a great structure!
Essential Ingredients for Authentic Thousand Layer Mo
Okay, this is where the magic starts getting real, and honestly, it all comes down to two separate components: the dough that holds everything together, and the fat layer that forces all those beautiful, **flaky Chinese buns** apart. Don’t panic when you see a few items you might not usually put into bread, especially that lard—it’s non-negotiable for the *best* melt and flavor separation! These simpler ingredients create something truly spectacular, proving you don’t need a pantry full of fancy flours to achieve great results. If you’re whipping up some fillings for these, perhaps my quick Teriyaki sauce would be an amazing complement!
Dough Components for Perfect Thousand Layer Mo
For the main dough, we are focusing on creating a supple, workable base. You’ll need:
- 2 cups all-purpose flour
- 1/2 teaspoon salt
- 3/4 cup boiling water
- 1/4 cup cold water
- 1/4 cup neutral oil for dough
That hot water step is crucial! It kind of pre-cooks some of the starch, which is a secret to getting that structure that stands up to pan-frying.
The Flavorful Fat Filling for Layer Separation
This is the glue that becomes steam and separates your layers! For this filling, you need something that stays pliable. Always make sure your fat is soft—just like room temperature butter—but for goodness sake, don’t let it melt! We want it spreadable, not pooling:
- 1/2 cup lard or shortening (Lard is the traditional winner here!)
- 1/4 cup all-purpose flour
- 1 tablespoon sesame oil
- Pinch of salt for filling
Expert tip alert: If you want to give them that classic **Chinese street food** fragrance, mix about one teaspoon of finely chopped scallions right into this fat mixture. It adds such a lovely background note!
Step-by-Step: Crafting Your Thousand Layer Mo Dough
Alright, time to get our hands dirty! Don’t let the term “laminated dough” scare you off; this initial stage is actually quite straightforward. We are using that hot water trick—similar to a simple tangzhong—to make the dough incredibly soft and cooperative later on. This step ensures we get those pillowy insides we talked about. I always put on some good music before I start because sometimes the dough needs a little positive energy, haha! Seriously though, being calm helps you handle the dough gently when we get into the rolling stages later.
Mixing the Dough Base
First up, grab a big bowl. Whisk your 2 cups of flour and that half teaspoon of salt together until they look happy. Now, the critical part: carefully pour in the boiling water! Mix it up quickly with chopsticks or a fork—it’s going to look like a hot, shaggy mess, and that’s exactly what you want. Once it cools down just enough to touch, add your cold water and your neutral oil. Keep mixing until it just comes together into a rough, clumpy thing. Don’t overthink it!
Kneading and Resting for Flaky Chinese Buns
Turn that shaggy lump out onto a lightly floured counter. Now, we knead! You need to work the dough for about 5 minutes solid until it smooths out and feels nice and elastic under your palms. It should feel soft, not tight. Once you get that smooth texture, cover it up with a bowl or plastic wrap. Let it rest on the counter for a full 30 minutes. This rest is huge, trust me! It relaxes the gluten so that when we start rolling it thin for the layers, it won’t constantly fight back and tear on us. Patience pays off huge when making these **flaky Chinese buns**!
If you’ve ever wondered how I get such perfectly structured doughs for things like my sourdough discard pancakes, it always comes down to that initial rest!
The Lamination Technique: Creating Layers in Thousand Layer Mo
Okay, deep breaths, this is the part that makes these buns famous! This is where we take that smooth, rested dough and turn it into a structural marvel. Because we are aiming for those paper-thin layers—that signature crunch that makes these **laminated dough recipes** so special—we have to treat the dough kindly during this process. If your fat filling is too hard, it’ll tear the dough; if it’s too soft, it’ll just melt in. You want a texture that’s just slightly softer than cold butter.
Assembling the Fat Layer for Thousand Layer Mo
First, divide that rested dough into 8 equal pieces. Roll each little dough ball out gently into a thin oval shape—don’t worry about a perfect circle yet. This is the moment for our special fat filling! Spread a whisper-thin, even layer of that softened lard mixture right across the surface of the oval. Now, roll that oval up super tightly, just like you’re making a jelly roll. You want those layers compressed right at the edges! Don’t skip spreading it edge to edge; that guarantees perfect separation later.
Coiling and Final Rolling of Laminated Dough Recipes
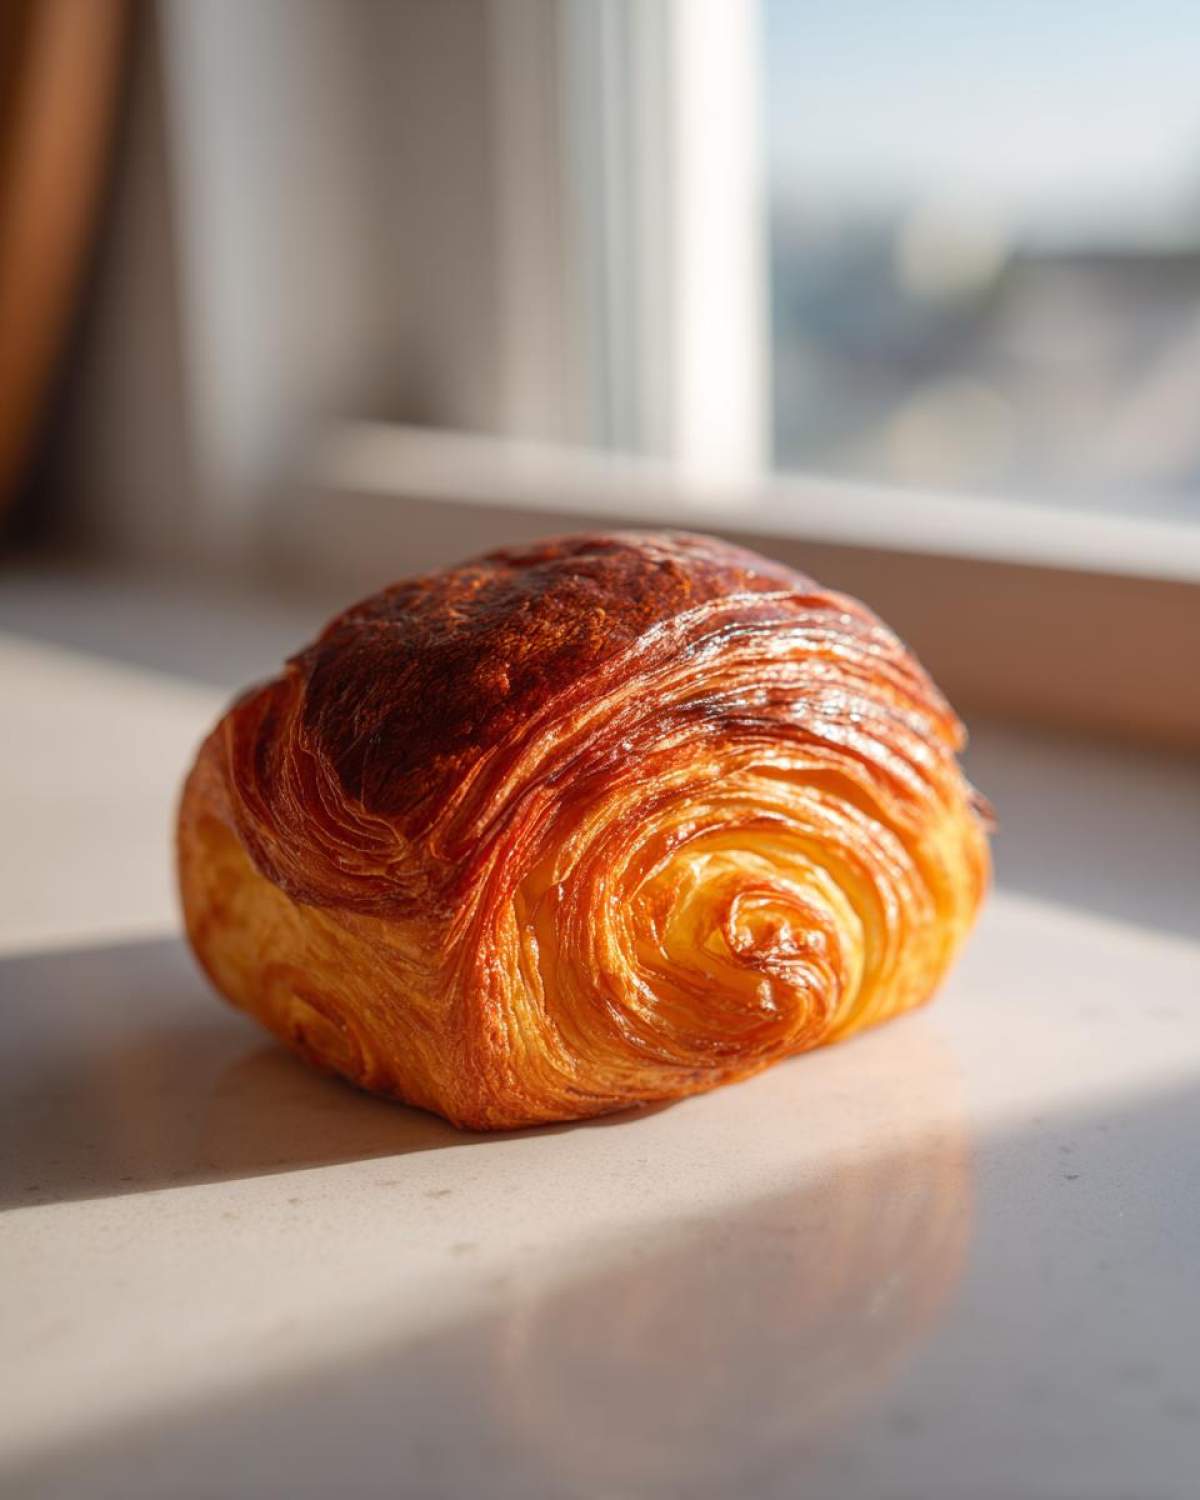
Once you have your tight cylinder, it’s time for the classic coil. Take the cylinder and gently curl it around itself into a snail shape, making sure you tuck the final end underneath so it seals. Set those snail-shaped pieces aside to rest again for 15 minutes—this second rest is just as important as the first! After resting, gently flatten the snail with the palm of your hand (don’t press too hard!). Then, very carefully, roll it out into a flat circle, maybe 6 inches wide. Go easy here, you are trying to stretch those layers, not break them! If you notice a spot tearing, just patch it gently; remember, these are handmade wonders!
If you want to see how I handle tricky fats in other baking adventures, take a peek at my tips for making crispy cheesy corn fritters; working with fat ratios is always crucial!
Cooking Your Perfect Thousand Layer Mo
This is the moment of truth, folks! We’ve done the complex rolling and resting, and now we get the reward: that incredible, audible crunch. Forget oil baths; the beauty of these **flaky Chinese buns** is that they cook dry, pushing those steam pockets apart using just the pan heat. Honestly, seeing them puff up and turn golden brown on the skillet is my favorite part of this entire **Chinese street food** adventure. It proves all that hard work creating layers was worth it!
Pan-Frying for Maximum Flakiness
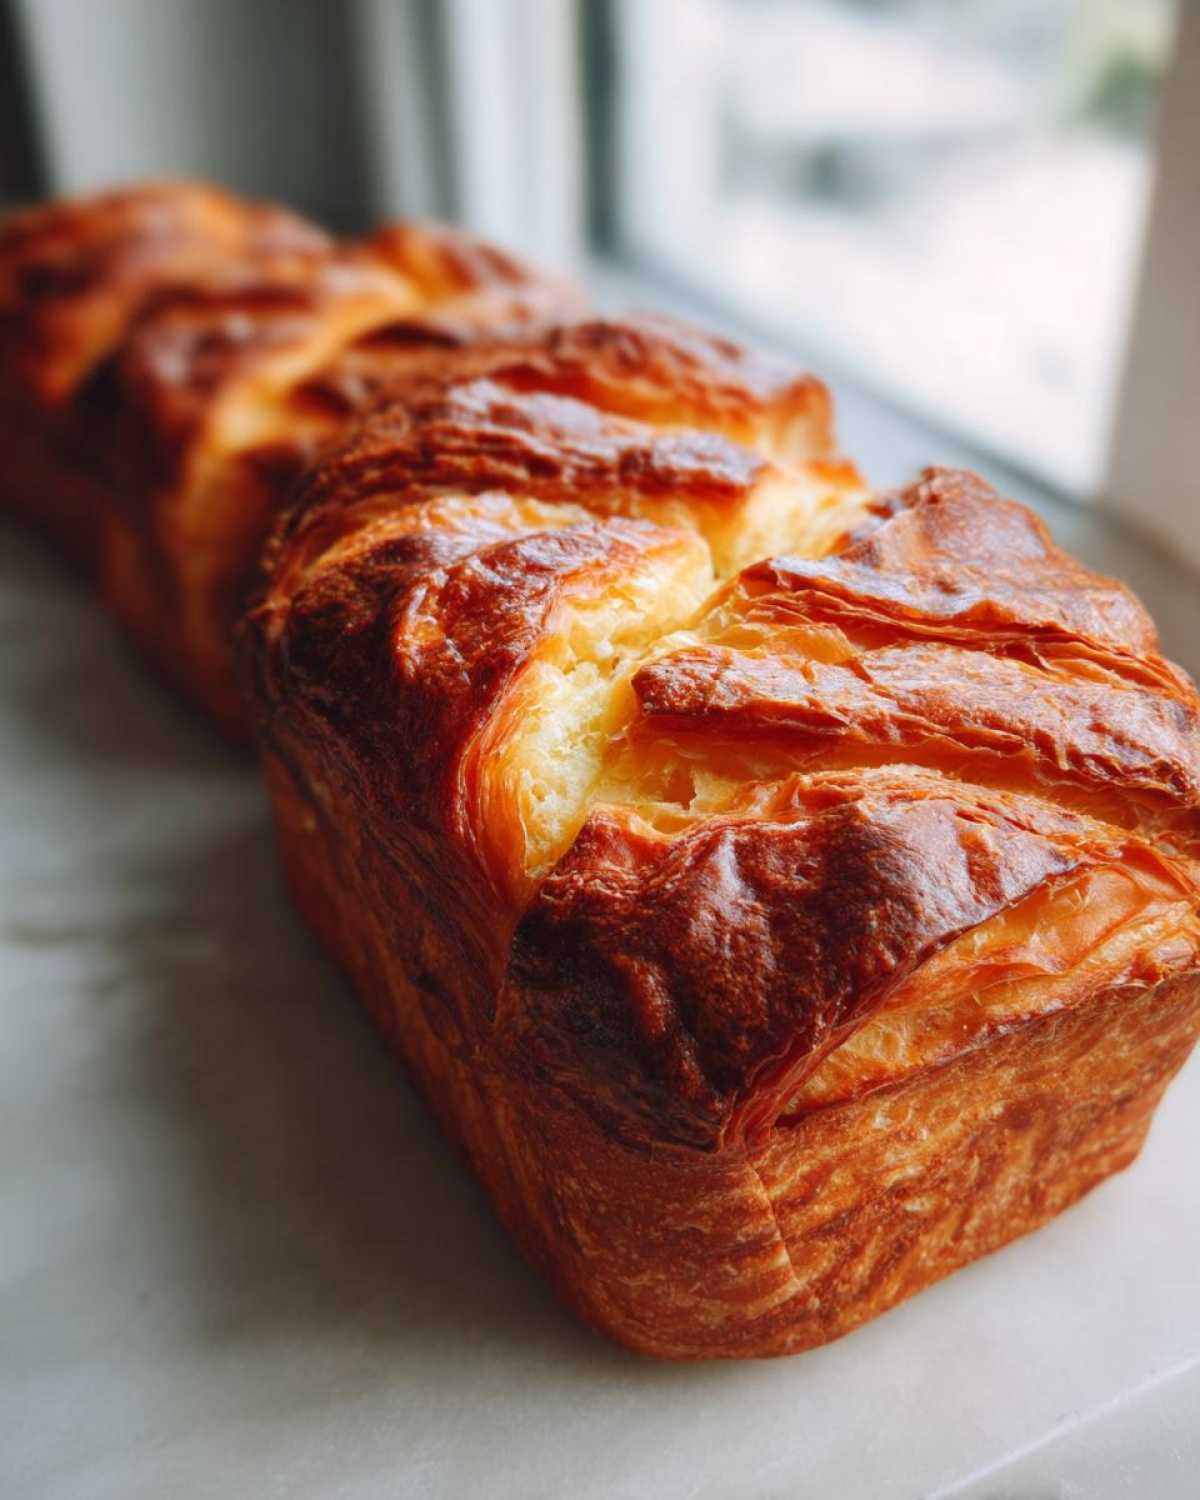
Get your best non-stick skillet—or even cast iron, if you prefer that deep browning, like I do for my skillet cornbread—and set the heat to medium. Do not add any oil to the pan! We need that direct, dry heat. Place one coiled bun right into the hot pan. Let it cook undisturbed for about 3 to 4 minutes per side. You must watch it closely; you want it to puff up beautifully and achieve that deep golden-brown color. That lovely crisp crust is the only way to guarantee that **potato-chip-like** texture we are craving!
Serving Suggestions: Beyond Plain Thousand Layer Mo
I love eating these fresh off the skillet just the way they are, but these buns truly shine when they become the vehicle for something delicious. Since we worked so hard on that flaky structure, we need to fill them! This is where they become the perfect star of your **AAPI month food** celebration.
Using Flaky Chinese Buns for Savory Sliders
Forget regular boring buns for your next gathering! You absolutely have to try these for savory sliders. Stuff them with spicy grilled chicken, some delicious pulled pork, or even a hearty vegetarian mushroom filling. If you’re looking for inspiration for slider fillings, check out my recipe for turkey cranberry sliders—just use these baked buns instead of rolls! And hey, for more visual inspiration on fun savory ideas, check out my boards on Pinterest, especially the ones dedicated to exciting AAPI month bakes!
Tips for Success with Laminated Dough Recipes
I know making any kind of dough that involves folding fat—whether it’s puff pastry or these beautiful **flaky Chinese buns**—can feel intimidating, but honestly, a few simple rules keep everything running smoothly. When I first tried this technique, I ended up with one giant, greasy flatbread instead of eight distinct layers! Oops! It all comes down to temperature control and patience during the rolling phase. If you can nail these two things, you’ll get that fantastic, light interior every time.
Temperature Control for Thousand Layer Mo
This is the big secret to success! Your fat filling—that lard or shortening mixture—must stay cool. If it gets warm and starts to melt while you’re spreading it onto the dough ovals, it’ll soak right in instead of creating defined layers. Work quickly when you are coating the ovals. If you start feeling like your hands are heating up the dough too much during the rolling and coiling, just pop the pieces back into the fridge for about 5 minutes before proceeding. A little chill keeps the fat solid enough to truly separate when it hits the hot skillet and turns to steam. It’s the same principle I use when trying to get those super-tall, flaky heights in my buttermilk biscuits!
Storage and Reheating for Crispy Thousand Layer Mo
Now, these are best eaten the second they come off the pan, obviously! But if, by some miracle, you have leftovers of these amazing **flaky Chinese buns**, don’t just toss them in a plastic bag. Store them airtight at room temperature for up to two days.
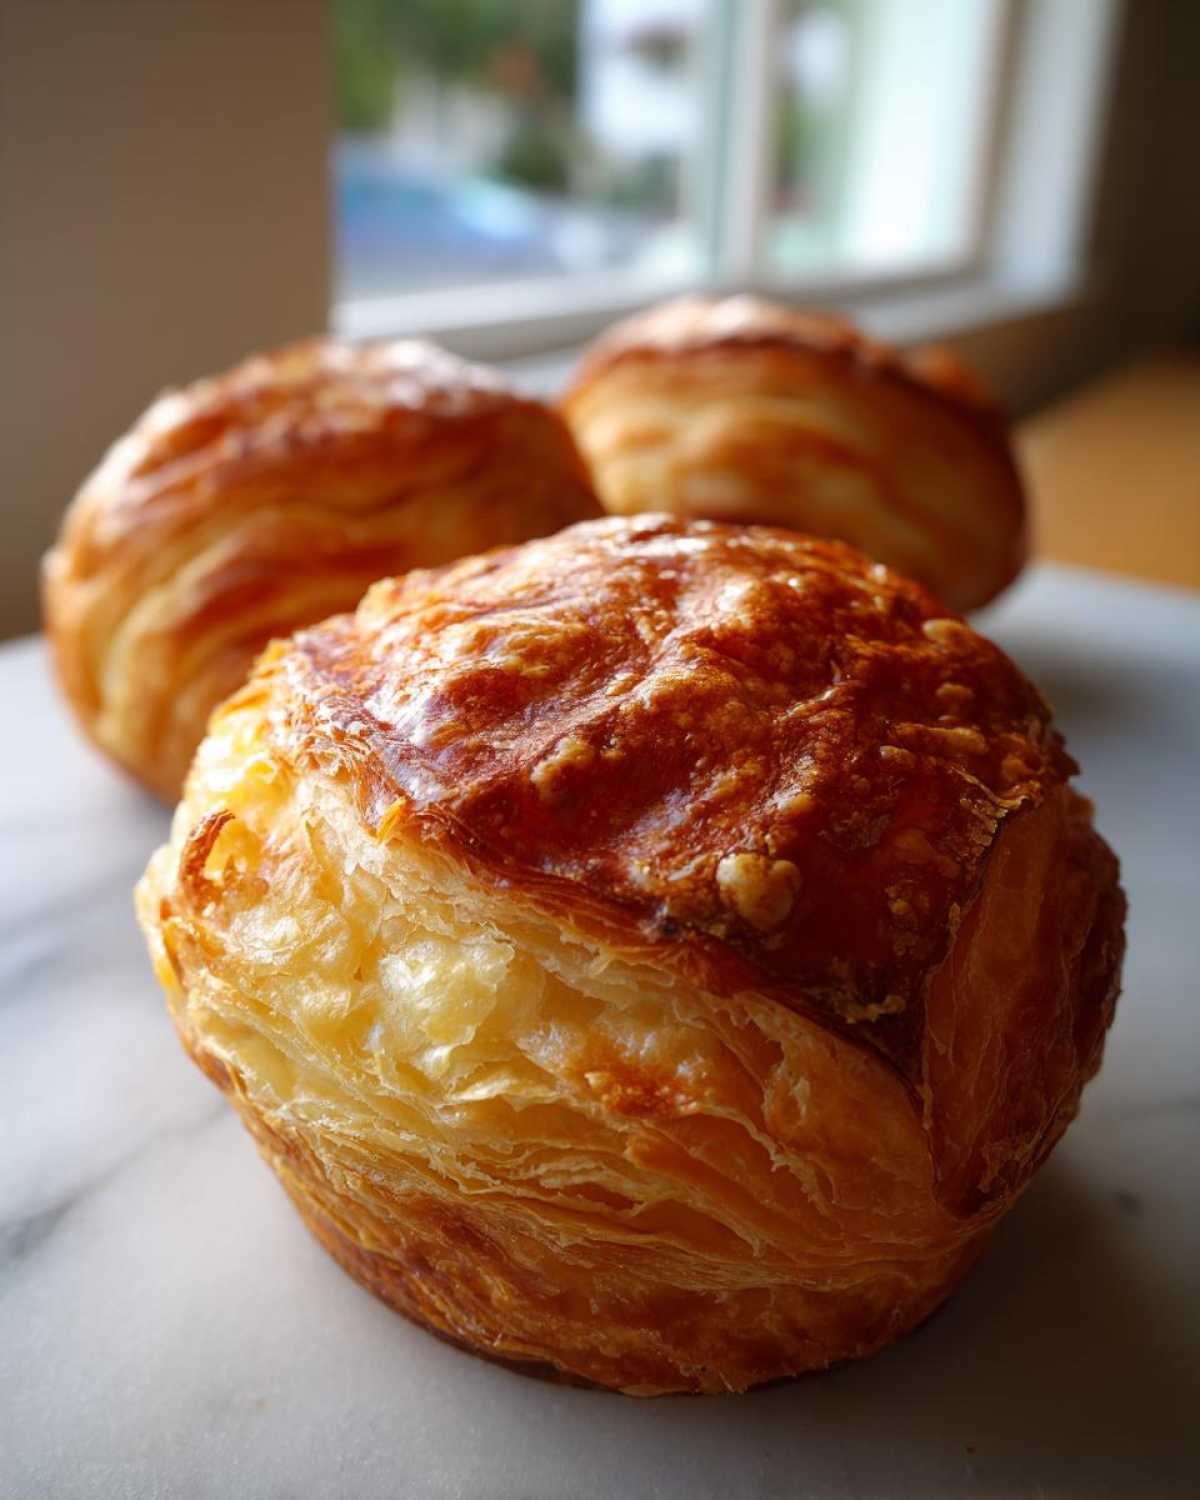
The trick to reheating and bringing back that essential crunch is avoiding the microwave—that’s a recipe for sadness! Pop them in a toaster oven or a dry skillet set over medium-low heat for a few minutes until they warm through and you hear that satisfying crisp start to return. It’s like magic! If you like to prep ahead, you can freeze them after they’ve been cooked; they reheat perfectly later. You can see similar reheating tips in my post on making easy puff pastry pinwheels!
Frequently Asked Questions About Thousand Layer Mo
I always get questions when I share a recipe that involves a slightly more advanced technique, and that’s totally okay! These **laminated dough recipes** are simple once you get the hang of it, but you’ve probably got a few burning questions for me first. I want you to succeed, so let’s tackle the common things that pop up when people try to make these incredible **flaky Chinese buns** at home. If you need a refresher on a basic dough, my guide to an easy pizza dough recipe might help build confidence!
Can I substitute the lard in this laminated dough recipe?
This is the most frequently asked question! While lard gives you that authentic, rich melt and incredible flakiness that defines the best **Chinese street food**, I know it’s not everyone’s choice. You can absolutely substitute it with solid shortening, or even very cold, cubed butter. Just know that using cold butter might require you to work a bit faster so it doesn’t smear into the dough before it gets a chance to steam and separate those layers!
How is this different from crispy scallion pancakes?
Great question! They both use lamination, but the end goal is different. Think of **crispy scallion pancakes** as a flatbread; they are usually rolled thin and pan-fried until crispy all over, often eaten as a side or appetizer. The Thousand Layer Mo is intentionally thicker—it’s a bun! We want a truly puffy exterior with that specific crunch, designed to be cut open and served as a fluffy, substantial base for savory sliders. You bake a pancake, you pan-fry a bun!
Can I bake the Thousand layer mo instead of pan-frying?
Technically, you *could* try baking them, but honestly, you’d miss the entire point of this specific recipe. The steam generated by the fat layer hitting the dry, hot skillet is what forces those thousand layers apart and creates that amazing, brittle, potato-chip-like crunch on the exterior. Baking will generally result in a softer, more bread-like exterior, not the signature crispness you are looking for in these **flaky Chinese buns**.
PrintThousand Layer Mo: Crispy Laminated Chinese Buns
Make authentic, flaky Chinese buns with a satisfying, potato-chip-like crunch. This laminated dough recipe delivers a visually impressive bread perfect for savory sliders.
- Prep Time: 45 min
- Cook Time: 20 min
- Total Time: 65 min
- Yield: 8 buns 1x
- Category: Bread
- Method: Pan-Frying
- Cuisine: Chinese
- Diet: Vegetarian
Ingredients
- 2 cups all-purpose flour
- 1/2 teaspoon salt
- 3/4 cup boiling water
- 1/4 cup cold water
- 1/4 cup neutral oil for dough
- 1/2 cup lard or shortening for filling
- 1/4 cup all-purpose flour for filling
- 1 tablespoon sesame oil
- Pinch of salt for filling
Instructions
- Mix 2 cups flour and 1/2 teaspoon salt in a bowl. Pour in boiling water and mix quickly with chopsticks until shaggy. Add cold water and mix until a rough dough forms.
- Knead the dough on a lightly floured surface for 5 minutes until smooth. Cover and let rest for 30 minutes.
- Prepare the filling: Mix lard or shortening, 1/4 cup flour, sesame oil, and a pinch of salt until smooth. This is your fat layer.
- Divide the rested dough into 8 equal pieces. Roll each piece into a thin oval shape.
- Spread a thin layer of the fat filling over each oval. Roll the oval tightly into a long cylinder, like a jelly roll.
- Coil each cylinder into a snail shape, tucking the end underneath. Cover and let rest for 15 minutes.
- Take one coiled piece and gently flatten it with your palm. Roll it out into a flat circle, about 6 inches wide, being careful not to break the layers.
- Heat a dry, non-stick skillet over medium heat. Place one bun in the skillet. Cook for 3 to 4 minutes per side until golden brown and puffed. You want that crispy exterior.
- Remove from heat. You can serve immediately or use these flaky Chinese buns for savory sliders.
Notes
- For extra flavor, add a teaspoon of finely chopped scallions to the fat filling mixture.
- If you are new to laminated dough recipes, practice rolling the first few pieces gently to avoid tearing the layers.
- These buns freeze well after cooking; reheat them in a toaster oven for the best crispness.
- Follow my Pinterest for more AAPI month food ideas.
Nutrition
- Serving Size: 1 bun
- Calories: 320
- Sugar: 0.5
- Sodium: 250
- Fat: 18
- Saturated Fat: 7
- Unsaturated Fat: 11
- Trans Fat: 0
- Carbohydrates: 35
- Fiber: 1.5
- Protein: 6
- Cholesterol: 15