
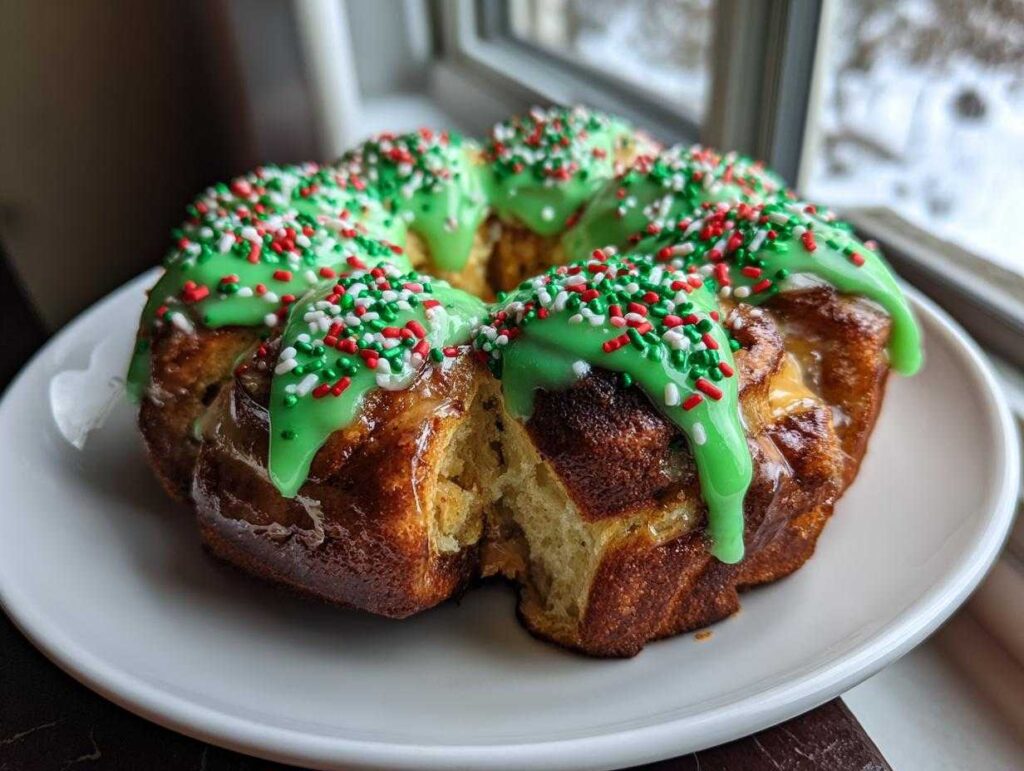
Oh, the magic of Christmas morning! The house is quiet, the lights are twinkling, and you desperately need a centerpiece breakfast that feels utterly spectacular without taking up your entire morning. That’s where my absolute favorite holiday hack comes in: the show-stopping Christmas Tree Cinnamon Rolls! My goal every year is to make the holidays special and memorable, and trust me, arranging store-bought dough into this edible Christmas tree recipe is pure genius. This pull-apart bread creation isn’t just delicious; it practically screams ‘festive cheer’ the moment you set it on the table. Get ready because your holiday baking just got a whole lot easier—and prettier!
- Why You Will Love These Christmas Tree Cinnamon Rolls
- Essential Ingredients for Festive Cinnamon Rolls
- The Shortcut: Using Store-Bought Dough for Christmas Tree Cinnamon Rolls
- Step-by-Step Shaped Cinnamon Rolls Tutorial for Your Edible Christmas Tree Recipe
- Tips for Perfect Fluffy Holiday Rolls
- Make Ahead Christmas Breakfast Options for Christmas Tree Cinnamon Rolls
- Serving Suggestions for Your Sweet Centerpiece Breakfast
- Storing and Reheating Your Decorated Cinnamon Rolls
- Frequently Asked Questions About Christmas Tree Cinnamon Rolls
Why You Will Love These Christmas Tree Cinnamon Rolls
Seriously, these rolls are a holiday lifesaver, and I keep coming back to this trick year after year because it delivers pure joy with almost zero stress. Why do I insist you make these for your next Christmas brunch recipes spread? Well, let me tell you!
- They are the ultimate sweet centerpiece breakfast that looks like you spent hours, but honestly, they’re so fast!
- It’s an incredibly easy Christmas baking project; kids absolutely adore helping with the shaping and decorating.
- Perfectly fluffy holiday rolls that are gooey and sweet—the definition of a Christmas morning treat.
- You get that wonderful pull apart bread Christmas experience, making serving easy peasy, no knives required!
- These make for beautiful, decorated cinnamon rolls that are inherently festive cinnamon rolls without any extra fuss.
If you need a quick reference for other charming holiday recipes, you should definitely check out my Christmas Sugar Cookie Bars recipe too!
Essential Ingredients for Festive Cinnamon Rolls
The beauty of this recipe, especially when relying on canned dough, is how few *actual* ingredients you need to worry about! This lets us focus our energy on the fun part—the shaping and decorating. But don’t worry, we’re going to boost that canned flavor with a few little upgrades to ensure these are the best sweet holiday breakfast rolls you’ve ever made. My grandmother always said the simple things, when done right, make all the difference!
Here’s what you’ll need gathered on your counter. If you skip my little boo-boost and use homemade dough, you can find my favorite recipe right here, but for today, we’re keeping it easy!
- One (13.2 ounce) can of refrigerated jumbo cinnamon rolls—I find the jumbo ones give you better tree coverage!
- 1/4 cup granulated sugar (for dusting)
- 1 teaspoon ground cinnamon (for dusting)
- 1/4 cup (that’s one half-stick!) unsalted butter, melted—don’t use margarine here, please!
- 1/4 cup light brown sugar, packed (this adds that deep molasses flavor we love!)
- 1/2 cup chopped pecans or walnuts (if you’re serving them plain, feel free to skip these optional additions!)
- One package vanilla icing (it comes right in the can, that’s the best part!)
- A few drops of green food coloring (for that ultimate festive look)
- Assorted holiday sprinkles—the more colorful, the better for decorating your tree!
If you’re looking for a fantastic, richer drizzle than what comes in the can, you absolutely must check out my guide for the best vanilla buttercream recipe; simply color it green and you’re golden!
The Shortcut: Using Store-Bought Dough for Christmas Tree Cinnamon Rolls
I’m going to let you in on a massive secret right now: this recipe works *incredibly* well with canned dough. Seriously, if you saw how many saves the Pillsbury version gets on Pinterest, you’d understand! I love my from-scratch recipes, I truly do, especially my Cinnamon Roll Cheesecake, but when it’s crunch time on Christmas Eve, convenience is my best friend.
This is truly an amazing option for easy Christmas baking because the dough is already proofed, rolled, and ready to go. You just need to commit to the art of the arrangement! If you use the standard-sized can, you’ll want to count out about 12 to 14 rolls. If you grab the jumbo ones—which I prefer for a really full look—you might only need 10 or 11 rolls to form your perfect tree shape. See? Minimal measuring, maximum holiday payoff!
The dough separates nicely, and giving each piece a little extra brush of butter and cinnamon-sugar coating—as we’ll discuss in the steps below—really elevates that store-bought flavor. It’s the key step that makes these Christmas Tree Cinnamon Rolls taste gourmet!
Step-by-Step Shaped Cinnamon Rolls Tutorial for Your Edible Christmas Tree Recipe
Okay, buckle up, because this is where the magic truly happens! If you’ve ever felt intimidated by shaping bread into something totally adorable, I want you to take a deep breath. This shaping part for our Christmas Tree Cinnamon Rolls is easier than you think, and I promise, it’s a fun family baking activity. I remember the first year I tried this—I was so nervous about messing up the roll spacing, but it turned out fantastic because they puff up and embrace each other in the oven. Remember, we want space for that gorgeous pull apart bread Christmas effect!
Preparing the Dough and Cinnamon Sugar Coating
First things first, get that oven preheated according to your specific can directions—don’t just guess! While it warms up, grab your baking sheet and grease it lightly, or yes, line it with parchment paper, which is my usual move to 100% guarantee easy cleanup later. Next, separate all your cinnamon rolls. In a shallow bowl, whisk together that 1/4 cup of granulated sugar and the teaspoon of cinnamon. Take your melted butter, brush just the tops of those separated rolls lightly, and then give them a good toss in the cinnamon-sugar mix. They should look beautifully coated!
Arranging the Christmas Tree Cinnamon Rolls Shape
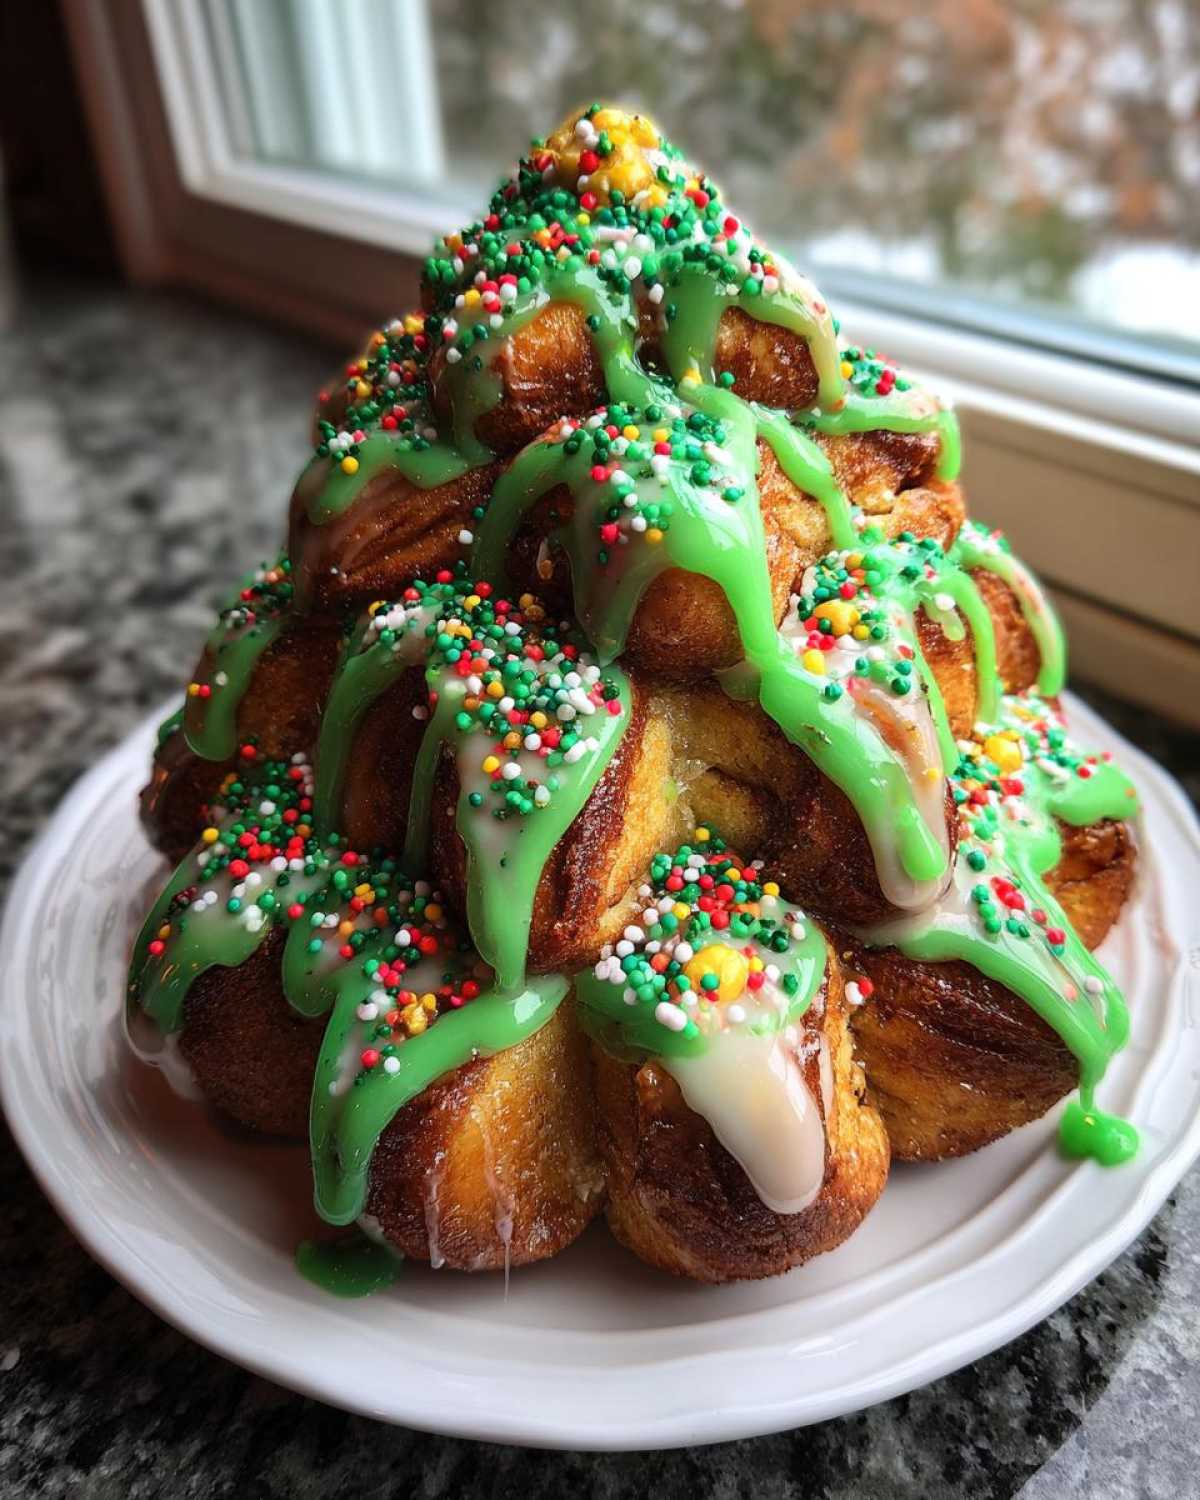
Now for the construction phase! On your prepared sheet, start with the very tip of the tree: place just one roll right in the center top. Then, you start building down. I usually go for four or five rows total. The second row needs two rolls, the third needs three, and so on, until you have a nice, wide triangle base. Make sure you leave just a little bit of space between each one. When they bake, they spread out, and that little gap disappears, leaving you with soft, perfectly connected branches. Don’t forget to check out what others are doing for inspiration; I always bookmark new ideas over on our Pinterest board Recipes Vault!
Baking and Preparing the Festive Green Icing
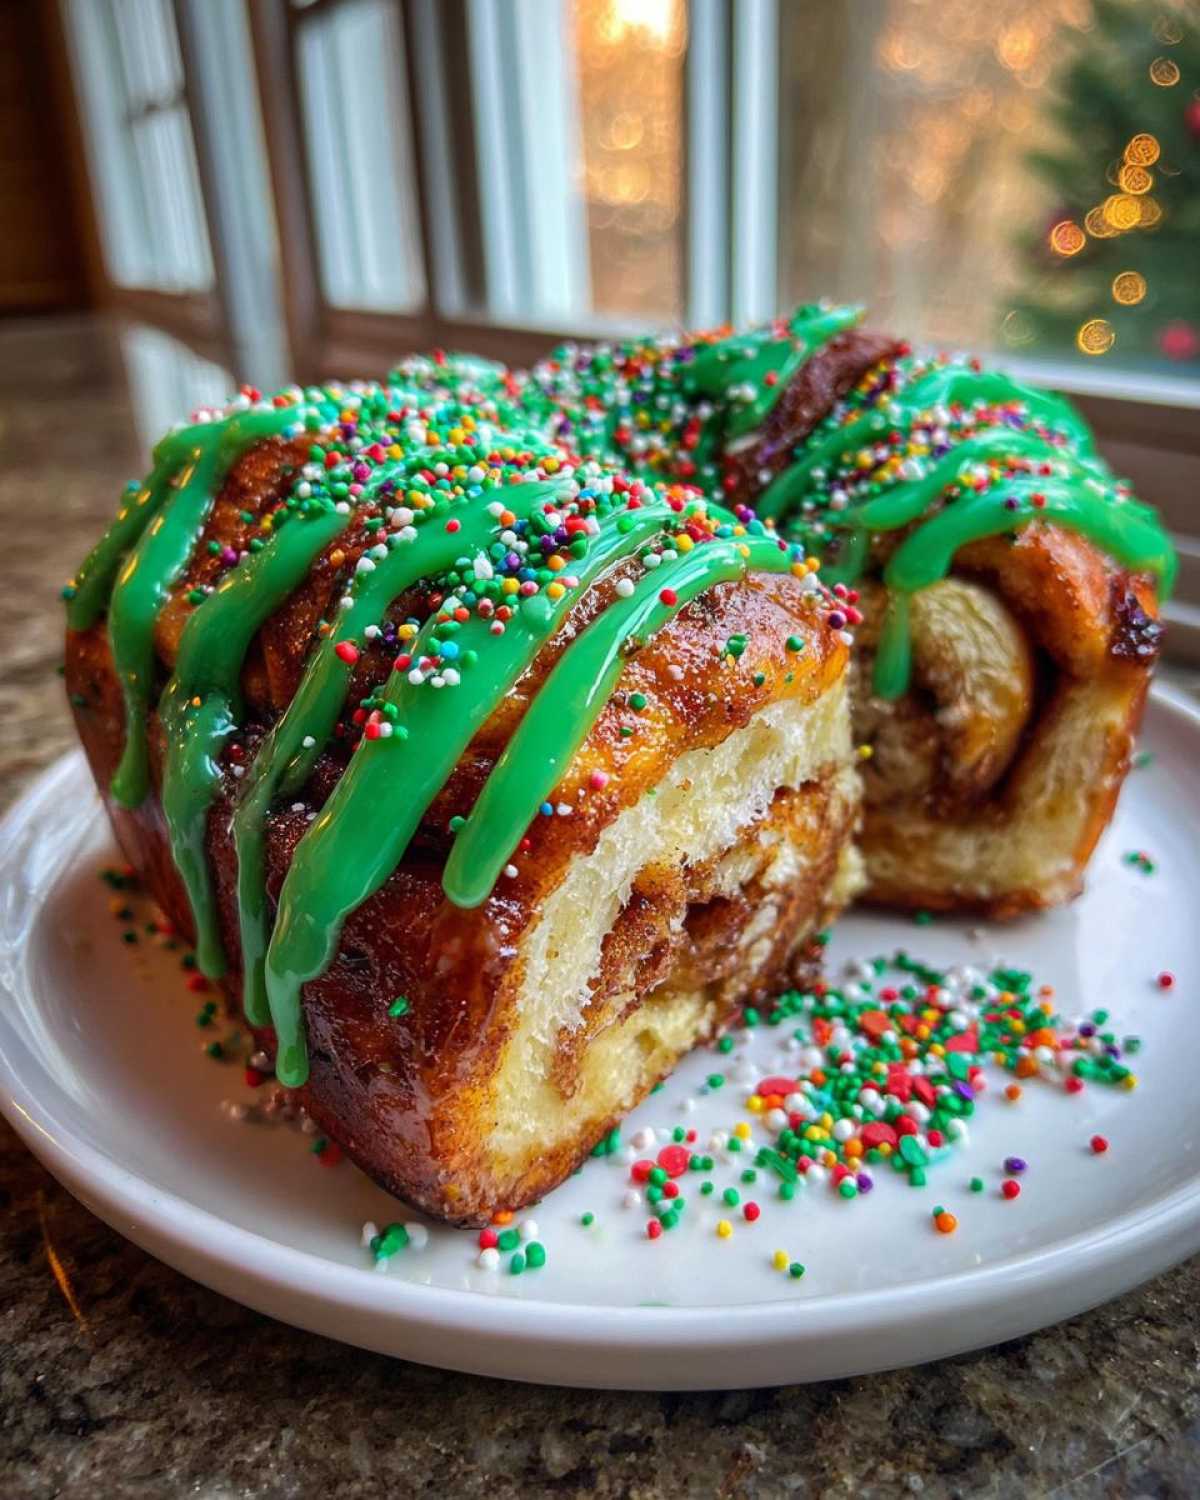
Pop that tree into the oven and bake it according to the can instructions, or until everything is beautifully golden brown. While it’s getting cozy in there, prepare your vibrant icing! Empty that whole packet of vanilla icing into a bowl. I add just a tiny splash of milk or water—literally a teaspoon at a time—until it becomes smooth enough to drizzle nicely. Then, add a few drops of green food coloring. Start small! You want a cheerful holiday green, not Swamp Thing green, right? Once the rolls pull out, let them settle for about five minutes before you start drizzling that amazing green “garland” over the top. Finish it off right away with those assorted sprinkles before the icing sets. If you want a deeper flavor bomb, try substituting this glaze with the recipe from my apple cinnamon oatmeal boost!
Tips for Perfect Fluffy Holiday Rolls
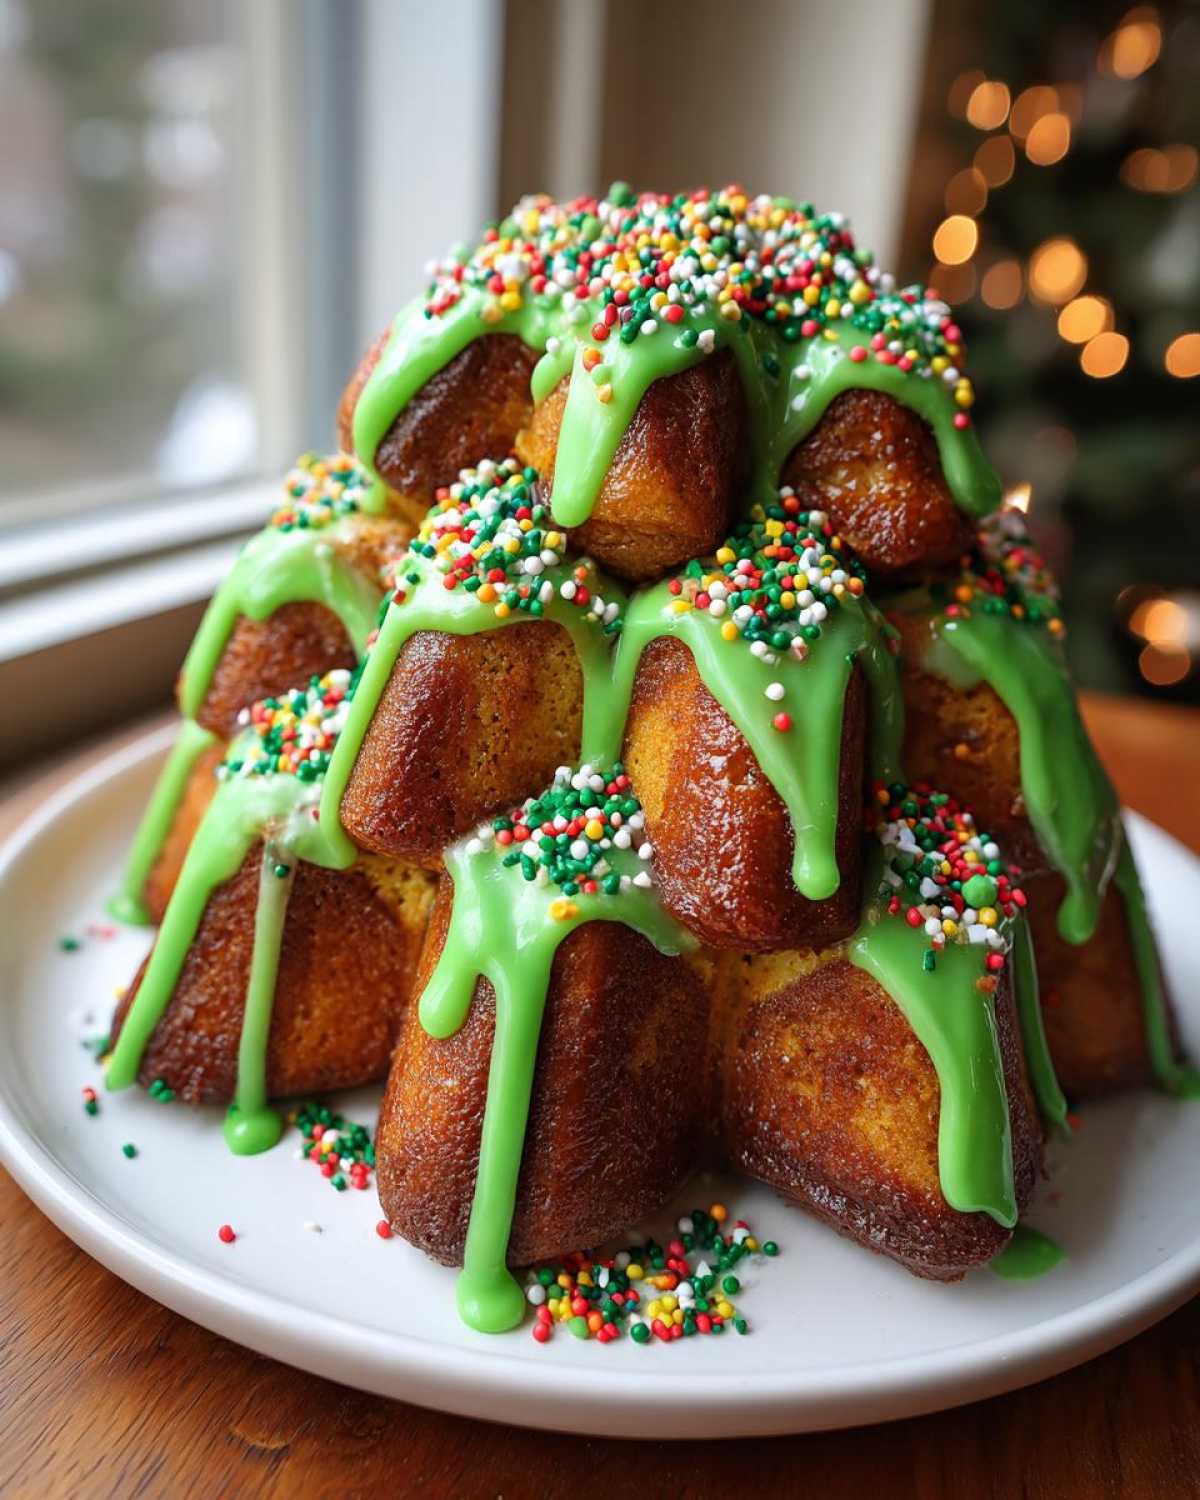
Even though we are using store-bought dough, we want these Christmas Tree Cinnamon Rolls to be as soft, gooey, and amazing as if we spent all day rolling them out ourselves! Over the years, I’ve picked up a few tricks that guarantee the fluffiest texture imaginable for our festive cinnamon rolls. I wish someone had told me these things when I first started trying to make gorgeous holiday breakfast spreads!
Here are my top three secrets for roll perfection:
- Don’t Overbake By Even One Minute: This is a universal rule, but it’s crucial for keeping the rolls soft. As soon as the edges look golden brown, pull them out! Remember, they keep cooking a little bit on the hot pan after you remove them. If you like a little extra gooey-ness, stick to the lower end of the time range listed on the can.
- The Warm Brush-Off: Right after you pull the tree out of the oven, before you apply any of that gorgeous green icing, brush the tops lightly with any remaining melted butter you might have leftover from the initial coating. This traps steam and moisture right in the pastry, ensuring they stay soft and don’t develop that slightly crusty top. It’s a small step, but wow, does it make a difference in softness!
- Use the Icing as a Softening Agent: Apply all the icing—both the green layer and the star decoration—while the rolls are still very warm. The warmth slightly melts the frosting base, which then soaks into the top layer of the rolls. This adds moisture back into the surface, keeping the entire sweet holiday breakfast experience wonderfully tender. For more guidance on making rolls super soft, check out my tips in the Best Fluffy Sweet Potato Rolls recipe!
Make Ahead Christmas Breakfast Options for Christmas Tree Cinnamon Rolls
Oh, Christmas morning! I adore the quiet wonder of that day, but let’s be honest, standing over the oven while everyone waits for presents is *not* my favorite memory. That’s why prepping this amazing centerpiece the night before is my secret weapon for a truly relaxed holiday. It turns this visually stunning Christmas Tree Cinnamon Rolls creation into a realistic, stress-free make ahead Christmas breakfast!
You won’t believe how simple this overnight trick is. It involves following all the shaping steps we just covered, but stopping right before it hits the heat. My strategy is always to manage the messy parts during the calmer evening hours.
So, here is exactly how you pull off this little miracle—it’s almost as easy as making my famous Hawaiian Roll Breakfast Casserole!
- Assemble the entire tree shape on your baking sheet exactly as you would for immediate baking—butter them, sugar them, place them perfectly in that triangle formation.
- Once assembled, do not put it in the oven! You need to cover the entire pan very tightly with plastic wrap. Make sure the wrap isn’t touching the rolls too much; you can tent it loosely over the top.
- Now, gently move the whole setup into the refrigerator to chill overnight. The cold temperature puts those yeast rolls into a nice, slow nap.
- When Christmas morning arrives, pull the tray out of the fridge. Here’s the crucial part: You must add about 5 to 10 extra minutes to the regular baking time listed on the can. Since the dough is cold, it needs that extra warmth to get fully cooked through and achieve that perfect fluffiness.
Once they are beautifully baked, pull them out, let them cool for five minutes, and then go ahead with the green icing and sprinkles! You’ve just saved yourself 20 minutes of active cooking time on the most special morning of the year. It’s hands-down the best hack for enjoying your festive cinnamon rolls.
Serving Suggestions for Your Sweet Centerpiece Breakfast
Now that you’ve created this gorgeous edible Christmas tree, you can’t just serve it with a glass of water, right? To really complete that amazing spread for your Christmas brunch recipes, you need a few perfect pairings. Since these rolls are sweet, rich, and packed with cinnamon goodness, balancing them out with something fresh or warm is the way to go.
For warming drinks—because this is definitely a winter morning pastry vibe—you absolutely have to make a big batch of hot chocolate. Forget the little packets; you need the real deal! You can find my favorite, super easy recipe for best crockpot hot chocolate recipe; set it on low, and it stays perfectly warm for everyone to sip on while they tear off their pieces of the tree.
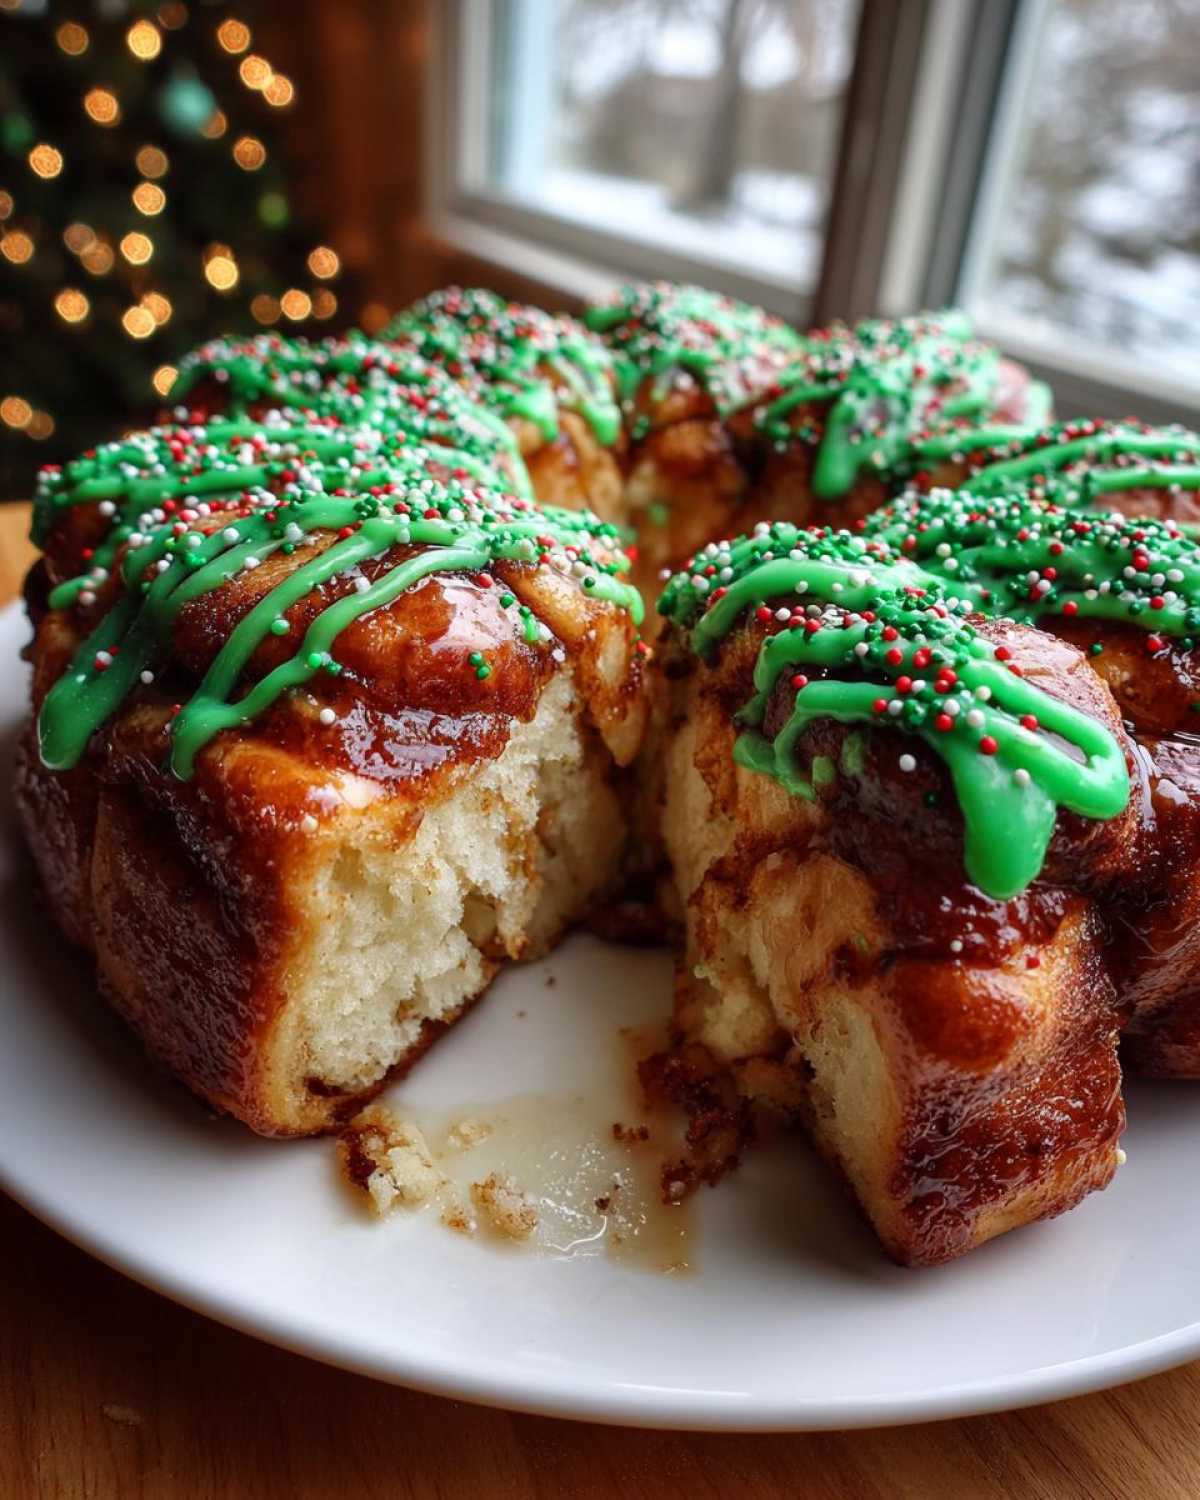
If you want something to cut through the sweetness, you need fruit! I always keep things simple: a big bowl of sliced clementines, maybe some vibrant green grapes, and perhaps some raspberries if they look good at the store. The tartness is the perfect counterpoint to the buttery dough and sweet icing. Trust me, having a fresh, cold element next to this warm centerpiece makes the whole breakfast feel balanced and totally complete!
Storing and Reheating Your Decorated Cinnamon Rolls
Okay, the tree was a smashing success! Everyone loved tearing off their warm, gooey pieces of Christmas Tree Cinnamon Rolls. But what happens the day after Christmas when you just want one more roll without any work? Don’t toss those leftovers! We want to keep these babies soft and tender, not turn them into hard holiday hockey pucks. I deal with leftovers all the time, whether it’s these rolls or my amazing Apple Bundt Cake, keeping things fresh is just part of being a good home cook!
For any rolls that didn’t get devoured, storage is simple. If you plan on eating them within a day or so, just keep them right on the counter at room temperature. Make sure you cover them really well! Use plastic wrap or pop them into a sealed airtight container. If they are still sitting on the baking sheet, you need to make sure you wrap the whole thing; covering them snugly prevents them from drying out overnight. That leftover glaze actually helps seal in moisture, which is a happy accident!
If you have a handful left over that you know won’t get eaten for three or four days, tuck that airtight container into the fridge. They’ll last longer, but you absolutely *must* reheat them before eating—cold cinnamon rolls are just sad, you know?
When it comes to reheating to get that perfect soft texture back, I have two favorite ways:
- The Oven Reheat (Best for multiple rolls): This is my preferred method for bringing back that *just baked* warmth and softness. Place the rolls on an oven-safe plate or back on the parchment paper. Heat them in a low oven—think 300°F (150°C)—for just about 5 to 8 minutes. This warms them all the way through without making the edges crisp right away.
- The Microwave Zap (Quickest fix): If you just want that one perfect roll, the microwave is your friend, but you have to be careful! Microwave them on 50% power for about 15 to 20 seconds. Going easy on the power prevents the dough from becoming rubbery too fast. You can even place a tiny damp paper towel nearby in the microwave as it heats; that little bit of steam works wonders to reintroduce moisture into your leftover sweet holiday breakfast treat!
Frequently Asked Questions About Christmas Tree Cinnamon Rolls
I know you might have a few last-minute questions before you jump into assembling your masterpiece! Organizing these Christmas Tree Cinnamon Rolls is so simple, but sometimes the little details trip us up. Don’t worry, I’ve answered the top things people ask me when they’re trying this for the first time. If you have other queries, feel free to drop them in the comments! We help each other out in the kitchen here, and you can also see lots of visual guides on our Pinterest account!
Can I use my own homemade cinnamon roll dough instead of canned dough?
Absolutely! This recipe is fantastic with homemade dough too. In fact, if you use a good, sturdy, slightly less rich recipe, they hold the shape even better. My recommendation for a homemade version would be to use a dough that yields about 12-14 regular-sized rolls. The only adjustment you might need is in the proofing time before baking, as homemade dough usually needs a bit more rise time sitting out on the tray than the canned version requires. Treat the shaping steps exactly as written in the tutorial!
How do I make the star shape for the very top of the tree?
That little star on top is what really sells the whole edible Christmas tree recipe look! When you separate your rolls, set aside one piece for the very top peak. Before you place it on the baking sheet (Step 4 of the tutorial), simply take that single roll and pinch the edges inward slightly, almost like gathering it in your hand, until it forms a distinct, slightly uneven star or triangular point. It looks a bit rough when you start, but it bakes up perfectly! It’s the easiest part of the whole shaped cinnamon rolls tutorial.
Can I freeze these rolls after they are baked and decorated?
This is a great question if you’re planning ahead for a big holiday weekend! You *can* freeze them after they are baked and iced, but I highly suggest freezing them *before* baking, as mentioned in the prep section. If you freeze them after they’ve been baked and iced, the texture doesn’t always rebound well, especially the icing and the outer edges of the dough. If you must freeze them baked, make sure they are fully cooled, store them in an airtight container, and reheat them gently in the oven (300°F) until just warm to bring back some of that softness.
What if I don’t have brown sugar for the coating? Can I use all white sugar?
You can, but you’re going to lose some of that deep, caramelized flavor that makes these rolls truly special! I use dark brown sugar in the coating because it blends so well with the cinnamon and gives a richer color and taste. If you must substitute, use only granulated sugar, but I’d suggest adding an extra 1/4 teaspoon of cinnamon to compensate for the lost richness. For an amazing from-scratch dough idea using different ingredients, take a peek at my easy pizza dough recipe—it shows you how to make yeasted dough with minimal fuss!
PrintChristmas Tree Cinnamon Rolls: Festive Pull-Apart Breakfast Centerpiece
Create a show-stopping holiday breakfast with these adorable Christmas Tree Cinnamon Rolls. This recipe shows you how to shape standard rolls into a festive tree shape, perfect for your Christmas morning treat or holiday brunch.
- Prep Time: 15 min
- Cook Time: 20 min
- Total Time: 35 min
- Yield: 10 servings 1x
- Category: Breakfast
- Method: Baking
- Cuisine: American
- Diet: Vegetarian
Ingredients
- 1 (13.2 ounce) can refrigerated jumbo cinnamon rolls (or homemade dough equivalent)
- 1/4 cup granulated sugar
- 1 teaspoon ground cinnamon
- 1/4 cup (1/2 stick) unsalted butter, melted
- 1/4 cup light brown sugar, packed
- 1/2 cup chopped pecans or walnuts (optional)
- 1 package vanilla icing (from the can)
- Green food coloring
- Assorted holiday sprinkles
Instructions
- Preheat your oven according to the directions on the cinnamon roll can. Lightly grease a large baking sheet or line it with parchment paper.
- Separate the cinnamon rolls. If using standard size, you will need about 12-14 rolls. If using jumbo rolls, you may need fewer.
- In a small bowl, mix the 1/4 cup granulated sugar and 1 teaspoon cinnamon. Brush the tops of each separated roll lightly with some of the melted butter, then toss them in the cinnamon-sugar mixture.
- Arrange the rolls on the prepared baking sheet to form a tree shape. Place one roll in the center top for the tree top. Arrange the remaining rolls in rows below it, gradually widening each row to create a triangle or tree shape. Leave a small space between each roll so they can expand and touch while baking (this creates the pull apart bread Christmas effect).
- Bake for the time specified on the can, or until the rolls are golden brown and cooked through.
- While the rolls bake, prepare the icing. In a small bowl, mix the entire contents of the icing packet with 1-2 teaspoons of milk or water until smooth. Add a few drops of green food coloring until you reach a festive green shade.
- Once the rolls are out of the oven, let them cool on the baking sheet for 5 minutes.
- Drizzle the green icing generously over the warm rolls in a pattern that resembles garland or snow.
- Immediately sprinkle with holiday sprinkles and chopped nuts (if using).
- Serve warm as a sweet centerpiece breakfast. This recipe is great for a fun family baking activity.
Notes
- For a make ahead Christmas breakfast option, assemble the tree shape on the baking sheet the night before, cover tightly, and refrigerate. Add 5-10 minutes to the baking time if baking directly from the refrigerator.
- If you want extra gooey holiday rolls, brush the baked rolls lightly with the remaining melted butter before icing.
- If you prefer a shortcut, this shape works perfectly with store-bought dough, making it an easy Christmas baking win.
Nutrition
- Serving Size: 1 roll section
- Calories: 350
- Sugar: 35g
- Sodium: 450mg
- Fat: 18g
- Saturated Fat: 5g
- Unsaturated Fat: 13g
- Trans Fat: 0g
- Carbohydrates: 45g
- Fiber: 1g
- Protein: 5g
- Cholesterol: 15mg