
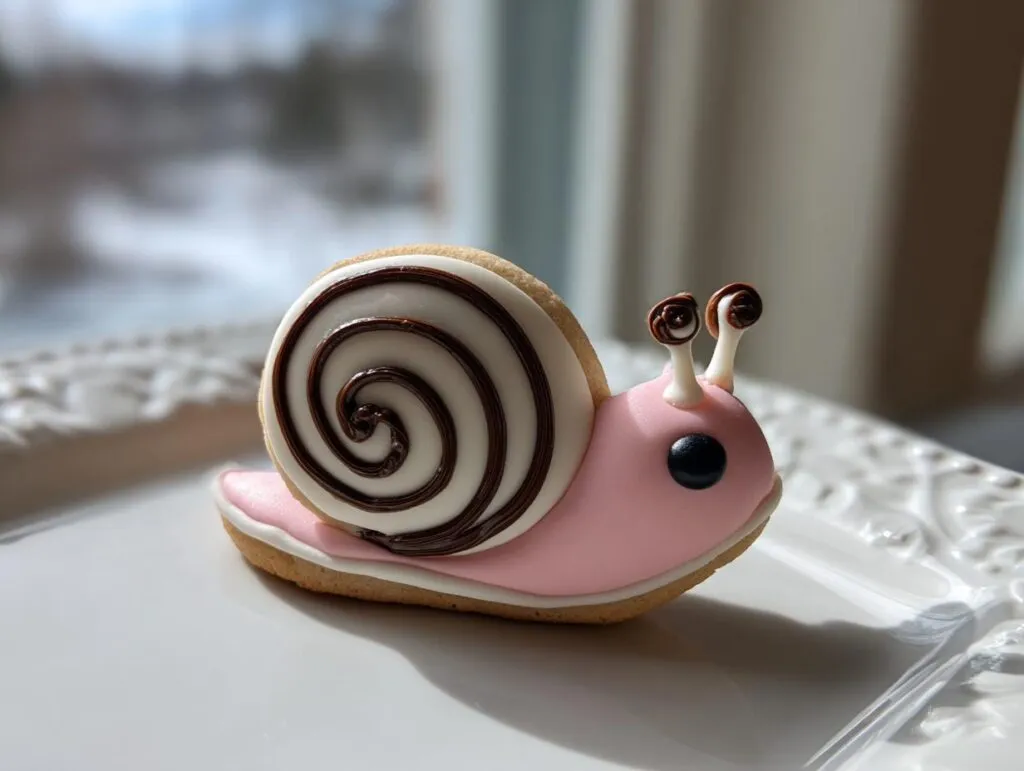
Oh my goodness, I am so excited you stopped by today! If you’re anything like me, sometimes you just need a project that makes you giggle while you bake. We are diving headfirst into the whimsical side of the kitchen to tackle something truly special: creating adorable, edible sugar snails! Forget fancy molds; I’m showing you how to use simple cookie dough and a basic royal icing recipe to make these cute animal cookies come to life. I absolutely adore making detailed, cute animal cookies—they just bring such joy to any table! I’m Sophia Collins, and drawing inspiration from my heritage, I promise that even if you’ve never piped an eye onto a creature before, you can absolutely master these sweet garden treats tutorial. Trust me, the base cookie dough is one of my tried-and-true recipes for cookies that hold their shape perfectly, which you can see here! We won’t involve any temperamental buttercream, so no need to worry about finding that recipe today.
- Why You Will Love Making These Sugar Snails
- Essential Ingredients for Perfect Sugar Snails
- Gathering Your Tools for Detailed Sugar Snails
- Step-by-Step Instructions to Make Your Sugar Snails
- Expert Tips for Perfect Sugar Snails Decorations
- Ingredient Notes and Substitutions for Your Sugar Snails
- Storage and Keeping Your Sweet Garden Treats Fresh
- Frequently Asked Questions About Making Sugar Snails
- Share Your Whimsical Creations
Why You Will Love Making These Sugar Snails
Honestly, these **sugar snails** aren’t just snacks; they are miniature works of art that happen to taste amazing! I think they are the perfect addition to any celebration. Here is why this recipe is going into your permanent rotation:
- They are surprisingly straightforward! We are using cookie dough that doesn’t spread, so you get clean shapes every single time.
- Perfect for little helpers! These are fantastic **easy candy crafts for kids** because the decorating is playful, not fussy.
- Unbeatable visual impact! They scream **whimsical dessert ideas** whether they are topping cupcakes or sitting on a platter.
- Total crowd-pleaser. Everyone stops to look at them, and they disappear fast!
Essential Ingredients for Perfect Sugar Snails
To make sure our little creatures stand tall and proud—just like a great cookie should—we need to get our ingredients right. Don’t skip the chilling step for the dough; that’s what keeps those snail bodies from looking like puddles! For the cookie base itself, you’ll need those classic things: butter, granulated sugar, one egg, and vanilla. Then we mix in the flour, baking powder, and salt. Make sure your butter is softened but not melty!
Now, for the fun part, the details that make these **sugar snails** pop! We need powdered sugar, milk, and a touch of clear vanilla extract for that stiff royal icing. Remember, for the best, brightest colors on your **fondant snail decorations** or icing—and trust me, you want bright colors for a garden theme—you really need to use food coloring gels. Liquid dyes can water down that precious icing texture. I always keep brown, pink, and black gels on hand for this specific project. If you were going for a lighter topping, you would need a full buttercream recipe, but for these guys, royal icing is king!
Gathering Your Tools for Detailed Sugar Snails
Okay, gather ‘round, because setting up your station is half the battle when you are making detailed confections. You don’t need a whole professional setup, but having the right tools makes creating these **sugar snails** so much less frustrating. First and foremost are your mixing bowls. You need a sturdy one for creaming that butter and sugar for the cookie dough.
Next up, the cookie cutters! Since we are cutting two distinct pieces—the body and the shell—you have a couple of options. You can use a tiny, small round cutter for the body and a small spiral cutter or even a teardrop shape cutter for the shell. If you don’t have cutters that look exactly right, don’t stress! I often freehand the shapes with a sharp knife after rolling out the dough. It just takes a little practice to get those clean edges we talked about.
For the decorating phase, you absolutely must have parchment paper to line those baking sheets. Trust me; nothing ruins a day faster than cookies sticking! When it comes time for the decoration, grab some small piping bags and the tiniest tips you own—maybe a size 1 or 2. This precision is what makes them look like real **royal icing garden creatures** rather than blobs! For tips on keeping those beautiful decorated Easter cookies perfect, check out my guide here. Having the right tools ensures your **cookie decorating snail ideas** turn into reality!
Step-by-Step Instructions to Make Your Sugar Snails
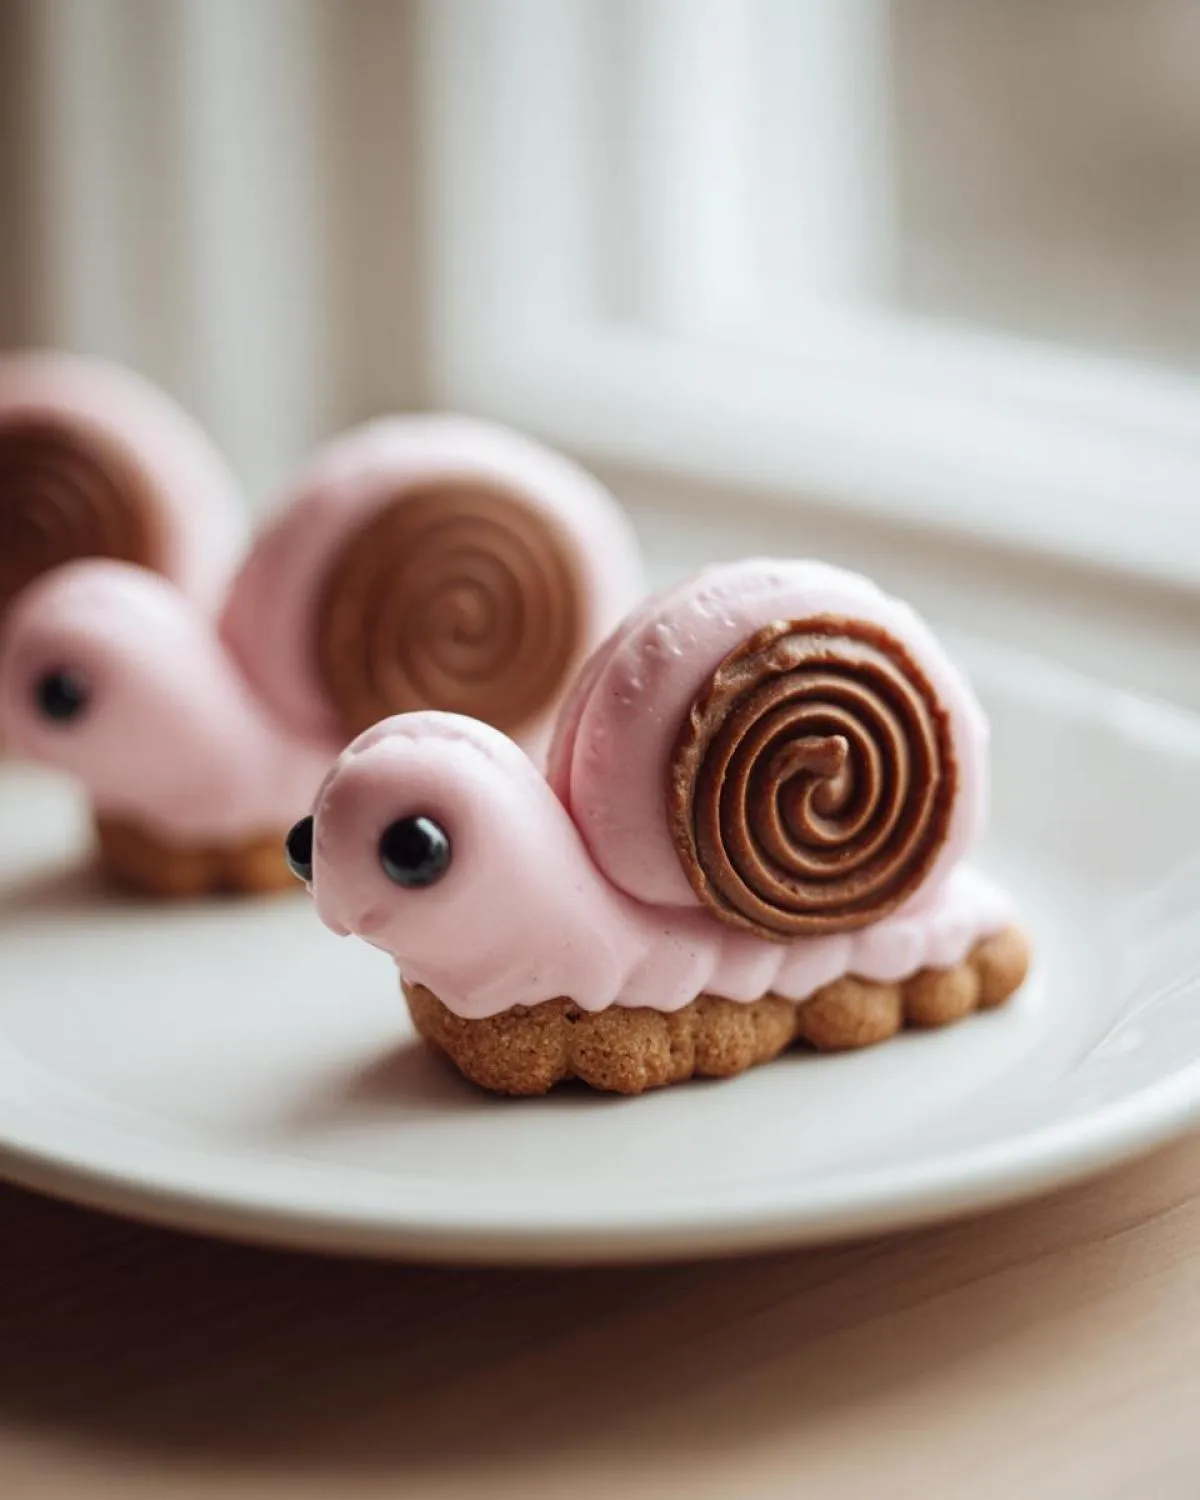
Alright, pop on an apron because we are finally making these adorable **sugar snails**! You’ll want to follow these steps closely, especially the mixing part, because that’s what keeps our cookies from spreading. Don’t worry if this seems like a lot; we are breaking it down!
Preparing the Cookie Dough Base for Sugar Snails
First things first: get that mixer going. Cream together your softened butter and granulated sugar until it looks light and fluffy—you know, pale yellow and airy. Beat in the egg and vanilla just until they vanish into the mix. In a separate bowl, give your flour, baking powder, and salt a quick whisk together. Now, here’s where we listen to that classic advice: gradually add the dry stuff to the wet stuff, mixing only on low speed until *just* combined. Seriously, stop mixing when you see the last streaks of flour disappear. Overmixing develops gluten and makes tough cookies, and we want tender **edible snail cookies**! If you want more detail on this base recipe, check out my guide on perfect sugar cookies that hold their shape.
Once the dough forms, divide it right in half. Wrap each piece up tight and send it to the fridge for at least 30 minutes. Chilling is non-negotiable for shapes that hold!
Cutting and Baking the Snail Shapes
Time to heat things up! Preheat your oven to 350°F (175°C) and line those baking sheets with parchment paper—you absolutely do not want these sticking. Take out one half of the dough. Roll it out nice and even, about 1/4 inch thick. Now for the magic: cut out your snail bodies (the pink part) and your shells (the brown part). Remember, you can use small corresponding cutters, or just freehand a rounded oval for the body and a nice little swirl for the shell. Place them gently on the parchment. Bake them for just 8 to 10 minutes. You’re looking for edges that are just barely golden. Let them cool on the pan for five full minutes—this strengthens them up—before moving them to a wire rack to cool completely.
Mastering the Royal Icing for Cute Animal Cookies
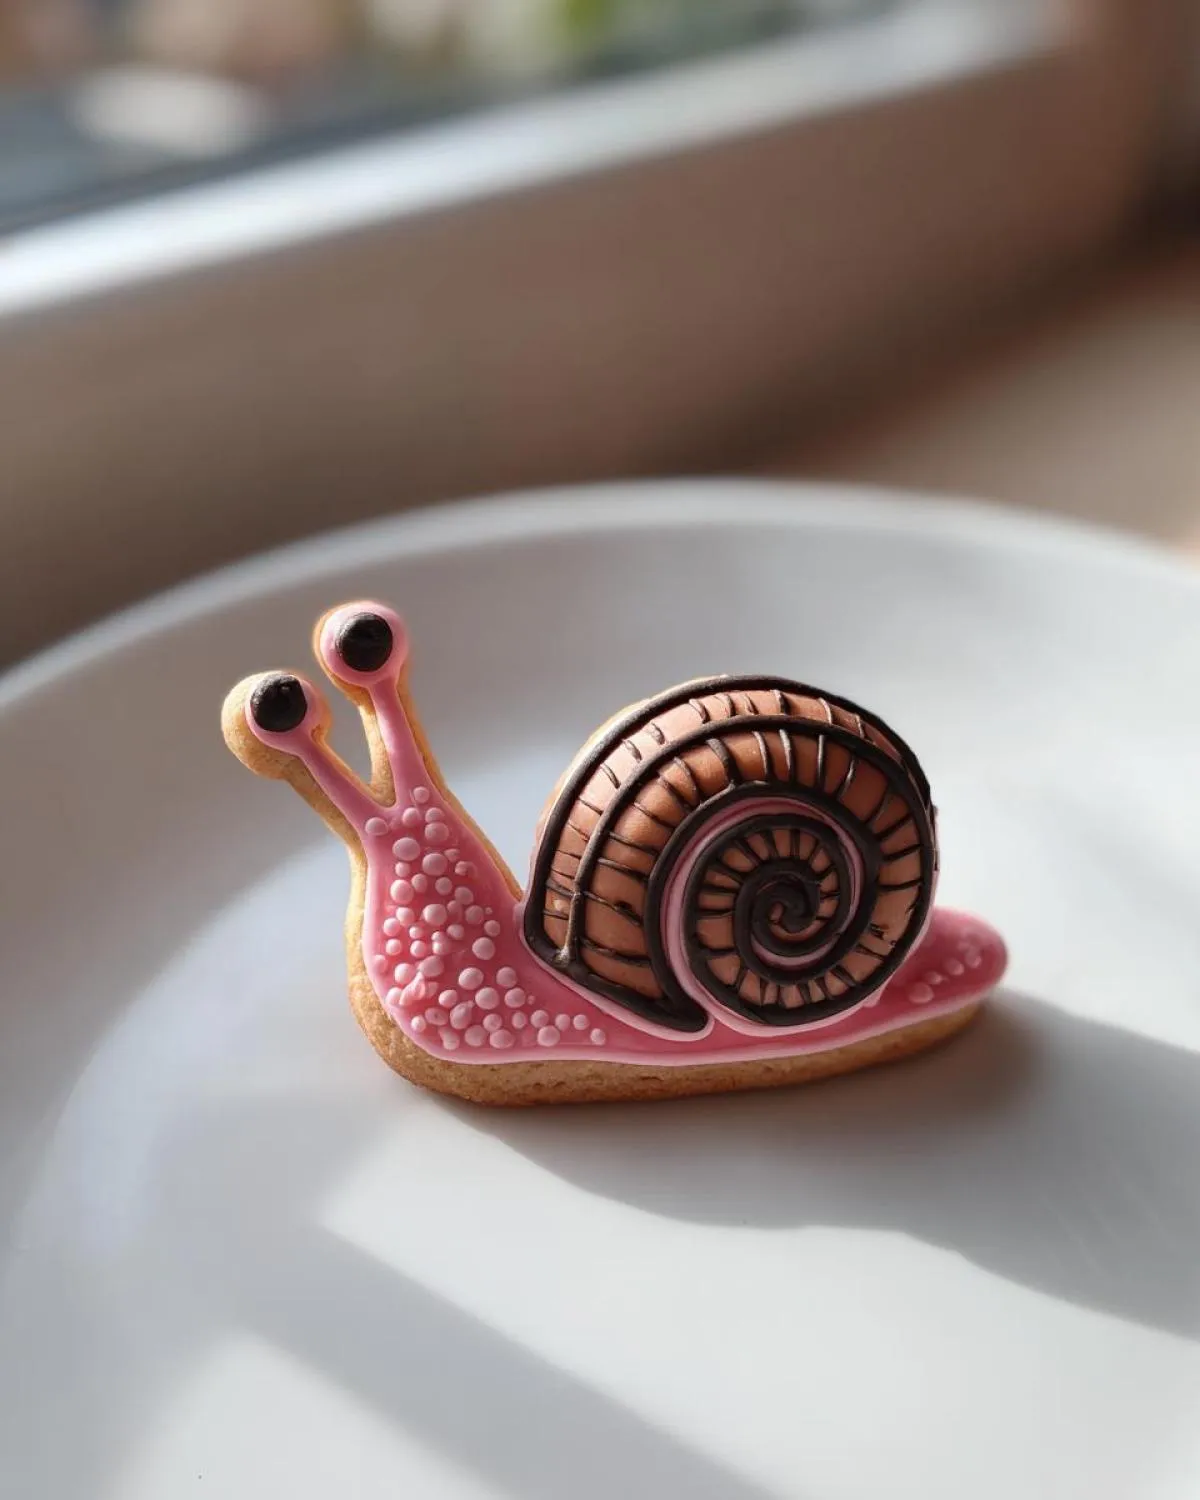
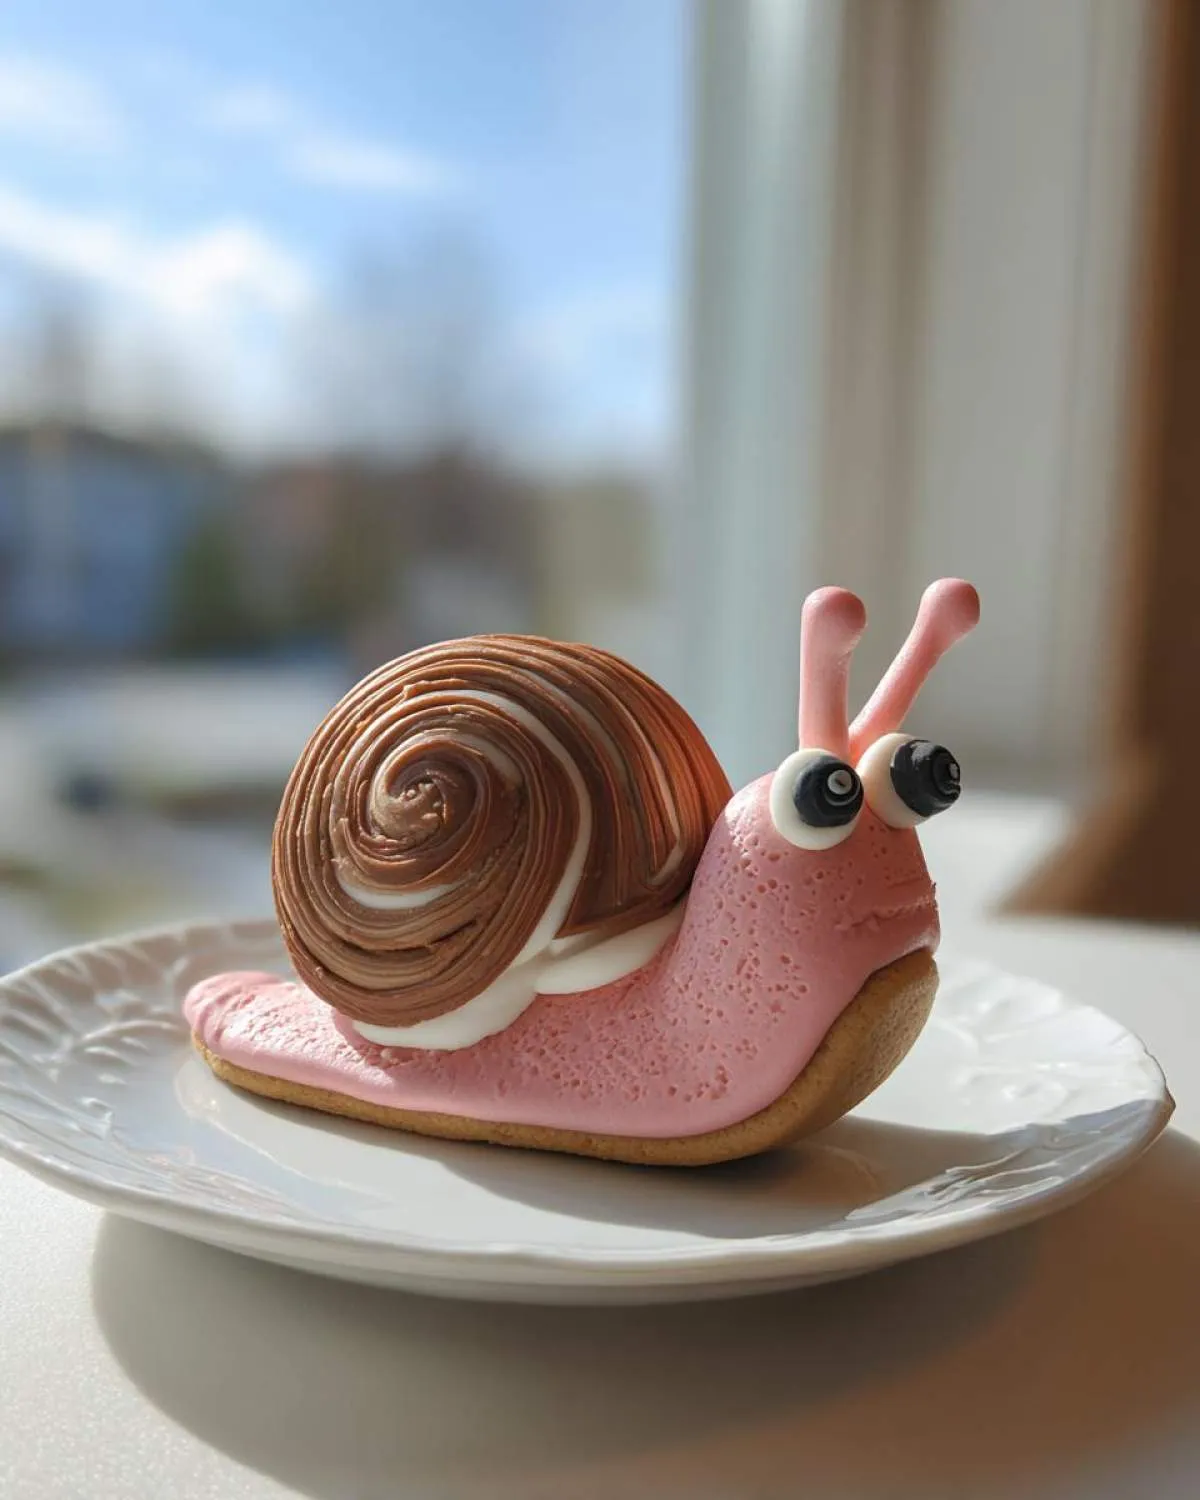
While those cookies are cooling, let’s whip up the **icing recipe shaped like snails** relies on. We need a stiff consistency here. Whisk your powdered sugar, milk, and clear vanilla extract together until it’s super smooth and holds a peak right off the whisk. If it slumps, add a teaspoon more sugar. Divide this stiff icing: make the bulk pink for the bodies, color a small portion brown for the shells, and keep a tiny bit white to tint black for the eyes. This stiff icing is perfect for giving our **miniature sugar sculptures** some dimension!
Assembling and Decorating Your Finished Sugar Snails
This is the fun payoff! When the cookies are stone cold, take the pink icing and cover the snail body cookie completely. Now, this is crucial for clean lines: let that pink layer set up for a good 15 minutes until it’s dry to the touch. Next, gently pipe that brown spiral pattern right onto the shell cookie. Once the shell has settled for just a minute, carefully place it on top of the pink body piece. Finally, use your black icing and a super-fine tip to give your **sugar snails** two little dots for eyes right at the front of the body. If you’re feeling fancy, add tiny antennae dots too! Let everything dry completely so no smudges happen.
Expert Tips for Perfect Sugar Snails Decorations
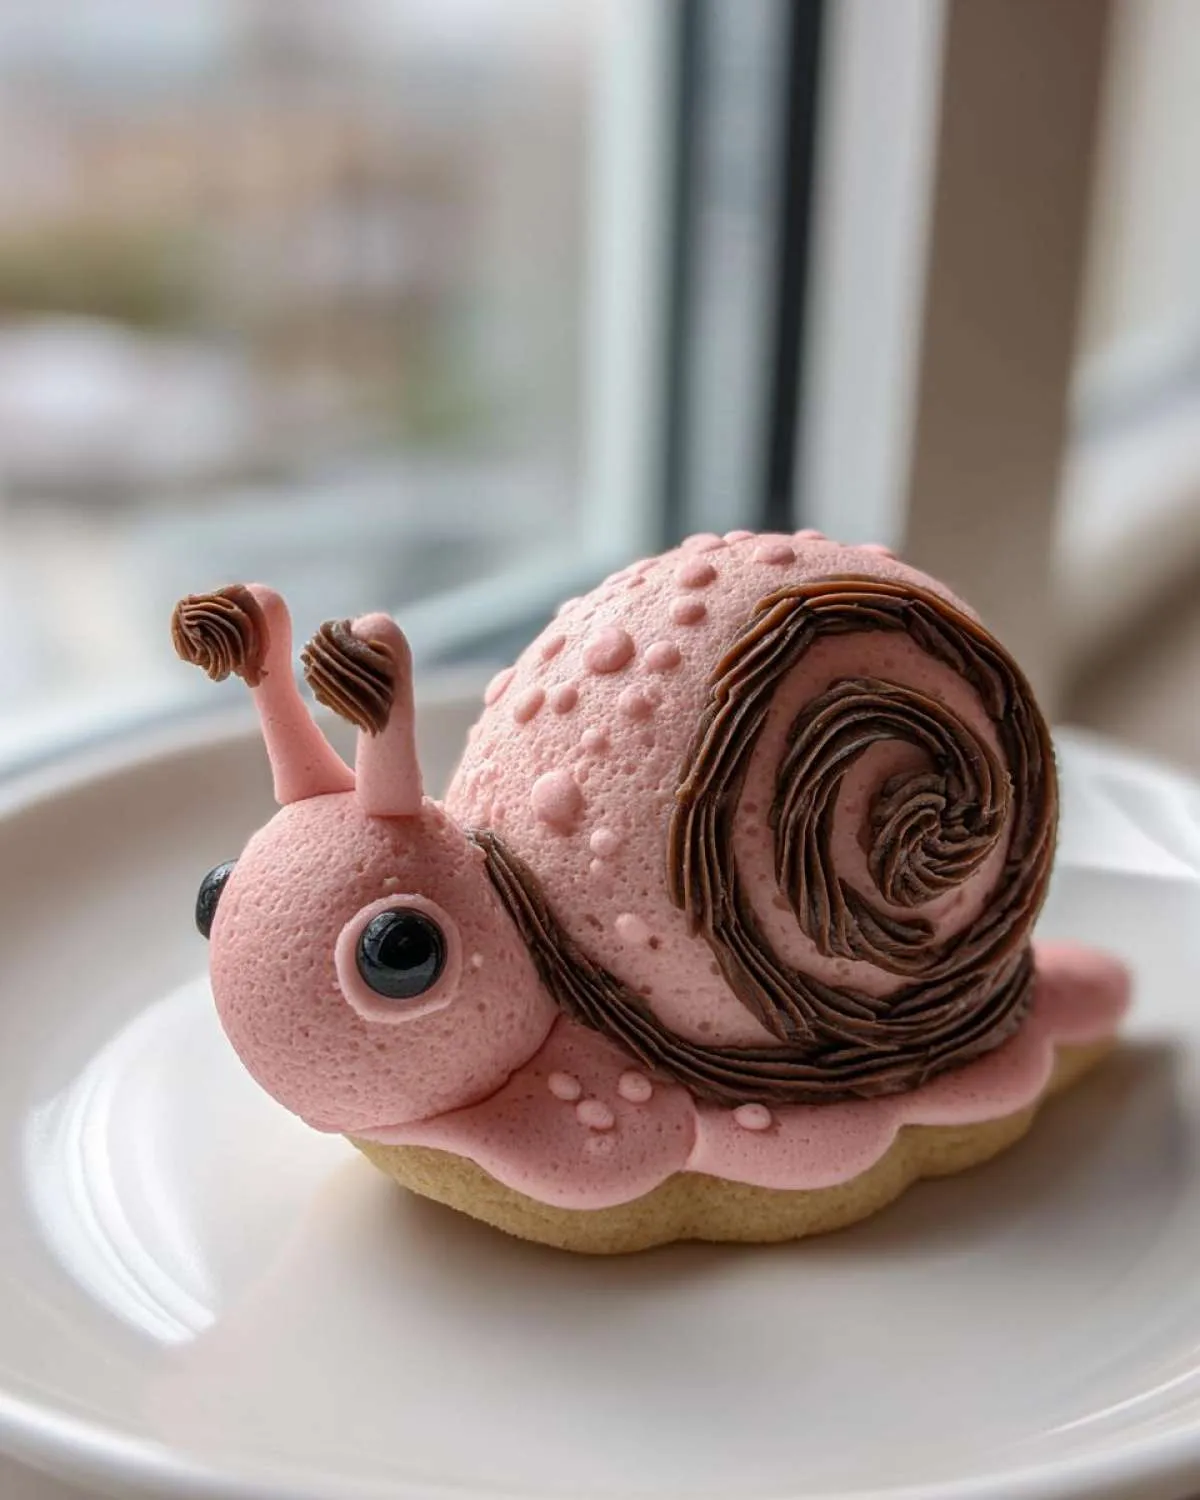
You’ve got the dough down, but the decoration phase is where we really bring these **sugar snails** to life! The biggest thing you’ll battle, especially if it’s a humid day outdoors, is consistency. If your icing seems too thick and cracks when you pipe, just stir in half a teaspoon of milk at a time until it flows nicely but still holds a distinct shape when you stop piping.
Remember, we let the base layer (the pink body) dry before adding the shell? That wait time is your friend! It keeps the shell icing from bleeding into the body icing, giving you that sharp, detailed look we want for all our **royal icing garden creatures**. If you want an ultra-smooth shell, you can try flooding the shell cookie with a slightly thinner icing, letting it dry, and then piping the spiral design on top! For more complex decorating, checking out my guide on decorated cookies techniques can really boost your confidence.
Ingredient Notes and Substitutions for Your Sugar Snails
Even though I’ve given you exactly what I use, I know sometimes we have to improvise! If you look in the cupboard and realize you are totally out of clear vanilla extract, don’t panic! You can still use regular pure vanilla extract. It might just give your icing a *tiny* beige tint, but honestly, with all the pink and brown on these **sugar snails**, no one will ever notice. It won’t change the structure at all.
What about sugar? I insist on granulated sugar for the cookie base because it helps them bake up crisp enough to hold their shape. If you need to substitute, make sure you use something that results in a firm cookie, so avoid overly moist sugars like molasses for the cookie itself. If you’re looking for alternatives for the shell decoration, maybe you don’t want to pipe swirls. That’s fine! You can absolutely roll out thin sheets of fondant and cut out swirl shapes to place on the body cookie instead of piping. This is great if you are looking for finished **fondant snail decorations** quickly!
Also, if you are aiming for speedy assembly and want to try **how to make candy snails** faster, you can sometimes use pre-made hard candies or soft chewable candies shaped like spirals pressed onto the body cookie before baking. It’s a fun variation for those quick **candy making projects easy** days!
Storage and Keeping Your Sweet Garden Treats Fresh
You’ve worked so hard on your perfect little **sugar snails**, and now we have to make sure they last! The great news about royal icing is that once it’s fully dried—and I mean *fully* dried, which can take several hours or even overnight depending on humidity—it becomes rock hard and seals the cookie beautifully. These aren’t delicate buttercream creations that wilt if they breathe!
For the best results, store them in an airtight container, stacked carefully with a sheet of parchment paper or wax paper between each layer. This prevents any little snail from sticking to its neighbor, which is crucial after all our assembly work! Kept this way, they will stay crisp and beautiful on your counter for at least a week. They honestly taste just as good five days later, maybe even better because the flavors have settled.
These cookies are such fantastic **spring themed baking projects**, which means you can make them ahead of time! Feeling ambitious? You can even decorate and store them a few days before your garden party. For long-term storage ideas on holiday cookies, I shared some tips in my guide on sugar cookie bars that are good for any setting where things need to last!
Frequently Asked Questions About Making Sugar Snails
Can I skip chilling the dough for my sugar snails?
Oh, please don’t! I know you’re eager to get to the decorating part, but skipping the chilling phase is exactly how we end up with sad, spread-out cookies instead of defined **cute animal cookies**. Chilling hardens the fat in the dough, which keeps the snail body and shell shapes nice and crisp while they bake. If you’re super rushed, you can put the wrapped dough in the freezer for about 15 to 20 minutes instead, but a full 30 minutes in the fridge is ideal for the best results when making these **whimsical dessert ideas**.
What if my royal icing is too thin when I try to make the shell spiral?
This is the most common issue when we try **detailed confectionery modeling**! If your icing for the shell or the eyes is spreading out too much, it means you added too much liquid. Don’t worry; we can save it! Slowly whisk in powdered sugar, about one teaspoon at a time, until you get that stiff consistency that holds its shape. You want it stiff enough so that when you pipe the spiral for the shell, the line stays exactly where you put it and doesn’t flatten out. This stiffness is essential for neat **icing recipe shaped like snails**!
Can I use buttercream instead of royal icing on these cookies?
You certainly can, but you’ll be changing the final texture, which is important for this specific look. Buttercream is much softer and won’t dry hard like royal icing does. If you used buttercream, your **sugar snails** wouldn’t be suitable for stacking or packing in a box because the shells would smudge immediately. Royal icing dries hard and acts like a protective shell for the cookie itself. If you did prefer buttercream instead, I suggest looking into my soft cookie recipe, as softer cookies pair better with soft frosting!
Are these snails just for cookies, or can I use this technique for other things?
They are so versatile! Once you get the hang of the shape, you can use this technique for all sorts of **sweet garden treats tutorial** additions. You can make the body piece slightly thicker and pipe the shell right on top of it, turning it into a lovely **whimsical cupcake topper**! Or, if you use a tiny dot of icing, you can stick them onto flat-lay chocolate pieces. The key is making sure you let the base color dry fully before adding the next layer, no matter the surface you are decorating.
Share Your Whimsical Creations
My absolute favorite part of sharing recipes like these **sugar snails** is seeing what YOU all create! Baking is meant to be fun, and when you bring these sweet, slightly goofy little creatures to life in your own kitchen, I want to cheer you on!
Please, if you try this recipe out—whether it’s your first time making **edible snail cookies** or your twentieth attempt at decorating—leave a rating right here on the post. Your feedback really helps other bakers decide to jump into this **whimsical dessert idea**! And if you share photos on Instagram or Facebook, please tag me, Sophia Collins! I absolutely love seeing how you decorate them and what color schemes you choose for your **cute animal cookies**.
And hey, if you are always looking for fun, easy things to decorate, you should definitely come hang out with me over on Pinterest! We share tons of inspiration there for everything from **whimsical cupcake toppers** to complete **sweet garden treats tutorial** setups. You’ll find all kinds of fun things over at our Pinterest page. Happy baking, everyone! I hope these little **sugar snails** bring a huge smile to your next gathering!
PrintWhimsical Sugar Snail Cookies: A Fun Baking Project
Learn how to create adorable, edible sugar snail cookies perfect for garden parties or whimsical dessert displays. This tutorial uses simple cookie dough and royal icing techniques.
- Prep Time: 45 min
- Cook Time: 10 min
- Total Time: 55 min
- Yield: 20 snails 1x
- Category: Dessert
- Method: Baking and Decorating
- Cuisine: American
- Diet: Vegetarian
Ingredients
- 1 cup unsalted butter, softened
- 1 cup granulated sugar
- 1 large egg
- 1 teaspoon vanilla extract
- 2 3/4 cups all-purpose flour
- 1 teaspoon baking powder
- 1/2 teaspoon salt
- 1/2 cup powdered sugar (for icing)
- 2 tablespoons milk (for icing)
- 1/4 teaspoon clear vanilla extract (for icing)
- Food coloring gels (brown, pink, black)
Instructions
- Cream together the softened butter and granulated sugar until light and fluffy.
- Beat in the egg and vanilla extract until just combined.
- In a separate bowl, whisk together the flour, baking powder, and salt.
- Gradually add the dry ingredients to the wet ingredients, mixing on low speed until a dough forms. Do not overmix.
- Divide the dough in half, wrap each half in plastic wrap, and chill for at least 30 minutes.
- Preheat your oven to 350°F (175°C). Line baking sheets with parchment paper.
- Roll out one half of the chilled dough to about 1/4 inch thickness. Use a small round cookie cutter for the snail body and a small spiral or teardrop cutter for the shell, or carefully cut freehand shapes resembling a snail body and a swirl shell.
- Place the body and shell pieces onto the prepared baking sheets.
- Bake for 8 to 10 minutes, or until the edges are lightly golden. Let cool on the baking sheet for 5 minutes before transferring to a wire rack to cool completely.
- While cookies cool, prepare the royal icing: Whisk the powdered sugar, milk, and clear vanilla extract until smooth. The icing should be thick enough to hold a shape (stiff consistency).
- Divide the icing into small bowls. Color a portion brown for the shells, a small amount pink for the body, and a tiny amount black for the eyes.
- Once cookies are completely cool, use a small offset spatula or piping bag to cover the cookie body with pink icing. Let this set for 15 minutes.
- Pipe a brown spiral shape onto the center of the shell cookie piece.
- Gently place the shell piece onto the body piece.
- Use the black icing to pipe two small dots for eyes on the front of the body. You can pipe tiny antennae if desired.
- Allow the royal icing to dry completely before serving or storing. These make excellent whimsical cupcake toppers too.
Notes
- For detailed confectionery modeling, use a stiffer royal icing or a small amount of gum paste mixed into your icing for better structure.
- If you are making these for a large group, consider using a simple marshmallow snail recipe instead for a faster assembly.
- These cute animal cookies look fantastic when displayed on a platter with other sweet garden treats.
Nutrition
- Serving Size: 1 cookie
- Calories: 180
- Sugar: 18g
- Sodium: 95mg
- Fat: 10g
- Saturated Fat: 6g
- Unsaturated Fat: 4g
- Trans Fat: 0g
- Carbohydrates: 22g
- Fiber: 0.5g
- Protein: 2g
- Cholesterol: 30mg