
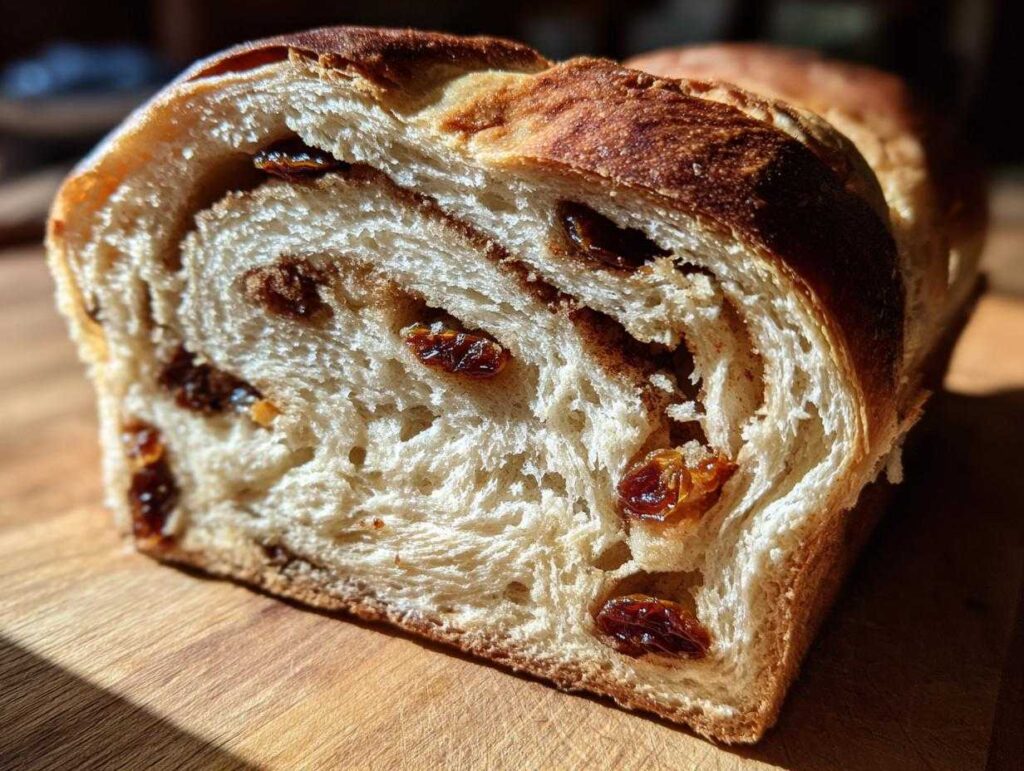
Oh, there is nothing quite like that moment when you pull a loaf of warm, yeasty bread out of the oven. Seriously, it stops me in my tracks every single time! If you’re looking for that ultimate cozy morning baking experience, you have found the recipe. Forget those dry, crumbly store-bought versions; we are making the absolute softest, fluffiest homemade cinnamon raisin bread you’ve ever tasted, bursting with those sweet, spicy swirls. Baking yeast bread is something I learned from my grandmother, and while her recipes were intricate, I’ve refined this one to be so incredibly satisfying. You’re going to adore this classic raisin bread slicing perfectly for toast!
- Why This Homemade Raisin Bread Recipe is Your New Favorite Sweet Breakfast Bread
- Gathering Ingredients for the Best Cinnamon Raisin Bread
- Step-by-Step Instructions for Soft Raisin Bread
- Expert Tips for Perfect Artisan Raisin Bread
- Serving Suggestions for Your Cozy Morning Baking Raisin Bread
- Storage and Keeping Your Raisin Bread Fresh
- Frequently Asked Questions About Making Raisin Bread
- Estimated Nutritional Snapshot for This Raisin Bread
- Share Your Soft Loaf Raisin Bread Creations
Why This Homemade Raisin Bread Recipe is Your New Favorite Sweet Breakfast Bread
I’ve tried a lot of recipes over the years, but this one wins every time because it delivers on pure comfort. It’s not just bread; it’s that aroma filling your entire house that just screams, ‘Relax, it’s the weekend!’ We are talking about serious texture here—a soft loaf raisin bread that practically melts when you toast it. That intense, wonderful cinnamon swirl makes it such a perfect sweet breakfast bread. I promise, once you smell this baking, you’ll never go back to the store-bought stuff! It’s everything a homestyle baked good should be.
If you love what we do here and want to try another unbelievably soft baked good that uses simple ingredients, check out my recipe for sweet potato cornbread—it offers that same cozy vibe!
Achieving That Perfect Soft Loaf Raisin Bread Texture
The secret to that signature fluffiness isn’t magic; it’s temperature control! You need warm milk, right around 105 to 115°F. If it’s too hot, you kill the yeast and your bread won’t rise properly, leaving you with a brick. If it’s too cool, the yeast just lazily wakes up. Same goes for that egg—make sure it’s at room temperature! A cold egg lowers the dough temperature too fast when incorporated with the wet ingredients, which can hinder the gluten development we are working so hard to build during the kneading phase. Trust me, these small steps are what separate a good loaf from the best cinnamon raisin bread!
Gathering Ingredients for the Best Cinnamon Raisin Bread
Okay, let’s talk ingredients because preparation is half the battle, right? For this recipe to deliver the fluffiest result, precision matters, especially when you are making a proper yeast bread recipe. Don’t eyeball those measurements, especially when it comes to the yeast or the liquid temperature—we need that beautiful, airy structure!
We’ve broken the list down so you can clearly see what goes into the main dough and what we reserve specifically for that mouthwatering swirl we talked about. That cinnamon sugar mix, layered with soft butter, is truly the highlight of this whole homemade raisin bread adventure.
For the Raisin Bread Dough:
- 1 cup warm milk (105-115°F)
- 2 1/4 teaspoons active dry yeast
- 1/4 cup granulated sugar plus 1 teaspoon for yeast
- 1 large egg, room temperature
- 1/4 cup unsalted butter, melted
- 1 teaspoon salt
- 3 1/2 cups all-purpose flour, plus more for dusting
- 1 cup raisins, plumped
For the Cinnamon Swirl Filling:
This is where all the magic happens! Pro tip: make sure your brown sugar is nice and packed into the measuring cup for that deep molasses flavor that makes the swirl so rich.
- 1/2 cup packed brown sugar
- 2 tablespoons ground cinnamon
- 4 tablespoons unsalted butter, softened
Step-by-Step Instructions for Soft Raisin Bread
Alright, let’s roll up our sleeves! While I try to keep things easy, making an amazing yeast bread like this cinnamon raisin bread takes a tiny bit of patience. We aren’t doing a super complicated artisan loaf here, but we do need to let the yeast work its magic. I find that just following these steps exactly guarantees that perfectly soft loaf raisin bread every time. If you’re looking for other simple, fun baking projects like my soft pretzel bites, you’ll love how straightforward this dough feels to handle!
Activating Yeast and Mixing the Raisin Bread Dough
First, we need to wake up that yeast! Mix your warm milk with the little bit of sugar and the yeast. Watch it for about five to ten minutes. It should look foamy and happy—that’s how I know it’s ready to go. Next, stir in the rest of the sugar, your room-temp egg, melted butter, and salt. Then, gradually add your flour. Keep mixing until it looks shaggy, almost like it doesn’t want to come together. Don’t panic; that’s exactly what good bread dough looks like before you knead it.
Kneading and First Rise for Fluffy Raisin Bread
Now comes the workout, but it’s worth it! Turn that shaggy mess out onto a lightly floured counter. You need to knead this dough for a good 6 to 8 minutes. You are looking for it to stop sticking to your hands and feel smooth and elastic—like a nice soft pillow. Once it’s there, pop it into a lightly oiled bowl, cover it up, and let it rest somewhere warm for about an hour and a half. It needs to double in volume, so give it space to breathe!
Creating the Cinnamon Swirl and Shaping the Raisin Bread Loaf
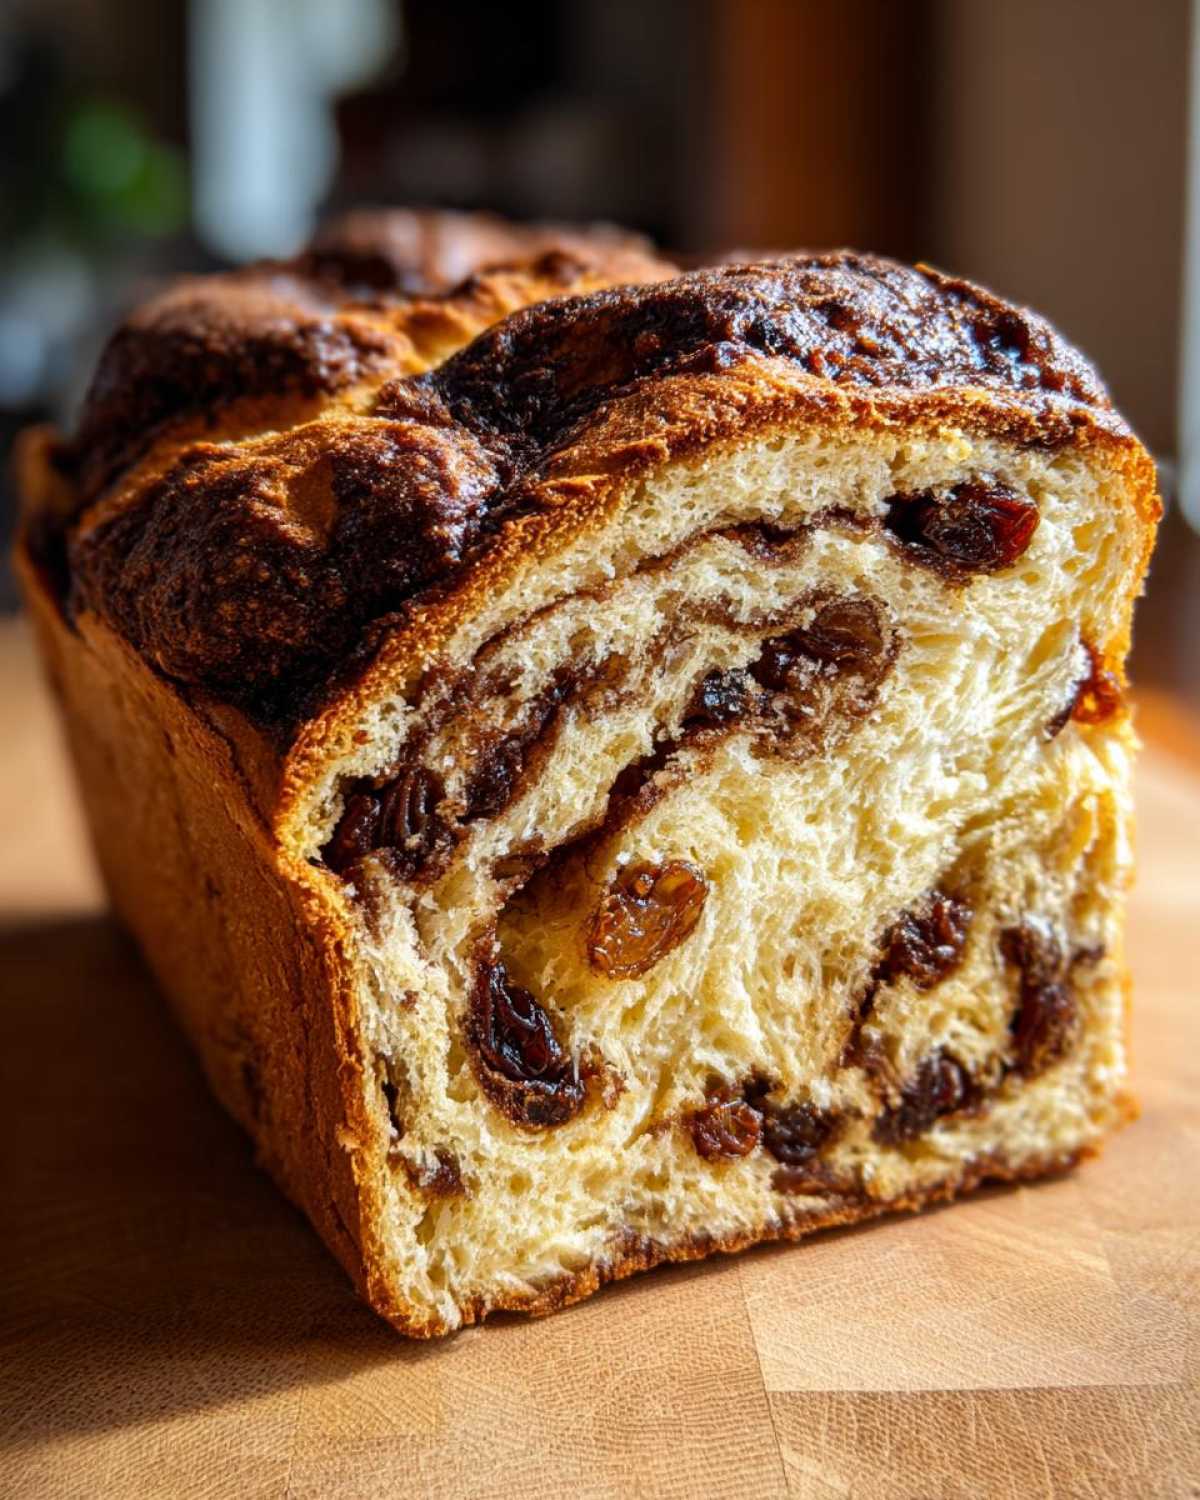
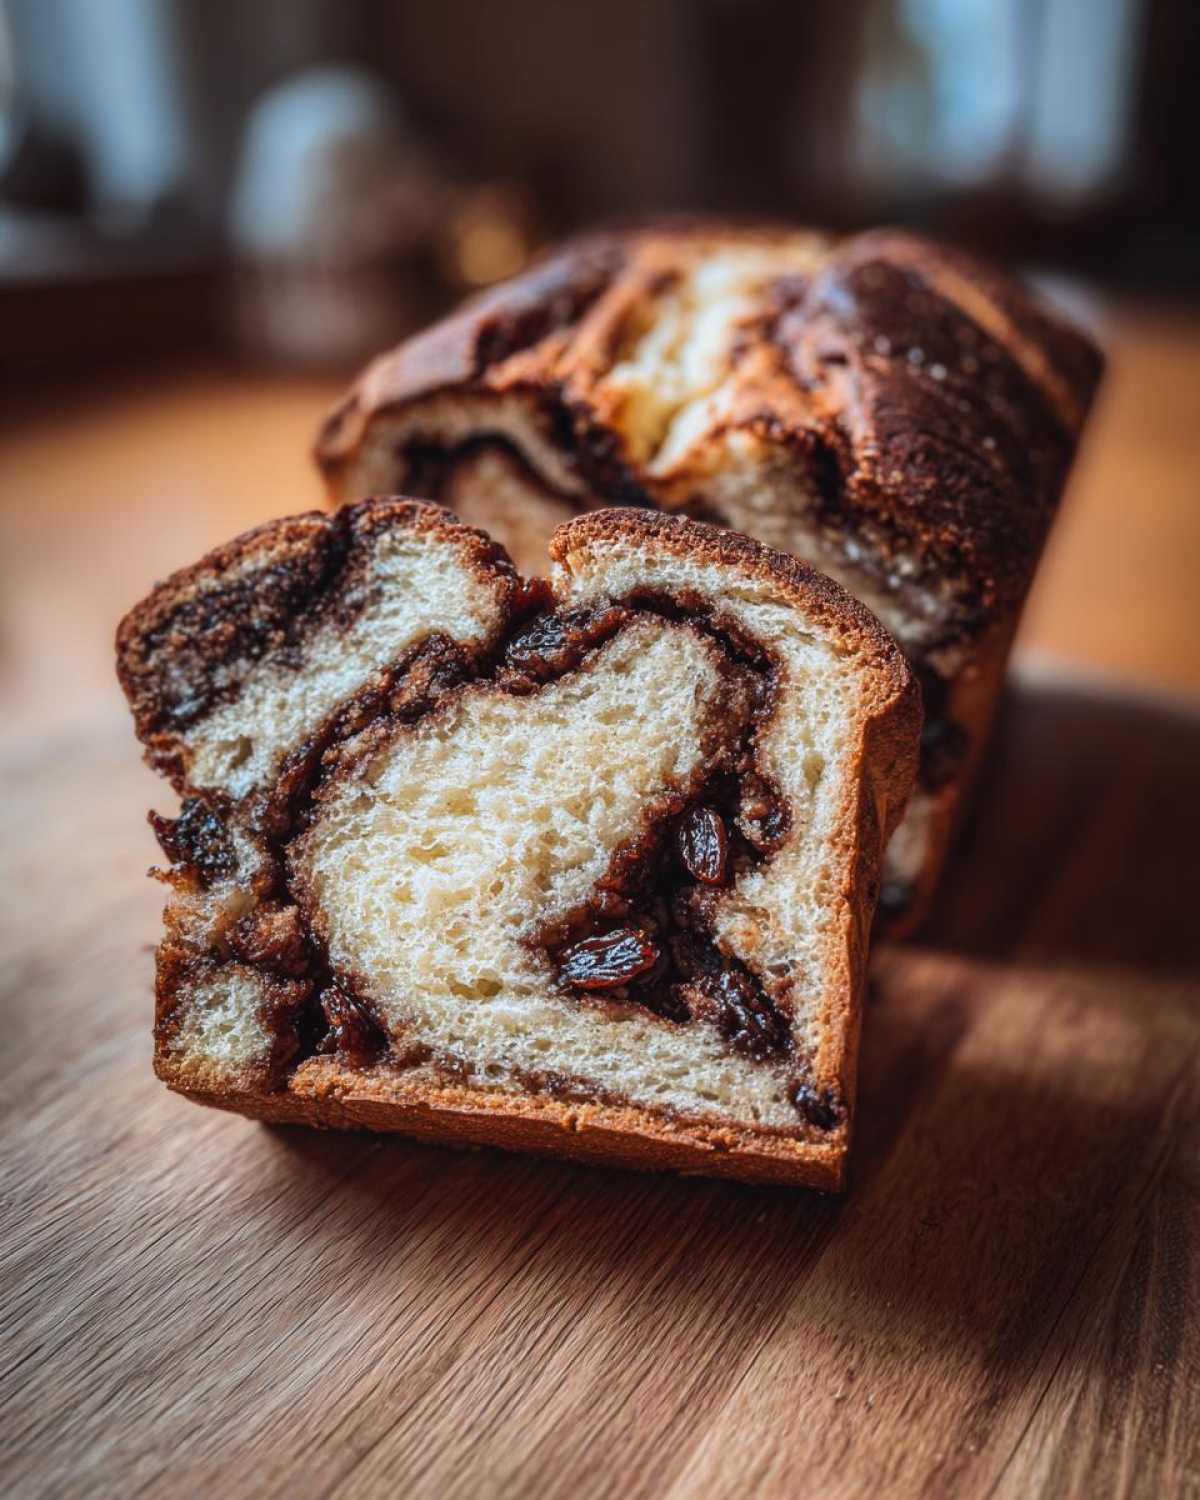
While it’s rising, mix up your swirl ingredients: brown sugar and cinnamon. Once the dough is puffy, gently punch it down. Roll it out into a big rectangle—I aim for about 10 by 16 inches so I get those beautiful outer wraps. Spread that softened butter right to the edges, then sprinkle that glorious cinnamon sugar mixture evenly over the top. Now—this is important for that signature raisin swirl bread look—scatter your plumped raisins over everything. Start rolling TIGHTLY from the long side! Pinch that seam shut and tuck it seam-side down into your greased 9×5 inch pan.
Second Rise and Baking Your Raisin Bread
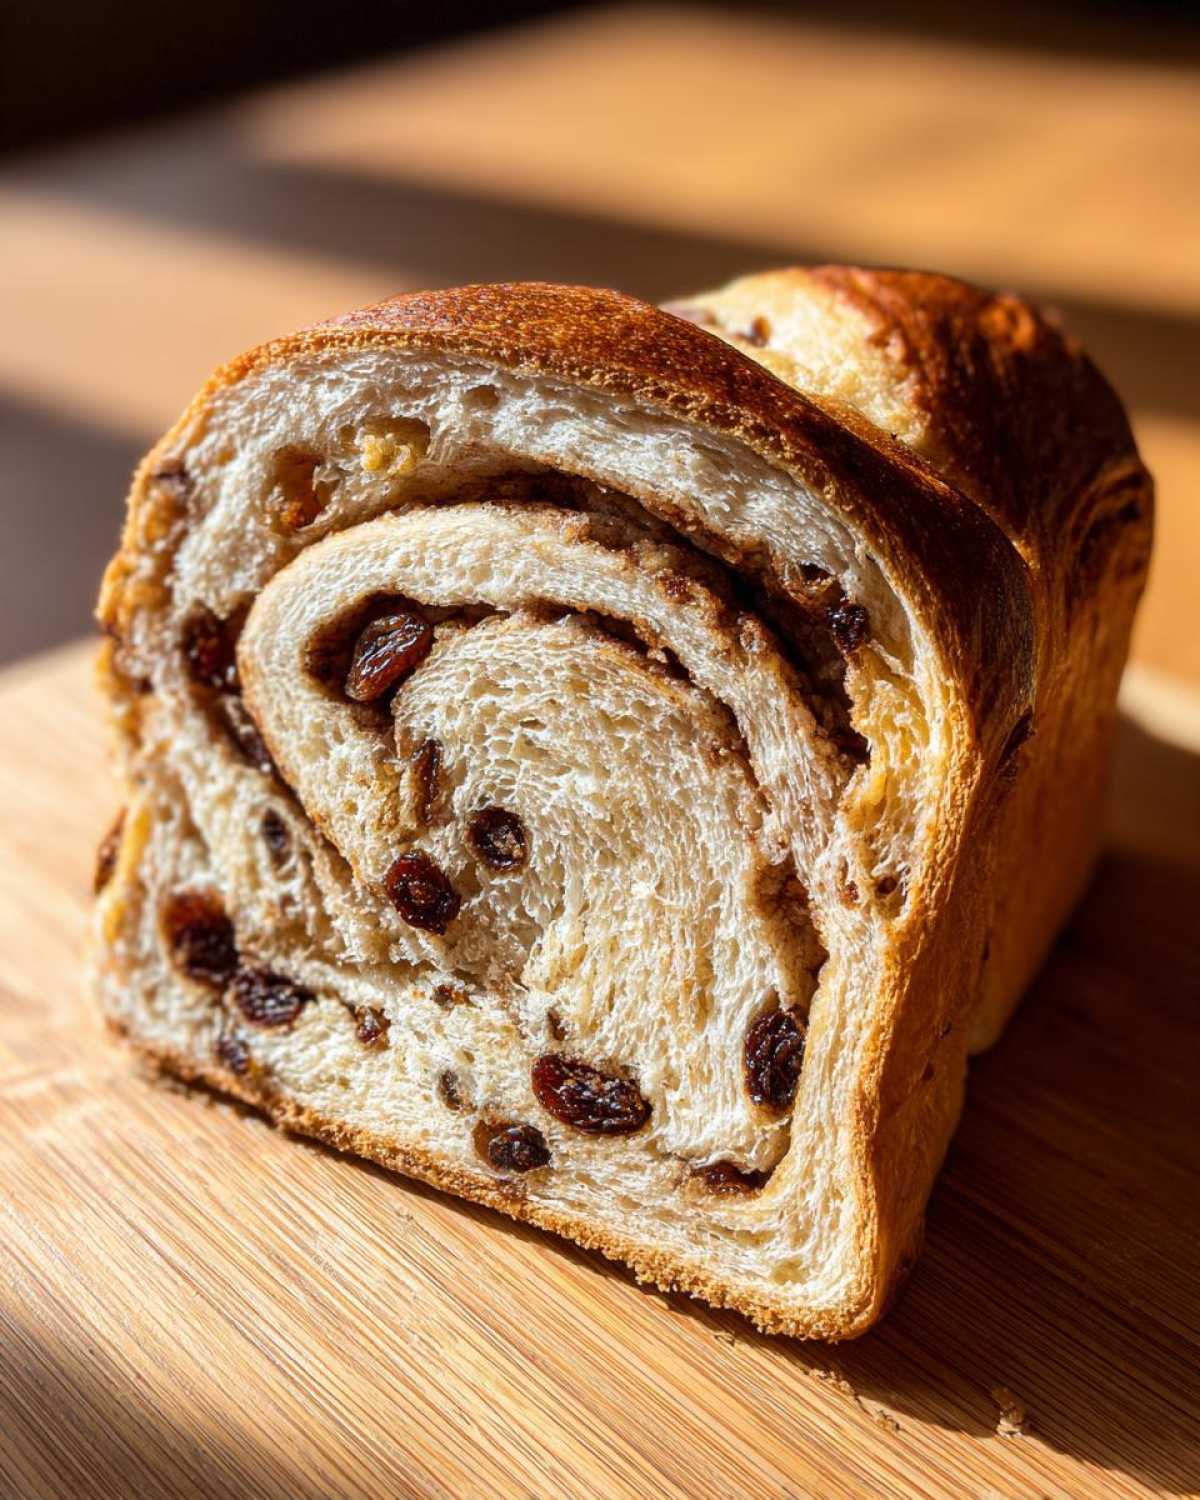
Cover your pan loosely for the second rise; this one is faster, maybe 30 to 45 minutes. You know it’s ready when the dough crown sits about an inch above the pan rim. Start warming up your oven to 375°F during the last 15 minutes of this rise! Bake it for about 30 to 35 minutes. If you notice the top getting too dark before the middle cooks (the internal temp should hit 200°F), just drape a piece of foil over it loosely. When it’s golden and sounds hollow when tapped, pull it out! Remember to remove it from the pan right away so it doesn’t steam itself soggy.
Expert Tips for Perfect Artisan Raisin Bread
Even when we are aiming for soft, homestyle baked goods, there are always little tricks you can pick up that elevate your bread to something truly special—we are talking top-tier artisan raisin bread quality here! Don’t worry, these tips won’t make the process complicated, but they will make your loaf taste like it came from a fancy bakery. I always find that paying attention to the finishing touches, like how to treat your raisins, makes a huge difference in the final chew and moisture.
If you’ve baked this loaf and are wondering how to serve it with some homemade flair, you really must try dipping the crusts into my famous garlic herb olive oil dip. It’s surprisingly delicious!
Ingredient Notes and Substitutions for Raisin Bread
Let’s quickly go over those raisins because we don’t want dry, hard little nuggets hiding in our perfectly soft loaf, right? If you didn’t soak them ahead of time, you can plump them quickly! Just toss them in very hot water for about ten minutes, then drain them well and pat them dry with a paper towel. This prevents them from sucking moisture right out of your beautiful dough while it bakes.
Since this recipe relies on active dry yeast for that reliable rise, switching to instant yeast is usually okay—just skip the “proofing” step entirely and mix it right into your flour; it’ll wake up later when it hits the liquid. As for making this a holiday treat, the optional glaze is lovely! Just whisk together a bit of powdered sugar with just enough milk until it drizzles nicely, maybe a tiny splash of vanilla if you happen to have it handy.
Serving Suggestions for Your Cozy Morning Baking Raisin Bread
Now that you have this stunning loaf of homemade raisin bread cooling, the real fun begins! That first slice when the bread is still just barely warm is unmatched. Of course, slathering it with good quality butter is mandatory for that proper cozy morning baking feeling. But don’t stop there! This bread is so versatile.
Try some fantastic toasted raisin bread ideas: Cream cheese is divine, or even a homemade jam like my soft, chewy maple cookies have a flavor profile that carries over beautifully onto toast! If you’ve got leftovers, they make the best little snack throughout the week. I actually pin a bunch of great serving ideas over on our kitchen’s Pinterest page, so don’t forget to take a peek over at our main board for more inspiration!
Storage and Keeping Your Raisin Bread Fresh
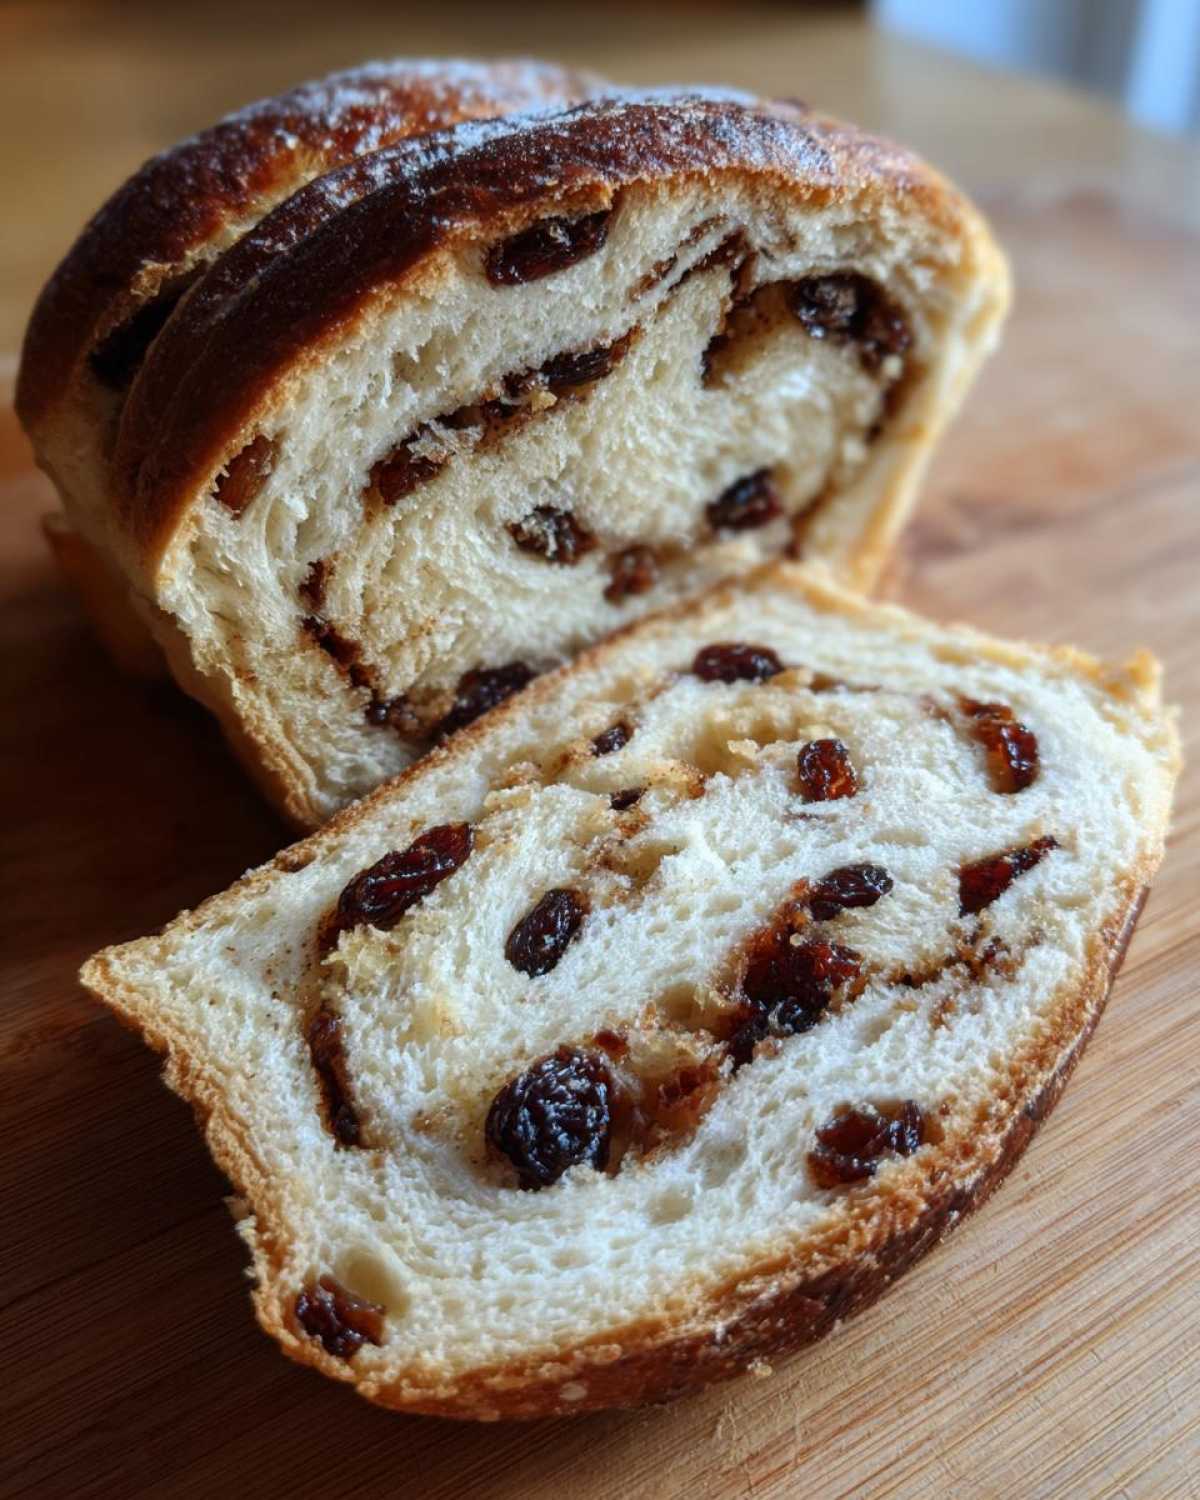
Okay, this is where new bakers often make tiny mistakes that ruin a perfect loaf! You’ve done all that work kneading and swirling, and the smell is intoxicating, right? But you absolutely must let this homemade raisin bread cool completely on a wire rack before you even THINK about slicing it. Seriously, don’t cheat! If you cut into it while it’s warm, all that trapped steam escapes, and you end up with gummy spots instead of that soft, fluffy texture we aimed for.
Once it’s fully cooled—give it at least an hour, maybe two, depending on your kitchen—wrap it up tightly. I usually use plastic wrap first, then maybe pop it into a zip-top bag. Storing it tightly prevents it from drying out, keeping that incredible soft loaf raisin bread quality intact for about three to four days on the counter. Keep it out of the fridge, though! Cold air is the enemy of soft bread; it makes it go stale way too fast.
If you baked a double batch (because honestly, who wouldn’t?), freezing is your best buddy. Once it’s totally, completely cool, slice the loaf first. Then, wrap the individual slices tightly in plastic wrap, and then toss the wrapped slices into a freezer bag. This way, you can just pull out two slices whenever you want toasted raisin bread ideas for a cozy morning! It thaws out on the counter in maybe an hour, or you can pop it straight into the toaster.
Frequently Asked Questions About Making Raisin Bread
I totally get it; baking can sometimes leave you with questions, especially when dealing with yeast! I’ve gathered the most common things people ask me about getting that perfect, soft loaf raisin bread every time. Hopefully, this helps you troubleshoot or just feel more confident before you start your cozy morning baking!
Can I turn this into an easy no knead bread recipe for raisin bread?
That’s a fair question, especially since some days you just don’t feel like working the dough! For this particular recipe, which relies on that lovely, fluffy texture, I really recommend sticking to the kneading process we detailed. Kneading builds the structure needed to hold a lot of cinnamon sugar and those juicy raisins.
If you absolutely want a no knead bread recipe, you can try it, but understand that the texture will change. You would need to increase the liquid slightly and let it rise for maybe 8 to 12 hours on the counter, or even overnight in the fridge. It will result in a slightly more open, chewier loaf—more of an artisan raisin bread vibe than the soft loaf raisin bread we are aiming for here.
How do I get more cinnamon swirl in my raisin bread?
Oh, wanting more swirl is my favorite problem to have, seriously! The swirl intensity comes down to how evenly you spread that softened butter and how generously you sprinkle the cinnamon sugar mix. Make sure you are spreading that 4 tablespoons of softened butter right up to the very edges of your 10×16 inch dough rectangle—no bare spots allowed!
When you roll it up, roll it as tightly as humanly possible without tearing the dough. A tight roll compresses those layers together, ensuring that when you slice it, you have those gorgeous, distinct layers of the sweet breakfast bread rather than just a streak of color in the middle. Try using just a touch more softened butter next time, but be careful not to make the dough too greasy!
Can I use a bread machine to make this raisin bread?
Yes, you certainly can adapt this for a bread machine, but you have to be smart about the swirl part! Most bread machine cycles will knead and rise the dough perfectly for you. You would add all your dough ingredients—milk, yeast, flour, etc.—and run it through the basic dough cycle.
The tricky part is the cinnamon swirl. You cannot just dump the brown sugar and butter in at the “add-ins” signal because it will blend right into the dough, giving you mildly flavored bread instead of that pronounced raisin swirl bread. Once the machine is done kneading, you need to remove the dough log, punch it down manually, perform step 6 through step 8 (rolling, spreading the filling, and rolling it up tightly), place it in your loaf pan for the second rise, and then bake it in a conventional oven at 375°F. It’s a hybrid approach, but totally achievable!
If you found this helpful, jump over and check out my super popular no-bake peanut butter pie recipe—it’s the easiest dessert you will ever make!
Estimated Nutritional Snapshot for This Raisin Bread
I always get questions about the nutrition because, well, it tastes so indulgent! While this cinnamon raisin bread is a treat made with wholesome ingredients, it’s still a sweet breakfast bread, so it’s good to know what you’re working with. Keep in mind that these numbers are based on estimates for one slice, assuming you use the full recipe yield of one loaf. Since we are making a homestyle baked good, slight variations are totally normal!
Here is the breakdown based on our recipe details:
- Calories: 220
- Fat: 5g (with 3g being saturated fat)
- Carbohydrates: 40g
- Protein: 5g
- Sugar: 12g (That’s natural sugar from the raisins and the added brown sugar swirl!)
Don’t forget that we used real butter and brown sugar for flavor, not flavor substitutes, which contributes to those numbers. Enjoy a slice, and if you want to pair it with something else from the blog, my olive oil bread dip flavor profile works surprisingly well with the sweetness if you’re feeling adventurous!
Share Your Soft Loaf Raisin Bread Creations
Now that your kitchen smells amazing and you have this beautiful, perfectly soft loaf raisin bread cooling, it’s time for the best part: eating it! I always feel such a burst of pride when I see my homemade treats come out looking exactly like the pictures. I truly hope this cinnamon raisin bread becomes a staple in your home, just like it is in mine.
I absolutely love hearing from all of you! If you tried this recipe, please come back and leave a rating—five stars if you loved that amazing swirl! Your feedback helps other bakers decide to take the plunge on their cozy morning baking adventure. Did you toast it? Did you slather it with cream cheese? Tell me everything in the comments below!
And please, if you snap a picture of your golden-brown loaf or your perfect slice with the raisin swirl, share it on social media and tag us! We adore seeing your kitchen creations. If you’re looking for more cozy baking inspiration, be sure you’re following along with us on Pinterest. We share tips and tricks constantly!
If you want another dessert that feels decadent but is sneakily simple to pull together, you have to try my no-bake chocolate mousse pie. It’s seriously the easiest crowd-pleaser!
PrintSoft and Fluffy Homemade Cinnamon Raisin Bread
Bake this soft, fluffy homemade cinnamon raisin bread loaf. It features sweet swirls of cinnamon sugar and plump raisins, making it perfect for toasting or enjoying warm with butter for a cozy morning treat.
- Prep Time: 30 min
- Cook Time: 35 min
- Total Time: 135 min
- Yield: 1 loaf 1x
- Category: Breakfast
- Method: Yeast Baking
- Cuisine: American
- Diet: Vegetarian
Ingredients
- 1 cup warm milk (105-115°F)
- 2 1/4 teaspoons active dry yeast
- 1/4 cup granulated sugar plus 1 teaspoon for yeast
- 1 large egg, room temperature
- 1/4 cup unsalted butter, melted
- 1 teaspoon salt
- 3 1/2 cups all-purpose flour, plus more for dusting
- 1 cup raisins, plumped
- For the Swirl: 1/2 cup packed brown sugar
- For the Swirl: 2 tablespoons ground cinnamon
- For the Swirl: 4 tablespoons unsalted butter, softened
Instructions
- Activate the yeast: In a large bowl, combine the warm milk, 1 teaspoon of sugar, and the yeast. Let it stand for 5 to 10 minutes until foamy.
- Mix the dough: Add the remaining 1/4 cup sugar, egg, melted butter, and salt to the yeast mixture. Stir to combine. Gradually add the flour, mixing until a shaggy dough forms.
- Knead the dough: Turn the dough out onto a lightly floured surface. Knead for 6 to 8 minutes until the dough is smooth and elastic.
- First rise: Place the dough in a lightly oiled bowl, turning to coat. Cover the bowl and let it rise in a warm place for 1 to 1.5 hours, or until doubled in size.
- Prepare the filling: While the dough rises, mix the brown sugar and cinnamon together in a small bowl. Set aside the softened butter.
- Shape the loaf: Gently punch down the risen dough. Roll the dough out into a large rectangle, about 10 by 16 inches.
- Spread the filling: Spread the softened butter evenly over the dough surface. Sprinkle the cinnamon-sugar mixture over the butter. Distribute the plumped raisins evenly over the top.
- Roll and place: Starting from the long side, tightly roll the dough into a log. Pinch the seam closed. Place the log, seam-side down, into a greased 9×5 inch loaf pan.
- Second rise: Cover the pan loosely and let the dough rise again in a warm spot for 30 to 45 minutes, or until it has crowned about 1 inch over the rim of the pan. Preheat your oven to 375°F (190°C) during the last 15 minutes of the rise.
- Bake: Bake for 30 to 35 minutes, or until the top is golden brown and the internal temperature reaches 200°F (93°C). If the top browns too quickly, loosely tent it with foil.
- Cool: Remove the loaf from the pan immediately and cool completely on a wire rack before slicing for the best texture.
Notes
- To plump your raisins quickly, soak them in hot water for 10 minutes, then drain and pat them dry before adding them to the dough.
- For a sweet glaze, mix 1/2 cup powdered sugar with 2 tablespoons of milk and drizzle over the cooled loaf.
- This homemade raisin bread is fantastic when toasted and served with cream cheese or butter.
Nutrition
- Serving Size: 1 slice
- Calories: 220
- Sugar: 12
- Sodium: 250
- Fat: 5
- Saturated Fat: 3
- Unsaturated Fat: 2
- Trans Fat: 0
- Carbohydrates: 40
- Fiber: 2
- Protein: 5
- Cholesterol: 25