
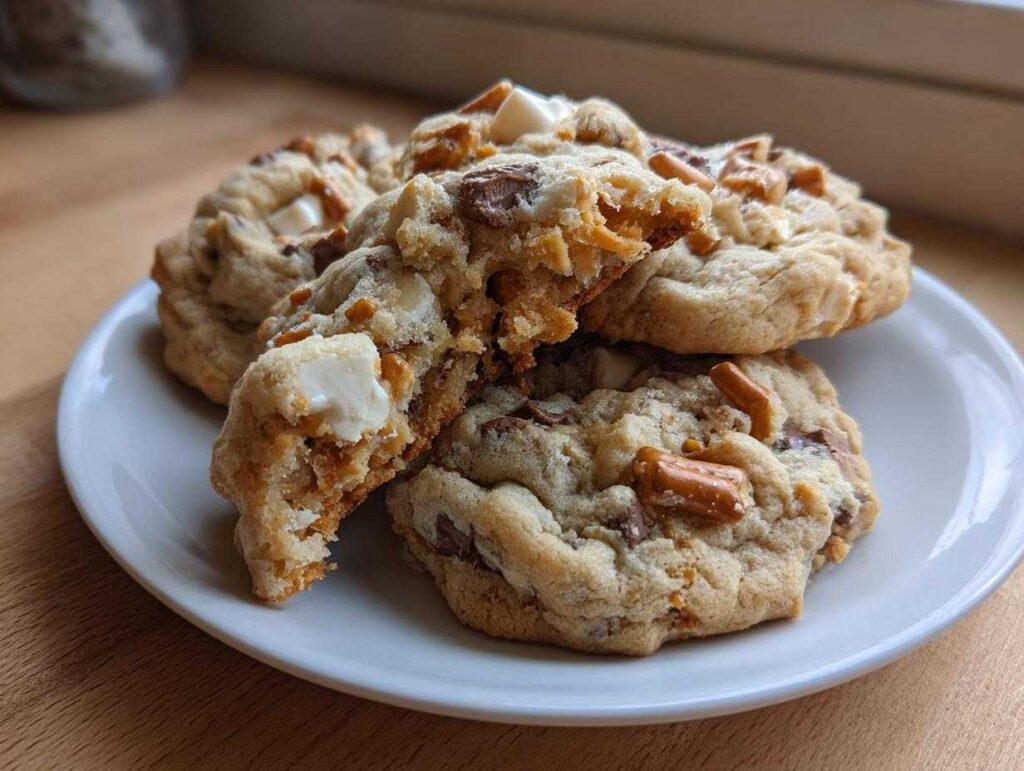
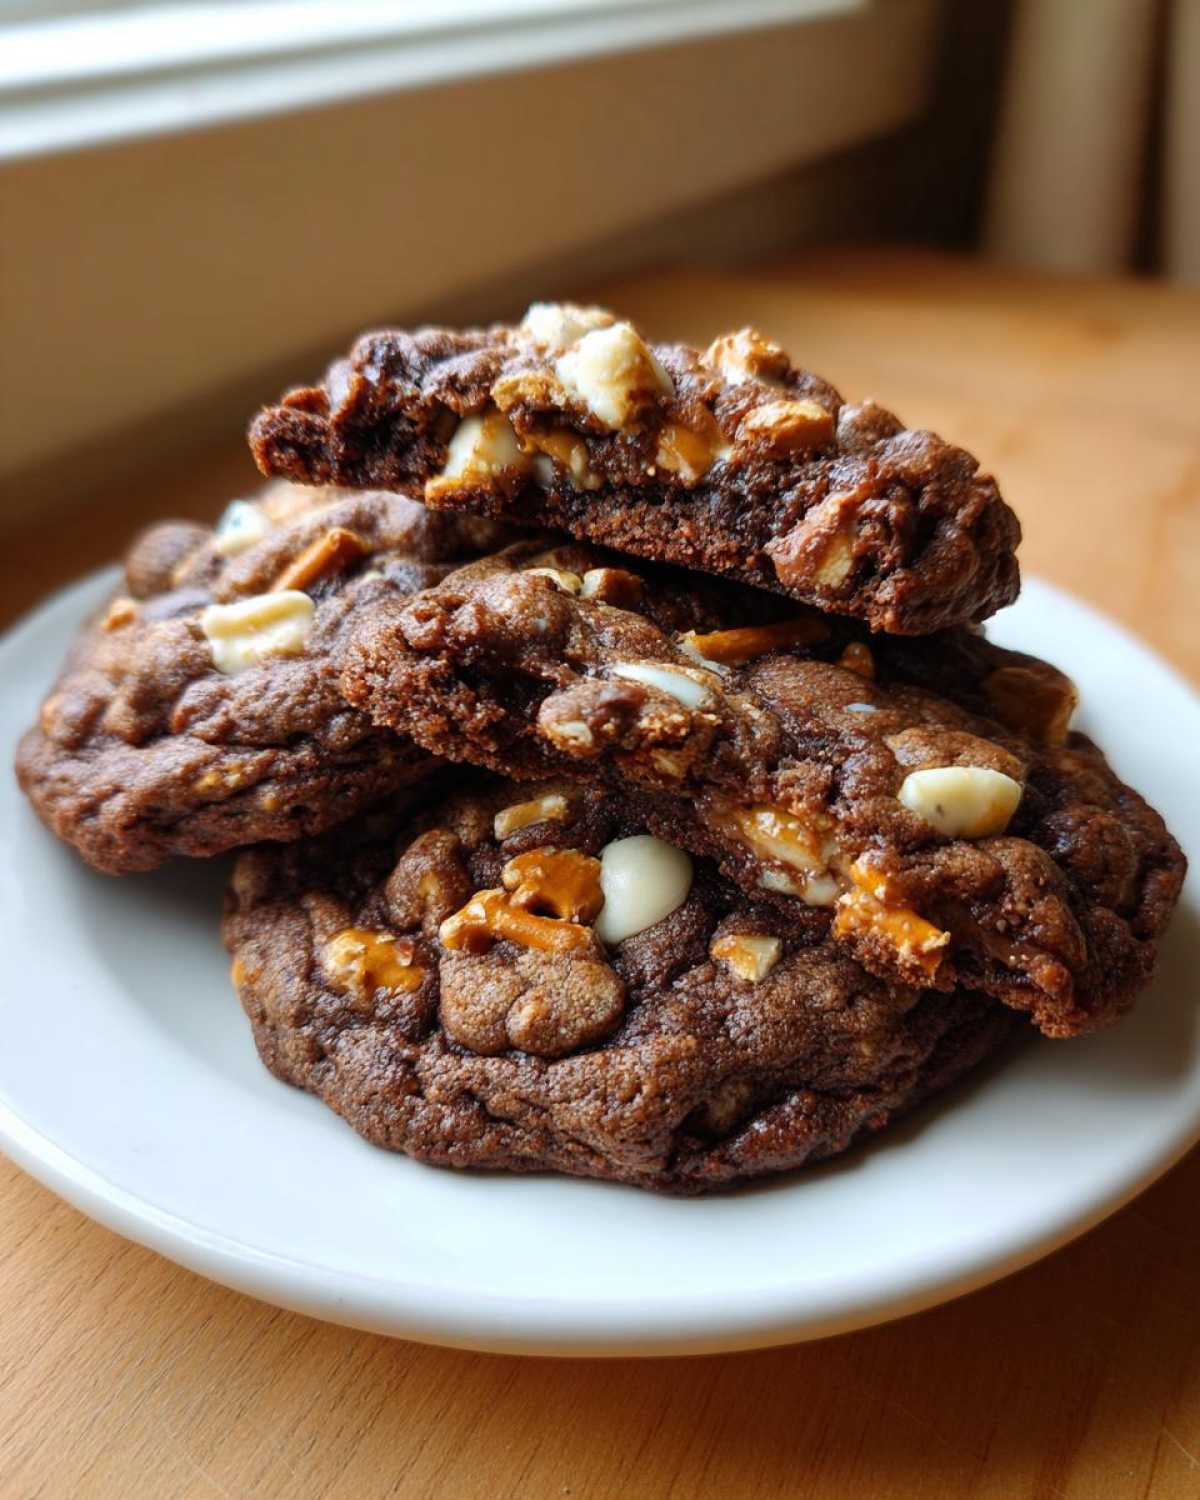
Oh my goodness, are you ready for a cookie that truly has it all? Forget sorting through your pantry; we’re throwing everything in! These kitchen sink cookies are my absolute favorite because they satisfy every craving in one glorious bite. We’re not just making cookies; we’re creating texture chaos in the best way possible. I’m so excited to share my recipe for The Ultimate Kitchen Sink Cookies: Soft, Chewy, and Sweet-Salty Perfection (Panera Copycat Inspired). Trust me, my family always begs for these, and achieving that perfect mix of salty crunch and gooey chew is way easier than you think!
- Why You Will Love These Ultimate Kitchen Sink Cookies
- Gathering Your Ingredients for Kitchen Sink Cookies
- Step-by-Step Instructions for Incredible Mix In Cookies
- Tips for Success Making Kitchen Sink Cookies
- Ingredient Notes and Substitutions for Kitchen Sink Cookies
- Storage and Reheating Instructions for These Loaded Cookies
- Serving Suggestions for Bakery Style Cookies at Home
- Frequently Asked Questions About Kitchen Sink Cookies
- Sharing Your Incredible Loaded Cookies
Why You Will Love These Ultimate Kitchen Sink Cookies
These aren’t just cookies; they are texture heaven! Once you try loading dough with this many amazing things, you won’t go back to boring snacks. Here is what makes these my go-to baking project:
- Perfect Sweet and Salty Cookie Recipe Balance: Wow, the pretzels and potato chips against the sweet chocolate and toffee? It’s an unbeatable flavor combination that keeps you reaching for more.
- Achieving That Thick and Chewy Cookies Texture: We nail this every time because we’re careful with the creaming step for our thick and chewy cookies experience. No flat, crispy discs here!
- Panera Bread Copycat Cookies Inspiration: If you love those big, jam-packed bakery cookies, this recipe delivers that bakery style cookies at home experience, inspired by the famous Panera version. They are the ultimate loaded cookies!
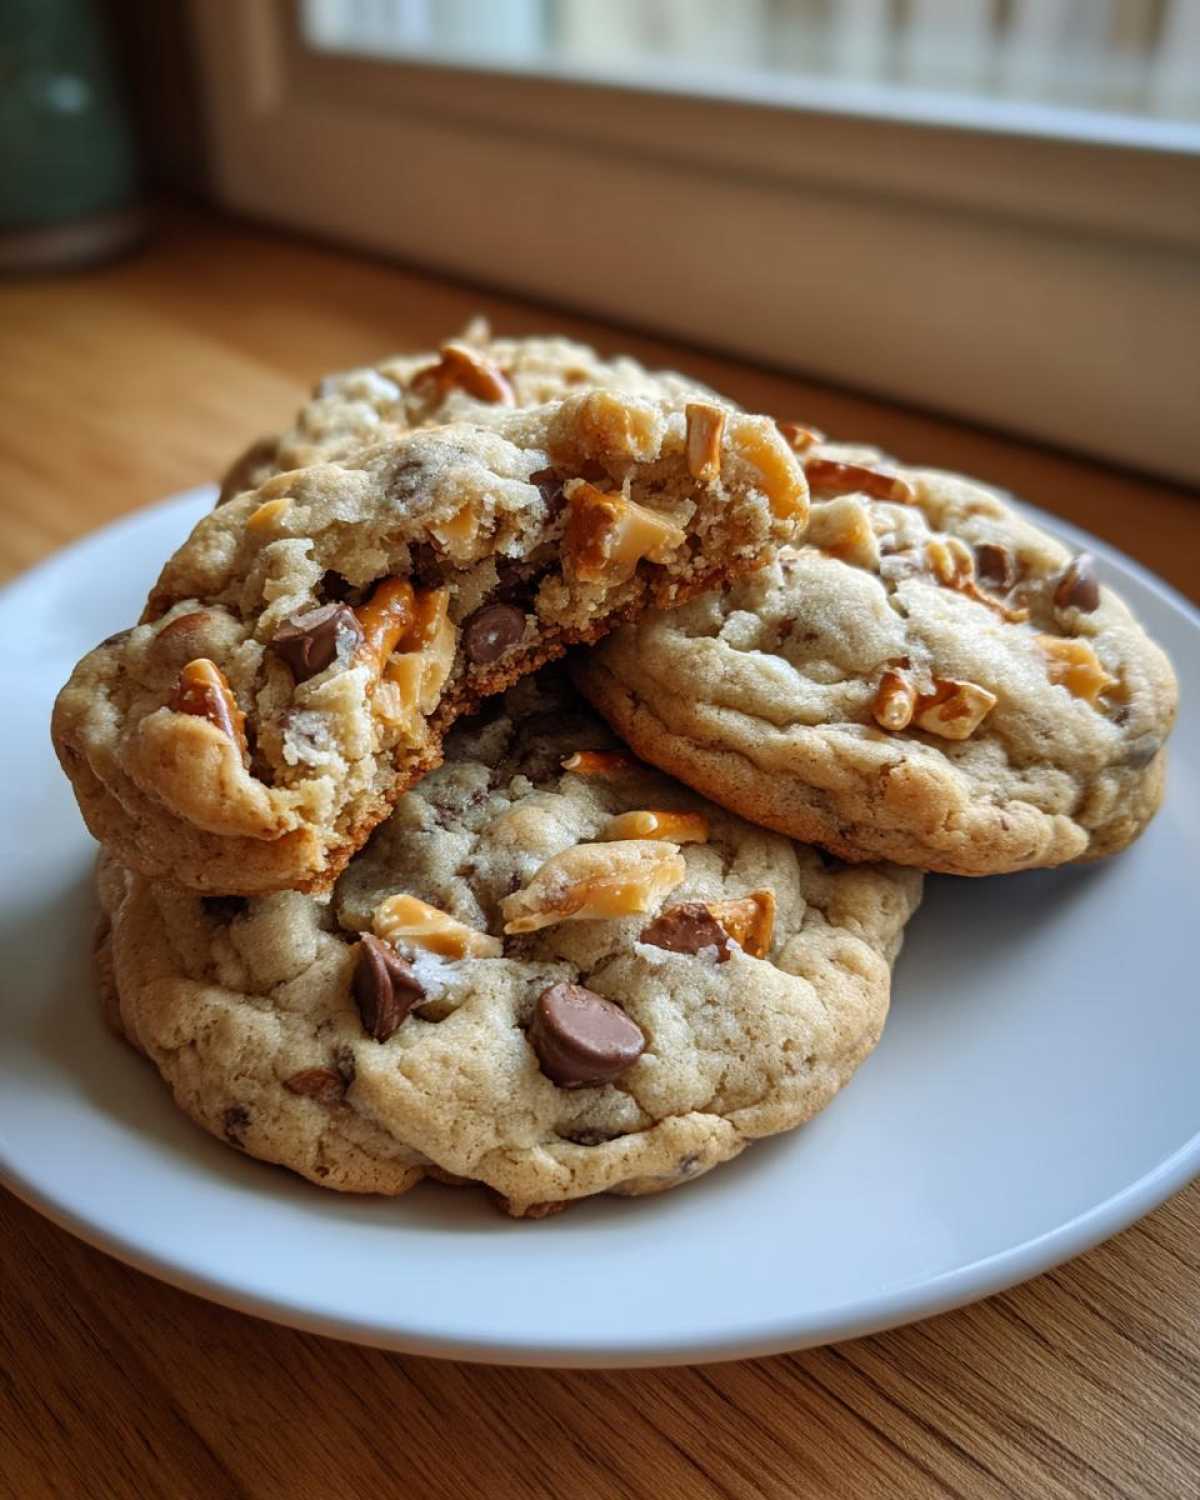
Gathering Your Ingredients for Kitchen Sink Cookies
Okay, this is where we set the stage for greatness! Because these are kitchen sink cookies, the quality of the dough base matters immensely. You can’t just throw everything into any old batter; you need a sturdy but tender foundation to hold all those goodies. Don’t skip softening that butter—it’s crucial for texture!
Essential Dough Base Ingredients
Make sure you have these ready before you start creaming:
- 1 cup (2 sticks) unsalted butter, softened—this is non-negotiable for creaminess!
- 3/4 cup packed light brown sugar
- 1/2 cup granulated white sugar
- 2 teaspoons pure vanilla extract
- 1 large egg
- 2 cups all-purpose flour
- 1 teaspoon baking soda
- 1/2 teaspoon kosher salt (I love using kosher salt here for a cleaner taste!)
The Best Chewy Cookie Mix Ins for Kitchen Sink Cookies
This is the fun part! Gather all the treasures that make these incredible mix in cookies so special. See? You’re already creating something utterly unique. And yes, you absolutely need the toffee bits for that gooey factor!
- 1 1/2 cups semi-sweet chocolate chips
- 1 cup milk chocolate chips or chunks
- 1 cup pretzel pieces (break up those twists!), or use your favorite toffee recipe if you’re feeling extra ambitious!
- 1/2 cup toffee bits
- 1/2 cup chopped pecans or walnuts
- 1/2 cup crushed potato chips (Don’t knock it ’til you try it—the saltiness is amazing.)
- Flaky sea salt, for topping (optional, but highly recommended!)
Step-by-Step Instructions for Incredible Mix In Cookies
Alright, now that we have all our beautiful, colorful ingredients ready, let’s get this dough mixed! We want that signature soft and chewy cookies texture, so we’re moving methodically. Remember, we’re aiming for bakery style cookies at home, and a little patience during mixing goes a long way toward preventing flat cookies.
Preparing the Wet Ingredients and Creaming
First things first, crank that oven up to 350°F (175°C) and get your baking sheets lined with parchment paper. In your big bowl, whip that softened butter with both the brown and white sugars until it looks gorgeously pale and fluffy—this creaming step is where we trap all the air needed for chewiness! Then, beat in your vanilla and that single egg until everything looks perfectly emulsified.
Combining Dry Ingredients and Folding in Chewy Cookie Mix Ins
Quickly whisk your flour, baking soda, and salt in a separate bowl. Now, add those dry bits to the wet mixture slowly, mixing just until you see the flour disappear. Seriously, stop mixing! Now, grab a sturdy spatula and gently fold in every single chocolate chip, pretzel, toffee bit, and nut. You want this dough to look ridiculously chunky and loaded.
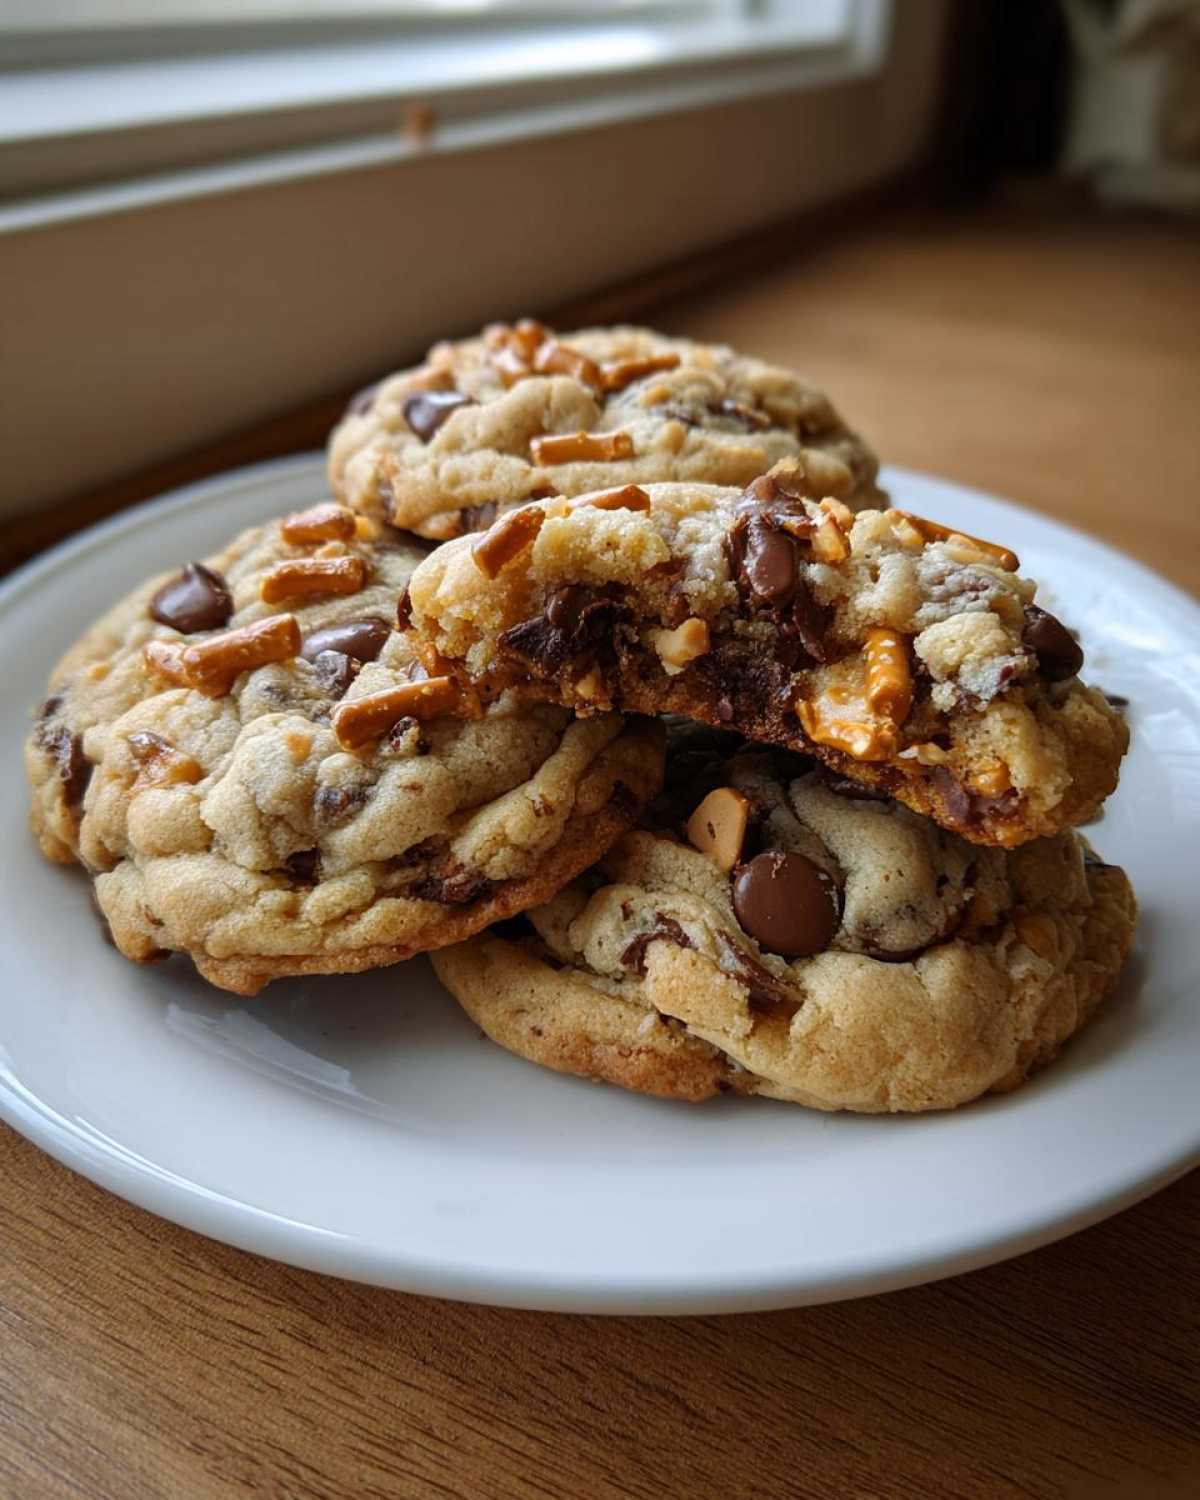
Baking and Cooling Your Kitchen Sink Cookies
Scoop rounded mounds onto your prepared sheets, leaving good space between them—these guys spread a little! Bake them for just 10 to 12 minutes. You’re looking for edges that are set and just barely turning golden, but the center should still look slightly soft, almost undone. Let them sit right there on the hot sheet for about 5 glorious minutes before carefully moving them over to a wire rack. That 5-minute rest is vital for them to set up into those amazing easy one bowl cookies!
Tips for Success Making Kitchen Sink Cookies
You know how it is—sometimes all the ingredients are right, but the cookie still doesn’t look like the picture! Because these are kitchen sink cookies, the sheer volume of mix-ins can cause strange spreading if you aren’t careful. My goal for you is that perfect thick and chewy cookies texture, so I want to share the absolute non-negotiables I learned through trial and error.
Chilling Dough for Thicker Cookies
If you want those satisfyingly tall, thick cookies that look like they came straight out of a high-end bakery, you absolutely must chill the dough. I know, I know, waiting is the hardest part when you have a giant bowl of mix-ins staring you down! But if you skip this step, all those chips and pretzels weigh down the structure, and they melt right into flat puddles in the oven. Trust me on this one, pop that dough into the fridge for at least 30 minutes—an hour is even better. That slight chill solidifies the fats, preventing too much spread while the edges get perfectly golden.
Ingredient Notes for Perfect Sweet and Salty Cookie Recipe
A few tiny ingredient details can make a huge difference in your sweet and salty cookie recipe. First, room temperature butter is vital for the initial creaming; if it’s hard, it won’t incorporate air, and your cookies will be dense, not chewy. Second, about that salt: I specifically noted kosher salt in the recipe, but if you’re using standard table salt in the dough base, cut that amount down just a hair because table salt is so much more intense.
Also, think about your mix-ins! For maximum impact, make sure your pretzel pieces are broken up a bit, but not pulverized into dust. You need those salty chunks to provide texture contrast! If you’re using chocolate chips for your soft-baked chocolate chip cookies base, mixing semi-sweet and milk chocolate ensures depth of flavor.
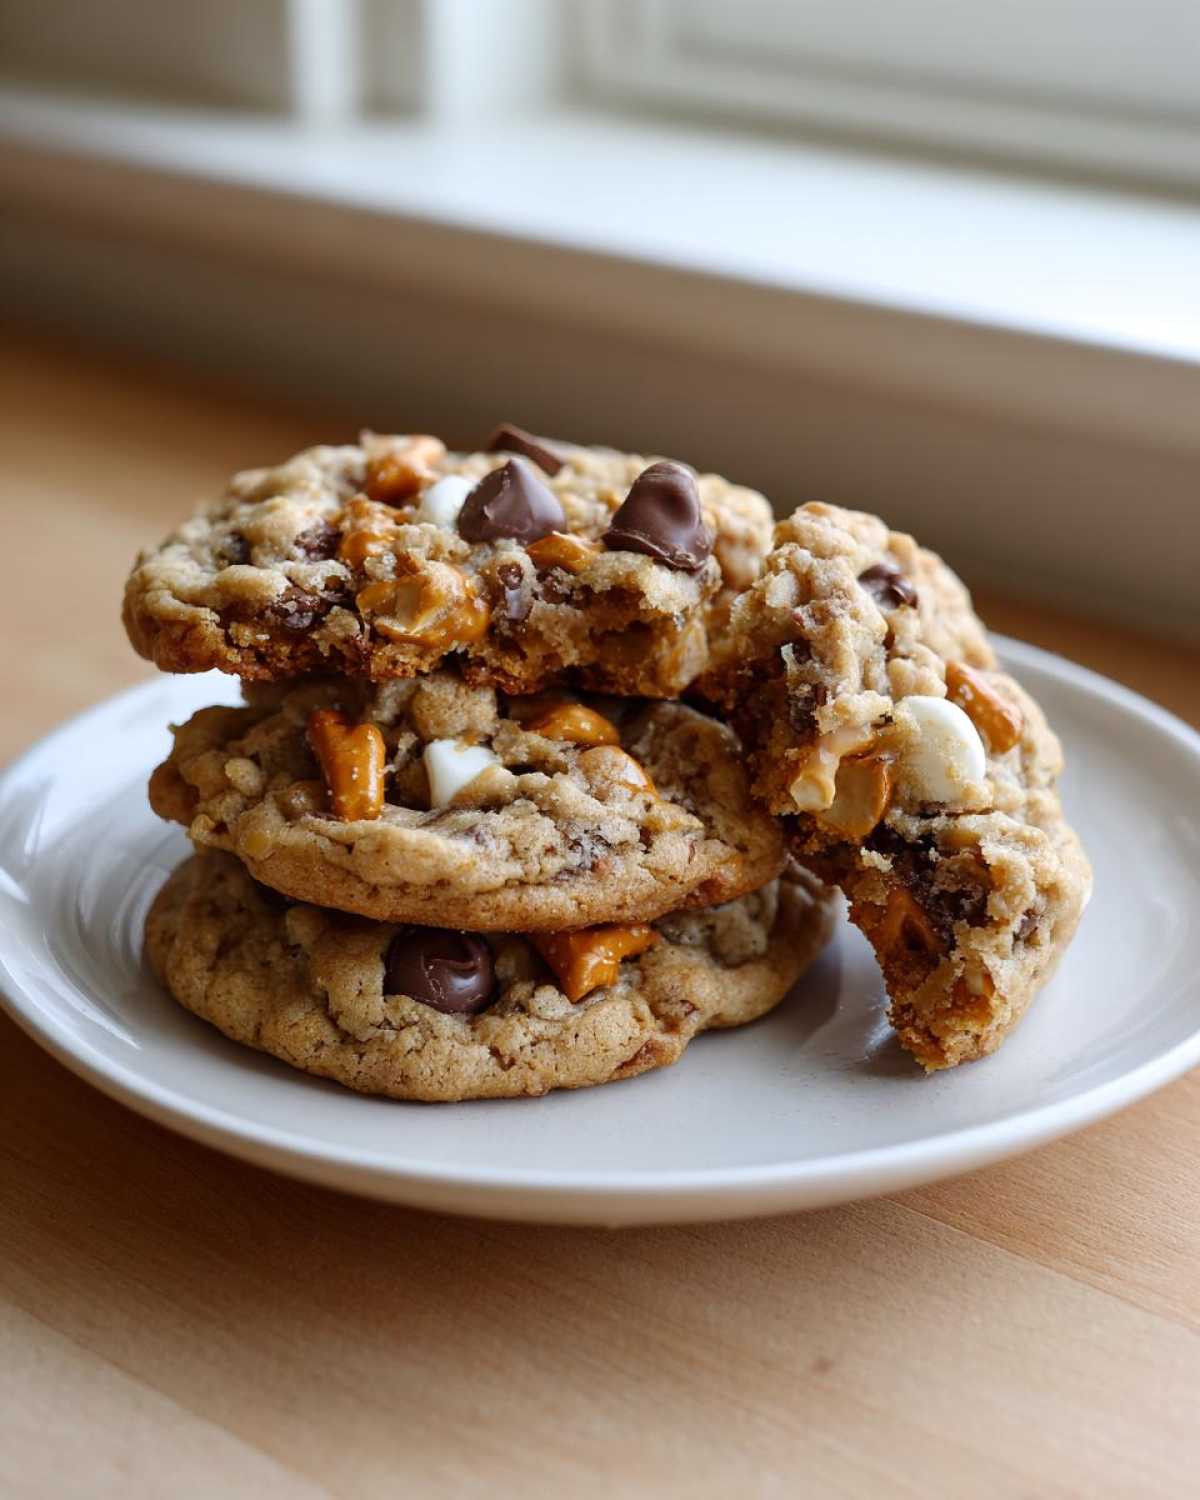
Ingredient Notes and Substitutions for Kitchen Sink Cookies
Honestly, the best thing about making kitchen sink cookies is the flexibility! It’s in the name, right? It’s supposed to be a pantry cleanout adventure. I want you to feel totally confident grabbing whatever looks good in your baking cabinet. While my recipe nails the sweet and salty cookie recipe balance we often aim for, feel free to customize heavily. That’s what makes these *your* iconic loaded cookie recipe!
First, let’s talk about those potato chips, since that ingredient throws some people off. If you aren’t keen on the chip crunch, just leave them out! You’ll still have plenty of salty goodness coming from the pretzels. If you skip the chips, maybe toss in a few extra toffee bits or maybe some peanut butter chips for a different kind of rich, surprising texture.
If nuts aren’t your friend, no problem at all. Pecans and walnuts add a lovely structure and slight earthiness, but you can substitute them one-for-one with more chocolate chips or even butterscotch chips. The main thing to remember for your chewy cookie mix ins is to keep the total volume of *add-ins* around 3 to 3.5 cups total. Any more than that, and the dough starts getting too stiff, which fights against achieving those chewy centers we love so much.
Remember, you can always use your favorite recipe for fudgy brownies if you wanted to swap out some chocolate entirely—just chop them small! The goal here is fun and flavor saturation, so use what you have and what makes you excited to bake!
Storage and Reheating Instructions for These Loaded Cookies
Once you bake these monsters, you definitely want to eat them all right away, I totally get it! But storing them correctly is key, especially because these kitchen sink cookies pack in so many different textures—pretzels can go soft and potato chips can get stale if they sit out too long unprotected.
The best way to keep them soft and chewy, just like when they first come out of the oven, is airtight storage. I usually let them cool completely—and I mean completely, or they’ll steam up the container—then lay them in a single layer in a sturdy cookie tin or a heavy-duty Ziploc bag. If you’re stacking them, put a small piece of wax paper between the layers. I find they stay fantastic at room temperature for a solid three or four days. The saltiness actually helps them stay nice for longer, which is a win!
Now, if you’ve managed to save some for later (good for you!), the pretzel crunch might fade a tiny bit. Don’t worry, we can fix that! To bring back that glorious fresh-baked texture and melt those chips just a little bit more, pop one or two cookies on a microwave-safe plate and zap them for about 10 to 15 seconds. They come out warm, gooey, and the saltiness feels instantly brighter again. They are also wonderful warmed for 5 minutes in a 300°F oven if you’re baking a bigger batch for later!
Serving Suggestions for Bakery Style Cookies at Home
You’ve made the ultimate indulgence, so how should you properly serve your new favorite bakery style cookies at home? Honestly, these are so flavorful and loaded that they really don’t *need* anything else. I mean, you could eat one standing over the sink while still warm—I’ve definitely done it! But if you’re feeling fancy or serving them to guests, here are my favorite ways to present these masterpieces.
Since these kitchen sink cookies lean so heavily into the sweet and salty profile, you want drinks that cut through that richness a little bit or lean into the comfort factor. A big tall glass of ice-cold milk is always, always the answer. The creamy dairy just wraps around the salty pretzel bits perfectly. My kids swear by it!
For a grown-up pairing, I love serving them alongside a really strong cup of coffee, maybe an Americano or a slightly bitter cold brew. The bitterness contrasts beautifully with the sugary dough and the chocolate chips. If you want something fun for a party, try serving them with mini milkshakes! A simple vanilla shake lets the complexity of the cookie shine, or try a coffee-flavored shake to double down on that richness.
If you wanted to decorate them just a bit, skip heavy frosting—it would fight too much with the pretzels and chips. Instead, serve them with a tiny dollop of plain whipped cream on the side, or a small bowl of slightly salted caramel sauce for dipping. This lets everyone customize their experience. Seriously, though, grab a cookie, a cold drink, and just enjoy the absolute chaos of flavor you created!
Frequently Asked Questions About Kitchen Sink Cookies
I know when I try a new, loaded recipe like this, I always have a million little questions floating around in my head! Since these are legendary kitchen sink cookies, people always ask about how to keep them perfect. Here are a few of the things I hear most often. If you have another question, drop it in the comments below, and I’ll get right back to you!
Can I make these Everything But The Sink Cookies ahead of time?
Oh yes, you absolutely can! Making the dough ahead of time is actually even better if you are trying to achieve those thick and chewy cookies. The chilling time solidifies the fats, which stops the cookies from spreading too thin when they hit the oven. You can wrap the whole batch of dough tightly in plastic wrap and keep it in the fridge for up to three days before baking. If you chill it longer than 24 hours, just let it sit on the counter for about 15 minutes before scooping, just to make it a tiny bit easier to handle.
What is the secret to soft and chewy kitchen sink cookies?
There are a few secrets at play here for spectacular texture! First, the ratio of brown sugar to white sugar gives you that soft, slightly molasses-y chew. Second, don’t overbake! I stop baking them when they look slightly underdone in the very middle. They firm up beautifully as they cool on the hot pan. And third, remember all those heavy mix-ins? If you really want those fudgy brownie-like centers, chilling the dough ensures the base doesn’t melt away too fast. This helps keep everything thick!
How do I get the Panera Bread Copycat Cookies look?
That big, impressive, messy-but-perfect look is all about presentation right before baking! For the classic bakery look, use a standard ice cream scoop or measure out about 2 to 3 tablespoons of dough per cookie. Don’t try to smoosh those huge dough balls flat; leave them mounded high. Then, the real trick for that professional look is topping them off: gently press a few extra chocolate chips, a couple of pretzel pieces, and maybe one or two toffee bits right onto the top of each dough ball before they go into the oven. That little sprinkle on top makes all the difference!
Are these a Quick 30 Minute Cookies recipe?
That’s a great question! If you skip the chilling step, then absolutely, yes! From the moment you pull out the butter to the moment they come out of the oven, these can totally be done in under 45 minutes, and the prep time is under 20 minutes if you’re quick with measuring. That makes them a fantastic, fast dessert when you need quick 30 minute cookies. Just be aware that if you skip the chill time, they will spread slightly more and be a little thinner than the super-thick versions. Either way, they are yummy!
Sharing Your Incredible Loaded Cookies
That’s it! You did it! You have officially baked up a batch of the most glorious, over-the-top, everything-but-the-sink cookies you will ever taste. Seriously, take a moment to step back and admire that mountain of chocolate, salt, and chewiness you created. I really hope these become one of your family’s new favorite homemade cookie favorites!
When you take that first bite—that perfect crunch followed by the soft, almost gooey center where the toffee has melted—you’ll understand why I get so passionate about these things. I put so much love into developing this recipe to make sure you got the ideal sweet and salty balance, and I truly hope it shines through in your kitchen.
I absolutely live to see what mix-ins everyone else includes! So don’t be shy—please leave me a comment below telling me what you threw in there. Did you add bacon bits? Extra chips? Let me know how you customized your batch! If you found this recipe helpful in your quest for texture-rich desserts, please give it a five-star rating right here on the blog. And hey, if you’re looking for more baking inspiration that’s just as fun and loaded, make sure you hop over and follow my Pinterest account here! Happy baking, friends!
PrintThe Ultimate Kitchen Sink Cookies: Soft, Chewy, and Sweet-Salty Perfection (Panera Copycat Inspired)

Make the best bakery-style cookies at home! These Kitchen Sink Cookies are loaded with everything but the kitchen sink—chocolate chips, pretzels, toffee bits, and nuts—creating an incredible sweet and salty flavor with a perfect soft and chewy texture. This recipe is inspired by the famous Panera Bread version.
- Prep Time: 15 min
- Cook Time: 12 min
- Total Time: 27 min
- Yield: 20 cookies 1x
- Category: Dessert
- Method: Baking
- Cuisine: American
- Diet: Vegetarian
Ingredients
- 1 cup (2 sticks) unsalted butter, softened
- 3/4 cup packed light brown sugar
- 1/2 cup granulated white sugar
- 2 teaspoons pure vanilla extract
- 1 large egg
- 2 cups all-purpose flour
- 1 teaspoon baking soda
- 1/2 teaspoon kosher salt
- 1 1/2 cups semi-sweet chocolate chips
- 1 cup milk chocolate chips or chunks
- 1 cup pretzel pieces (use small twists or broken pieces)
- 1/2 cup toffee bits
- 1/2 cup chopped pecans or walnuts
- 1/2 cup crushed potato chips (optional, for extra saltiness)
- Flaky sea salt, for topping (optional)
Instructions
- Preheat your oven to 350°F (175°C). Line baking sheets with parchment paper.
- In a large bowl, cream together the softened butter, brown sugar, and white sugar until light and fluffy. This step helps create those chewy centers.
- Beat in the vanilla extract and the egg until fully combined.
- In a separate medium bowl, whisk together the flour, baking soda, and kosher salt.
- Gradually add the dry ingredients to the wet ingredients, mixing on low speed until just combined. Do not overmix.
- Fold in all your mix-ins: semi-sweet chocolate chips, milk chocolate chips, pretzel pieces, toffee bits, chopped nuts, and crushed potato chips, if using. Distribute everything evenly throughout the dough.
- Scoop rounded tablespoons of dough onto the prepared baking sheets, leaving about 2 inches between each mound. For thicker cookies, press the dough balls down slightly.
- If desired, sprinkle a few extra chocolate chips, toffee bits, or a pinch of flaky sea salt on top of each dough ball.
- Bake for 10 to 12 minutes, or until the edges are set and lightly golden brown, but the centers still look slightly soft.
- Let the cookies cool on the baking sheet for 5 minutes before transferring them to a wire rack to cool completely. These cookies are best enjoyed slightly warm.
Notes
- For the best sweet and salty balance, make sure your pretzels are lightly salted.
- If you want a truly thick and chewy cookie, chill the dough for at least 30 minutes before scooping and baking.
- You can substitute any mix-in you like! Try butterscotch chips, M&Ms, or shredded coconut for your own version of everything but the sink cookies.
- If you enjoy this recipe, see more of our baking inspiration on our Pinterest account.
Nutrition
- Serving Size: 1 cookie
- Calories: 250
- Sugar: 18g
- Sodium: 180mg
- Fat: 14g
- Saturated Fat: 8g
- Unsaturated Fat: 6g
- Trans Fat: 0.2g
- Carbohydrates: 30g
- Fiber: 1g
- Protein: 3g
- Cholesterol: 30mg