Nothing says “happy fall” like the smell of warm spices and pumpkin wafting through my kitchen. This pumpkin roll recipe is my absolute favorite thing to make when the leaves start turning – it brings back memories of my great-aunt Martha teaching me her secret for a perfectly rolled, crack-free dessert. I’ll never forget the first time she showed me how to use the kitchen towel trick – I thought it was pure magic when that golden sponge rolled up without a single tear!
What makes this pumpkin roll so special is that cream cheese filling – so luscious and tangy it makes your eyes roll back with every bite. And the secret bakery-style texture? That comes from a simple but crucial technique I’ll share with you. Whether it’s for Thanksgiving dessert or just a cozy autumn afternoon, this pumpkin roll has become my signature dish that friends and family beg me to bring to every gathering. It’s the kind of recipe that makes people think you spent hours in the kitchen, when really, it’s surprisingly simple when you know the tricks.
- Why You'll Love This Pumpkin Roll
- Ingredients for the Perfect Pumpkin Roll
- How to Make a Pumpkin Roll Step by Step
- Tips for a Flawless Pumpkin Roll
- Pumpkin Roll Variations and Serving Ideas
- How to Store and Freeze Pumpkin Roll
- Pumpkin Roll FAQs
- Nutritional Information
- Share Your Pumpkin Roll Creations
Why You’ll Love This Pumpkin Roll
Trust me, this isn’t just any pumpkin roll – it’s the kind that’ll have your guests begging for the recipe. Here’s why it’s become my go-to dessert every fall:
- Crack-free every time: My kitchen towel trick (you’ll see!) makes rolling this bad boy up foolproof – no more sad, broken cakes!
- That dreamy filling: The cream cheese mixture is so creamy it practically melts in your mouth, with just the right balance of sweet and tangy
- Holiday hero: Looks fancy on a dessert table but takes way less effort than pie – perfect for your Thanksgiving dessert spread
- Easy peasy: Don’t let the spiral shape intimidate you – I’ll walk you through the simple steps (you’ve probably got everything you need already!)
Seriously, once you taste that spiced pumpkin sponge hugging the luscious filling, you’ll understand why I make this every October through December.
Ingredients for the Perfect Pumpkin Roll
Gathering the right ingredients is half the battle with a pumpkin roll – and I’ve learned through trial and error that quality matters! I like to divide mine into two groups because, honestly, you’ll be making them separately anyway. Here’s exactly what you’ll need:
For the Pumpkin Sponge:
- 3/4 cup all-purpose flour (spooned and leveled – no packing!)
- 1 tsp baking powder (make sure it’s fresh!)
- 2 tsp pumpkin pie spice (or make your own blend – I sometimes add an extra pinch of cloves)
- 1/4 tsp salt (I prefer fine sea salt)
- 3 large eggs (room temperature is crucial here – about 30 minutes out of the fridge)
- 1 cup granulated sugar
- 2/3 cup pumpkin puree (not pie filling – and please, for the love of autumn, don’t use that last bit from an old can!)
- 1 tsp pure vanilla extract (the real stuff makes all the difference)
For the Cream Cheese Filling:
- 8 oz cream cheese (full-fat please, and softened – I leave mine out for 1 hour)
- 1 cup powdered sugar (sifted if you’re fancy)
- 6 tbsp butter (unsalted, softened – salted will make it too savory)
- 1 tsp vanilla extract
See? Nothing crazy – just good, simple ingredients that create something magical when combined. Pro tip: Measure everything before you start – it makes the whole process so much smoother when you’re not digging through cabinets mid-bake!
How to Make a Pumpkin Roll Step by Step
Okay friends, here’s where the magic happens – I’ll walk you through each step to pumpkin roll perfection. Don’t let the fancy spiral shape intimidate you! With these simple techniques, you’ll be rolling like a pro. Just follow along, and I promise you’ll end up with a stunning dessert that’ll have everyone thinking you trained at a fancy bakery.
Preparing the Pumpkin Sponge
First things first – let’s make that gorgeously spiced pumpkin sponge! Preheat your oven to 375°F and line a 15×10-inch jelly roll pan with parchment paper (pro tip: grease the pan first so the paper sticks). In a bowl, whisk together flour, baking powder, pumpkin pie spice, and salt – I like to give mine a good 20 whisks to really blend those spices. In another bowl, beat the eggs and sugar until thick and pale yellow – about 3 minutes with a mixer. Then gently stir in the pumpkin puree and vanilla. Fold the dry ingredients into the wet just until combined – overmixing is the enemy here! Spread the batter evenly in the pan – I use an offset spatula to get perfect coverage. Bake for 13-15 minutes until the top springs back when lightly touched.
Rolling and Cooling the Pumpkin Roll
Here’s the most important step – the roll! Lay a clean kitchen towel (I use flour sack towels) on a flat surface and generously dust it with powdered sugar. As soon as the cake comes out, flip it onto the sugared towel. Carefully peel off the parchment (look at that gorgeous color!). Starting from a short end, roll the cake and towel together into a spiral. Let it cool completely like this – the towel helps the pumpkin roll “remember” its shape so it won’t crack when you add the filling later. I usually give mine about 30 minutes to an hour to cool.
Adding the Cream Cheese Filling
Time for the best part – that luscious filling! While the cake cools, beat together the softened cream cheese, powdered sugar, butter, and vanilla until super smooth. Gently unroll the cooled cake (don’t panic if there are a few little cracks – they’ll disappear). Spread the filling evenly, leaving about a half-inch border. Then, carefully re-roll the cake without the towel this time – I find it helps to use the towel underneath as a guide. Wrap it in plastic and chill for at least an hour (this makes slicing way easier). Trust me, waiting is the hardest part!
And there you have it – the secrets to a perfect pumpkin roll! If you love this technique, you might enjoy my crack-free pumpkin pie recipe too – same attention to detail, different delicious dessert.
Tips for a Flawless Pumpkin Roll
After making dozens of pumpkin rolls (and yes, a few disasters along the way!), I’ve picked up some foolproof tricks that guarantee success every time. First – and I can’t stress this enough – use room temperature ingredients! Cold eggs and cream cheese just won’t incorporate properly. I set everything out about an hour before baking (or speed it up by putting eggs in warm water for 10 minutes).
Chilling is your best friend here. I know it’s tempting to slice right away, but that hour in the fridge makes all the difference – it firms up the filling so you get those picture-perfect spirals when you cut. For extra clean slices, run your knife under hot water and wipe it between cuts. And here’s my secret weapon: a serrated bread knife saws through the pumpkin roll like a dream!
One last pro tip – dust the finished roll with powdered sugar right before serving for that gorgeous bakery-window look. If you love this kind of foolproof pumpkin dessert, you’ll adore my no-crack pumpkin cheesecake recipe too – it’s another holiday showstopper that’s easier than it looks!
Pumpkin Roll Variations and Serving Ideas
Just when you thought this pumpkin roll couldn’t get any better – let’s talk fun twists! For nut lovers, try folding chopped pecans or walnuts right into the batter before baking (about ½ cup does the trick). My cousin swears by adding mini chocolate chips to the filling – it’s like a pumpkin-chocolate hug in every bite!
Presentation is everything with this beauty. I love serving mine on a wooden board with a dusting of powdered sugar and a side of whipped cream (add a splash of bourbon to the whipped cream for adult gatherings – you’re welcome!). A drizzle of caramel sauce makes it feel extra special, or go fancy with candied pecans on top.
Perfect pairings? A steaming mug of spiced chai or dark roast coffee cuts through the sweetness beautifully. For holiday brunches, this pumpkin roll shines next to savory quiches – the ultimate sweet-savory combo!
How to Store and Freeze Pumpkin Roll
Okay, so you’ve made this gorgeous pumpkin roll (and eaten way too much of it fresh – no judgment!) Now let’s talk about keeping it tasting amazing. In the fridge, wrap it tightly in plastic wrap or aluminum foil – this keeps the sponge moist and prevents fridge smells from creeping in. It’ll stay perfect for 3-4 days, though let’s be real…it never lasts that long in my house!
For freezing, here’s my trick: wrap the whole roll or individual slices in plastic wrap, then pop them in a freezer bag. When that pumpkin spice craving hits months later, just thaw overnight in the fridge. The filling stays creamy and the sponge stays soft – like you just made it! Perfect for meal planning ahead of holiday chaos.
Pumpkin Roll FAQs
I get asked about this pumpkin roll recipe all the time – here are the most common questions from readers (and my tried-and-true answers!):
Can I use homemade pumpkin puree?
Absolutely! I’ve made it both ways, and homemade pumpkin puree gives such a fresh, vibrant flavor. Just make sure it’s thick like canned puree – if it’s watery, strain it in cheesecloth first. The consistency makes all the difference in how the sponge turns out.
Why did my pumpkin roll crack when I rolled it?
Don’t panic! Most cracks happen if you bake the sponge too long (dry = crack) or wait too long after baking to roll it. Here’s my foolproof trick: roll it in the towel immediately while it’s still warm and flexible. That “muscle memory” sets the shape perfectly for when you add the cream cheese filling later.
Can I make this ahead for Thanksgiving?
Yes! This pumpkin roll actually tastes better after chilling overnight – the flavors meld beautifully. Just wrap it tightly in plastic wrap after assembling and store in the fridge for up to 2 days. Add the final powdered sugar dusting right before serving so it doesn’t dissolve.
What’s the secret to the cream cheese filling not being lumpy?
Three words: room temperature ingredients! Take your cream cheese and butter out at least 1 hour ahead. If you’re impatient like me sometimes, you can microwave them in 5-second bursts (but no longer or they’ll melt!). Beat everything until you can’t see a single lump – it should look like fluffy clouds!
For more baking inspiration, check out the gorgeous pumpkin recipes on Pinterest. And if you have other questions, drop them in the comments – I love hearing your pumpkin roll adventures!
Nutritional Information
Here’s the thing about nutrition labels – they’re always just ballpark figures! The exact numbers in this pumpkin roll will vary depending on your specific ingredients and how generously you spread that dreamy cream cheese filling. Consider the values as friendly estimates rather than strict facts – after all, holiday desserts are meant to be enjoyed!
Share Your Pumpkin Roll Creations
I’d love to see your beautiful pumpkin roll creations! Did you add any fun twists like nuts or chocolate? Snap a pic and share it in the comments below – nothing makes me happier than seeing your baking masterpieces. You can also follow me on Pinterest for more delicious fall dessert inspiration (just search for Kitchen User). Trust me, this pumpkin roll is too pretty not to show off – I can’t wait to see your version!
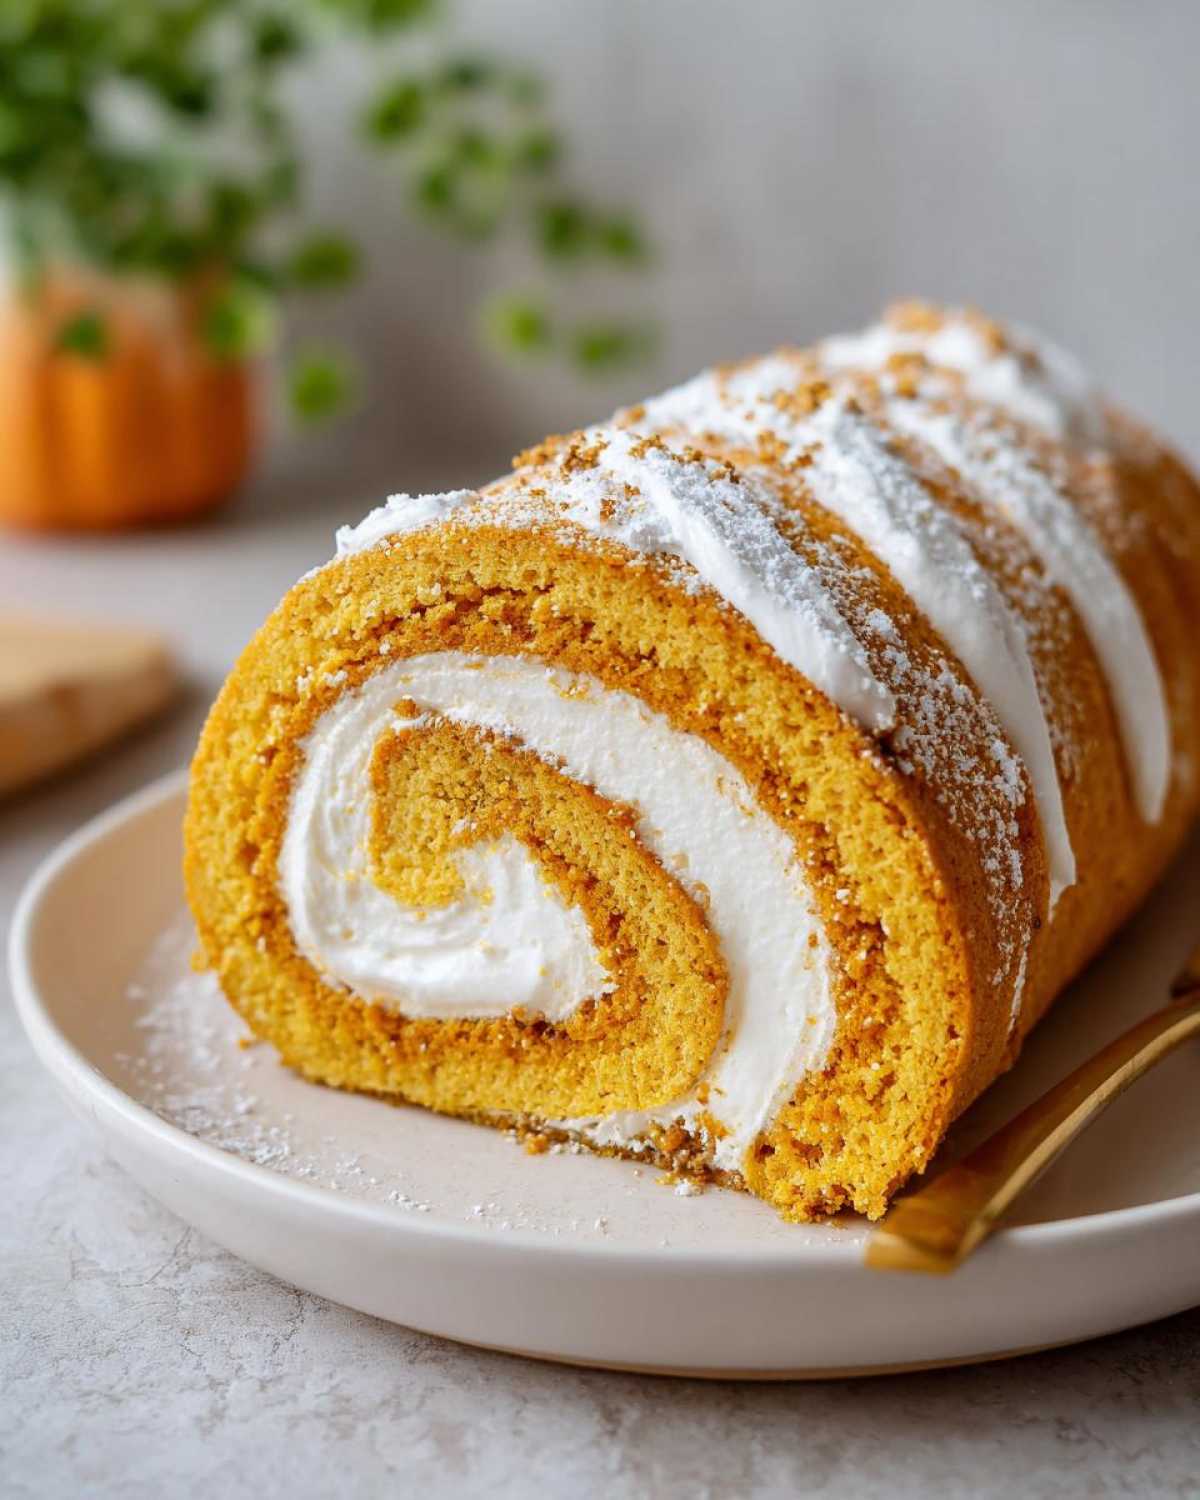
PrintPumpkin Roll with Cream Cheese Filling
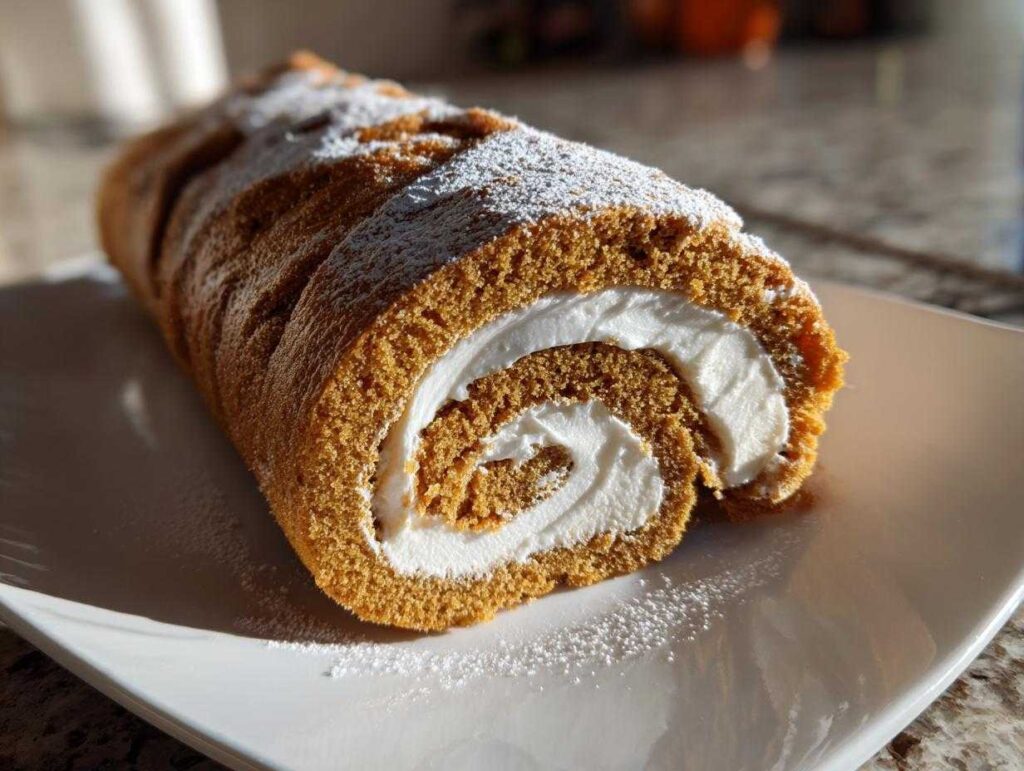
A bakery-style Swiss roll with a spiced pumpkin sponge and creamy filling, perfect for fall and holiday gatherings.
- Prep Time: 20 min
- Cook Time: 15 min
- Total Time: 1 hr 35 min
- Yield: 10 servings 1x
- Category: Dessert
- Method: Baking
- Cuisine: American
- Diet: Vegetarian
Ingredients
- 3/4 cup all-purpose flour
- 1 tsp baking powder
- 2 tsp pumpkin pie spice
- 1/4 tsp salt
- 3 large eggs
- 1 cup granulated sugar
- 2/3 cup pumpkin puree
- 1 tsp vanilla extract
- 8 oz cream cheese, softened
- 1 cup powdered sugar
- 6 tbsp butter, softened
- 1 tsp vanilla extract
Instructions
- Preheat oven to 375°F. Line a 15×10-inch jelly roll pan with parchment paper.
- Whisk flour, baking powder, pumpkin pie spice, and salt in a bowl.
- Beat eggs and sugar until thick. Mix in pumpkin puree and vanilla.
- Fold dry ingredients into wet until just combined. Spread batter evenly in the pan.
- Bake for 13-15 minutes until the cake springs back when touched.
- Lay a clean kitchen towel on a flat surface. Dust with powdered sugar.
- Flip the warm cake onto the towel. Peel off parchment paper.
- Roll the cake and towel together from the short end. Cool completely.
- Beat cream cheese, powdered sugar, butter, and vanilla until smooth.
- Unroll the cake, spread filling evenly, then re-roll without the towel.
- Chill for at least 1 hour before slicing.
Notes
- Use room temperature ingredients for smoother filling.
- Dust the towel well with powdered sugar to prevent sticking.
- Chill before slicing for clean cuts.
Nutrition
- Serving Size: 1 slice
- Calories: 280
- Sugar: 28g
- Sodium: 180mg
- Fat: 12g
- Saturated Fat: 7g
- Unsaturated Fat: 4g
- Trans Fat: 0g
- Carbohydrates: 39g
- Fiber: 1g
- Protein: 4g
- Cholesterol: 85mg