
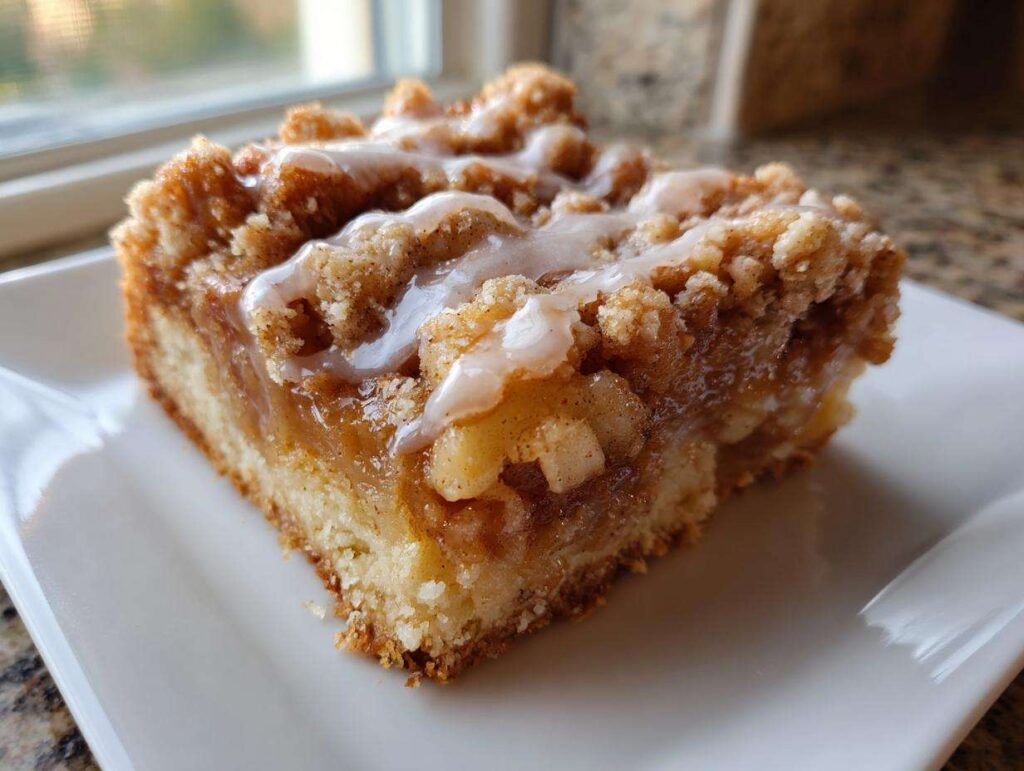
Oh, friends, you know how much I adore classic comfort food desserts, especially when the leaves start turning that gorgeous shade of orange! Deep down, I truly believe the best flavors come from simple, time-honored baking, but sometimes a full, traditional apple pie feels like too much work for a weeknight treat. That’s where my absolute favorite shortcut comes in! I’m talking about **apple pie bars**. Seriously, this recipe takes everything you adore about that flaky, spiced, sweet-tart pie filling and puts it into a perfectly portioned, sliceable, and surprisingly easy bar form. These are my go-to for quick **fall baking recipes**!
- Why These Buttery Apple Pie Bars Are Your New Favorite Autumn Dessert Bars
- Gathering Ingredients for Your Apple Pie Bars
- How to Prepare the Best Homemade Apple Bars Step-by-Step
- Tips for Success with Your Flaky Crust Apple Bars
- Variations for Your Apple Pie Bars Recipe
- Serving Suggestions for These Autumn Dessert Bars
- Storage and Make-Ahead Tips for Apple Pie Bars
- Common Questions About Making Apple Pie Bars
- Nutritional Estimates for Your Buttery Apple Dessert Bars
- Share Your Best Homemade Apple Bars Creations
Why These Buttery Apple Pie Bars Are Your New Favorite Autumn Dessert Bars
If you’ve ever felt intimidated by crimping a pie crust, listen up! These **buttery apple dessert bars** are totally going to change your baking life. Honestly, they nail that cozy, nostalgic feeling we all crave during autumn without the hassle. This recipe is pure, unadulterated **comfort food desserts**. It gives you that deep, spiced apple flavor tucked inside a fantastic base and topping, all baked together in one simple pan. You get all the wow factor with half the fuss. I just love pulling these out of the oven; the smell alone is worth the effort! If you love my apple crumb cake, you are going to swoon over these bars.
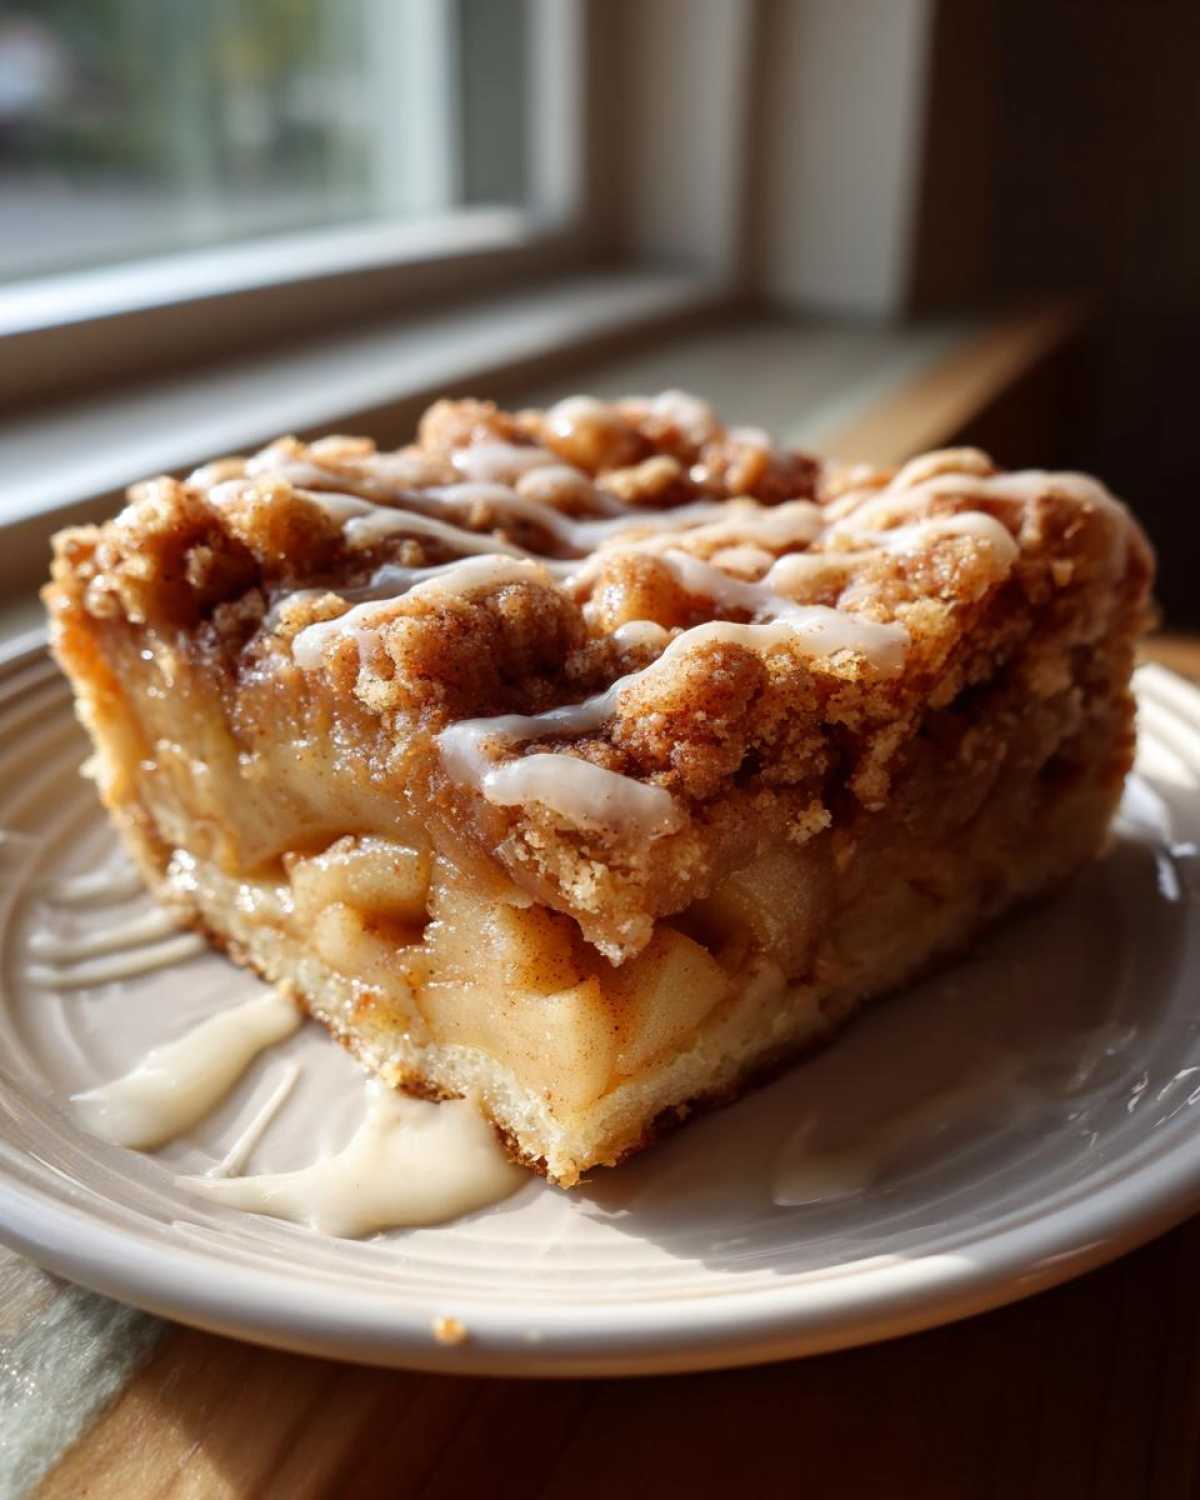
The Perfect Flaky Crust Apple Bars Experience
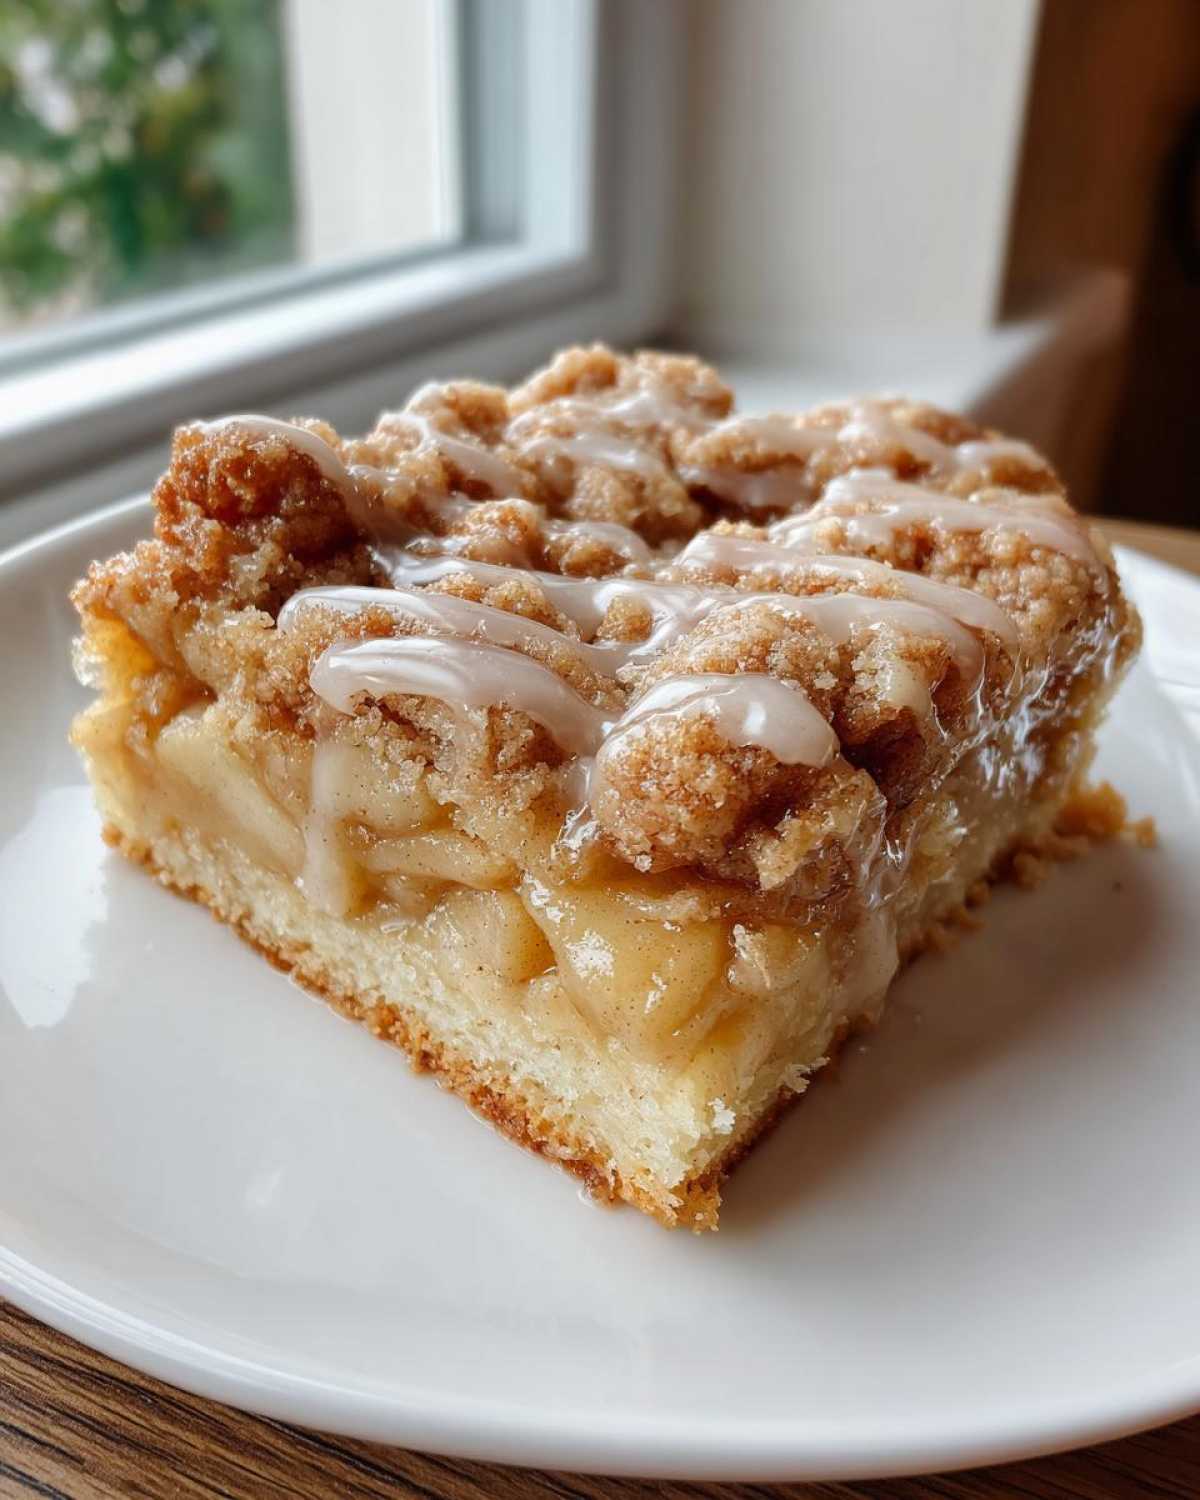
The secret here, truly, is that crust! We aren’t making a traditional rolled pie dough, thank goodness. This is a press-in shortbread-style dough that gives you the most amazing texture. It’s rich, buttery, and incredibly tender. When it bakes up around those apples, it forms these magnificent **flaky crust apple bars**—they literally melt in your mouth. You get that satisfying crumble on top and a dense, chewy layer underneath. It’s heaven, I’m telling you!
Quick Apple Treats with Classic Cinnamon Apple Squares Flavor
While the crust is simple, the inside is all about that classic pie experience. We load up the apples with brown sugar, lemon juice, and plenty of warm cinnamon and nutmeg. This turns into that gooey, slightly tart filling that everyone adores. It’s truly an **easy apple pie bars recipe** because just tossing the filling together means you get those concentrated **cinnamon apple squares** of flavor in every single bite. It’s fast, it’s fragrant, and it tastes like autumn just walked into the kitchen!
Gathering Ingredients for Your Apple Pie Bars
For any baker to trust a recipe, you have to see the exact list, right? I keep everything organized so I’m never scrambling mid-mix! This recipe relies on pantry staples elevated by fresh apples, which makes it even better. We need ingredients broken down clearly for the buttery base, the filling, and that final drizzle. When you see how straightforward this list is, you’ll realize why these **apple pie bars** are such a quick win for stovetop apple cinnamon oatmeal lovers looking for a baked treat!
For the Buttery Crust and Topping of the Apple Pie Bars
For the dough, you’ll need 1 cup of unsalted butter that is nice and softened! Don’t try to cheat and use cold butter here; we need that creamy texture when we beat it with 1 cup of granulated sugar. Next, grab 2 large eggs and 1 teaspoon of vanilla extract. The dry part is simple: 2 1/2 cups of all-purpose flour, 1 teaspoon of baking powder, and just half a teaspoon of salt to balance everything out.
For the Tender Cinnamon Apple Filling
The heart of the bar needs 4 medium Granny Smith apples—peeled, cored, and diced small, please! Mix those tart beauties with half a cup of packed light brown sugar for that cozy molasses flavor. A splash of fresh lemon juice (about 1 tablespoon) keeps the apples bright, and don’t forget the spices: 1 teaspoon of ground cinnamon and a pinch—about 1/4 teaspoon—of ground nutmeg. That’s it for the filling!
For the Cinnamon Glaze on Your Glazed Apple Bars Tutorial
This glaze is optional, but wow, it takes things up a notch! It’s just 1/4 cup of powdered sugar, and then you slowly add 1 to 2 tablespoons of milk. I always advise adding the liquid slowly because you want a beautiful pourable consistency for this part of the **glazed apple bars tutorial**. A tiny splash of vanilla extract in there too makes the final drizzle perfect!
How to Prepare the Best Homemade Apple Bars Step-by-Step
Okay, this is where the magic really happens! Making these **apple pie bars** is actually really straightforward if you just follow the order. We are building layers, just like a fancy layered cake, but much faster. Preheat your oven right away to 350°F (175°C). I always line my 9×13 inch pan with parchment paper first, making sure there’s a little overhang on the sides—this acts like built-in handles so you can lift the whole thing out later. Super important for clean slicing!
Prepping the Pan and Mixing the Shortbread Apple Bars Dough
First up is that gorgeous buttery base. Make sure your butter is softened, not melted! In a big bowl, beat that butter with the granulated sugar until it’s pale and fluffy, which means you’ve created those tiny air pockets. Then, beat in the eggs one at a time until they are fully incorporated. Now, gently mix in your flour, baking powder, and salt until it just comes together into a soft dough. Stop mixing the moment you don’t see streaks of flour! This is what guarantees you get those amazing **shortbread apple bars** texture.
Assembling the Apple Pie in a Pan Layers
This part requires just a tiny bit of division. Take about two-thirds of that dough and press it evenly into the bottom of your prepared pan. Really press it down firmly—that’s your base crust. Now, take your spiced apple mixture and spread it evenly over that base layer. Don’t overthink the apple distribution! Finally, take the remaining one-third of the dough and crumble it right over the top of the apples. This makes that wonderful, rustic look we all love in an **apple pie in a pan**!
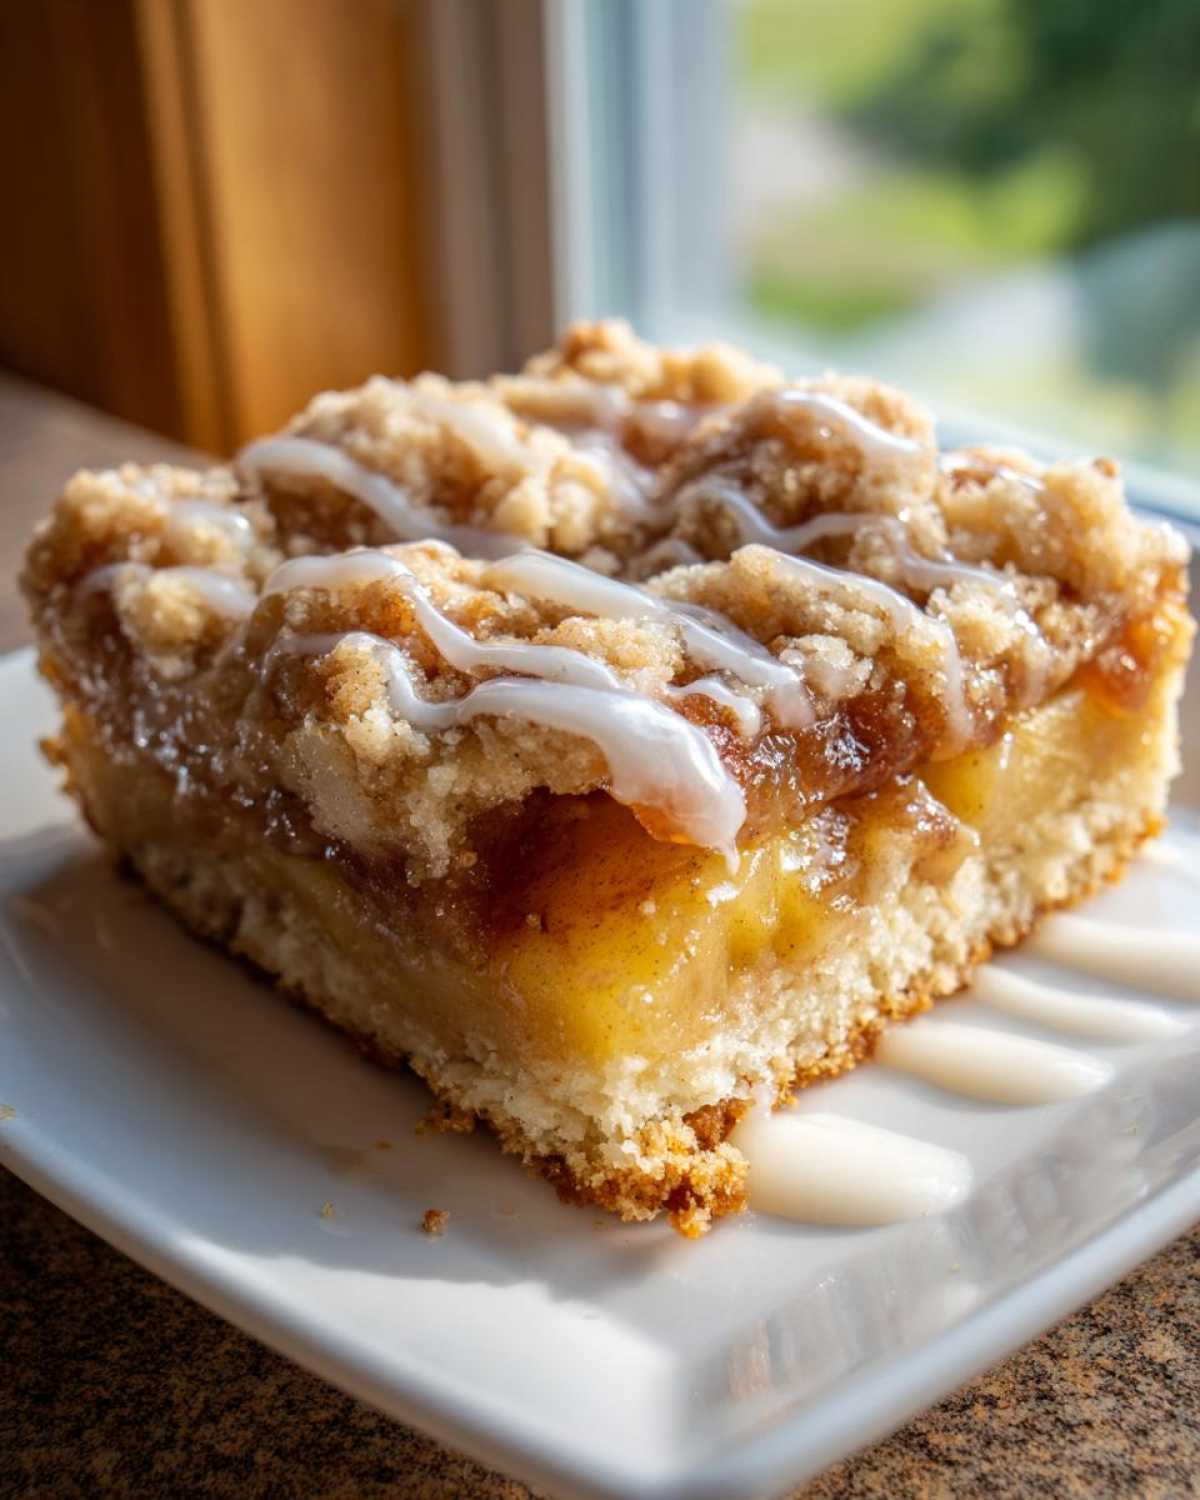
Baking and Cooling Your Apple Pie Bars Completely
Pop the pan into the 350°F oven and let it bake for about 40 to 45 minutes. You are looking for the topping to be a lovely light golden brown, and you should see the apple filling bubbling happily around the edges. Trust me on this next part: you must let these cool *completely* before you even think about glazing or slicing. If they are even slightly warm, the glaze will just run everywhere, and you’ll have sticky hands instead of perfect squares. Seriously, wait! Once cooled, you can lift the whole thing out using those parchment sling handles. For more great **apple bundt cake recipe** inspiration, check out this moist spiced dessert idea!
Applying the Final Drizzle to the Cinnamon Apple Squares
Once you are sure they are cool—maybe chill them for 30 minutes if you’re impatient like me—it’s time for the drizzle! Whisk together your powdered sugar and just 1 tablespoon of milk to start. We want a relatively thick, drizzly texture, not a thin wash, so keep adding milk just a tiny bit at a time until it flows nicely off your whisk. Drizzle this vanilla goodness haphazardly over the top for that beautiful finish. Once the glaze sets up slightly, slice into your perfect **cinnamon apple squares**. If you want to see this in action, check out my favorite baking shots saved on our Pinterest board!
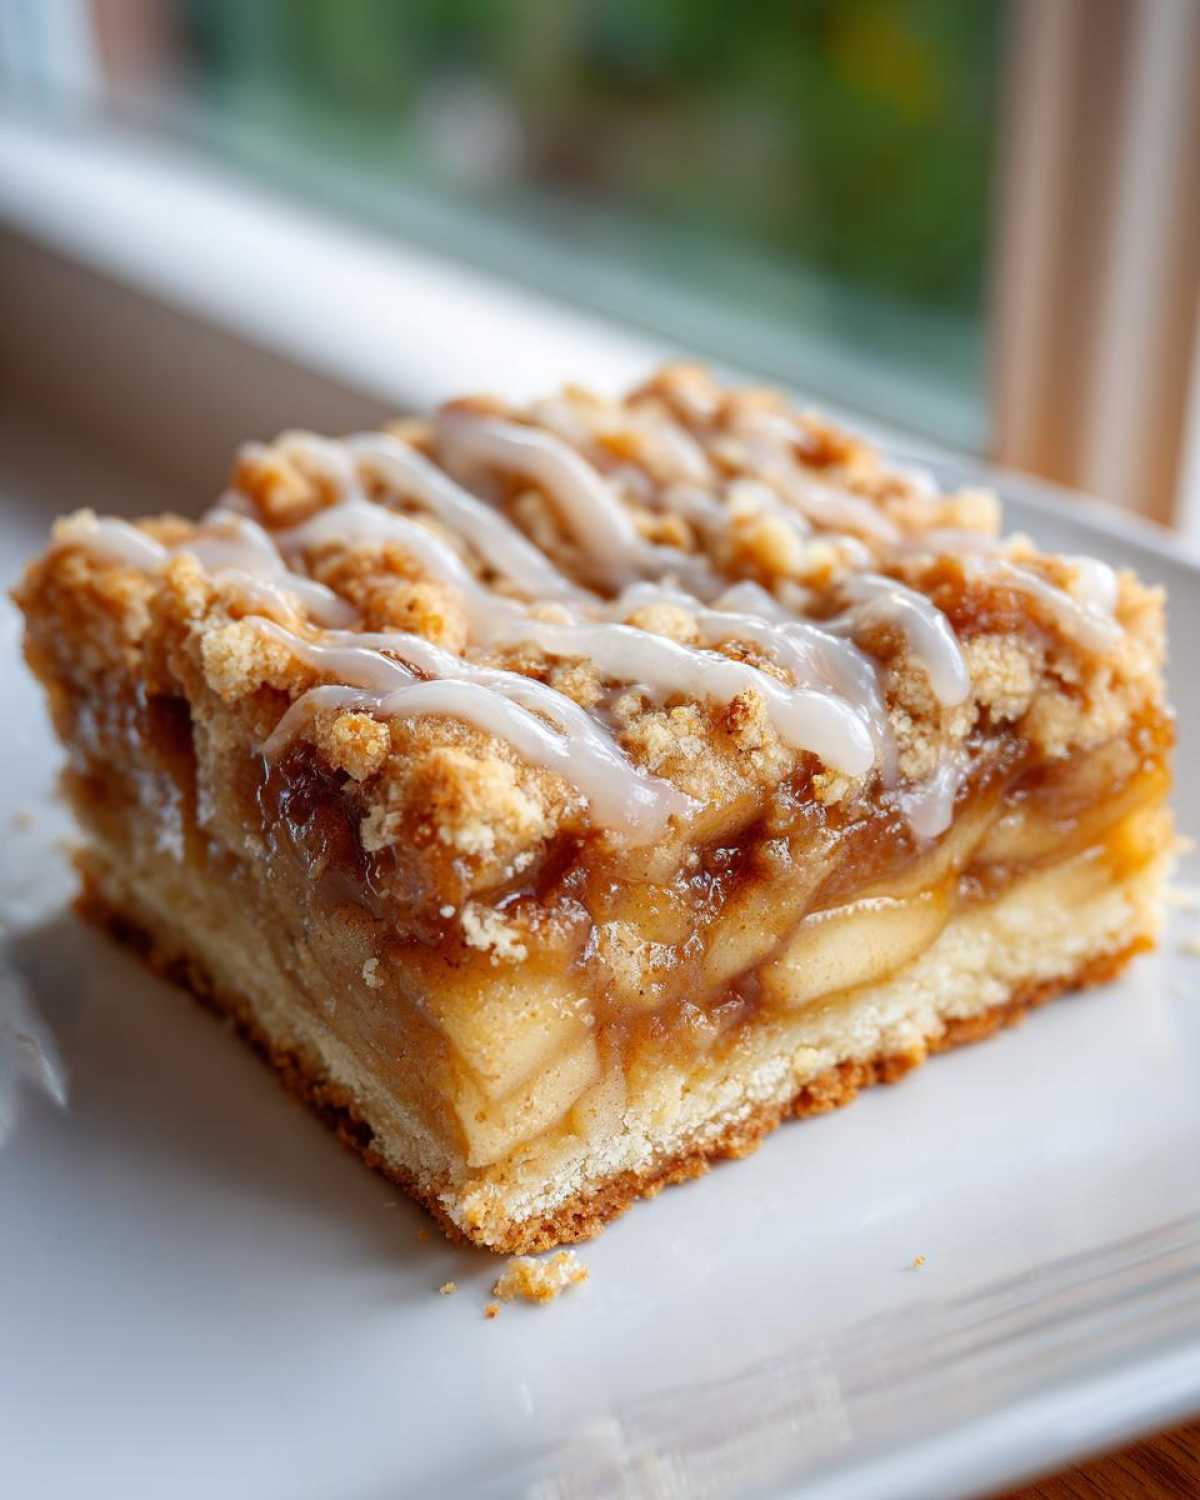
Tips for Success with Your Flaky Crust Apple Bars
Even though these are so much easier than a classic pie, paying attention to a few key details makes the difference between good and absolutely incredible **flaky crust apple bars**. This is where we rely on those little tricks that make us feel like seasoned pros! Getting the texture right is everything, especially because the buttery crust has to stand up beautifully to that wet apple filling. For even more bar inspiration, you should definitely check out my graham cracker toffee recipe; it shares that satisfying crunch!
Ingredient Quality for Perfect Apple Pie Bars
My number one tip for any apple dessert? You have to balance your apples! Using only sweet apples makes the filling taste flat. That’s why I insist on Granny Smiths because their tartness cuts through the rich butter wonderfully. And remember that crust butter: it needs to be softened perfectly—think cool but yielding, not greasy. If your butter is too warm, your crust will bake up hard, and we definitely don’t want that for our **apple pie bars**!
Achieving the Right Topping Texture
When you crumble that reserved dough on top, try not to fuss with it too much. Just use your hands and let it fall naturally over the apples. You want variation in the size of those crumbs—some big chunks, some smaller sprinkles. This ensures a varied texture when it bakes, which fans of **apple crumble bars** really appreciate. Those bigger pieces get wonderfully golden brown and crisp, contrasting perfectly with the soft filling underneath. It’s all about that textural contrast!
Variations for Your Apple Pie Bars Recipe
I love that once you master the core of this dessert, you can totally start playing around! The beauty of these bars is how easily they adapt, making them feel brand new every time you bake them. If you’re looking for ways to shake things up, or maybe you want a batch that feels extra decadent, this is the perfect base for experimentation. Mastering this Christmas sugar cookie bars recipe style of ease means you can whip up these **apple pie bars** any time. It gives you so many options for holiday baking or just Sunday afternoon snacking!
Adding Nuts or Oats to the Apple Crumble Bars
If you love texture, you HAVE to try boosting that top layer! For ultimate crunch, toss in about half a cup of chopped pecans or walnuts right along with that reserved dough crumble before it goes into the oven. Another wonderful trick to turn these into something even heartier is adding half a cup of rolled oats into your topping mix. This really leans into the cozy feeling of **apple crumble bars**, giving you a nice chewiness right alongside the buttery dough. So easy, so much flavor!
Flavor Twists for the Apple Filling
While the cinnamon and nutmeg are perfect, occasionally I like to lean into a more grown-up flavor profile. When I’m making these for an adult gathering, I love adding just a teaspoon or two of good quality bourbon right into the diced apples when I’m mixing them with the brown sugar. It evaporates during baking, but it leaves behind this incredible oaky warmth that pairs beautifully with the tartness. You could also swap out some of the nutmeg for a small pinch of cardamom—it adds a bright, floral note that is just stunning with baked apples.
Serving Suggestions for These Autumn Dessert Bars
Once these gorgeous **apple pie bars** have cooled and been drizzled with that shiny glaze, how do you serve them? Oh, the possibilities are endless! My absolute favorite way to enjoy these **autumn dessert bars** is slightly warm, paired with a scoop of really good vanilla bean ice cream while the glaze is still soft. Imagine that contrast—warm, spiced apple against cold, creamy vanilla? Perfection! If you’re serving them in the morning with coffee, letting them cool completely ensures that super clean slice. For a fun accompaniment, you could try pairing them with something savory like my whipped ricotta dip (for a sweet twist, maybe topped with candied pecans instead of hot honey!). Either way, they disappear fast!
Storage and Make-Ahead Tips for Apple Pie Bars
I know we all love baking ahead when the holidays roll around, and thankfully, these bars store like a dream! You can absolutely make these **apple pie bars** a day or two ahead of time. Just keep them covered tightly at room temperature. They actually taste even better the next day once the spices really settle in, similar to how my chewy granola bars firm up overnight! For longer storage, they freeze beautifully. Just slice them first, wrap each square individually in plastic wrap, and tuck them into a freezer-safe bag. They keep well for about three months. Thaw on the counter, and they are ready for a cozy afternoon treat!
Common Questions About Making Apple Pie Bars
It’s totally normal to have questions when you’re making a new dessert or trying to perfect an old favorite! I get so many messages about baking times and texture, so I put together answers for the things I hear most often about these delicious **apple pie bars**. Don’t worry if you’re unsure—baking should be fun!
Can I use a different type of apple in my apple pie bars?
You absolutely can! While I love Granny Smiths because their tartness keeps the overall flavor bright and prevents it from becoming too sweet next to that buttery crust, you shouldn’t feel locked in. If Granny Smiths are too sharp for you, try a mix! I often combine two Granny Smiths with two Honeycrisp or Fuji apples. This gives you the great structure and tartness from one group, balanced by the sweetness and aroma of the other. It just makes for a really complex, well-rounded apple flavor in your bars.
How do I prevent the crust from getting soggy?
Ah, the dreaded soggy bottom! This is the biggest fear when making anything that involves a wet fruit filling, right? There are two things that help me here. First, make sure you press that bottom crust layer down *firmly* into the pan—you want it packed tight so it forms a solid barrier. Second, try not to let your diced apples sit around in the sugar mixture for too long before they go into the oven. The longer they sit, the more liquid they draw out. Quick assembly means the moisture stays contained in the filling until it bakes!
Are these technically apple crumble bars or shortbread apple bars?
That’s a fantastic question because the terms overlap so much these days! Here’s my take: because the base is made from a creamed butter/sugar mixture that is pressed down, it functions exactly like a **shortbread apple bar** base. However, the topping is specifically made by crumbling the reserved dough over the filling—which mimics the look and texture of **apple crumble bars**. So, I call it a delicious hybrid! You get the density of a shortbread base with the rustic, crumbly texture on top. Win-win!
Nutritional Estimates for Your Buttery Apple Dessert Bars
Now, I always stress that I’m a baker first and a nutritionist second, so please take these numbers with a big grain of salt—or maybe a tiny bit of that brown sugar! These estimates are calculated based on the ingredients listed for 18 servings of these **buttery apple dessert bars**. Since we are using real butter and sugar, this is definitely a delightful treat, not an everyday snack! If you’ve ever mastered my sweet potato pound cake recipe, you know these richer desserts clock in a bit higher in the tasty department!
For one bar (based on 18 servings), you can generally expect the following breakdown, but remember, your apple size and exact glaze drizzle will change things up:
- Calories: Around 280 per bar. Worth every single one, trust me!
- Fat: Roughly 15 grams. Hello, real butter goodness! This is split between saturated (about 9g) and unsaturated fats.
- Carbohydrates: About 35 grams total.
- Sugar: This comes in around 25 grams, thanks to the combination of granulated and brown sugar in the dough and filling.
- Protein: Around 3 grams, mostly from the eggs and flour.
- Cholesterol: About 55 mg.
These numbers confirm that our **apple pie bars** are firmly in the indulgence category, perfect for a cozy weekend or sharing at a potluck. Enjoy them guilt-free because they are homemade with love!
Share Your Best Homemade Apple Bars Creations
Now that you’ve baked up your batch of the **best homemade apple bars**, I really want to see them! Don’t forget to snap a quick photo and share it! Tag me when you post your beautiful **apple pie bars** on social media—I live for seeing what you all create in your kitchens. And if you loved this recipe, make sure you stick around and follow along so you don’t miss any of my upcoming **fall baking recipes**! I love connecting with you all! If you need a savory break, check out my baked mac and cheese next!
PrintButtery Flaky Apple Pie Bars with Cinnamon Glaze
Make the classic flavor of apple pie in an easy bar form. These buttery apple dessert bars feature a flaky shortbread crust, tender cinnamon-spiced apples, and a simple vanilla glaze. They are perfect for fall baking and sharing.
- Prep Time: 25 min
- Cook Time: 45 min
- Total Time: 70 min
- Yield: 18 servings 1x
- Category: Dessert
- Method: Baking
- Cuisine: American
- Diet: Vegetarian
Ingredients
- 1 cup unsalted butter, softened
- 1 cup granulated sugar
- 2 large eggs
- 1 teaspoon vanilla extract
- 2 1/2 cups all-purpose flour
- 1 teaspoon baking powder
- 1/2 teaspoon salt
- 4 medium Granny Smith apples, peeled, cored, and diced
- 1/2 cup packed light brown sugar
- 1 tablespoon lemon juice
- 1 teaspoon ground cinnamon
- 1/4 teaspoon ground nutmeg
- 1/4 cup powdered sugar (for glaze)
- 1–2 tablespoons milk (for glaze)
Instructions
- Preheat your oven to 350°F (175°C). Line a 9×13 inch baking pan with parchment paper, leaving an overhang on the sides for easy removal.
- Prepare the crust: In a large bowl, cream together the softened butter and granulated sugar until light and fluffy. Beat in the eggs one at a time, then stir in the vanilla extract.
- In a separate bowl, whisk together the flour, baking powder, and salt. Gradually add the dry ingredients to the wet ingredients, mixing until just combined to form a soft dough.
- Press two-thirds of the dough evenly into the bottom of the prepared pan to form the bottom crust. Set the remaining one-third of the dough aside for the topping.
- Prepare the apple filling: In a medium bowl, toss the diced apples with brown sugar, lemon juice, cinnamon, and nutmeg until the apples are evenly coated.
- Spread the apple mixture evenly over the bottom crust in the pan.
- Crumble the reserved one-third of the dough over the apple layer to create a topping. This forms your apple crumble bars base.
- Bake for 40 to 45 minutes, or until the topping is lightly golden brown and the filling is bubbly.
- Let the bars cool completely in the pan on a wire rack. This step is important for clean slicing.
- Prepare the glaze: Whisk together the powdered sugar and milk until smooth. Add milk slowly until you reach a drizzly consistency.
- Once cool, drizzle the cinnamon apple squares with the vanilla glaze. Let the glaze set before slicing into bars.
Notes
- For a flakier crust, chill the dough for 15 minutes before pressing it into the pan.
- Use a mix of tart and sweet apples for the best flavor balance in your apple pie in a pan.
- If you prefer a richer flavor, substitute half the butter in the crust with cold, cubed butter and cut it into the flour mixture like you would for a traditional pie dough.
Nutrition
- Serving Size: 1 bar
- Calories: 280
- Sugar: 25
- Sodium: 110
- Fat: 15
- Saturated Fat: 9
- Unsaturated Fat: 6
- Trans Fat: 0
- Carbohydrates: 35
- Fiber: 2
- Protein: 3
- Cholesterol: 55