
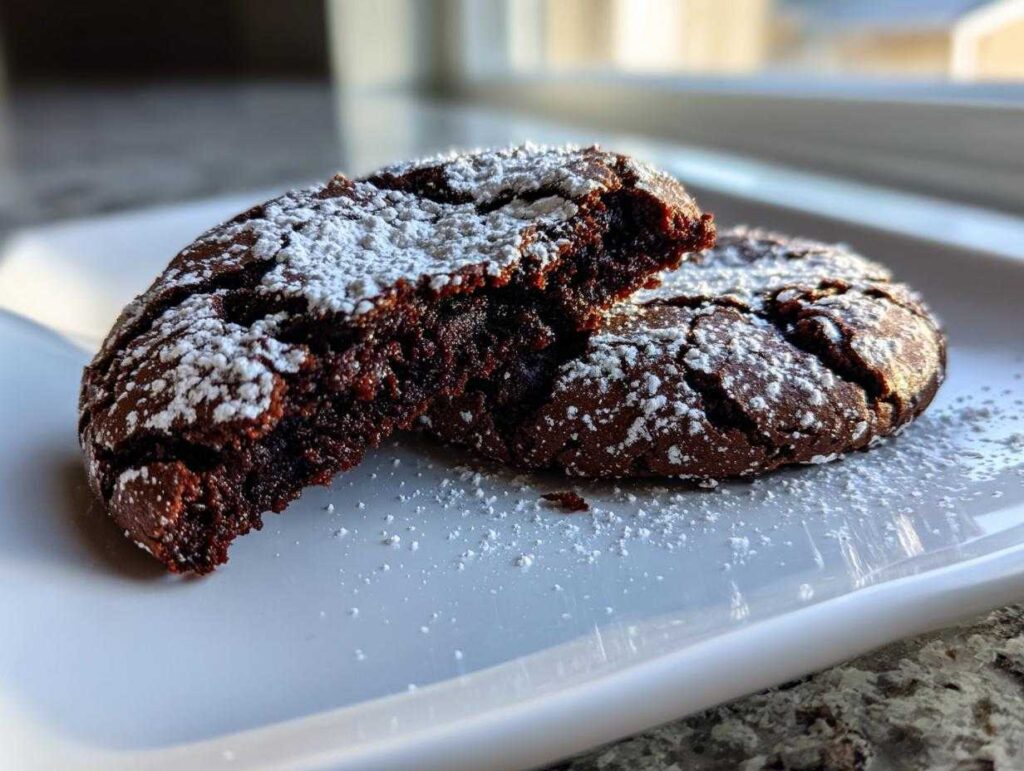
Oh, welcome back to my kitchen! When the air gets crisp and the scent of woodsmoke starts drifting around, you know it’s time for the season of truly decadent baking. Nothing says festive cheer quite like presenting a cookie plate overflowing with rich, dark chocolate treats, especially when they have that stunning, snow-dusted finish.
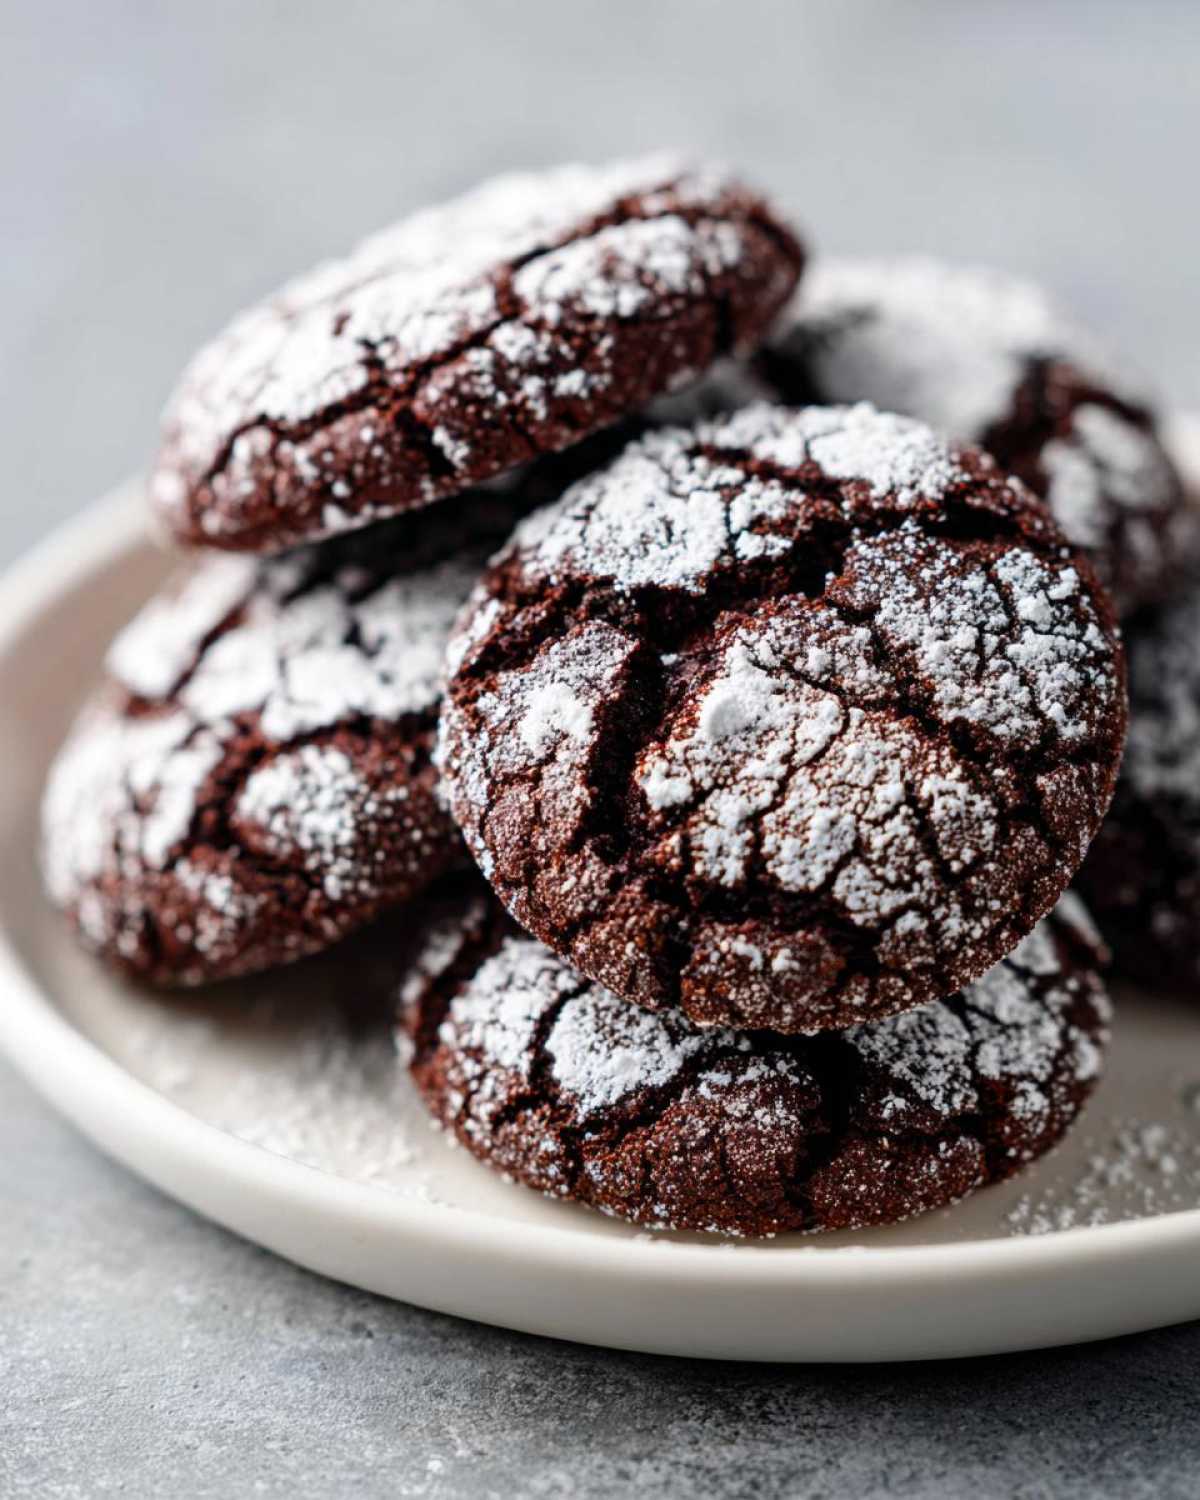
Forget dry, crumbly versions you might have tried—these **crinkle cookies** are my absolute gold standard. I’m talking about the fudgiest, chewiest chocolate cookies you can imagine, guaranteed to have that signature, beautiful crackle on top. Every time I pull a sheet of these out, perfectly cracked and glossy, I remember setting up cookie boxes for the neighborhood Christmas exchange. Trust me, these disappear first!
- Why These Are the Best Crinkle Cookies You Will Ever Make
- Gathering Ingredients for Perfect Crinkle Cookies
- Step-by-Step Instructions for Fudgy Crinkle Cookies
- Tips for Baking Bakery Style Crinkle Cookies
- Storage and Keeping Your Crinkle Cookies Fresh
- Variations on Classic Crinkle Cookies
- Frequently Asked Questions About Making Crinkle Cookies
- Estimated Nutritional Data for Your Crinkle Cookies
- Share Your Perfect Crinkle Cookies Creations
- Estimated Nutritional Data for Your Crinkle Cookies
- Share Your Perfect Crinkle Cookies Creations
Why These Are the Best Crinkle Cookies You Will Ever Make
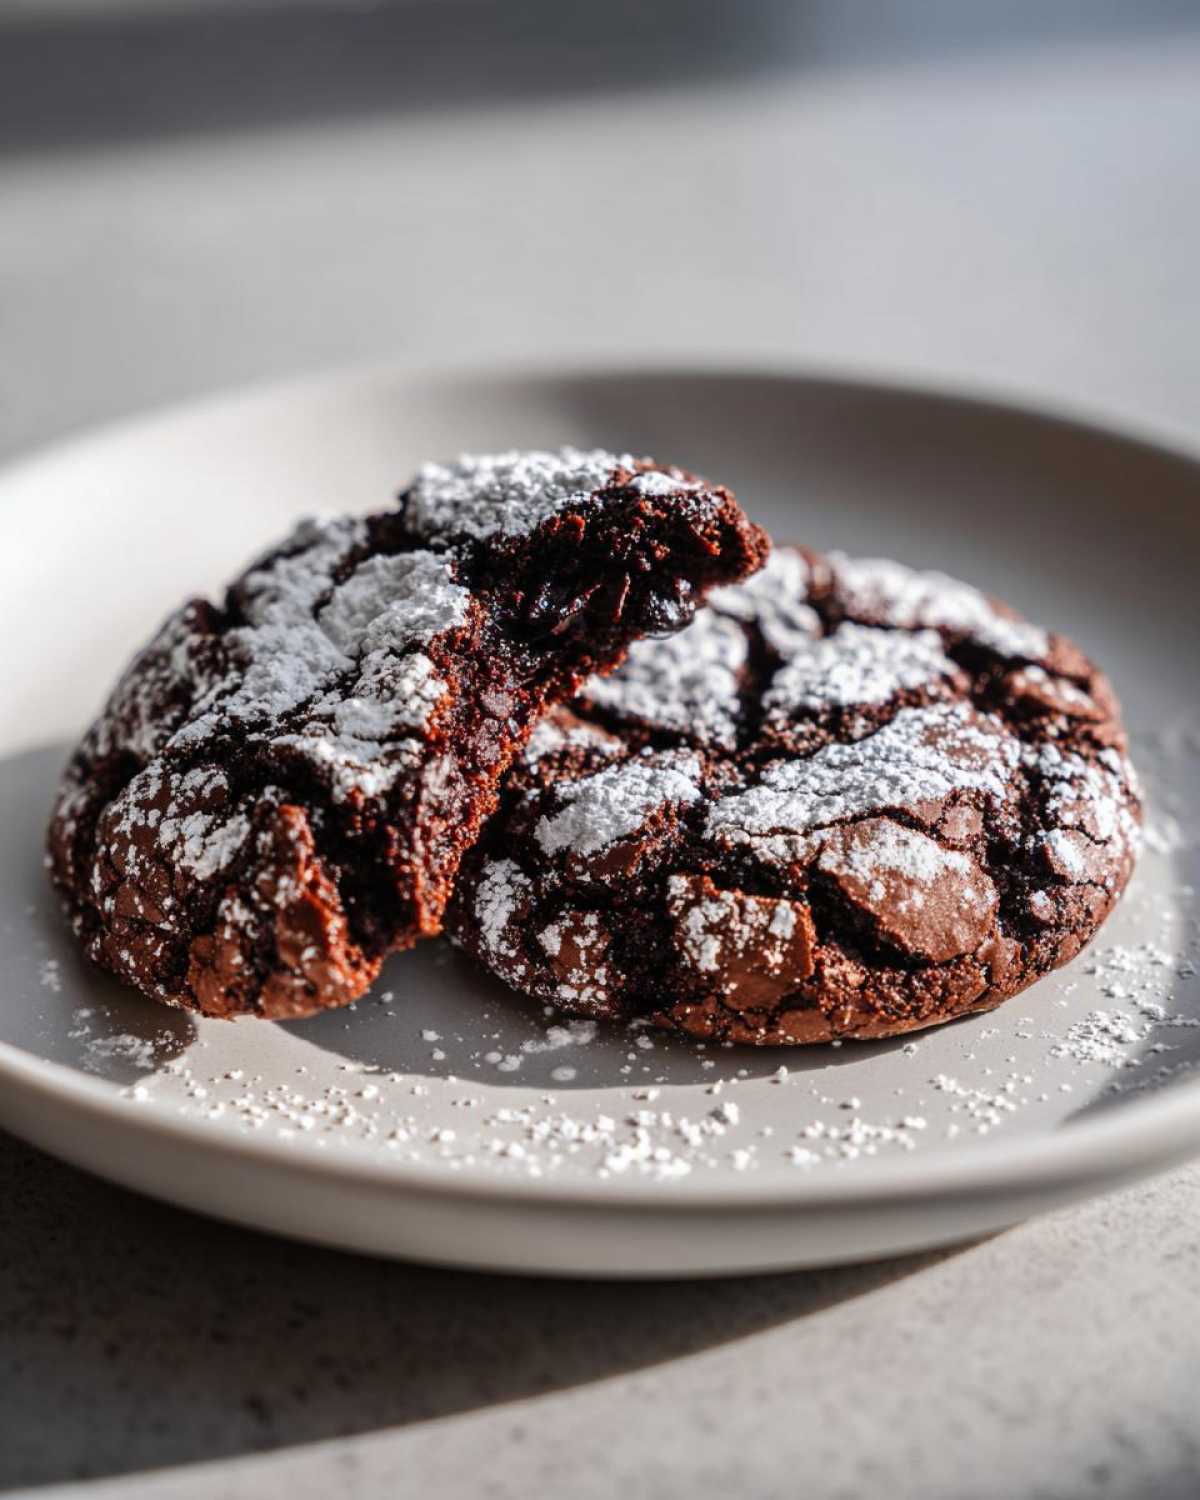
These aren’t just good; they are, without a doubt, the *best* **crinkle cookies** to ever grace my holiday baking rotation. What makes the difference? It all comes down to texture when you bite into one. We are chasing that perfect marriage of a deep, rich chocolate center—yes, wonderfully **fudgy crinkle cookies**—with edges that still have a little chew. These aren’t those dry, cake-like things people sometimes bring to parties!
I’ve perfected this recipe so that if you follow the steps carefully, you get these wonderfully **chewy crinkle cookies** every single time. The secret sauce involves a high-quality unsweetened cocoa and making sure you don’t fall victim to the temptation of overbaking. Honestly, if you’re looking for an alternative to heavy chocolate chip recipes, these are it. If you want to see how I focus on texture in other bakes, check out my guide to fluffy pancake baking—the principle of gentle mixing is the same!
Achieving the Signature Powdered Sugar Crinkle Top
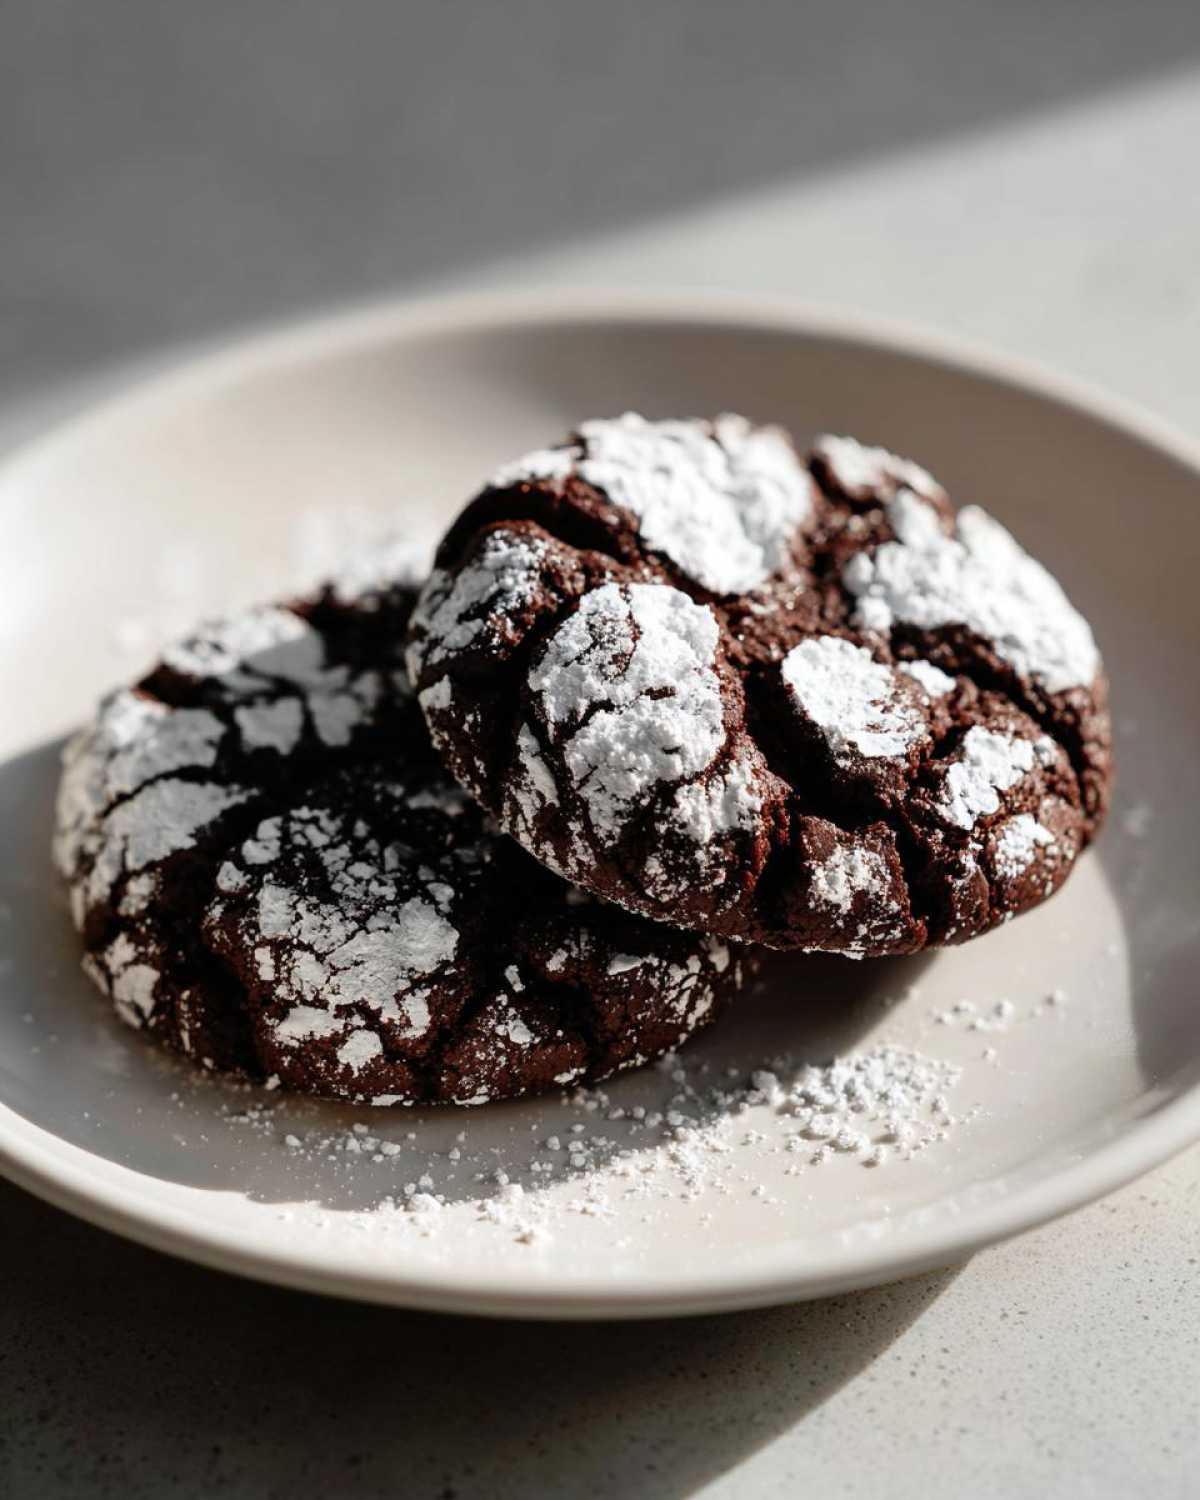
The visual appeal of these **crinkle cookies** is half the battle, right? That beautiful, cracked, snowy top is what stops everyone in their tracks at the cookie exchange. You absolutely must use the double-roll technique. Don’t skip the first dip in granulated sugar!
Rolling them first in the regular sugar helps a thick layer of the final powdered sugar coating adhere properly. If you go straight into the powdered sugar, it just clumps up and melts too fast in the oven. Also, temperature matters! If your dough is too warm, the cookies spread instantly and the cracks don’t set right. That’s why I sometimes chill the dough for just thirty minutes—it gives the butter structure so when those cookies hit the heat, they puff up, and the sugar coating cracks perfectly, revealing that dark interior. It’s pure magic!
Gathering Ingredients for Perfect Crinkle Cookies
Okay, now that we’ve talked about the magic of the crackle, let’s talk about what actually goes into making these incredible **crinkle cookies**. Getting your mise en place ready is half the fun! Remember, since chocolate is the star here, we really need to treat it right. That means investing in a good quality cocoa powder; it makes a world of difference between a standard chocolate cookie and a truly deep, decadent one.
Gathering these few simple things sets us up for success. Don’t worry, this list is pretty straightforward, which makes this an amazing easy cookie recipe when you need a quick fix! Here is what you need for about two dozen of the best cookies you’ll ever make:
- 1 cup unsalted butter, softened
- 2 cups granulated sugar
- 4 large eggs
- 1 teaspoon vanilla extract
- 1 cup all-purpose flour
- ¾ cup unsweetened cocoa powder
- 2 teaspoons baking powder
- ½ teaspoon salt
- 1 cup powdered sugar, for rolling
Ingredient Notes and Substitutions for Your Crinkle Cookies
I always get questions about which cocoa to use, so let’s clarify that! For the darkest, most intense color—the kind that really makes those white cracks pop—I highly recommend using Dutch-processed cocoa powder. It’s less acidic and gives you that beautiful, almost black exterior. If all you have is natural cocoa, it will still taste great, but the color won’t be quite as dramatic.
Also, pay attention to the eggs! Make sure those four large eggs are at room temperature before you start creaming them with the butter and sugar. When eggs are warm-ish, they emulsify so much better with the fat, which creates a smoother batter structure. A smooth batter means less chance of those greasy puddles when they bake. If you keep your butter soft, don’t forget the eggs need to cooperate too!
Step-by-Step Instructions for Fudgy Crinkle Cookies
This is where the fun really begins! While the ingredient list is straightforward, the success of your **crinkle cookies** really hinges on how you handle the dough. I like to get everything ready first—preheat that oven to 350°F (175°C) and line those baking sheets with parchment paper so you’re not scrambling later. Seriously, good preparation is the bedrock of great home baking. I promise, if you follow these steps, you’ll have an unbelievably rewarding baking experience.
My instructions are designed to give you the perfect mix of fudgy interior and cracked white exterior. We’re aiming for **bakery style cookies**, and that takes a little specific technique. For more inspiration on pairing great bakes with tasty sides, check out my recipe for roasted broccolini—sometimes savory balance is needed after all that sugar!
Mixing the Dough for Ideal Crinkle Cookies Texture
Always start slow! You need to cream that softened butter with the 1 cup of granulated sugar until it’s genuinely light and fluffy. This takes a couple of minutes, so don’t rush it. Those air pockets you’re creating are vital for the final texture later. Once it looks pale and creamy, you add the eggs one by one. If you dump them all in at once, the batter can sometimes look sad and separated. Beat well after each egg! Then, stir in the vanilla.
Next, get your dry team together: flour, cocoa powder, baking powder, and salt. Whisk them well in a separate bowl. Now, add this dry team gradually to your wet ingredients. Here’s my biggest warning for any chocolate cookie: stop mixing as soon as you see the last streaks of flour disappear! Overmixing develops gluten, and gluten is the enemy of a tender, chewy cookie. If the dough feels a little slack, pop it in the fridge for 30 minutes before rolling. Trust me on this little chill time!
The Essential Rolling Technique for Great Crinkle Cookies
This is the famous dual-coating process, and it’s non-negotiable for fantastic visuals! Get your remaining 1 cup of granulated sugar in one shallow dish and your whole cup of powdered sugar in another. You want the dough balls rolled first completely in the granulated sugar.
Why? The granulated sugar acts like a textured primer. After that, roll the sugar-coated ball generously into that cloud of powdered sugar—and I mean *generously*! You want a thick, pure white coating so that when the cookie spreads in the heat, that thick coating tears apart, revealing the dark chocolate underneath. I remember the first time I tried cutting corners here; the coating just melted away into a thin glaze. No crinkles! Now, I make sure every single ball looks like a little snowball before it goes anywhere near the baking sheet. If you love seeing all the best holiday cookies, don’t forget to check out what others are baking on our Pinterest page!
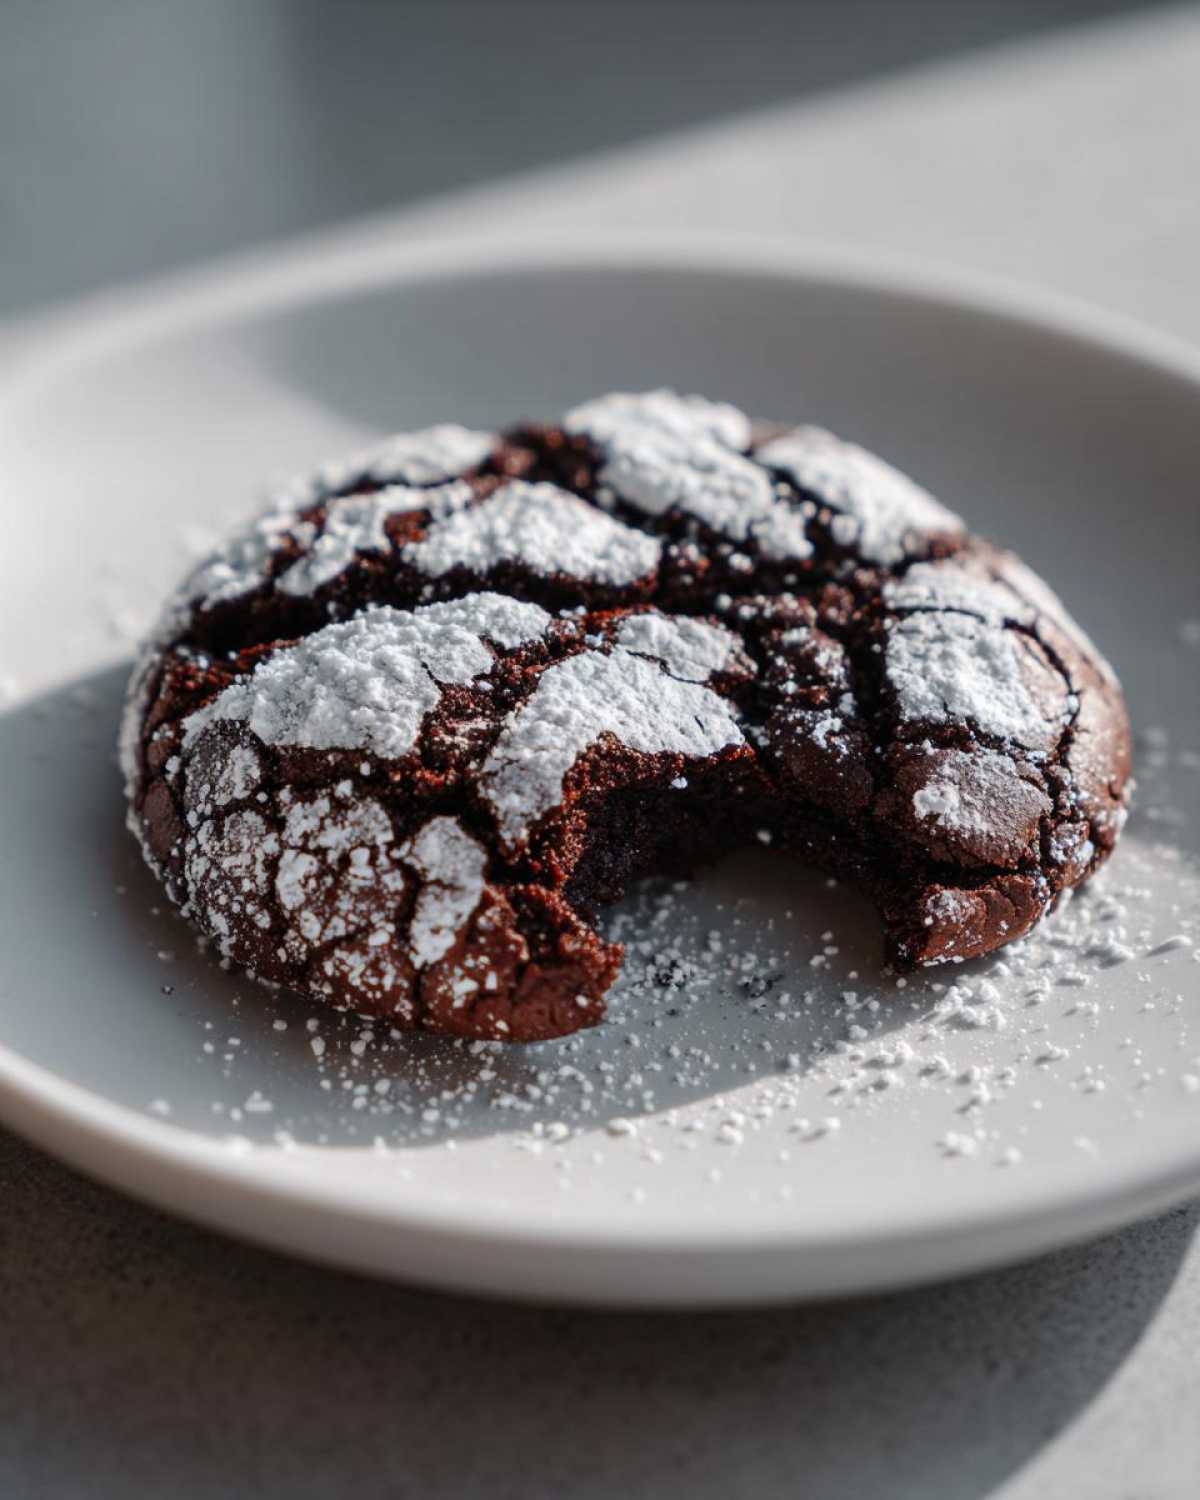
Finally, drop those beautifully coated dough balls onto your parchment-lined sheets, leaving about two inches between them. Bake them for just 10 to 12 minutes. They must look slightly soft in the middle when you pull them out; this guarantees that fudgy texture. As they sit on the hot tray for those first five minutes, the residual heat finishes the cooking process and sets those gorgeous cracks. Enjoy that moment!
Tips for Baking Bakery Style Crinkle Cookies
Baking is about science, but great cookies? That’s all about intuition and knowing the little tricks that separate a home batch from something you’d line up to buy at a fancy bakery. When it comes to these **crinkle cookies**, a couple of quick tips can make the difference between a flat, greasy mess and those perfectly domed, deliciously chewy treats we are aiming for!
First and foremost, let’s talk about the biggest pitfall: overbaking. If you wait until the centers look completely firm, you’ve cooked out all that precious fudginess we worked so hard to build into the dough. Pull these cookies out when the edges look set enough that they won’t slide apart, but the center still looks a tiny bit soft, maybe even slightly glossy. Trust me, they finish cooking on that hot baking sheet, and this residual heat is the secret to that melt-in-your-mouth texture.
Another thing to watch for is spreading. If your cookies are spreading too much and turning into thin disks of chocolate before they set up, your butter was definitely too warm, or you skipped the optional chill time. If you find this happening, next time, scoop your balls, roll them, and stick the trays right into the fridge for a good twenty minutes. Those firmer balls hold their shape much better, allowing the cookie to rise up before it spreads wide. This technique really helps achieve that desirable height in your **bakery style cookies**.
If you’re looking for more tips on achieving perfect textures in your baked goods, especially when dealing with butter and sugar ratios, you absolutely have to check out my article on brown butter maple cookies. The science behind creaming fat is huge for great cookie structure!
Storage and Keeping Your Crinkle Cookies Fresh
The toughest part about baking **crinkle cookies** is waiting for them to cool down enough so you can eat one! Once they are completely cool—and I mean totally cooled down, or you risk melting that gorgeous powdered sugar!—it’s time to think about storage.
The good news is that because these are so fudgy and dense, they keep their texture beautifully. You can store these right on the counter, covered tightly, for about three to four days, especially if you didn’t use any fancy glazes. They stay soft and chewy! Honestly, I rarely have any left after day three; they disappear so quickly, especially when they are part of a big holiday spread.
Now, here’s the big warning flag for all you **powdered sugar cookies**: humidity is the enemy! If it’s a super rainy or damp day here in the kitchen, that beautiful white coating can start to look sticky or melt right into the cookie surface. If you live somewhere humid, you might want to chill them instead. Store them in an airtight container in the fridge. They firm up a bit more when cold, but honestly, the texture is still fantastic when eaten cold or slightly warmed up.
If you need to stash them for longer—maybe you’re baking ahead for a big cookie exchange—you can absolutely freeze them! Just make sure they are completely cool. Place them in a sealed, freezer-safe container, perhaps with a layer of wax paper between them so they don’t stick together. They freeze perfectly for up to three months. They thaw out beautifully right on the counter!
Variations on Classic Crinkle Cookies
While my fudgy chocolate recipe is the standard bearer in my house, I absolutely love seeing how adaptable the basic **crinkle cookie** template is! You mentioned seeing Lemon and Gingerbread versions out there, and they are fantastic ways to shake up your winter baking routine or handle a crowd that might want something lighter than deep chocolate. Thankfully, changing the flavor profile is super easy, as long as you keep that essential double-roll technique intact!
When you move away from chocolate, the visual contrast between the cookie and the white sugar coating is less dramatic, but the flavor payoff is huge. If you’re looking for something bright and zingy, trying a citrus flavor is a must. Plus, if you need an alternative chocolate classic for comparison, you can always jump over and check out my super easy tiramisu recipe!
Here are my favorite ways to switch up this versatile base:
Bright and Zesty Lemon Crinkle Cookies
For these beauties, you are essentially keeping the structure but swapping out that rich cocoa powder for pantry staples and citrus power! To make **lemon crinkle cookies**, you need to skip the cocoa powder entirely. Instead, add about 1/4 cup of fresh lemon zest—make sure you only get the bright yellow part, not the bitter white pith! A splash of lemon juice mixed into the wet ingredients also helps keep the dough moist enough since we are losing the wetness from the cocoa.
The dough will be paler, so the final powdered sugar coat is crucial for that classic cracked look. They taste like sunshine in cookie form, and they are a wonderful palate cleanser after all those rich holiday cookies!
Warm and Spiced Gingerbread Crinkle Cookies
If you love the warm, cozy spices of Christmas, you have to try the **gingerbread crinkle cookies**! This variation focuses on turning the base dough into a spiced delight. To swap from chocolate to gingerbread, you’ll eliminate the cocoa powder and add about 2 teaspoons of ground ginger, 1 teaspoon of cinnamon, and perhaps a pinch of cloves or allspice into your dry mixture.
What seals the deal for gingerbread is molasses. You need to replace about 1/4 cup of the granulated sugar in the creaming step with a good quality molasses. This not only adds that deep, signature molasses flavor but also keeps the cookies incredibly soft and chewy—perfect for that satisfying **cracked top cookies** texture we look for. Roll them up tight, and enjoy the incredible aroma coming from your oven!
Frequently Asked Questions About Making Crinkle Cookies
Even with the best instructions, sometimes little questions pop up, especially when you’re trying to achieve that perfect look! I’ve gathered the most common things readers ask me after they try this **crinkle cookie recipe**. Don’t worry if you run into an issue; we can usually fix it with a quick adjustment!
These recipes are designed to be straightforward, some of the most **easy cookie recipes** out there, but details matter. Whether you’re worried about the coating or the chewiness, I’ve got you covered so your batch of **powdered sugar cookies** turns out flawlessly every time.
Why didn’t my cookies crinkle?
This is the number one question! If your cookies came out looking like soft, powdered chocolate domes instead of cracked masterpieces, it almost always comes down to two things: dough temperature or coating technique. If the dough is too soft when it hits the oven, the cookie spreads before the powdered sugar has a chance to set and tear. Make sure your dough balls are nice and firm, or chill them for 30 minutes! Alternatively, did you skip that first roll in the granulated sugar? That initial coating allows the heavy outer layer of powdered sugar to cling on long enough to crackle beautifully without immediately dissolving into the dough.
Can I use an electric mixer for everything?
You certainly can! While I love my grandmother’s old wooden spoon for creaming—it really forces you to incorporate air—using a stand mixer or a hand mixer for the creaming of the butter and sugar is totally fine and saves your arm! Just be mindful when you add the dry ingredients. You want to drop your mixer speed to low and mix until *just* combined. If you see the flour streaks disappear, stop immediately! Overmixing once the flour is in is the fastest way to turn a tender cookie into a tough one.
Can I freeze the dough for these crinkle cookies?
Yes, and I highly recommend it! Having balls of **fudgy crinkle cookies** dough ready to go in the deep freeze is a lifesaver, especially during busy holiday baking seasons. Roll the dough into balls, coat them completely in both sugars as directed, and then flash freeze them on a baking sheet for an hour. Once they are rock solid, transfer them into a zip-top freezer bag, trying to keep them separated with a small square of parchment if you have room. They will last great for a couple of months! You can bake them straight from frozen, just add a couple of extra minutes to the baking time.
Can I use cake mix instead of making these crinkle cookies from scratch?
I know cake mix cookies are fast, and goodness knows I rely on them for quick fixes sometimes! You *can* make a version using cake mix, but I need to be honest with you: the texture just isn’t the same. My scratch recipe, using the right balance of butter, eggs, and cocoa, develops a much deeper fudgy interior that cake mix just can’t replicate. If you try to substitute cake mix, you are compromising on that dense, chewy texture we prize so much in these **best crinkle cookies**. For the best results, stick with building it from the base ingredients!
If you’re looking for other easy, no-fuss sweet treats that still rely on basic ingredients, you should check out my recipe for easy no-bake peanut butter pie. Sometimes fast and delicious is exactly what we need!
Estimated Nutritional Data for Your Crinkle Cookies
When you are whipping up batches of **holiday cookies** like this, it’s always handy to have a rough idea of what’s in that beautiful, fudgy goodness. Please keep in mind that these values are estimates calculated based on the traditional ingredient list provided in this recipe. If you swap out butter for oil, or use alternative sweeteners, these numbers will change, of course!
But based on the recipe for approximately 24 cookies, here is the approximate breakdown per serving:
- Serving Size: 1 cookie
- Calories: 210
- Sugar: 22g
- Fat: 11g
- Carbohydrates: 28g
- Protein: 3g
They certainly pack a punch of flavor, which is exactly what you want for a rich **chocolate dessert recipe**!
Share Your Perfect Crinkle Cookies Creations
I absolutely live for seeing what you all create in your kitchens! Honestly, sending me a picture of your perfectly cracked **crinkle cookies** makes my entire week. When you bake up a batch of what I hope are the **best crinkle cookies** you’ve ever made, please snap a photo!
If you loved this recipe, please consider leaving a star rating right here on the blog—it really helps other **winter baking ideas** enthusiasts find the perfect treat. And if you want to see what inspired some of these darker chocolate recipes, feel free to follow my baking adventures over on Pinterest! Happy baking, everyone!
If you want to use up any extra dough right away, or just need something savory after all that sweetness, you have to try dipping some crusty bread into my garlic herb olive oil dip next time!
Estimated Nutritional Data for Your Crinkle Cookies
When you are whipping up batches of **holiday cookies** like this, it’s always handy to have a rough idea of what’s in that beautiful, fudgy goodness. Please keep in mind that these values are estimates calculated based on the traditional ingredient list provided in this recipe. If you swap out butter for oil, or use alternative sweeteners, these numbers will change, of course!
But based on the recipe for approximately 24 cookies, here is the approximate breakdown per serving:
- Serving Size: 1 cookie
- Calories: 210
- Sugar: 22g
- Fat: 11g
- Carbohydrates: 28g
- Protein: 3g
They certainly pack a punch of flavor, which is exactly what you want for a rich **chocolate dessert recipe**! If you are looking for other decadent sweets that require no oven time, you really ought to check out my no-bake chocolate mousse pie recipe—it’s unbelievable!
Share Your Perfect Crinkle Cookies Creations
I absolutely live for seeing what you all create in your kitchens! Honestly, sending me a picture of your perfectly cracked **crinkle cookies** makes my entire week. When you bake up a batch of what I hope are the **best crinkle cookies** you’ve ever made, please snap a photo!
If you loved this recipe, please consider leaving a star rating right here on the blog—it really helps other **winter baking ideas** enthusiasts find the perfect treat. And if you want to see what inspired some of these darker chocolate recipes, feel free to follow my baking adventures over on Pinterest! Happy baking, everyone!
If you want to use up any extra dough right away, or just need something savory after all that sweetness, you have to try dipping some crusty bread into my garlic herb olive oil dip next time!
PrintFudgy Chocolate Crinkle Cookies: The Best Chewy Holiday Treat
Make soft, fudgy chocolate crinkle cookies with a perfect powdered sugar crackle top. This easy recipe delivers bakery style cookies ideal for Christmas cookie exchanges.
- Prep Time: 20 min
- Cook Time: 12 min
- Total Time: 32 min
- Yield: 24 cookies 1x
- Category: Dessert
- Method: Baking
- Cuisine: American
- Diet: Vegetarian
Ingredients
- 1 cup unsalted butter, softened
- 2 cups granulated sugar
- 4 large eggs
- 1 teaspoon vanilla extract
- 1 cup all-purpose flour
- ¾ cup unsweetened cocoa powder
- 2 teaspoons baking powder
- ½ teaspoon salt
- 1 cup powdered sugar, for rolling
Instructions
- Preheat your oven to 350°F (175°C). Line baking sheets with parchment paper.
- In a large bowl, cream together the softened butter and 1 cup of the granulated sugar until light and fluffy.
- Beat in the eggs one at a time, mixing well after each addition. Stir in the vanilla extract.
- In a separate medium bowl, whisk together the flour, cocoa powder, baking powder, and salt.
- Gradually add the dry ingredients to the wet ingredients, mixing on low speed until just combined. Do not overmix.
- Place the remaining 1 cup of granulated sugar in one shallow bowl and the powdered sugar in another shallow bowl.
- Roll the dough into balls, about 1.5 inches in diameter. First, roll each ball thoroughly in the granulated sugar, then roll it completely in the powdered sugar until fully coated.
- Place the coated dough balls onto the prepared baking sheets, leaving about 2 inches between them.
- Bake for 10 to 12 minutes. The edges should look set, but the centers will still look slightly soft.
- Let the cookies cool on the baking sheets for 5 minutes before transferring them to a wire rack to cool completely. The signature crinkle top will develop as they cool.
Notes
- For the best fudgy texture, do not overbake these cookies. They should look slightly underdone when you remove them from the oven.
- Chill the dough for 30 minutes before rolling if your kitchen is warm; this helps prevent the cookies from spreading too much.
- If you want a more intense chocolate flavor, use Dutch-processed cocoa powder.
- These are excellent for holiday baking and cookie exchanges. Find more festive cookie recipes on our Pinterest account.
Nutrition
- Serving Size: 1 cookie
- Calories: 210
- Sugar: 22
- Sodium: 110
- Fat: 11
- Saturated Fat: 7
- Unsaturated Fat: 4
- Trans Fat: 0
- Carbohydrates: 28
- Fiber: 2
- Protein: 3
- Cholesterol: 45