
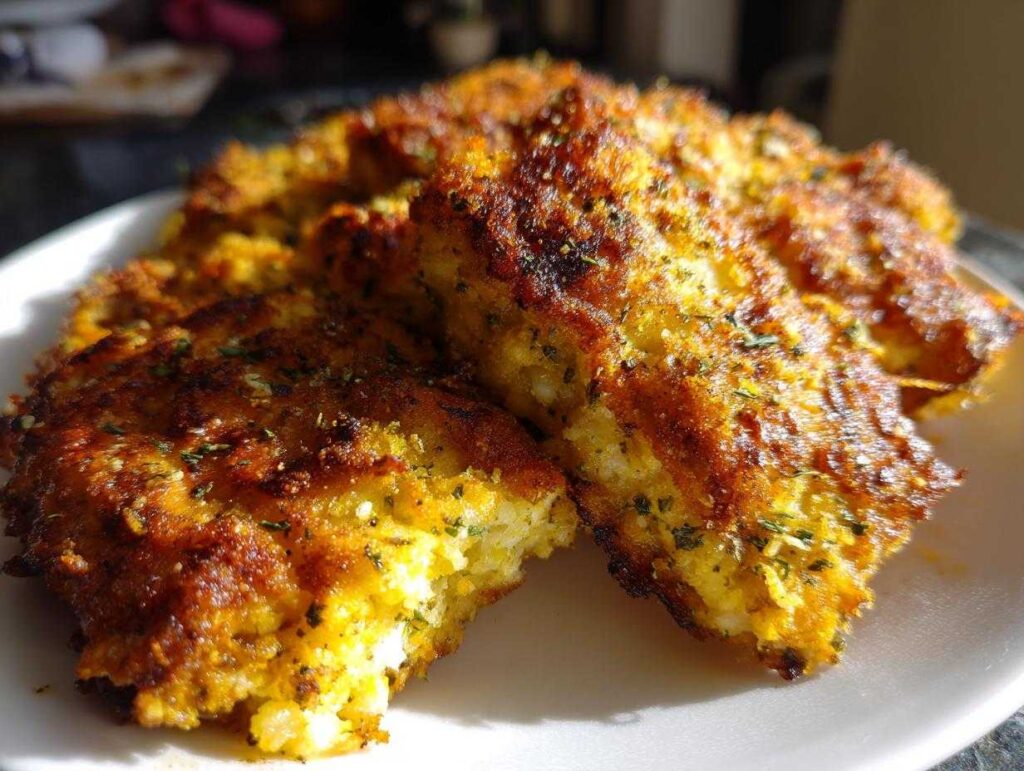
Are you tired of the same old bland chicken on a busy Tuesday night? Me too! That’s why I’ve spent weeks tinkering in the kitchen to bring you something truly revolutionary: the crispy dill pickle parmesan chicken. I know, it sounds wild, but trust me, the tang of the pickle mixed with that sharp, salty Parmesan crust is pure magic. It hits every note you want in a fantastic meal—it’s bold, it’s savory, and oh my goodness, the crunch factor is off the charts!
If you’re ready to trade boring weeknight dinners for something your whole family will actually cheer about, you’re in the right spot. Before we dive into the coating, you might want to peek at my tips for getting super juicy meat next time; here is my guide on the best chicken marinade techniques. This recipe uses a few simple tricks that guarantee you get the ultimate crunchy, savory chicken dinner every single time. Forget dry breading; we are achieving peak crispiness here!
- Why This Crispy Dill Pickle Parmesan Chicken Recipe Works
- Gathering Ingredients for Crispy Dill Pickle Parmesan Chicken
- Step-by-Step Instructions for Perfect Crispy Dill Pickle Parmesan Chicken
- Ingredient Notes and Substitutions for Your Crispy Dill Pickle Parmesan Chicken
- Tips for Achieving Maximum Dill Pickle Crunch
- Serving Suggestions for Your Pickle Flavored Dinner
- Storage and Reheating Crispy Dill Pickle Parmesan Chicken
- Frequently Asked Questions About Crispy Dill Pickle Parmesan Chicken
- Share Your Crispy Dill Pickle Parmesan Chicken Creations
Why This Crispy Dill Pickle Parmesan Chicken Recipe Works
This dish isn’t just another breaded chicken; it’s a flavor fiesta! We hit a sweet spot where the tangy pop of dill pickle meets the deep, savory hit of sharp Parmesan cheese.
- Maximum Crunch Factor: We use Panko, not regular breadcrumbs, ensuring that incredible, long-lasting crispiness.
- Perfect Weeknight Shortcut: You get maximum flavor payoff in about 30 minutes – talk about an easy chicken dinner idea!
- Balanced Flavor: That little bit of pickle juice in the binder cuts through the richness of the Parmesan, keeping every bite exciting.
Gathering Ingredients for Crispy Dill Pickle Parmesan Chicken
Okay, let’s get that beautiful assembly line ready! The secret to this incredible breaded chicken with pickle brine is having everything prepped and measured out before you even look at the chicken. Trust me, when you start coating, things move fast, and you don’t want to be hunting for your dried dill!
You’ll need ingredients for three main areas: the dry dredge, the wet binder, and the glorious crunchy coating. For that legendary Dill Pickle Crunch, make sure you spring for good quality Panko breadcrumbs; they are lighter and absorb less oil, which means more crunch for us!
Here is exactly what you need for four servings of this amazing meal:
- 4 boneless, skinless chicken breasts (about 6 oz each)
- 1 cup all-purpose flour
- 1 teaspoon salt (Don’t skimp, it boosts the savory!)
- 1 teaspoon black pepper
- 1 teaspoon garlic powder
- 1/2 teaspoon paprika
- 2 large eggs
- 1/4 cup dill pickle juice (Make sure you reserve this from your jar—it’s liquid gold!)
- 1 cup panko breadcrumbs
- 1/2 cup grated Parmesan cheese (Use the real stuff, please!)
- 1 tablespoon dried dill weed
- 1/2 teaspoon onion powder
- Vegetable oil, for frying (or cooking spray for air fryer)
Step-by-Step Instructions for Perfect Crispy Dill Pickle Parmesan Chicken
Getting that perfect, shatteringly crisp exterior on our chicken might sound intimidating, but honestly, it’s all about setting up your stations correctly. You’re going to love how surprisingly fast this all comes together. Remember, we are aiming for the best crispy chicken coating technique here, so follow these steps closely!
Preparing the Chicken Cutlets
First things first, we need consistency! Take those thicker chicken breasts and place each one between two sheets of plastic wrap. Grab your trusty meat mallet and pound them gently until you have an even 1/2-inch thickness all over. Why do we do this? Because if you don’t, the thin parts will dry out while you wait for the thick parts to cook through. Expertise, my friend, expertise!
Setting Up the Three Dredging Stations
This is where the magic happens for our flavorful Savory Chicken Coating. Set out three shallow dishes in a line. Station one gets your flour mix—that’s the flour seasoned with salt, pepper, garlic powder, and paprika. Station two is your binder: the eggs whisked right up with that gorgeous, tangy dill pickle juice. And station three, the star of the show, is where the Panko, Parmesan, dried dill, and onion powder hang out.
Now, take one cutlet at a time. First, dredge it completely in the flour, shaking off any loose powder. Then, dip it luxuriously into the pickle-egg wash. Finally, press it hard into the Panko mixture. Pressing firmly is super important—this locks that delicious coating onto the chicken so it doesn’t fall off when it hits the heat!
Cooking Methods: Frying vs. Air Frying for Crispy Dill Pickle Parmesan Chicken
You have two fantastic ways to cook this, depending on your mood and what equipment you have handy today.
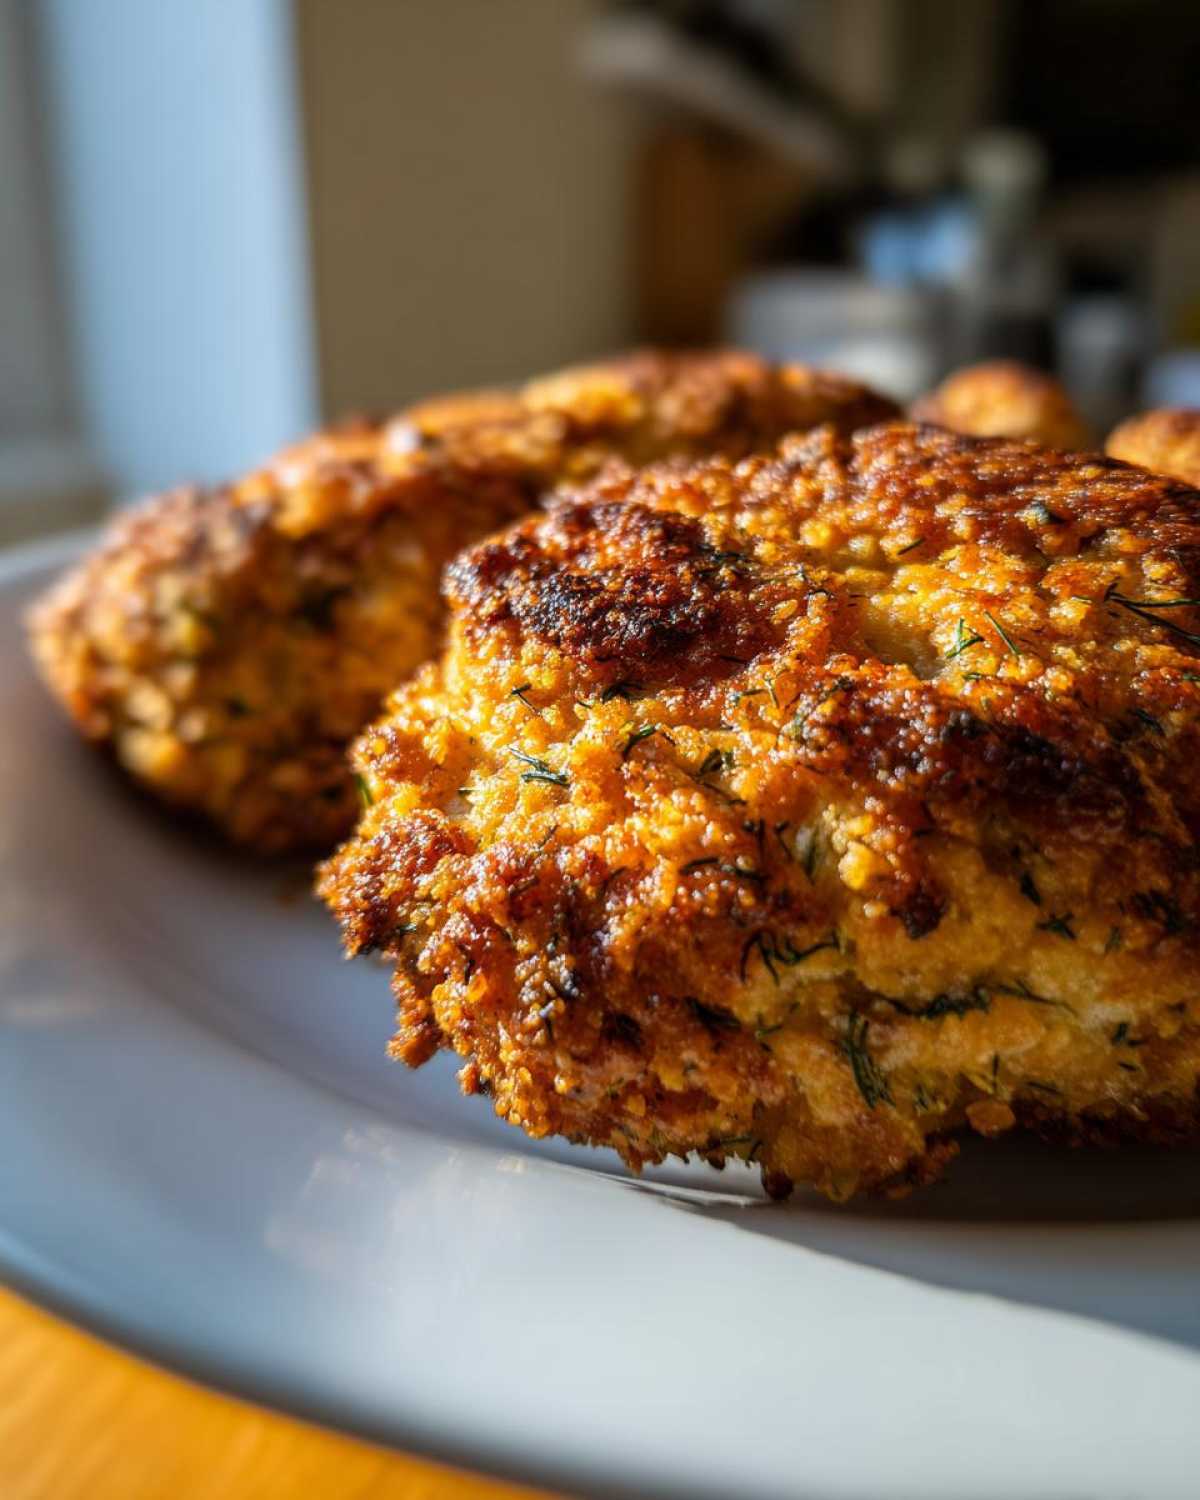
For the absolute, undeniable best crunch, you need to fry! Heat about an inch of oil in a big skillet over medium-high heat until it hits 350 degrees F. Carefully drop in the chicken—don’t overcrowd the pan, or the temperature will crash! Fry for about 4 to 5 minutes per side until it’s perfectly golden and hits that 165-degree internal temperature. That fried version is intense!
If you’re going the lighter route, preheat your air fryer to 380 degrees F. You must spray the coated chicken lightly with cooking spray—this helps the crust crisp up instead of drying out. Air fry for 12 to 15 minutes, making sure to flip them halfway through. Either way, you’re ending up with incredible results!
Ingredient Notes and Substitutions for Your Crispy Dill Pickle Parmesan Chicken
I get so many questions about ingredient swaps, and I totally understand—we always have to work with what’s in the pantry! For this particular dish, certain ingredients really make the difference between good and absolutely incredible, especially when we’re chasing that peak savory experience.
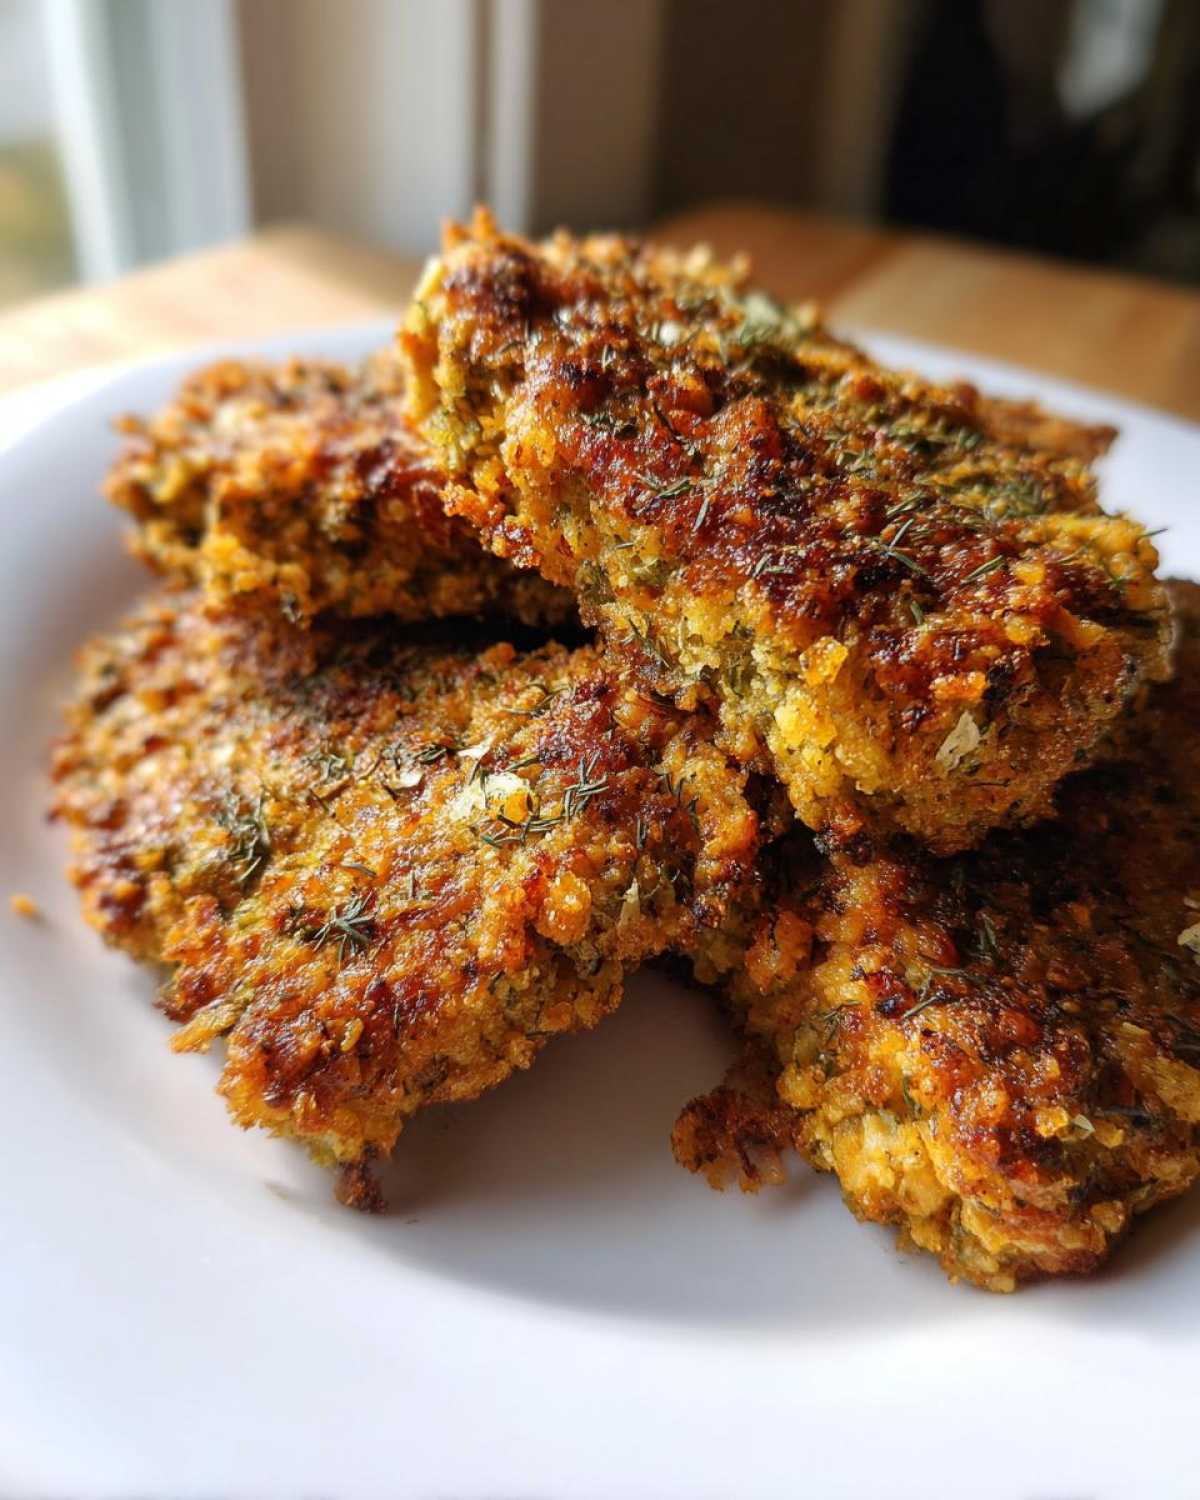
Let’s talk about the Parmesan first. You absolutely must use grated Parmesan cheese, not the stuff in the plastic shaker container if you can help it! That pre-grated stuff has anti-caking agents that prevent it from melting and browning properly in the crust. If you can only find the hard block, grate it finely yourself; it integrates so much better with the Panko for that perfect Italian Herb Parmesan Chicken profile we are aiming for.
Now, about Panko. Honestly, if you try to make this crispy dill pickle parmesan chicken with regular breadcrumbs, you’ll miss out on the light, airy crunch we love. If you’re out of Panko, you can try pulsing thick slices of white bread (crusts off!) a few times in your food processor until you get coarse flakes. It works in a pinch, but Panko really shines through.
My personal favorite kitchen trick, and this is a little extra step that boosts the flavor bomb way up, is what I call the “double dip.” After you coat the chicken the first time, if you have a minute, just dip it back into the wet egg wash really quickly, and then press it again into the Panko mix. This doubles the thickness of that coating and guarantees you get that intense Parmesan Crusted Chicken experience right up to the last bite. It holds up better to frying that way, too!
Tips for Achieving Maximum Dill Pickle Crunch
Listen, this whole recipe hinges on the crunch. If you end up with mushy chicken, I haven’t done my job properly! Crispy isn’t just about the breading; it’s about technique, timing, and letting the flavors settle in just right. Don’t worry if you think you messed up the coating—we can save it!
My absolute favorite tip for battle-testing the coating is to pop the breaded chicken into the refrigerator for about ten minutes before it hits the heat. Seriously, try this! As noted in the recipe earlier, this resting period lets that pickle-egg wash truly adhere to the meat and slightly hydrate the Panko. When the cold crust hits the hot oil or fryer basket, it sets almost instantly, making it incredibly resilient against falling off. It’s the secret insurance policy for your Dill Pickle Crunch!
If you are pan-frying—which gives you the most aggressive, crackly crust, by the way—temperature control is everything. You need that oil hot enough (350°F) so the exterior cooks fast, sealing in the moisture and crisping the crust before the inside overcooks. If your oil is too cool, the chicken soaks up grease instead of frying, and you end up with soggy disappointment. I always drop a tiny crumb of breading in first; if it sizzles violently, you’re ready to go!
Now, if you’re using the oven for your Air Fryer Pickle Chicken variation, humidity is your enemy. Make sure your baking sheet is nice and hot before the chicken goes on, and definitely use a wire rack if you have one. This gets air cycling underneath the cutlets, which prevents the bottom from steaming itself soggy. A little bit of airflow goes a long way toward making sure your chicken stays crunchy until it hits the plate.
For all my Pinterest fans out there who save recipes for later—you can find lovely plating ideas over at Pinterest! But if you’re making this now, make sure to serve it right away for that peak experience. If you’re planning ahead, stick to the refrigeration tip, but always cook immediately after that rest for the loudest crunch!
Serving Suggestions for Your Pickle Flavored Dinner
Wow, congratulations! You’ve harnessed the power of pickle brine and Parmesan to create one seriously delicious crispy dill pickle parmesan chicken. Now, what do you serve alongside this crunchy masterpiece? Since the chicken has such a bold, tangy, and savory punch, we want sides that cool things down a bit or provide a soft, comforting base.
For me, this dish screams for something creamy because it balances out the sharpness of the pickle. Think about a super creamy mashed potato—it’s simple, but it soaks up any little bits of seasoning that fall off the crust. Or, if you want something slightly brighter, a simple cucumber salad dressed with a little bit of vinegar and herbs would be absolutely perfect. That coolness is just divine next to the heat and crunch!
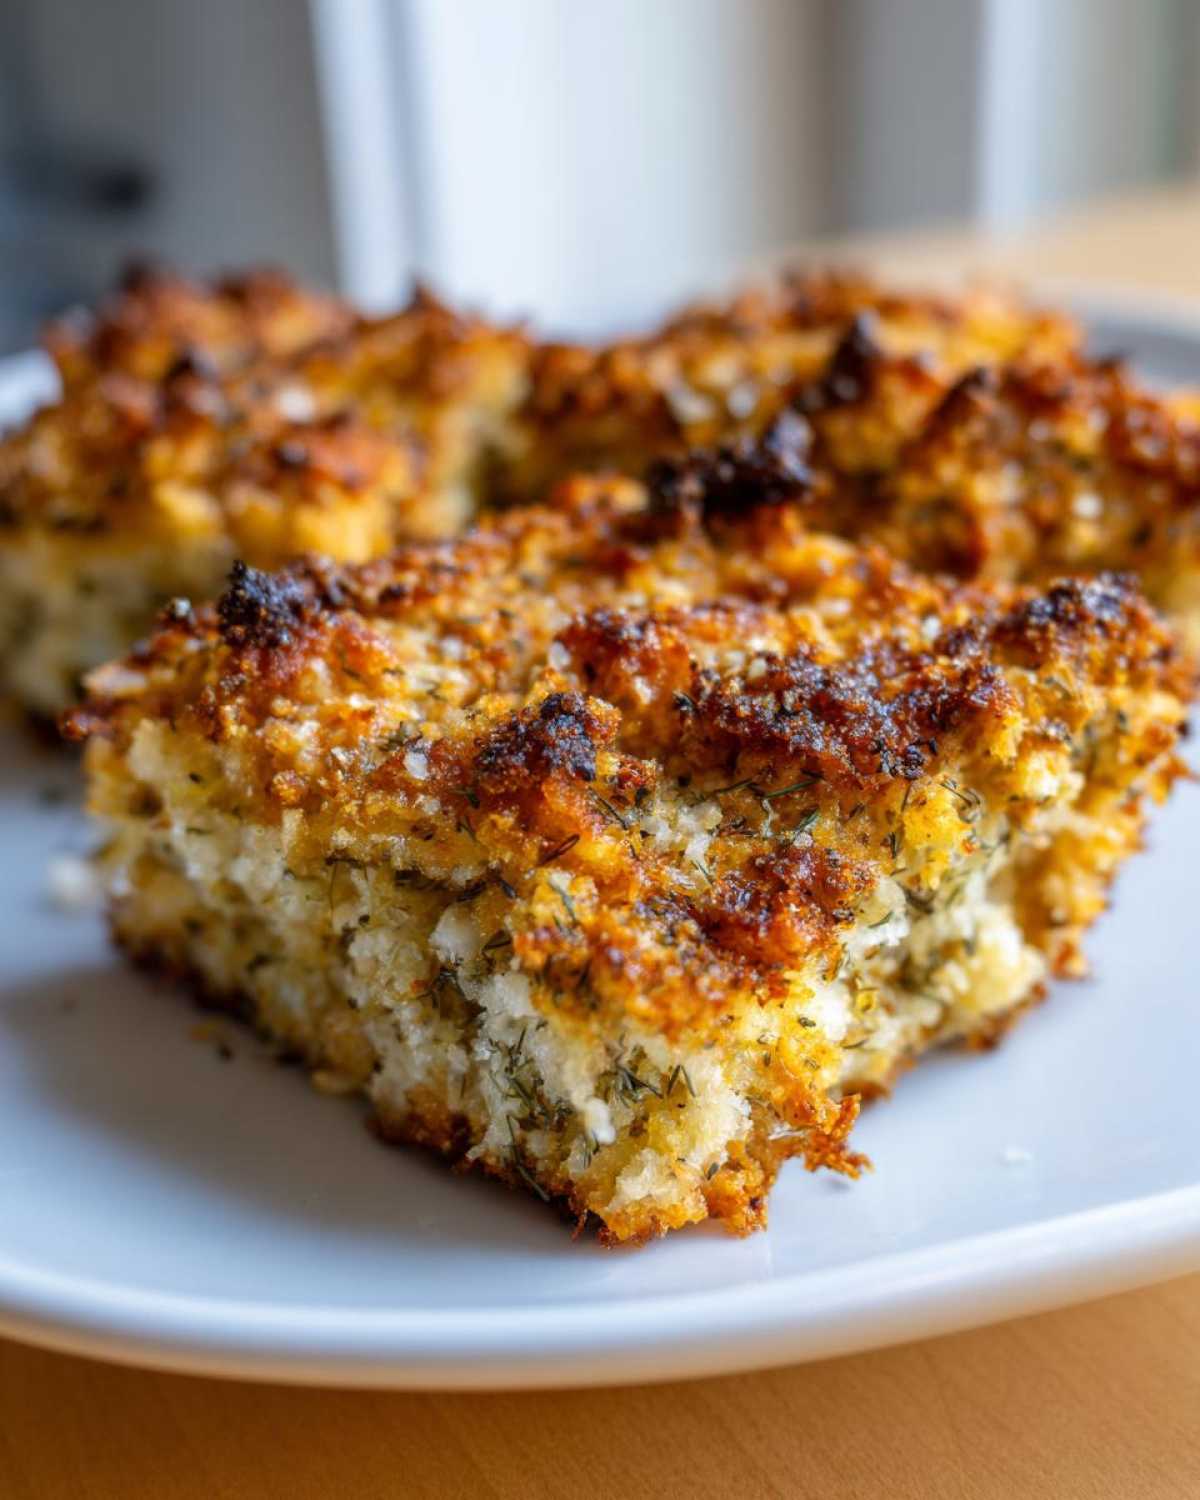
If you’re looking for a roast vegetable, skip anything that might clash with the dill. Roasted green beans tossed with just salt and pepper would be great, but my absolute favorite starchy side that makes this a truly memorable Easy Chicken Dinner Idea is roasted sweet potatoes. I know, sweet veggies with savory chicken, but wait until you try them with a little honey! You can find my favorite recipe for roasted sweet potato with honey and cinnamon; the slight sweetness complements the pickle tang so unexpectedly well.
Ultimately, because this chicken is the star—it’s crispy, crunchy, and flavorful—you don’t need complex side dishes. Keep it simple, let that crust shine, and you’ve got a gourmet weeknight dinner on the table in minutes!
Storage and Reheating Crispy Dill Pickle Parmesan Chicken
We all know the tragedy: wonderful leftover chicken that gets sad and soggy in the fridge overnight. We definitely don’t want that fate for our perfectly seasoned crispy dill pickle parmesan chicken! The good news is that because we used Panko and managed the oil temperature well, this coating actually holds up better than average, but leftovers still require some love.
For storage, the absolute best thing you can do is avoid moisture buildup in the container. Once the chicken has cooled completely—and I mean totally cool, don’t put hot food in the fridge—layer paper towels in your storage container. Place the chicken pieces on the paper towels, then add another layer of paper towels on top. Seal the container and pop it in the fridge. This helps wick away any residual steam that could soften your glorious crust. It should keep well for about three days, perfect for lunch leftovers if you have any!
Now, reheating. This is the most crucial bit of advice I can give you for this incredibly flavorful $\text{Pickle Flavored Dinner}$. Please, I beg you, put the microwave away! Microwaves are the sworn enemy of crispiness; they heat the trapped moisture, turning your crunchy coating into soft mush. We want to bring that crust back to life!
Your two best friends for reheating are the air fryer or the oven. If you’re using the air fryer—which is my go-to suggestion for bringing back that fresh-out-of-the-fryer texture—set it to about 350 degrees F. Pop the cold chicken pieces in a single layer (no crowding!) and cook for about 4 to 6 minutes. It heats through quickly, and the dry heat instantly crisps up that Panko and Parmesan crust again. It comes out unbelievably good, almost identical to the first batch!
If you don’t have an air fryer, the conventional oven works wonders too. Set your oven to 400 degrees F. Lay the chicken right on the rack (a wire rack over a baking sheet is even better if you have one, just like we discussed for the original bake option) and heat for about 8 to 10 minutes. Keep checking it after 6 minutes. This method dries out the coating beautifully and brings back that snap. This ensures that your $\text{Breaded Cutlets Recipe}$ leftovers taste just as fantastic as the main course. If you haven’t tried these techniques, you are going to be shocked at how much better they are than nuking them! Happy storing, and don’t forget to share your amazing leftovers experience over on my easy chicken dinner ideas board!
Frequently Asked Questions About Crispy Dill Pickle Parmesan Chicken
I know you probably have a few lingering questions swirling around, especially about getting that perfect texture or tweaking the flavor for your family. That’s totally fine! Whenever I try a new, exciting combination like this crispy dill pickle parmesan chicken, I always have a million questions too. Let’s clear up some of the most common things folks ask when they’re aiming for the ultimate crunchy, tangy dinner!
Can I make this a baked crispy chicken recipe instead of frying?
Oh, absolutely! While frying gives you that over-the-top, restaurant-level crunch, I know not everyone wants to deal with oil on a busy Tuesday. You can definitely turn this into an Oven Baked Crispy Chicken situation. Just follow the breading steps exactly as written, but instead of frying, you will bake it at 400 degrees F. Make sure you place the coated cutlets on a wire rack set over a baking sheet—this lets air move underneath so the bottom doesn’t steam!
You’ll need to bake them for about 20 to 25 minutes, but you must flip them halfway through the cooking time. Once they’re golden brown and your thermometer reads 165 degrees F internally, you’re golden! It won’t be quite as heavily fried crispy as the deep-fried version, but it’s still wonderfully crunchy and a fantastic lighter option!
What is the best way to get the pickle flavor into the chicken?
The primary way we infuse that bright, zesty pickle essence is right in the wet dredge—using that reserved dill pickle juice mixed with the eggs. That pickle brine is packed with acetic acid and dill aroma, and it really transfers beautifully when it cooks. It’s the key to achieving that signature Dill Pickle Chicken taste!
But if you wanted to really turn up the volume on the pickle side, here is my pro tip: add finely minced dill pickle relish right into your Panko/Parmesan coating mix! You only need about 2 tablespoons max, and it adds an extra burst of dill flavor and little flecks of pickle texture. Just make sure when you are pressing the coating onto the chicken, you press hard. You want that relish fully adhered so it crisps up nicely instead of burning!
Is this recipe suitable for making Crunchy Chicken Breast ahead of time?
Hmm, this is where we have to be careful because we are obsessed with crunch! For the very best results, you should always cook the chicken right after breading, following that 10-minute chill trick I mentioned earlier. Cooking it immediately maximizes the oil seal and keeps it from getting soggy.
However, if you need to prep ahead, the best thing to do is prepare the chicken up to the point of breading. Pound the chicken, set up your stations, but do not coat them. Or, if you must bread them ahead of time, put the breaded cutlets on a parchment-lined baking sheet and refrigerate them, uncovered, for no more than 4 hours. The uncovered step is important to prevent moisture buildup. When you are ready to cook, proceed directly to frying or air frying without the extra rest period. You might find that the coating softens slightly during the rest, but if you stick to frying or air frying over baking, you can usually crisp it right back up!
If you’re looking into other ways we use Parmesan in our family cooking, you absolutely have to check out my recipe for low-carb Parmesan chicken if you’re watching your carbs! It keeps that cheesy flavor without the breading!
Share Your Crispy Dill Pickle Parmesan Chicken Creations
Well, friends, we’ve done it! We’ve taken those humble chicken breasts and transformed them using pickle juice and sharp Parmesan into the most ridiculously flavorful, crunchy number you’ll have all year. Seriously, once you taste this crispy dill pickle parmesan chicken, I’m scared you might never go back to plain chicken again—but hey, I’m not mad about it! This dish proves that exciting, unique flavors don’t have to take all day to make it to the table.
I put so much love into perfecting that perfect ratio for the ultimate Parmesan Crusted Chicken, and now it’s your turn to bring it to life in your own kitchen! That’s why I always ask—I truly want to see how you’ve made this recipe your own. Did you try it in the air fryer? Did you add extra onion powder to your coating? Snap a picture!
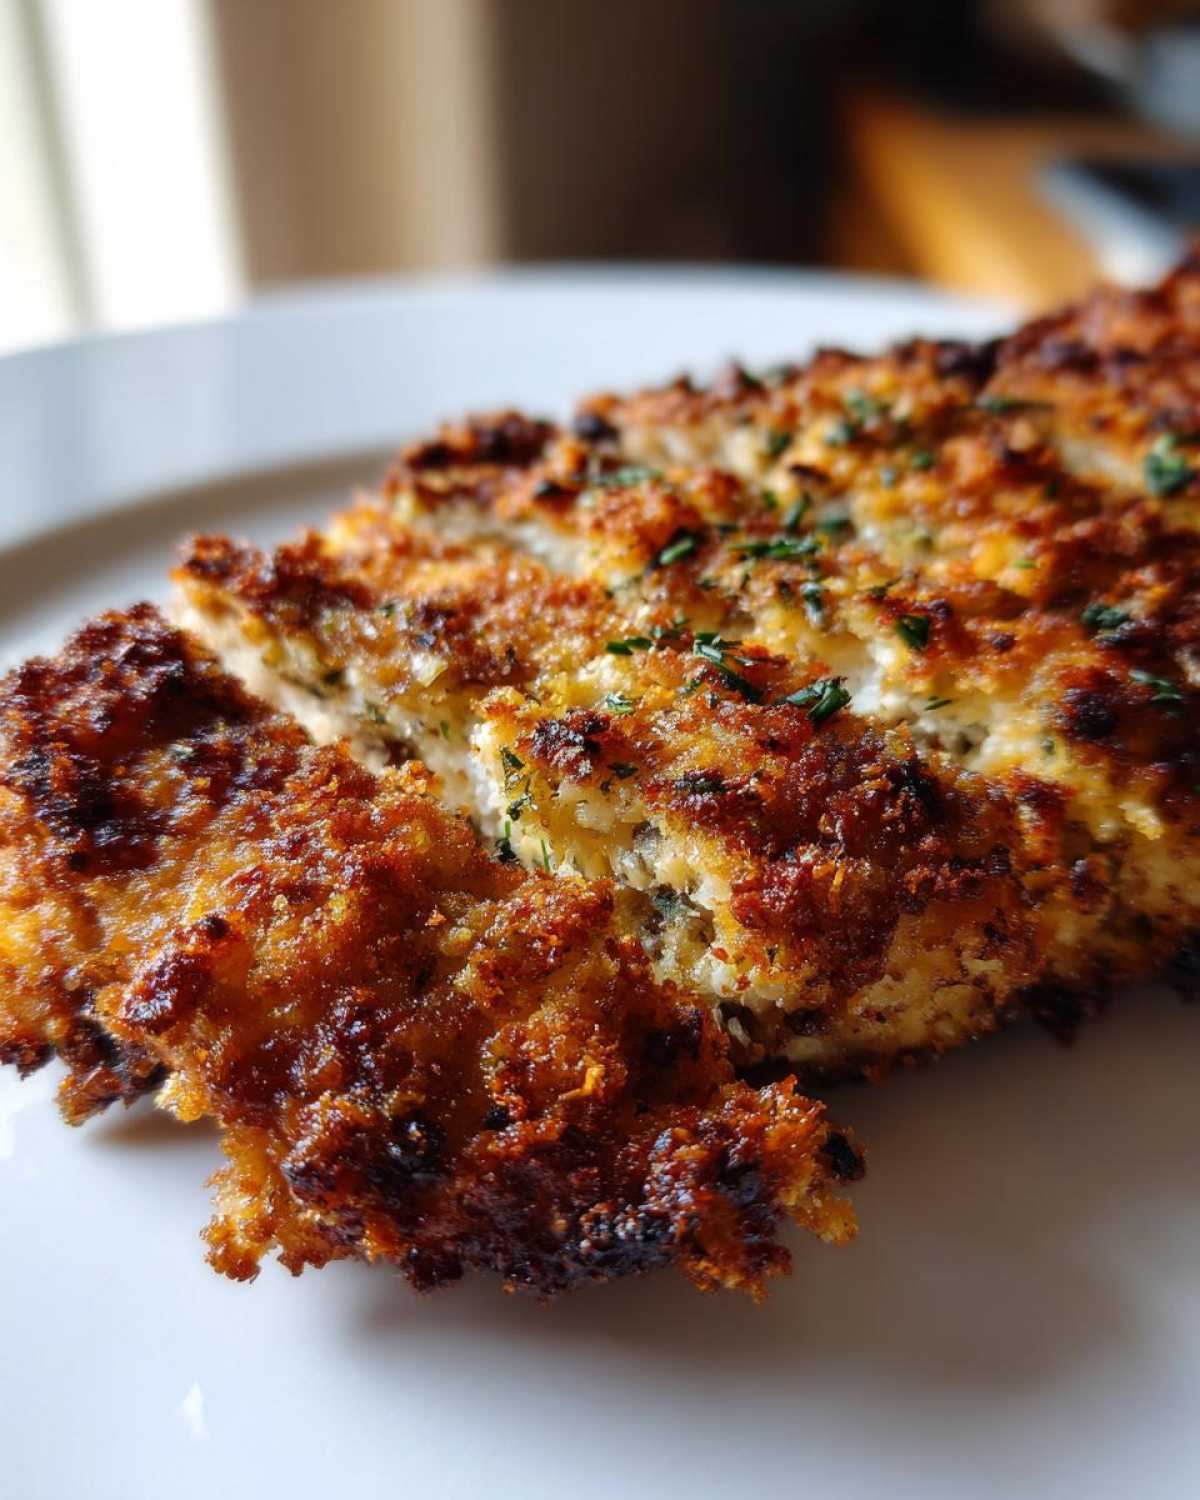
Please, when you make this amazing Pickle Flavored Dinner, come back here and leave a rating and a comment letting me know what you thought. Your feedback helps me know what recipes to share next, and honestly, reading your success stories genuinely makes my day. If you loved the savory parmesan elements here, you absolutely have to check out my recipe for creamy parmesan garlic chicken pasta—it’s another guaranteed crowd-pleaser!
From my kitchen to yours, thank you for trusting me with your weeknight dinner. Happy cooking, and may your crust always be crunchy!
PrintCrispy Dill Pickle Parmesan Chicken
Make incredibly crunchy chicken breasts coated in a savory mix of dill pickle flavor and sharp Parmesan cheese. This recipe delivers maximum crunch for a fun weeknight dinner.
- Prep Time: 15 min
- Cook Time: 15 min
- Total Time: 30 min
- Yield: 4 servings 1x
- Category: Dinner
- Method: Frying or Air Frying
- Cuisine: American
- Diet: Low Lactose
Ingredients
- 4 boneless, skinless chicken breasts (about 6 oz each)
- 1 cup all-purpose flour
- 1 teaspoon salt
- 1 teaspoon black pepper
- 1 teaspoon garlic powder
- 1/2 teaspoon paprika
- 2 large eggs
- 1/4 cup dill pickle juice (reserved from jar)
- 1 cup panko breadcrumbs
- 1/2 cup grated Parmesan cheese
- 1 tablespoon dried dill weed
- 1/2 teaspoon onion powder
- Vegetable oil, for frying (or cooking spray for air fryer)
Instructions
- Prepare the chicken: Place each chicken breast between two sheets of plastic wrap. Pound them to an even 1/2-inch thickness using a meat mallet.
- Set up the dredging stations. In a shallow dish, combine the flour, salt, pepper, garlic powder, and paprika. This is your first dredge.
- In a second shallow dish, whisk the eggs with the dill pickle juice until combined.
- In a third shallow dish, mix the panko breadcrumbs, grated Parmesan cheese, dried dill weed, and onion powder. This is your crunchy coating.
- Dredge each pounded chicken breast first in the flour mixture, shaking off excess.
- Dip the floured chicken into the egg and pickle juice mixture, letting excess drip off.
- Press the chicken firmly into the Parmesan panko mixture, coating both sides completely. Place the coated chicken on a plate.
- To fry: Heat about 1 inch of vegetable oil in a large skillet over medium-high heat until it reaches 350 degrees F. Carefully place the chicken in the hot oil, ensuring not to overcrowd the pan. Fry for 4 to 5 minutes per side until golden brown and cooked through (internal temperature reaches 165 degrees F).
- To air fry: Preheat your air fryer to 380 degrees F. Lightly spray the coated chicken with cooking spray. Air fry for 12 to 15 minutes, flipping halfway through, until crispy and cooked.
- Serve immediately for the best crispy texture.
Notes
- For extra pickle flavor, soak the breaded chicken for 10 minutes in the refrigerator before cooking. This helps the coating adhere better.
- You can bake this dish at 400 degrees F for 20 to 25 minutes, flipping once, if you prefer an oven baked crispy chicken.
- Use high-quality Parmesan cheese for the best savory flavor in your savory chicken coating.
Nutrition
- Serving Size: 1 breast
- Calories: 450
- Sugar: 2
- Sodium: 650
- Fat: 22
- Saturated Fat: 6
- Unsaturated Fat: 16
- Trans Fat: 0
- Carbohydrates: 25
- Fiber: 1
- Protein: 38
- Cholesterol: 110