Oh my gosh, you guys – this cotton candy cake is pure magic! I still remember the first time I made it for my niece’s birthday party. Her eyes lit up like fireworks when she saw those swirls of pink and blue peeking through the fluffy whipped topping. It’s not just a cake – it’s a carnival in dessert form, with that nostalgic cotton candy flavor we all love.
What makes this recipe special? It’s surprisingly simple to whip up, but looks like you spent hours decorating. The secret is in the cotton candy syrup – it gives every bite that unmistakable fairground sweetness without being overpowering. Trust me, this cake disappears faster than cotton candy on a windy day at the county fair!
Now, I know what you’re thinking – “Sophia, isn’t this just a regular cake with food coloring?” Nope! The real trick is in how we layer the flavors. The buttermilk keeps it moist, the vanilla adds depth, and that cotton candy syrup? Well, that’s what makes kids (and let’s be honest, adults too) go absolutely wild for seconds.
Why You’ll Love This Cotton Candy Cake
This isn’t just any cake – it’s a party on a plate! Here’s why it’s become my go-to celebration dessert:
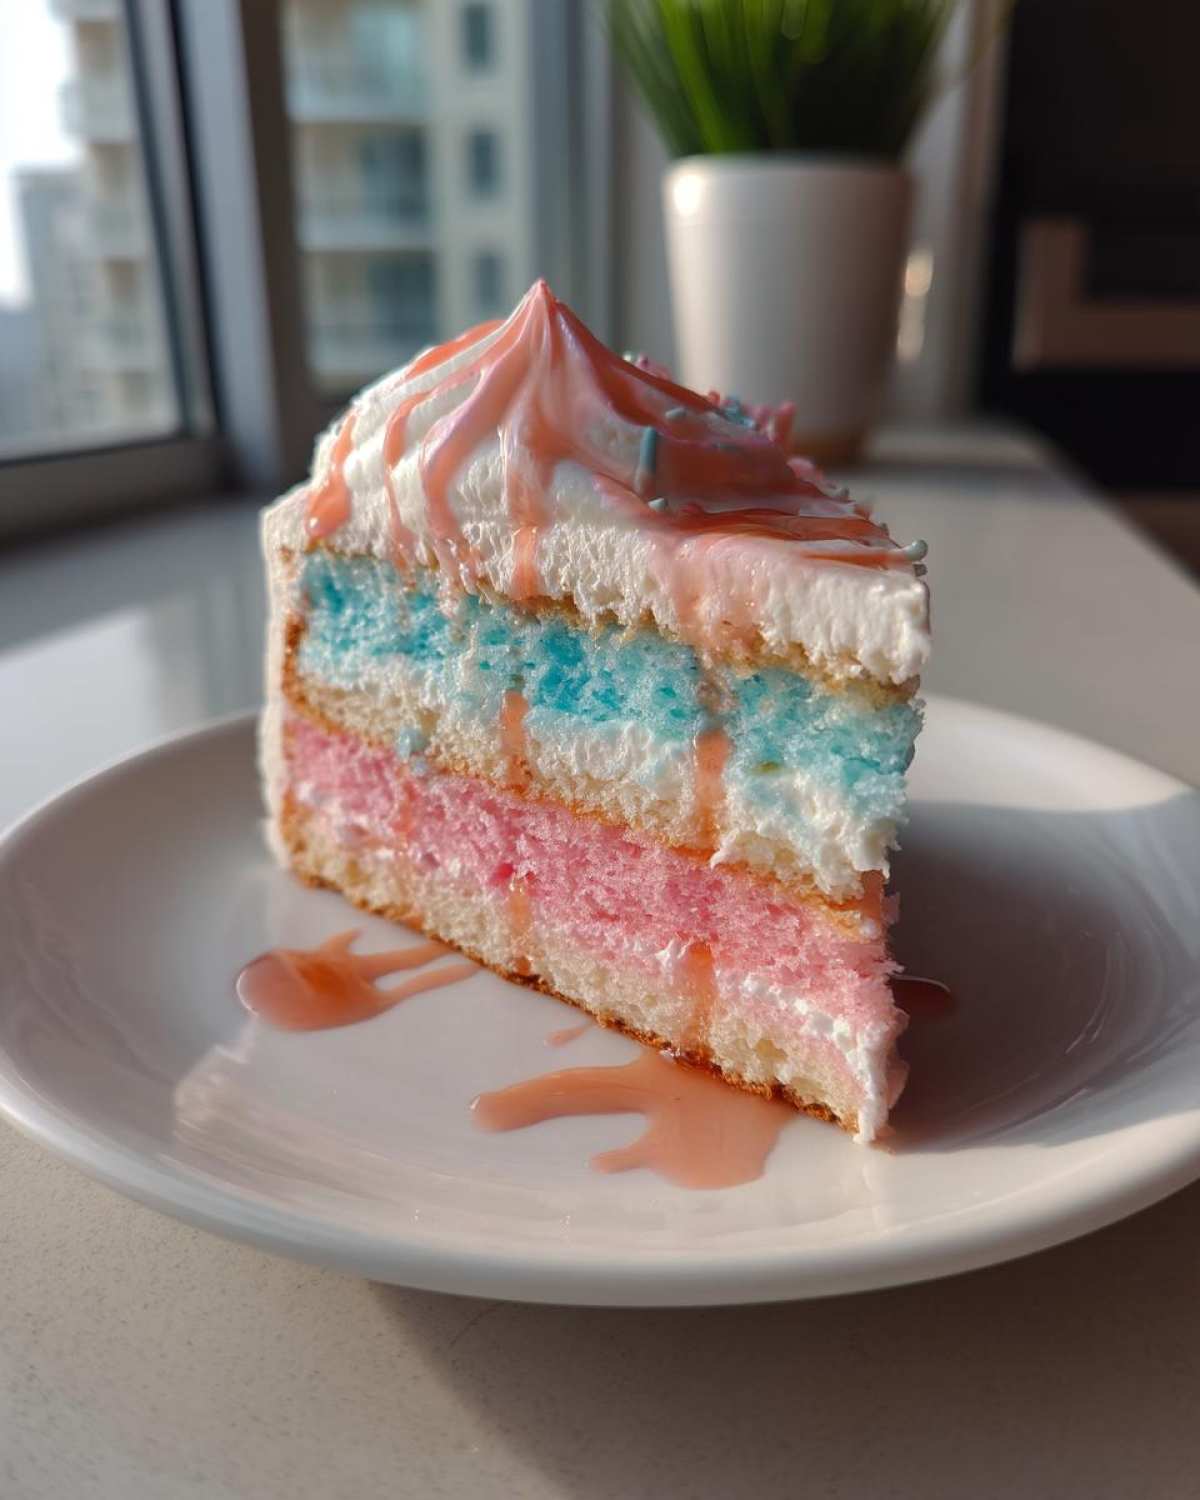
- Instant happiness: Those swirls of pink and blue batter bake up into the most cheerful slices you’ve ever seen
- Nostalgia in every bite: That cotton candy syrup flavor will transport you straight to childhood fairgrounds
- Foolproof fun: Even if you’re not a baking pro, the simple steps make it hard to mess up
- Crowd-pleaser magic: I’ve never seen kids (or grown-ups!) get so excited over a cake before
- Customizable colors: Go full rainbow or stick to pastels – it’s your edible canvas!
Seriously, this cake turns ordinary birthdays into unforgettable celebrations. The first time I made it, my neighbor’s kids started begging for it at every holiday!
Cotton Candy Cake Ingredients
Okay, let’s gather our colorful magic! Here’s what you’ll need to create this whimsical cotton candy cake (and yes, I’ve learned the hard way – measure everything before you start mixing!):
- 2 cups all-purpose flour – spooned and leveled, please! No packed flour here
- 1 1/2 cups granulated sugar – because we’re making a sweet celebration
- 1 tsp baking powder + 1/2 tsp baking soda – our rising dream team
- 1/2 tsp salt – trust me, it makes the sweet pop
- 1/2 cup unsalted butter, softened – leave it out for 30 minutes first
- 2 large eggs – room temp is best for smooth mixing
- 1 cup buttermilk – the secret to that cloud-like texture
- 1 tsp vanilla extract – pure, not imitation, for best flavor
- 1/2 cup cotton candy syrup – find it near ice cream toppings
- Pink & blue food coloring – gel works best for vibrant colors
- 1 cup plant-based whipped topping – keeps it light and dairy-free friendly
Heads up: Contains gluten and dairy (use gluten-free flour and dairy-free butter if needed). That plant-based whipped topping? Total game-changer for my lactose-intolerant friends!
How to Make Cotton Candy Cake
Alright, let’s turn these ingredients into pure magic! I’ve made this cotton candy cake more times than I can count, and I’ve learned a few tricks along the way to make sure it comes out perfect every time.
Preparing the Batter
First things first – preheat that oven to 350°F and grease your pans really well. Nothing’s worse than beautiful cake stuck to the pan! In a big bowl, whisk together all your dry ingredients – that’s the flour, sugar, baking powder, baking soda, and salt. Get them nice and combined.
Now, in your mixer (or with a strong arm and a wooden spoon), beat that softened butter until it’s creamy. Add eggs one at a time, mixing well after each. Here’s where the magic starts – pour in the vanilla and cotton candy syrup. The batter will smell like a carnival already!
The key to perfect texture? Alternate adding the dry ingredients and buttermilk to the butter mixture. I do three additions of dry and two of buttermilk, starting and ending with dry. Mix just until combined – overmixing makes tough cake, and we want clouds here!
Coloring and Baking the Cake
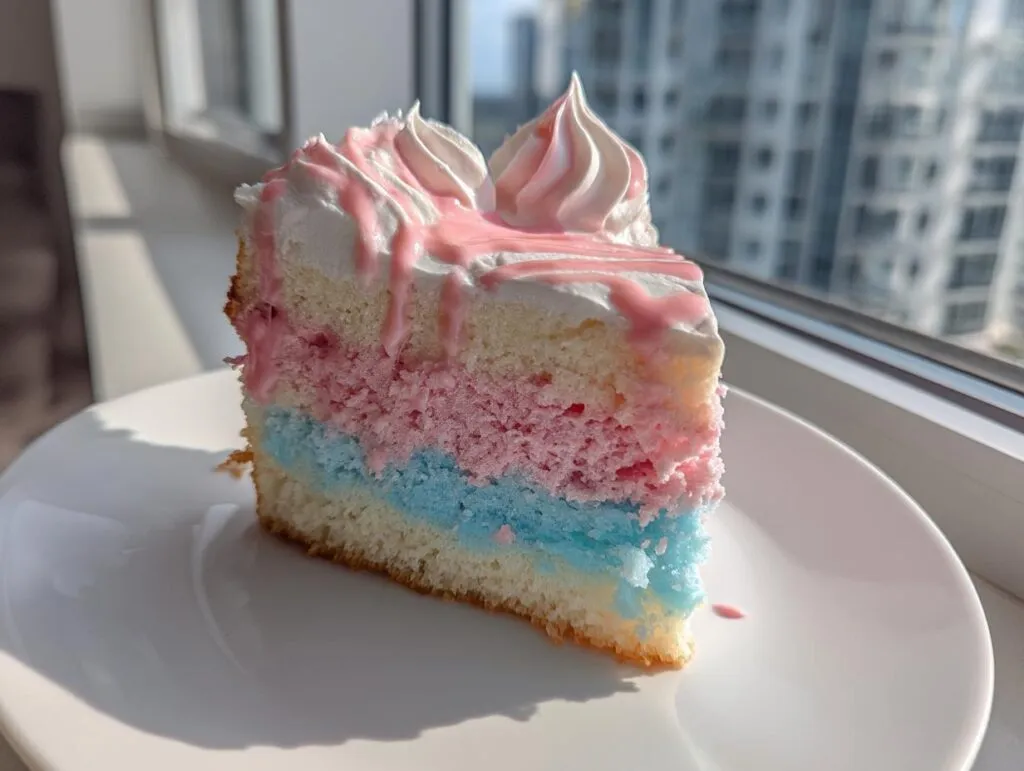
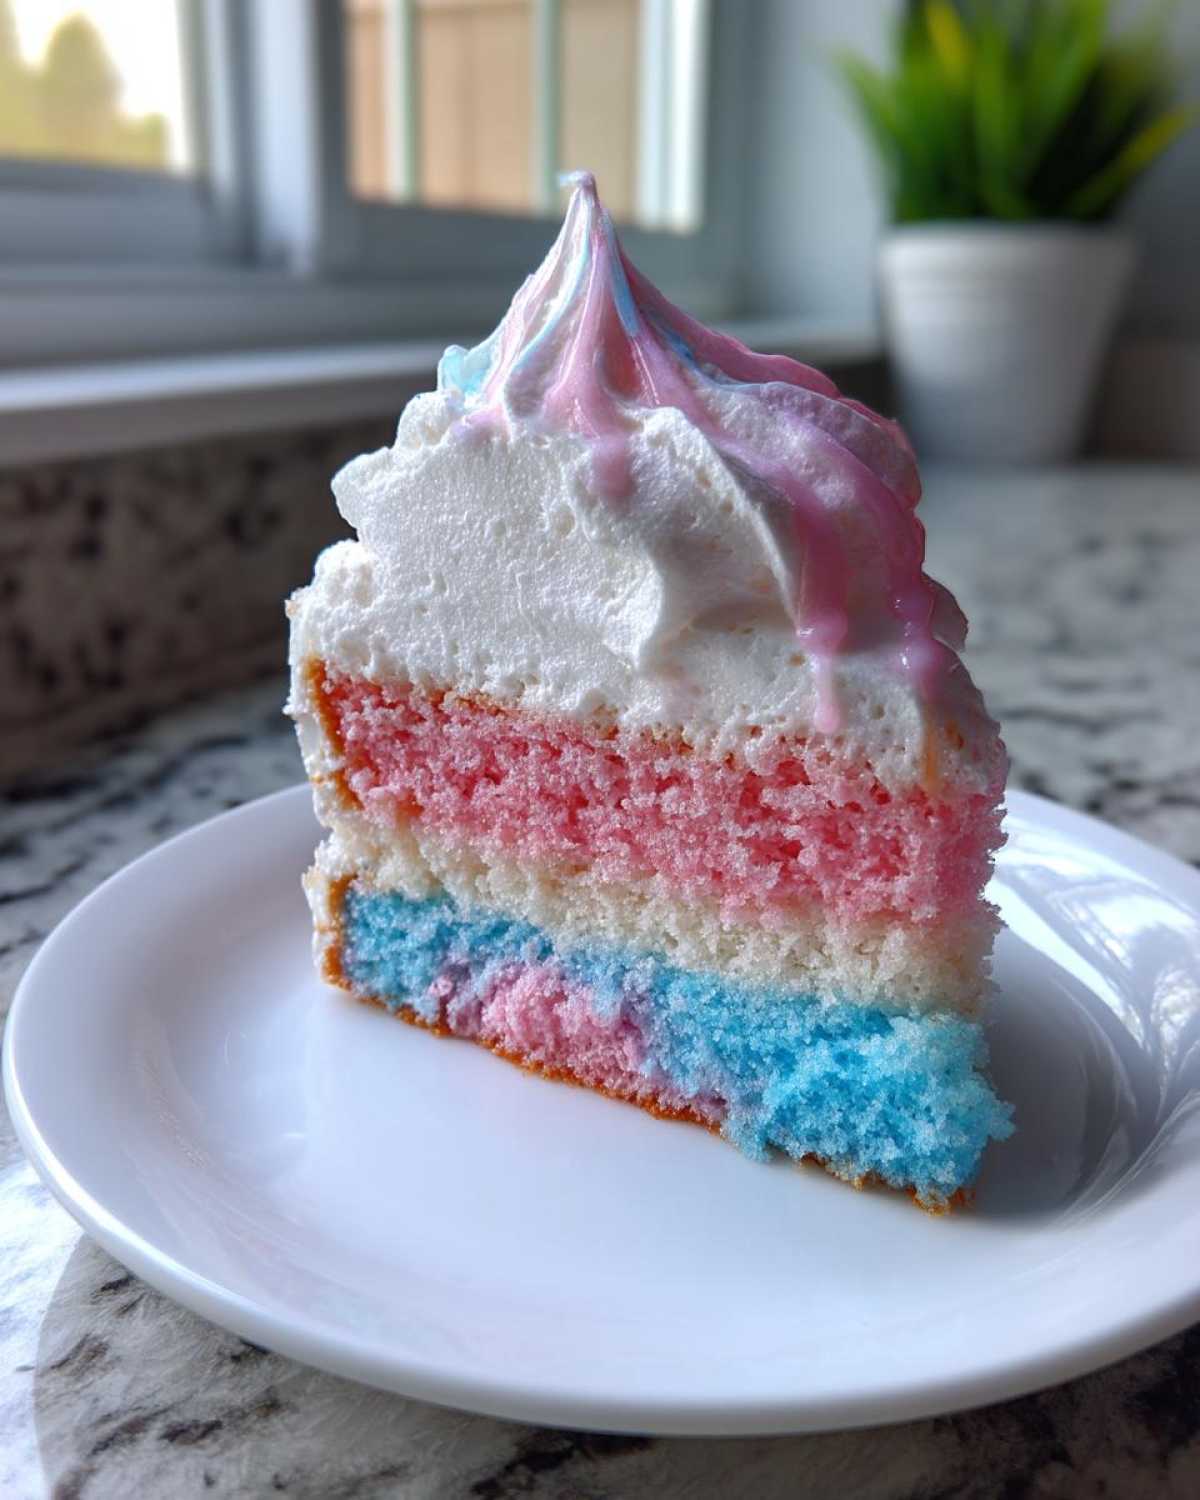
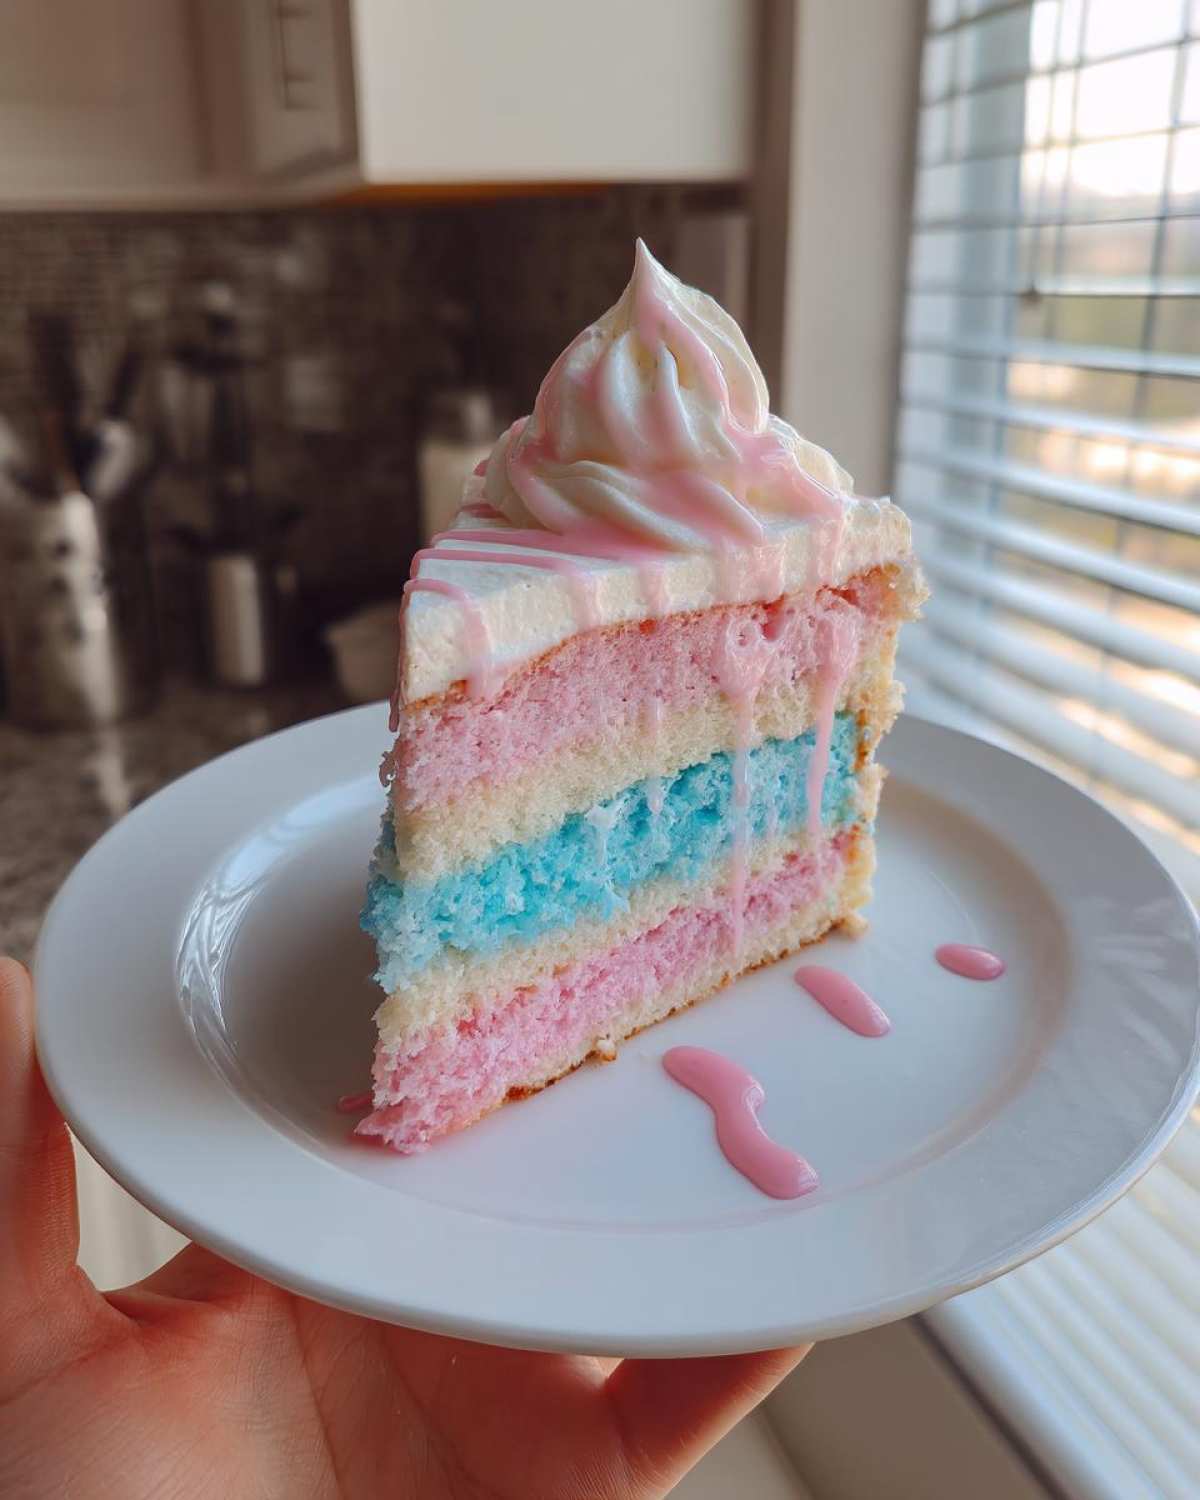
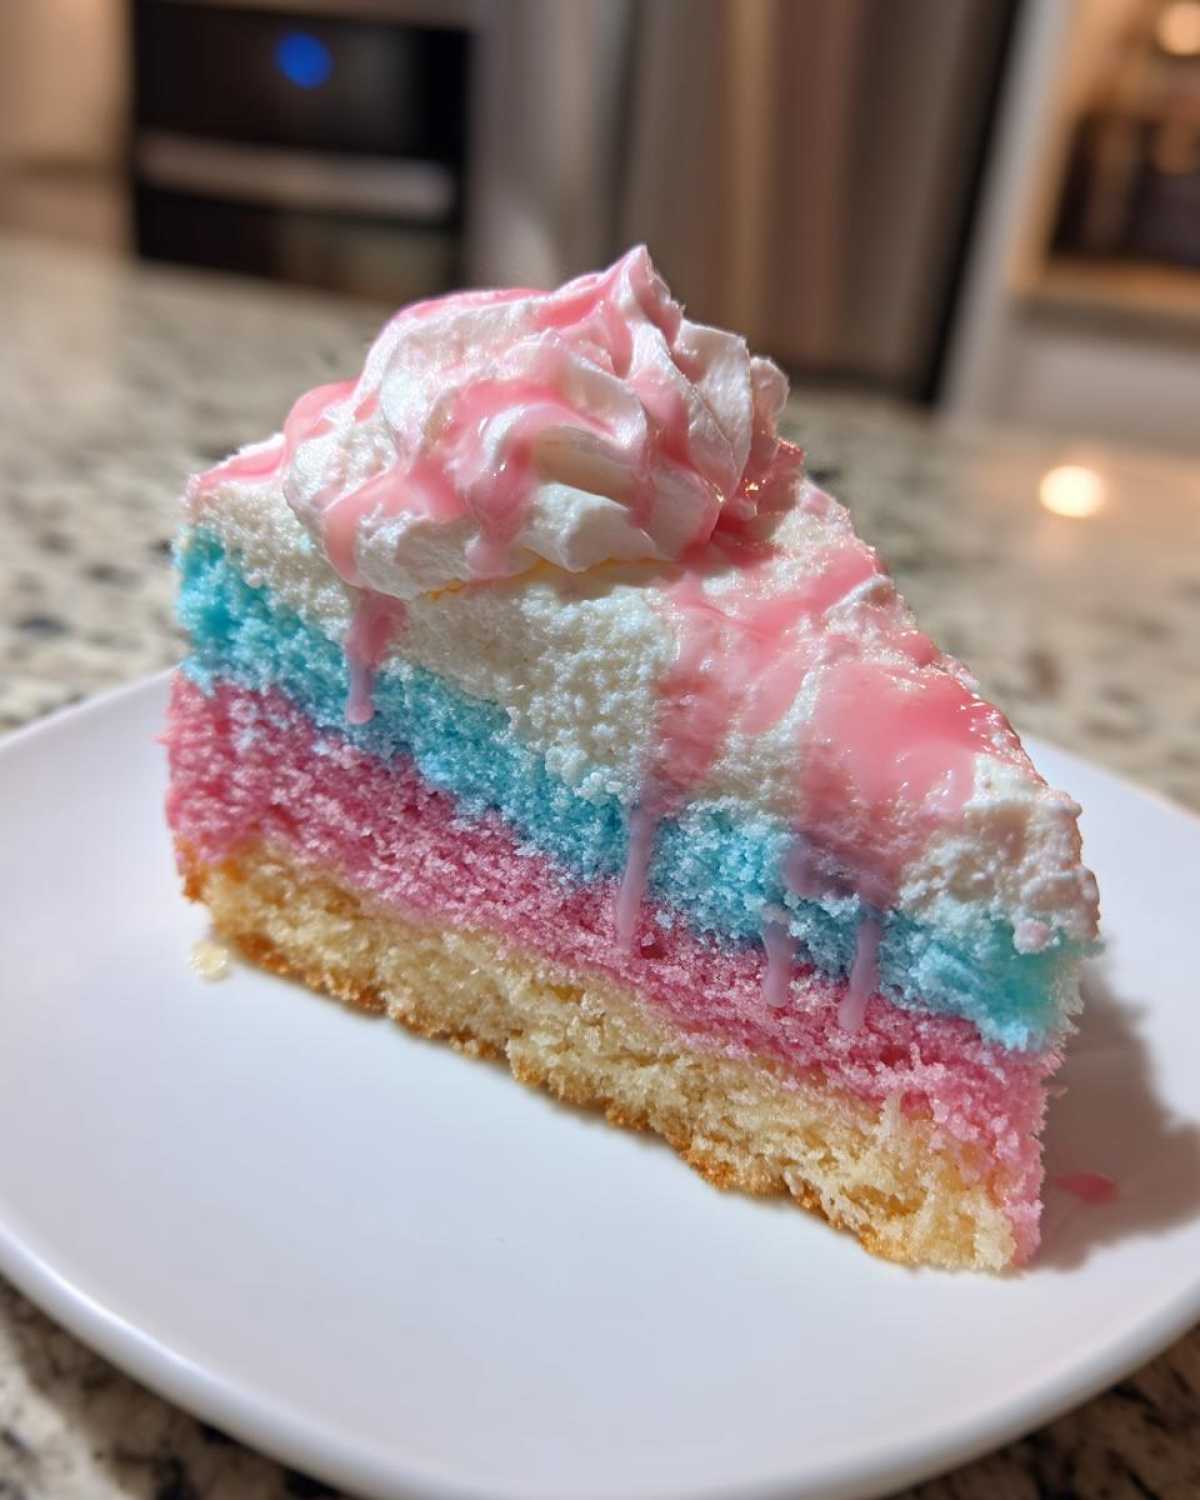
Now for the fun part! Divide your batter evenly between two bowls. Add pink food coloring to one and blue to the other – gel colors give the most vibrant hues. Don’t be shy with the color – it bakes up lighter than it looks in the bowl.
Pour the batters into your prepared pans, swirling slightly if you want a marbled effect. Bake for 25-30 minutes. The toothpick test is your best friend here – when it comes out with just a few moist crumbs, you’re golden. The cakes should be springy to the touch too.
Frosting and Decorating
Patience, my friend! Let those cakes cool completely in their pans for about 10 minutes, then transfer to a wire rack. Trying to frost warm cake is a recipe for disaster – trust me, I’ve made that mistake!
Once cool, spread that fluffy plant-based whipped topping generously between layers and over the top. Then drizzle with extra cotton candy syrup – I like to let it drip down the sides for that “just unwrapped cotton candy” look. The first slice will reveal those beautiful colored layers – instant party!
Tips for the Perfect Cotton Candy Cake
After making this cake more times than I can count (and learning from a few colorful disasters!), here are my can’t-miss tips:
- Gel food coloring is your BFF – Liquid colors dilute the batter, but gel gives those vibrant carnival hues without changing texture
- Extra syrup = extra magic – For serious cotton candy lovers, add an extra tablespoon of syrup to the batter (just reduce buttermilk slightly)
- Chill before slicing – 30 minutes in the fridge makes cleaner cuts through those pretty layers
- Store it right – Keep covered in the fridge for up to 3 days – the whipped topping stays perfect!
- Color surprise – Add a third color layer for a fun rainbow effect – kids go nuts when they see it!
Pro tip from my last birthday fail: Don’t skip greasing the pans! Those colorful layers deserve to come out perfectly.
Cotton Candy Cake Variations
Oh, the possibilities! This cotton candy cake is like a blank canvas for your creativity. For my gluten-free friends, swap in your favorite 1:1 gluten-free flour blend – it works like a charm! Dairy-free? Use vegan butter and stick with that plant-based whipped topping (it’s seriously just as dreamy).
Want to get wild? Try swirling in crushed freeze-dried strawberries for a berry twist, or add rainbow sprinkles to the batter for extra crunch. The best part? However you tweak it, that magical cotton candy flavor still shines through!
Serving and Storing Cotton Candy Cake
Here’s the best way to enjoy your cotton candy masterpiece! I always serve this cake chilled – about 30 minutes in the fridge firms up that whipped topping perfectly. The cool temperature makes the cotton candy flavor even more refreshing, like a sweet summer breeze. For storage, just pop any leftovers (ha – as if!) in an airtight container in the fridge. It’ll stay dreamy for up to 3 days – though in my house, it never lasts that long!
One important note: Don’t freeze this cake. The whipped topping and syrup don’t play nice with freezing temperatures. Trust me, I learned this the hard way after a sad, weepy cake incident. Room temperature is fine for about 2 hours if you’re serving at a party, but otherwise, keep it chilled for best texture.
Cotton Candy Cake FAQs
I get so many questions about this cake – here are the ones that pop up most often from fellow bakers:
Can I use regular frosting instead of whipped topping?
Absolutely! A cream cheese frosting works beautifully if you’re not worried about keeping it dairy-free. Just reduce the sugar slightly since the cake is already sweet. My trick? Add a splash of cotton candy syrup to the frosting for extra flavor magic!
How can I make this cake vegan?
Easy peasy! Swap the eggs for flax eggs (1 tbsp ground flax + 3 tbsp water per egg), use vegan butter, and stick with the plant-based whipped topping. The cotton candy syrup is usually vegan, but double-check the brand.
My colors baked out lighter than I wanted – help!
This happens to me too! Gel food coloring is your best bet for vibrant hues. And don’t be afraid to add a few extra drops – the colors mellow during baking. Pro tip: Add a tiny bit of purple to your blue batter to keep it from looking pastel.
Can I make cupcakes instead?
You bet! This batter makes about 18 perfect cotton candy cupcakes. Just reduce baking time to 18-22 minutes. They’re adorable with a swirl of pastel frosting and a mini cotton candy cloud on top!
Nutritional Information
Okay, let’s be real – we’re not eating cotton candy cake for its health benefits! But because I know some of you like to keep track (or have curious kids asking), here’s the scoop per slice (based on 10 servings):
- Calories: 320 – consider it a happy splurge!
- Sugar: 25g – it’s a celebration, after all
- Fat: 12g (7g saturated) – thank that glorious butter
- Carbs: 48g – fluffy cake dreams
- Protein: 4g – surprise bonus from the eggs
Remember: These are estimates – your exact numbers might vary based on brands and how generous you are with that whipped topping! For special diets, check my variation tips above.
Share Your Cotton Candy Cake Creation
I’d love to see your colorful creations! Snap a photo of your cotton candy cake masterpiece and tag me – nothing makes me happier than seeing your swirls of pink and blue joy. Did the kids go wild for it? Leave a comment below with your best tips or funny cake stories!
PrintMagical Cotton Candy Cake Recipe in 3 Simple Steps

A fun and colorful cotton candy cake that’s perfect for birthdays and celebrations. This cake is light, fluffy, and bursting with sweet cotton candy flavor.
- Prep Time: 20 minutes
- Cook Time: 30 minutes
- Total Time: 50 minutes
- Yield: 1 cake (8-10 servings) 1x
- Category: Dessert
- Method: Baking
- Cuisine: American
- Diet: Vegetarian
Ingredients
- 2 cups all-purpose flour
- 1 1/2 cups granulated sugar
- 1 tsp baking powder
- 1/2 tsp baking soda
- 1/2 tsp salt
- 1/2 cup unsalted butter, softened
- 2 large eggs
- 1 cup buttermilk
- 1 tsp vanilla extract
- 1/2 cup cotton candy syrup
- Pink and blue food coloring (optional)
- 1 cup plant-based whipped topping
Instructions
- Preheat oven to 350°F. Grease and flour two 9-inch round cake pans.
- In a bowl, whisk flour, sugar, baking powder, baking soda, and salt.
- Beat butter until creamy. Add eggs one at a time, then mix in vanilla.
- Alternate adding dry ingredients and buttermilk to the butter mixture, mixing until smooth.
- Divide batter into two bowls. Add pink food coloring to one and blue to the other.
- Pour batters into prepared pans. Bake for 25-30 minutes or until a toothpick comes out clean.
- Let cakes cool completely. Frost with plant-based whipped topping and drizzle with cotton candy syrup.
Notes
- For a stronger cotton candy flavor, add extra syrup to the batter.
- Use gel food coloring for vibrant colors.
- Store in the refrigerator for up to 3 days.
Nutrition
- Serving Size: 1 slice
- Calories: 320
- Sugar: 25g
- Sodium: 180mg
- Fat: 12g
- Saturated Fat: 7g
- Unsaturated Fat: 4g
- Trans Fat: 0g
- Carbohydrates: 48g
- Fiber: 1g
- Protein: 4g
- Cholesterol: 55mg