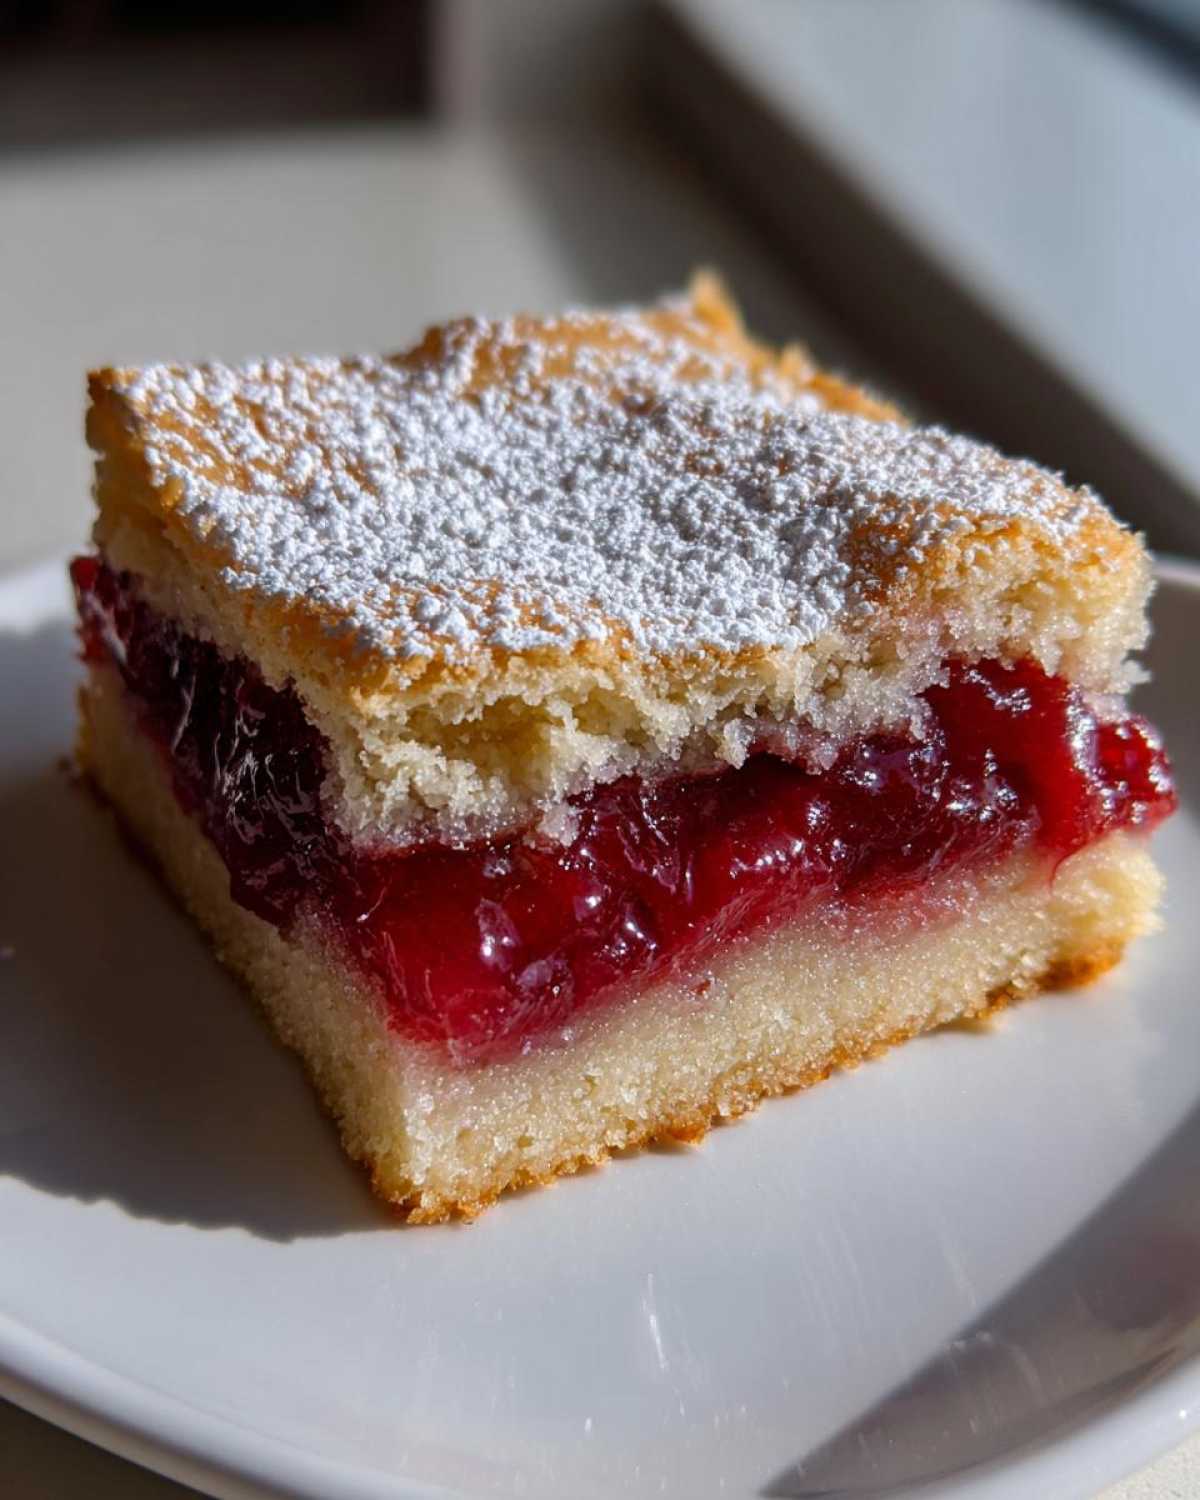
There’s something magical about desserts you can hold in your hand—no fork, no plate, just pure, sweet joy. These cherry pie bars are my go-to when I want all the nostalgia of Grandma’s cherry pie but don’t feel like rolling out crusts or waiting for slices to set. They’re the ultimate summer treat, especially when I’m up to my elbows in fresh cherries from the farmer’s market. Every bite is a little flaky, a little jammy, and bursting with that sweet-tart cherry flavor I’ve loved since I was a kid stealing spoonfuls of pie filling from the mixing bowl. Trust me, once you try them, you’ll stash a few in your meal planning rotation for picnics, potlucks, or just because Tuesdays deserve dessert too!
Why You’ll Love These Cherry Pie Bars
These cherry pie bars are my secret weapon when I need a dessert that wows without the fuss. Here’s why they’ll become your new favorite too:
- Easiest “pie” you’ll ever make – No rolling pins or fancy crimping – just press the dough into the pan and go! Perfect for when you’re juggling meal planning and need a quick sweet fix.
- Travels like a dream – Unlike messy slices that fall apart, these sturdy bars stay perfect in lunchboxes, picnic baskets, or your bag when that afternoon sugar craving hits.
- Crowd-pleasing flavor – That sweet-tart cherry jam filling sandwiched between buttery layers? Pure magic. I’ve watched these disappear at potlucks faster than you can say “seconds please!”
- Summer nostalgia in every bite – They taste like childhood summers, whether you use fresh cherries at their peak or quality canned ones when you’re craving that bright flavor off-season.
Ingredients for Cherry Pie Bars
You won’t believe how simple the ingredient list is for these amazing cherry pie bars! Everything comes together with pantry staples, plus that gorgeous cherry jam filling that’ll make your kitchen smell like a summer orchard. Here’s what you’ll need:
For the crust & crumble topping:
- 2 cups all-purpose flour – I always use unbleached for the best texture
- 1/2 cup granulated sugar – The perfect amount of sweetness to balance that tart jam
- 1/2 teaspoon salt – Don’t skip this! It makes all the flavors pop
- 1 cup (2 sticks) unsalted butter, cold and cubed – Seriously cold, straight from the fridge is best
- 1 large egg – My grandma taught me room temp works best for even mixing
- 1 teaspoon vanilla extract – The good stuff, not imitation!
For that luscious cherry filling:
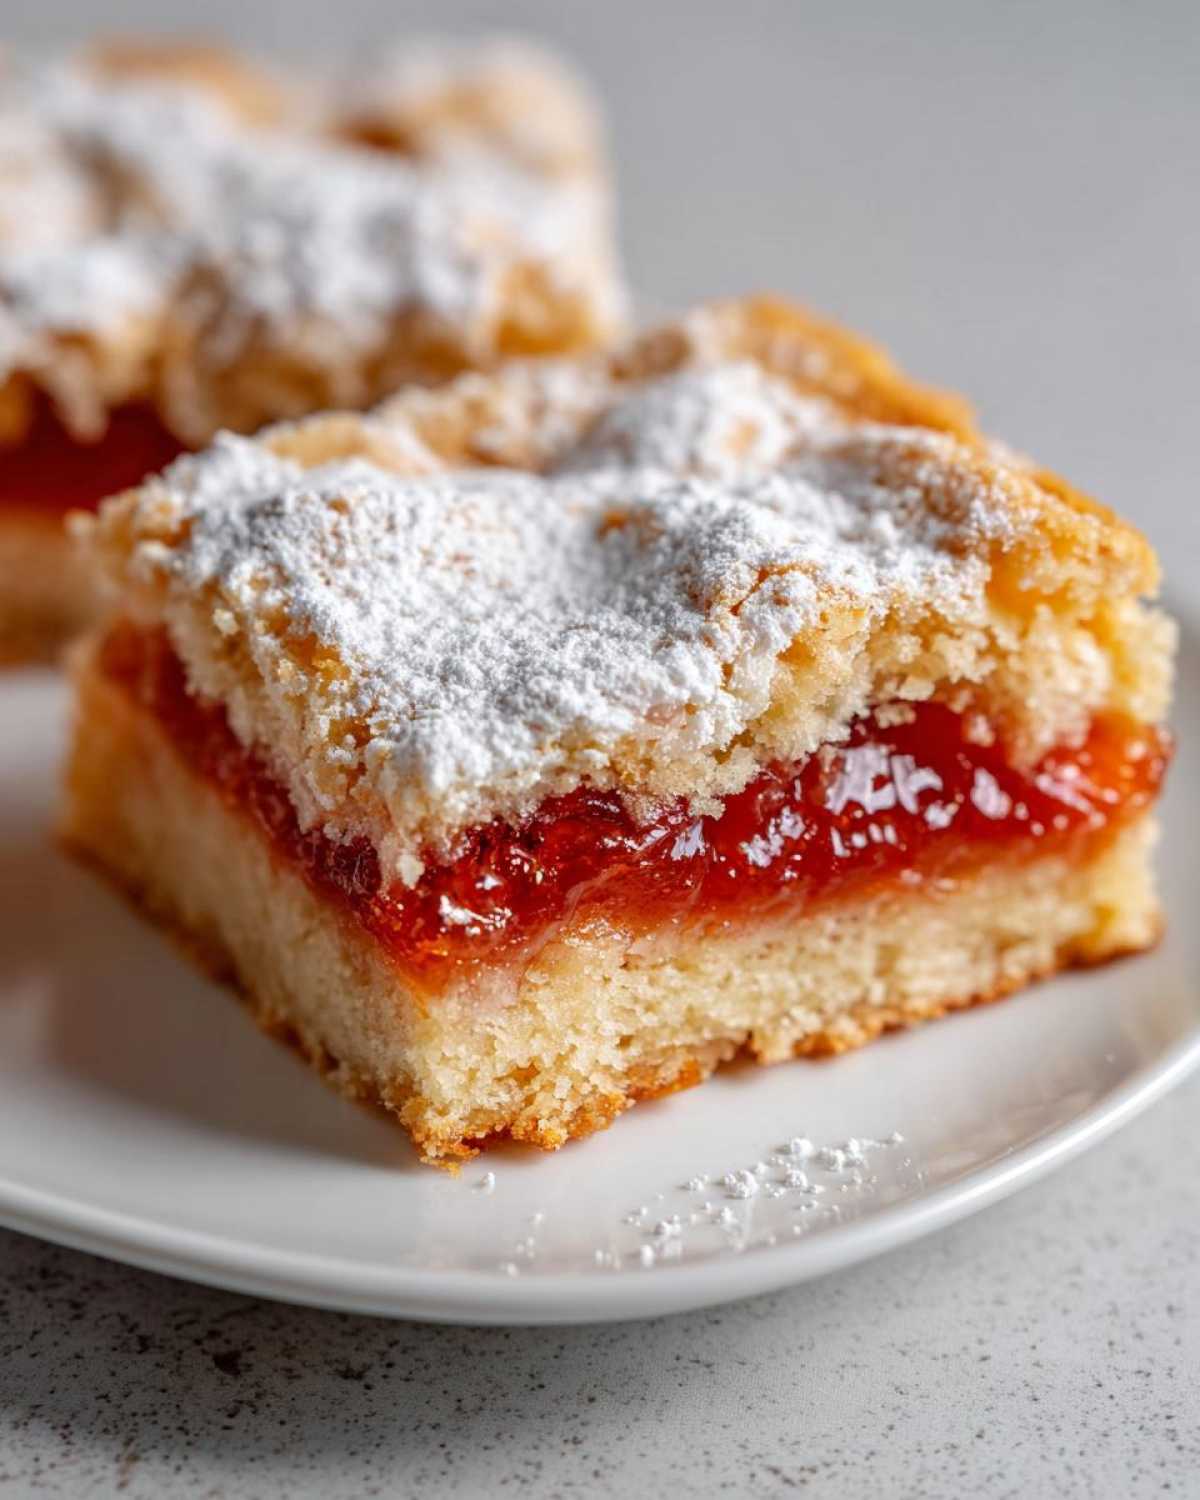
- 1 1/2 cups cherry jam – My secret? I use either homemade or the best quality store-bought I can find
- 1 tablespoon lemon juice – Just a splash brightens up the whole dish
For finishing:
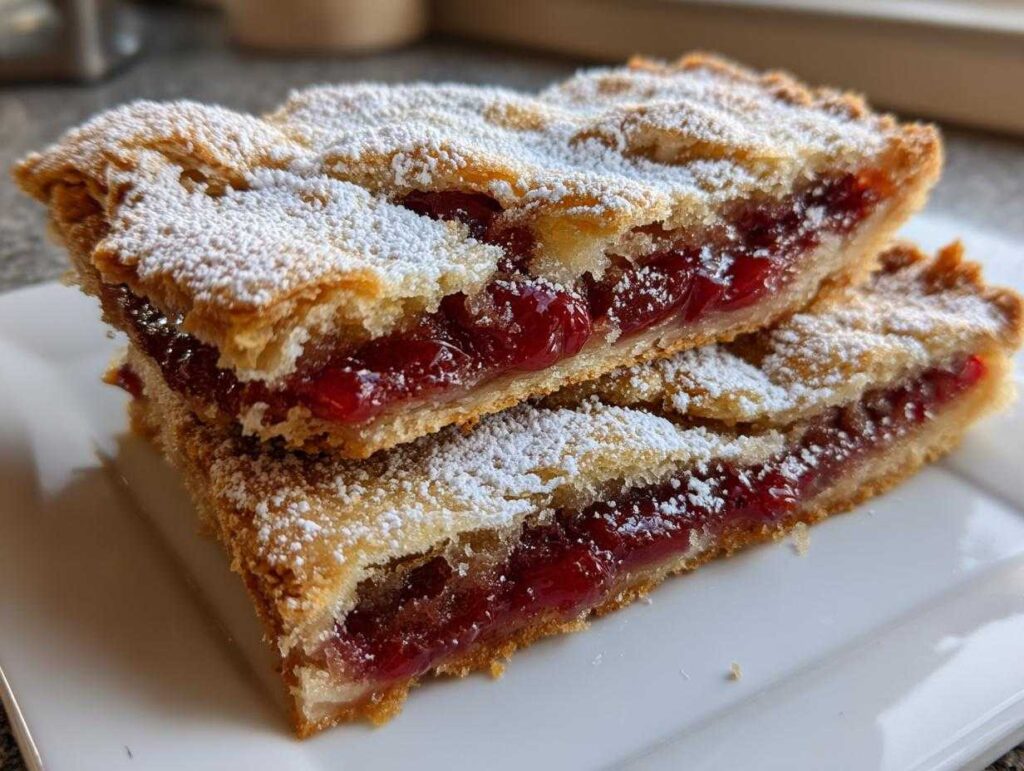
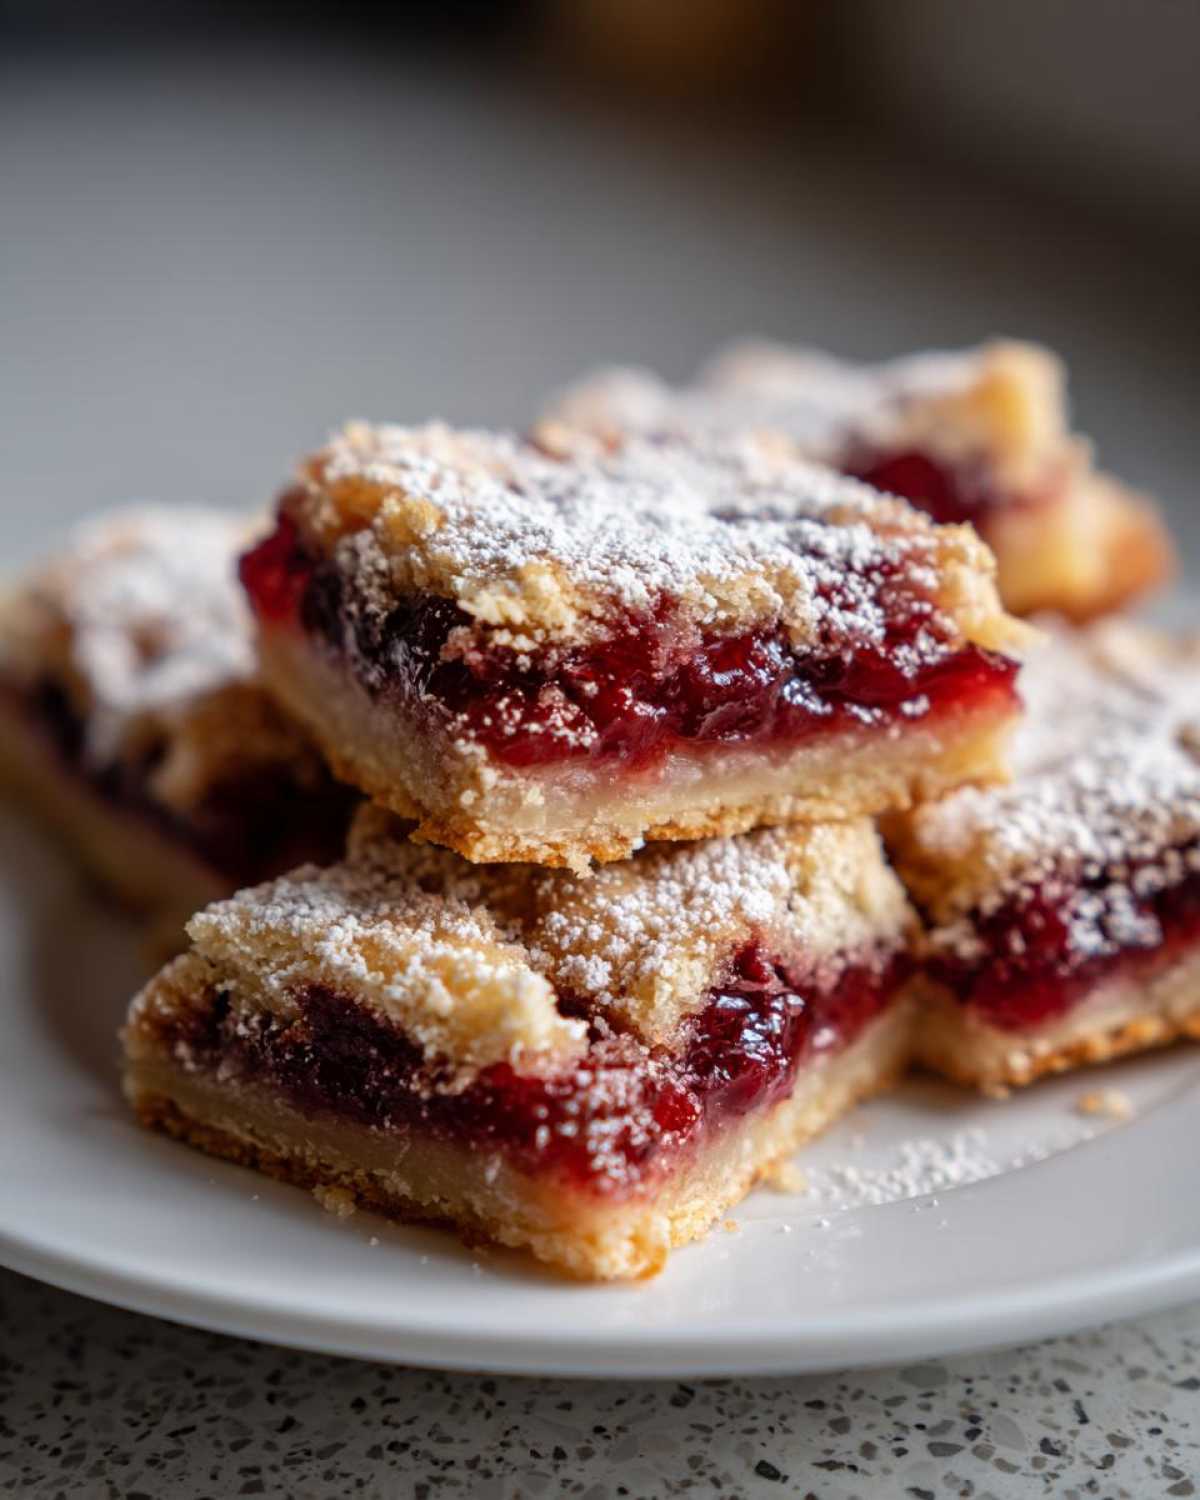
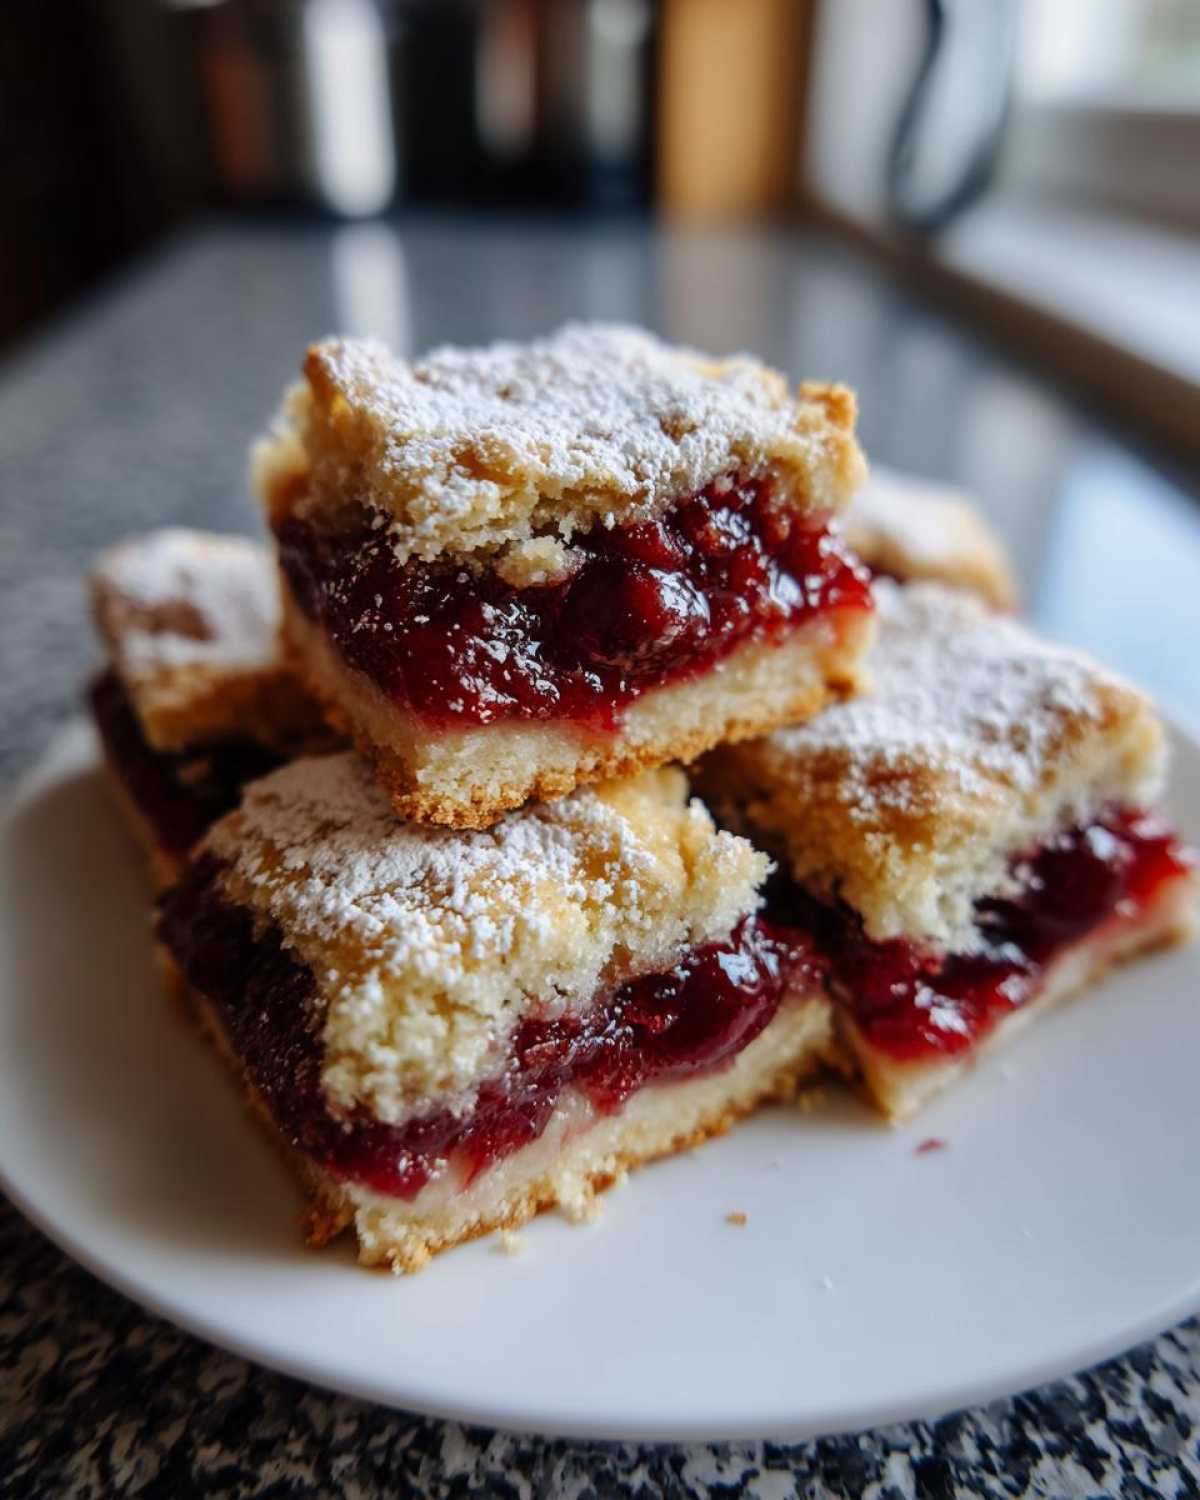
- 1/4 cup powdered sugar – For that pretty snowy dusting that hides any imperfections (not that you’ll have any!)
P.S. If you’re feeling fancy during cherry season, you can absolutely use fresh cherries! Just pit and cook down about 3 cups with 1/4 cup sugar and a squeeze of lemon until jammy. Otherwise, quality canned cherries work beautifully too – I promise no one will know the difference when they’re biting into these irresistible bars!
How to Make Cherry Pie Bars
Okay friends, let’s get baking! These cherry pie bars couldn’t be simpler – you’ll have that sweet cherry goodness ready in no time. Just follow these easy steps, and soon your whole house will smell like a pastry shop. Don’t worry if you’re not a baking pro – I’ve broken everything down so even first-timers can make these like a champ.
Preparing the Crust
First things first – preheat that oven to 350°F (175°C) and line your 9×13-inch baking pan with parchment paper. Trust me, this makes cleanup a breeze! Now let’s make that buttery crust. In a big bowl, whisk together the flour, sugar, and salt. Here comes the fun part – grab your cold butter cubes and start mixing them into the flour. I like to use a pastry cutter at first, but honestly? Your clean hands work just as well. Keep going until the mixture looks like coarse crumbs with some pea-sized butter bits still visible – that’s what gives the crust its perfect flakiness. Mix in the egg and vanilla until it just starts to come together – don’t overdo it! Press about two-thirds of this magical dough evenly into your prepared pan (save the rest for the topping!), and pop it in the oven for 15 minutes while you get the filling ready.
Assembling the Cherry Pie Bars
While the crust gets toasty, let’s prepare that gorgeous cherry filling. I like to stir the lemon juice into the cherry jam – it brightens up the flavor and cuts through the sweetness just right. Once the crust has baked for 15 minutes, take it out (it won’t be fully cooked yet, and that’s perfect!) and spread the jam mixture evenly across the top. Now, remember that reserved dough? Crumble it between your fingers over the jam layer – don’t worry about being too precise, those irregular bits make the topping extra pretty. Pro tip: If your hands get too sticky, dust them with a little flour first!
Baking and Finishing Touches
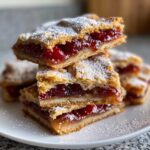
Back into the oven it goes for 25-30 minutes – you’ll know it’s ready when those crumbles on top turn a gorgeous golden brown and you can see the jam bubbling slightly around the edges. This is the hardest part, but resist the urge to cut into them right away! Let the pan cool completely on a wire rack – about an hour should do it. This gives the filling time to set so you’ll get clean slices. When you’re ready to serve, dust with powdered sugar through a fine mesh sieve for that perfect bakery-style finish. Now comes the best part – cutting into squares and watching everyone’s eyes light up when they taste that first bite of cherry pie bar heaven!
Expert Tips for Perfect Cherry Pie Bars
After years of making these cherry pie bars (and taste-testing way more than I should admit), I’ve picked up some foolproof tricks to guarantee bakery-quality results every time. Here are my golden rules:
Keep everything cold! I pop my butter cubes and bowl in the freezer for 10 minutes before starting – the colder the butter, the flakier the crust. If your kitchen’s warm, chill the pressed crust for 20 minutes before baking. You can even prep everything ahead when meal planning – the unbaked dough keeps beautifully in the fridge overnight.
Jam thickness matters – Too runny and your bars get soggy, too thick and they’re dry. I look for a jam that slowly drips off the spoon, not pours. If yours seems thin, simmer it for 5 minutes to reduce, or thicken with a teaspoon of cornstarch mixed with lemon juice.
The perfect cut – Clean slices require patience! Let bars cool completely – I usually wait a full hour. For super neat edges, I run my knife under hot water between cuts. Bonus? These freeze like a dream for up to 3 months – portion them with parchment like the pros at meal delivery services do!
Butter alternatives – In a pinch, I’ve used high-quality margarine where every ounce counts (like for weight loss programs), but nothing beats real butter for that rich, nostalgic flavor.
Serving and Storage Tips
Oh, you’re gonna love serving these cherry pie bars—they practically beg for a scoop of vanilla ice cream melting over the top! My kids call it “cherry pie à la mode in your hand,” and I swear, that cold creaminess against the warm jammy center is pure dessert bliss. For parties, I’ll slice them small and arrange them on a platter so guests can grab-and-go (they disappear fast, trust me).
Storage is a breeze—just tuck cooled bars into an airtight container with parchment between layers. They’ll stay fresh at room temp for 2 days (if they last that long), or refrigerate for up to 5 days. For longer storage? Freeze them! Wrap individual bars tightly in plastic, then foil, and they’ll keep their magic for 3 months. Thaw at room temp when those cherry cravings hit—they taste just-baked every time.
Cherry Pie Bars Variations
One of my favorite things about this recipe is how easily you can mix it up while keeping that perfect bar texture. Try swapping almond extract for vanilla sometime – just 1/2 teaspoon gives these an elegant bakery flavor that pairs beautifully with cherries. When berry season hits, I’ll often do half cherry jam and half raspberry for a gorgeous marbled effect. For a gluten-free version, I’ve had great success using a 1:1 GF flour blend (just be sure to add 1/4 teaspoon xanthan gum if your blend doesn’t include it). The possibilities are endless!
Nutritional Information
Just a quick note – these nutritional estimates are based on my standard ingredients, but your cherry pie bars might vary slightly depending on the exact jam and butter you use. Each delicious bar comes out to about 220 calories with 18g of sugar (that cherry jam sweetness, yum!). They’ve got 10g of fat from all that glorious butter, 2g of protein, and 1g of fiber. Not too shabby for such an indulgent-tasting treat!
Frequently Asked Questions
Can I use fresh cherries instead of jam for these cherry pie bars?
Absolutely! In the summer when fresh cherries are at their peak, I love using them for these bars. Just pit about 3 cups of cherries and cook them down with 1/4 cup sugar and a squeeze of lemon juice until they’re nice and jammy. The key is to let them simmer until most of the liquid cooks off – you don’t want soggy crusts! Fresh cherries give such a bright flavor, though I’ll admit – when I’m in a hurry, my favorite quality store-bought cherry jam works like a charm too.
How do I prevent the crust from getting soggy?
Ooh, this was my biggest struggle back when I first started making cherry jam bars! Here’s what I’ve learned: first, partially bake your base crust before adding the filling – those 15 minutes are crucial. Second, make sure your filling isn’t too runny (see my jam thickness tip above!). Lastly, cool completely before cutting – this gives everything time to set up nicely. I’ve also had great success sprinkling a thin layer of crushed nuts or graham cracker crumbs over the hot crust before the jam – they soak up extra moisture.
How long do these portable cherry bars stay fresh?
At room temperature, they’ll be perfect for about 2 days if stored in an airtight container (though they rarely last that long in my house!). For longer storage, I pop them in the fridge where they’ll keep for up to 5 days. The freezer’s my secret weapon though – individually wrap the bars and they’ll taste fresh months later! Just thaw at room temp when you get a sudden craving for summer cherry dessert goodness.
Can I make these cherry pie bars gluten-free?
You sure can! I’ve made them successfully with a 1:1 gluten-free flour blend (Bob’s Red Mill is my go-to). Pro tip: if your blend doesn’t include xanthan gum, add 1/4 teaspoon to the dry ingredients. The texture comes out just slightly more crumbly than the original, but still totally delicious – I served them at a book club once and no one even guessed they were GF!
Share Your Cherry Pie Bars Creation
Nothing makes me happier than seeing your cherry pie bar masterpieces! Snap a photo when you make them – I’d love to see your crumbly tops and that gorgeous cherry swirl. Pin your creation on Pinterest and share how it turned out in the comments below. Did you add any special twists? Rate the recipe to let me know if it hit all those sweet, nostalgic notes for you too!
PrintCherry Pie Bars
A portable version of classic cherry pie with a flaky crust and sweet cherry-jam filling, perfect for summer desserts.
- Prep Time: 20 min
- Cook Time: 30 min
- Total Time: 50 min
- Yield: 12 bars 1x
- Category: Dessert
- Method: Baking
- Cuisine: American
- Diet: Vegetarian
Ingredients
- 2 cups all-purpose flour
- 1/2 cup granulated sugar
- 1/2 tsp salt
- 1 cup unsalted butter, cold and cubed
- 1 egg
- 1 tsp vanilla extract
- 1 1/2 cups cherry jam
- 1 tbsp lemon juice
- 1/4 cup powdered sugar (for dusting)
Instructions
- Preheat oven to 350°F (175°C). Line a 9×13-inch baking pan with parchment paper.
- Mix flour, sugar, and salt in a bowl. Cut in butter until crumbly.
- Whisk egg and vanilla, then stir into flour mixture until dough forms.
- Press 2/3 of the dough into the pan. Bake for 15 minutes.
- Spread cherry jam and lemon juice over the crust. Crumble remaining dough on top.
- Bake for 25-30 minutes until golden. Cool, then dust with powdered sugar.
Notes
- Use fresh cherries in summer or high-quality canned cherries off-season.
- Pair with vanilla ice cream for extra indulgence.
- Store leftovers in an airtight container for up to 3 days.
Nutrition
- Serving Size: 1 bar
- Calories: 220
- Sugar: 18g
- Sodium: 50mg
- Fat: 10g
- Saturated Fat: 6g
- Unsaturated Fat: 3g
- Trans Fat: 0g
- Carbohydrates: 30g
- Fiber: 1g
- Protein: 2g
- Cholesterol: 35mg