
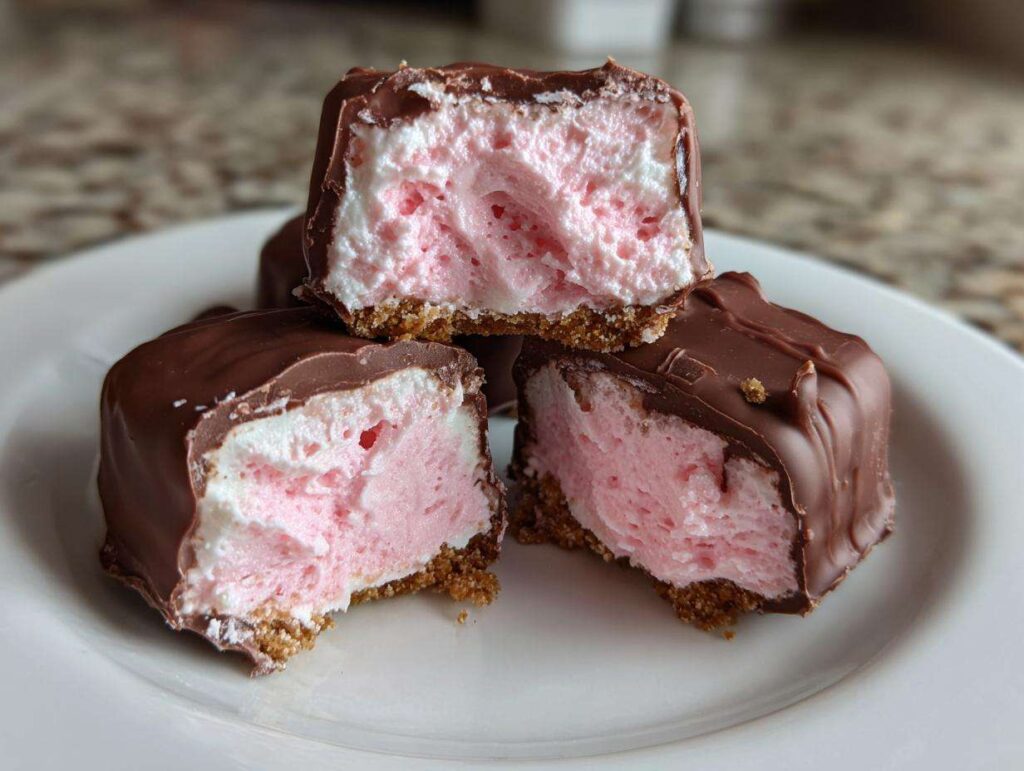
Oh, you know that feeling when you need a show-stopping dessert but the thought of turning on the oven makes you break out in a sweat? Me too! That’s why I’m so thrilled to talk about my absolute secret weapon: these incredibly easy, no-bake pink velvet cheesecake bites. Seriously, these little individual velvet cheesecake servings are crowd-pleasers, and they look so fancy when they’re all lined up on a platter! For me, this recipe became my standard for impromptu gatherings. When unexpected guests show up, I can whip these up, pop them in the fridge, and bam—instant edible elegance. They hit that perfect note between rich, tangy cheesecake and that mild, cocoa-laced flavor we all crave. Trust me, these are the best no bake cheesecake recipe when time is short!
- Why You Will Love These No-Bake Pink Velvet Cheesecake Bites
- Essential Ingredients for Perfect No-Bake Pink Velvet Cheesecake Bites
- Step-by-Step Instructions for No-Bake Pink Velvet Cheesecake Bites
- Tips for the Best No-Bake Pink Velvet Cheesecake Bites
- Making Simple Velvet Dessert Variations
- Storage and Make-Ahead Instructions for Your No bake Cheesecake Bites Recipe
- Serving Suggestions for Pink Dessert Party Food
- Frequently Asked Questions About No Bake Pink Velvet Cheesecake Bites
- Nutritional Estimate for Individual No Bake Desserts
- Share Your No-Bake Pink Velvet Cheesecake Bites Creations
- Nutritional Estimate for Individual No Bake Desserts
- Share Your No-Bake Pink Velvet Cheesecake Bites Creations
Why You Will Love These No-Bake Pink Velvet Cheesecake Bites
I honestly can’t stop making these, and I know you won’t either once you try them! They fit into my hectic schedule perfectly. If you’re looking for a treat that delivers big flavor without the fuss, keep reading. You might want to check out my ultimate no-bake Oreo pie next week!
- Absolutely Zero Oven Time: That’s right, forget preheating! These mini pink velvet desserts come together entirely on the countertop, which saves me major stress on hot days.
- Perfect Portions: Because they are bites, they are so easy to serve at a party. No messy slicing required! Everyone just grabs one—it’s so neat.
- Stunning Visual Appeal: That soft pink color is naturally eye-catching, especially when contrasted with the dark chocolate coating. They always get compliments before anyone even tastes them.
- Incredibly Fast Prep: You whisk up the filling in about 15 minutes flat. The longest part is waiting for them to chill, which is hands-off time for me!
- Rich Velvet Flavor: We capture that classic red velvet taste—the subtle tang and chocolate hint—without all the steps of a traditional layer cake. It’s just pure, creamy satisfaction.
- Freezer Friendly: For those of us who like to plan ahead, these individual no bake desserts freeze like a dream. Perfect for keeping emergency treats on hand!
Essential Ingredients for Perfect No-Bake Pink Velvet Cheesecake Bites
Getting the right texture and that signature flavor is all about the components we use! Since we aren’t baking anything, the quality and state of our ingredients matter a ton for these no-bake pink velvet cheesecake bites. Don’t swap out the cream cheese for a lower fat version if you can help it; we really need that full-fat goodness for the structure. I always lay out the cream cheese a couple of hours before I start so it’s perfectly softened—this cuts down on mixer time later!
For the Graham Cracker Crust
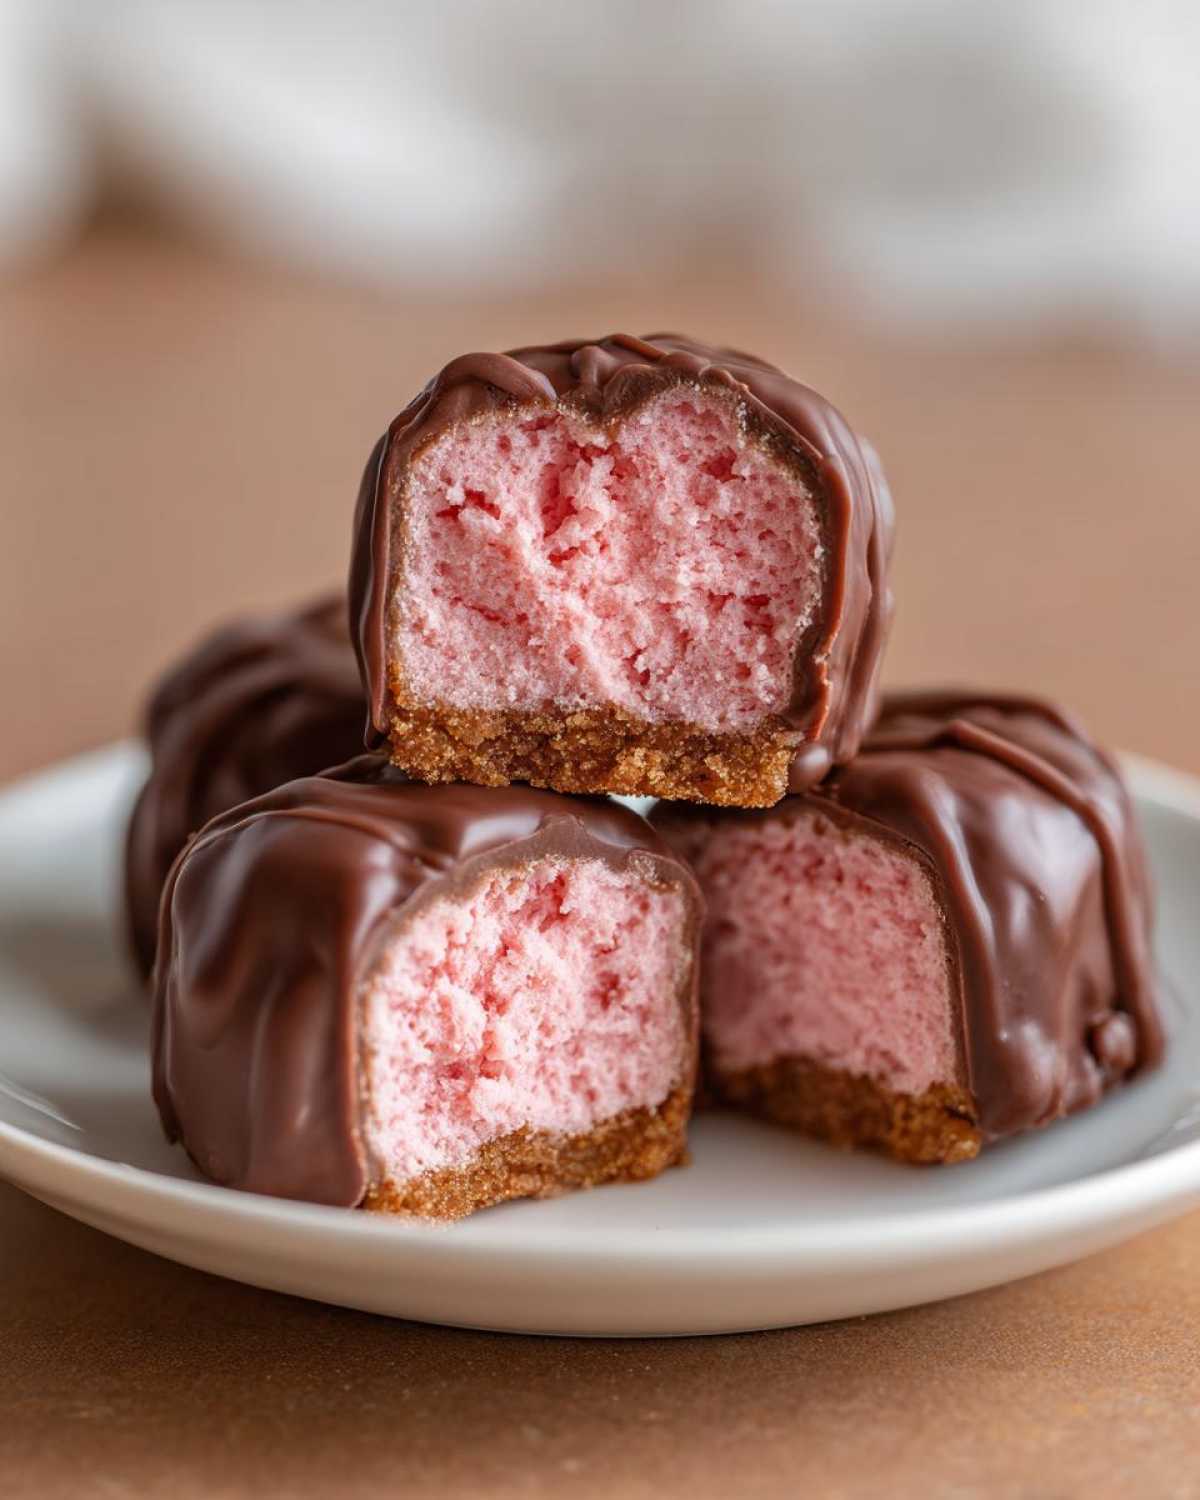
The base needs to hold up to that creamy filling, and for simple no-bake cheesecake bites recipe, the crust is usually the easiest part. You need one cup of good graham cracker crumbs. I prefer the classic flavor, but sometimes I feel wild and use vanilla wafers! Whichever you pick, make sure you measure out exactly 1/4 cup of butter, melted softly, not scorching hot. It all gets mixed together until it looks like the wet sand you use to build a really sturdy castle—it needs to hold its shape when pressed down for the crust base of your no-bake pink velvet cheesecake bites.
For the Pink Velvet Filling
This is where the magic happens! You’ll need 8 ounces of that softened cream cheese, whipped up beautifully with 1/2 cup of powdered sugar—make sure it’s powdered, not granulated, or you’ll end up with a gritty mess! Then we add in 1/4 cup of heavy cream for lightness, 1 teaspoon of vanilla extract, and just a tiny splash—1/2 teaspoon—of white vinegar. That little bit of acid is crucial, believe it or not, as it really wakes up the ‘velvet’ flavor profile we’re aiming for, much like in a traditional red velvet cake! We throw in 1/4 cup of unsweetened, natural cocoa powder; this is what gives us that deep, subtle chocolate hint that makes it *velvet* and not just pink cheesecake. Lastly, for the color, just 1 or 2 drops of red food coloring will turn it into a lovely, pale pink. If you use too much, it stops looking delicate!
For the Chocolate Coating
To finish these individual velvet cheesecake servings off right, we need a nice, crisp shell. I usually opt for white chocolate melting wafers because they set up beautifully hard, or if you want an easy shortcut, pink candy melts work just as well! These melts act as the final seal, locking in that creamy center and adding a nice little snap when you bite into the treat.
Step-by-Step Instructions for No-Bake Pink Velvet Cheesecake Bites
Okay, putting this all together is just as fun as eating them, I promise! Since there’s no oven involved, our main goal here is temperature control—we need cold things cold and smooth things smooth. Remember what I said about the crust having to be sturdy? That starts right now with getting it firmly set. Don’t rush the chill time either; that’s the secret to getting those gorgeous, clean little no bake cheesecake bites recipe out of the tin later!
Preparing the Crust Base for Your No Bake Cheesecake Bites Recipe
First things first, grab your mini muffin tin and line all the cups with little paper liners. This is crucial for easy removal later! Mix up your graham cracker crumbs and melted butter until everything is evenly saturated. Now, here’s my little trick for strong foundations: take about one tablespoon of that mixture and press it down into the bottom of each liner as firmly as you possibly can. I usually use the bottom of a small glass to really compact it. Once they are packed tight, get them into the freezer right away while you start the filling. They need a good, deep freeze for about 15 minutes to set up properly.
Creating the Fluffy Pink Velvet Cheesecake Filling
Grab your biggest bowl! We start by beating that softened cream cheese until it’s utterly smooth—no lumps allowed! Next, slowly shower in the powdered sugar while the mixer is running on low to medium speed until it looks pale and creamy. Now, drizzle in the heavy cream, vanilla, vinegar, and salt. Keep beating until it gets nice and fluffy—it’s gaining air! Then, you add your color—just those 1 or 2 drops of red food coloring. Finally, sprinkle in the cocoa powder. This part is key: fold the cocoa in just until you don’t see white streaks anymore. If you mix it too hard here, you’ll knock all the air out, and we want fluffy easy no bake cheesecake balls, not dense ones!
Assembling and Chilling the Individual Velvet Cheesecake Servings
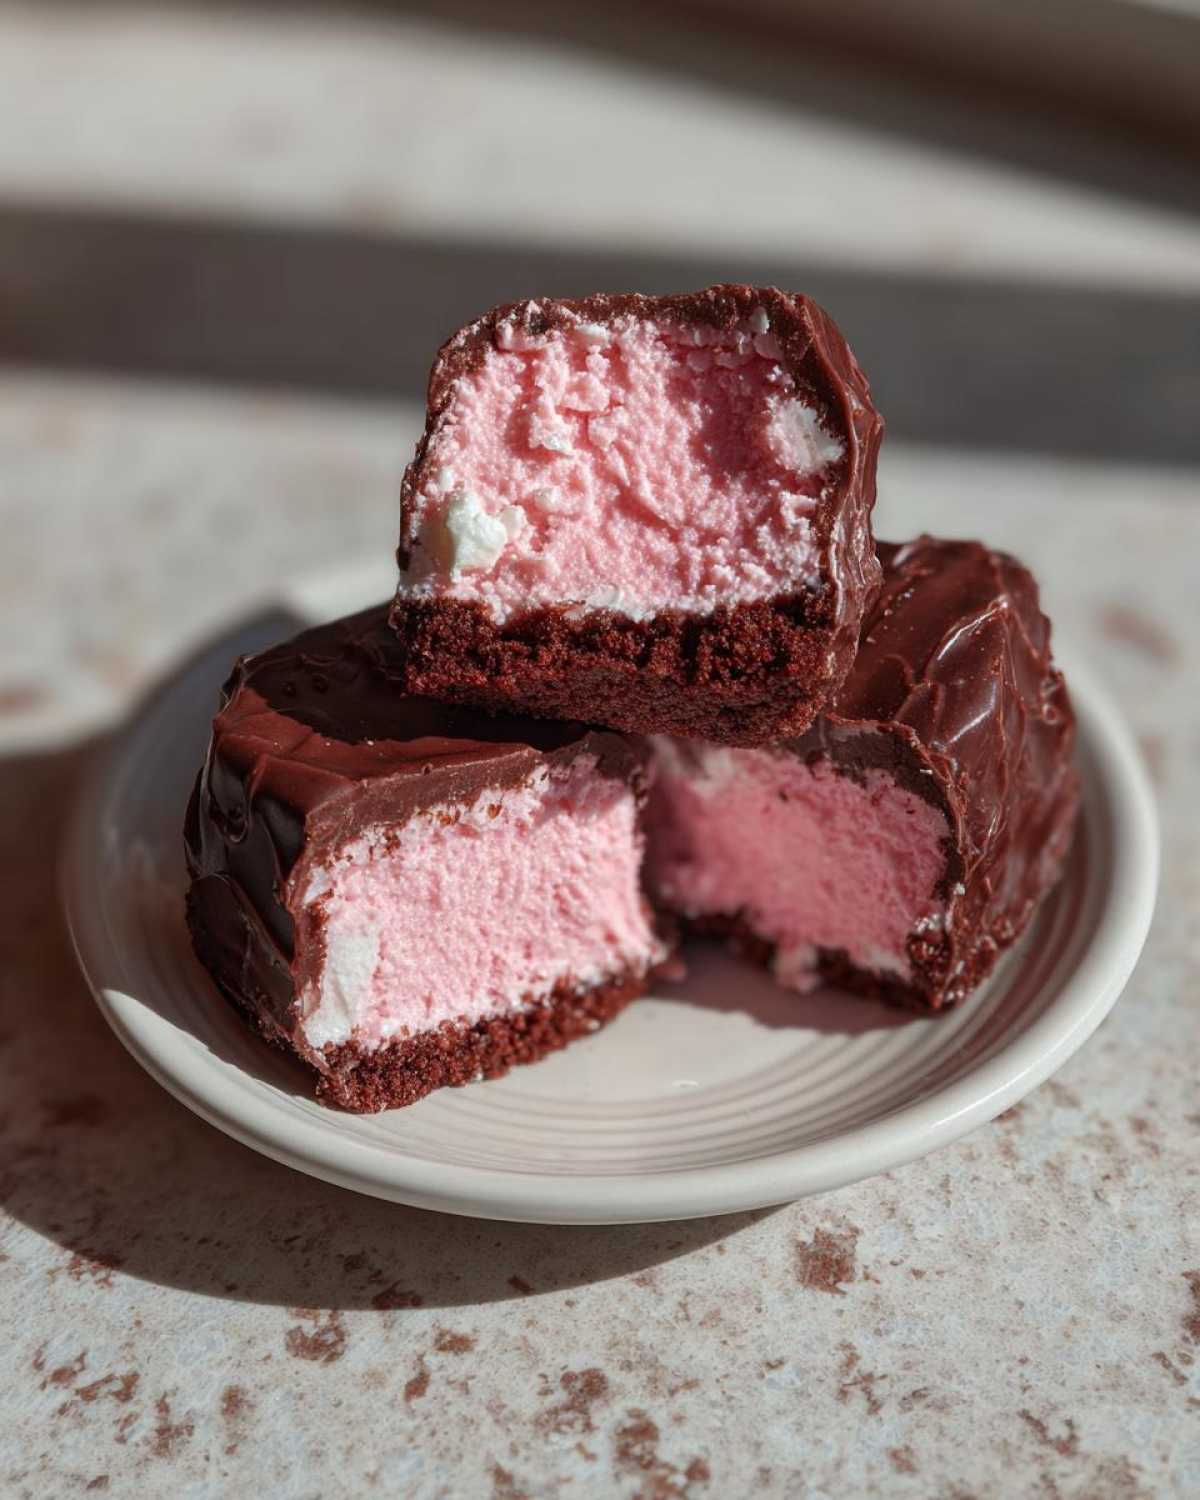
Time to marry the crust and the filling! Spoon or pipe your pink velvet mixture right over those chilled crusts in the muffin tin until they look plump and inviting. You can smooth the top with a small offset spatula if you want them extra neat. Now comes the hardest part: they absolutely must go into the refrigerator for a minimum of four hours! I usually let mine go overnight so they are rock hard when it’s time to dip. This mandatory chilling time is what stops your individual velvet cheesecake servings from melting all over your fingers when you try to coat them.
Finishing Your No Bake Dessert Bites for Parties
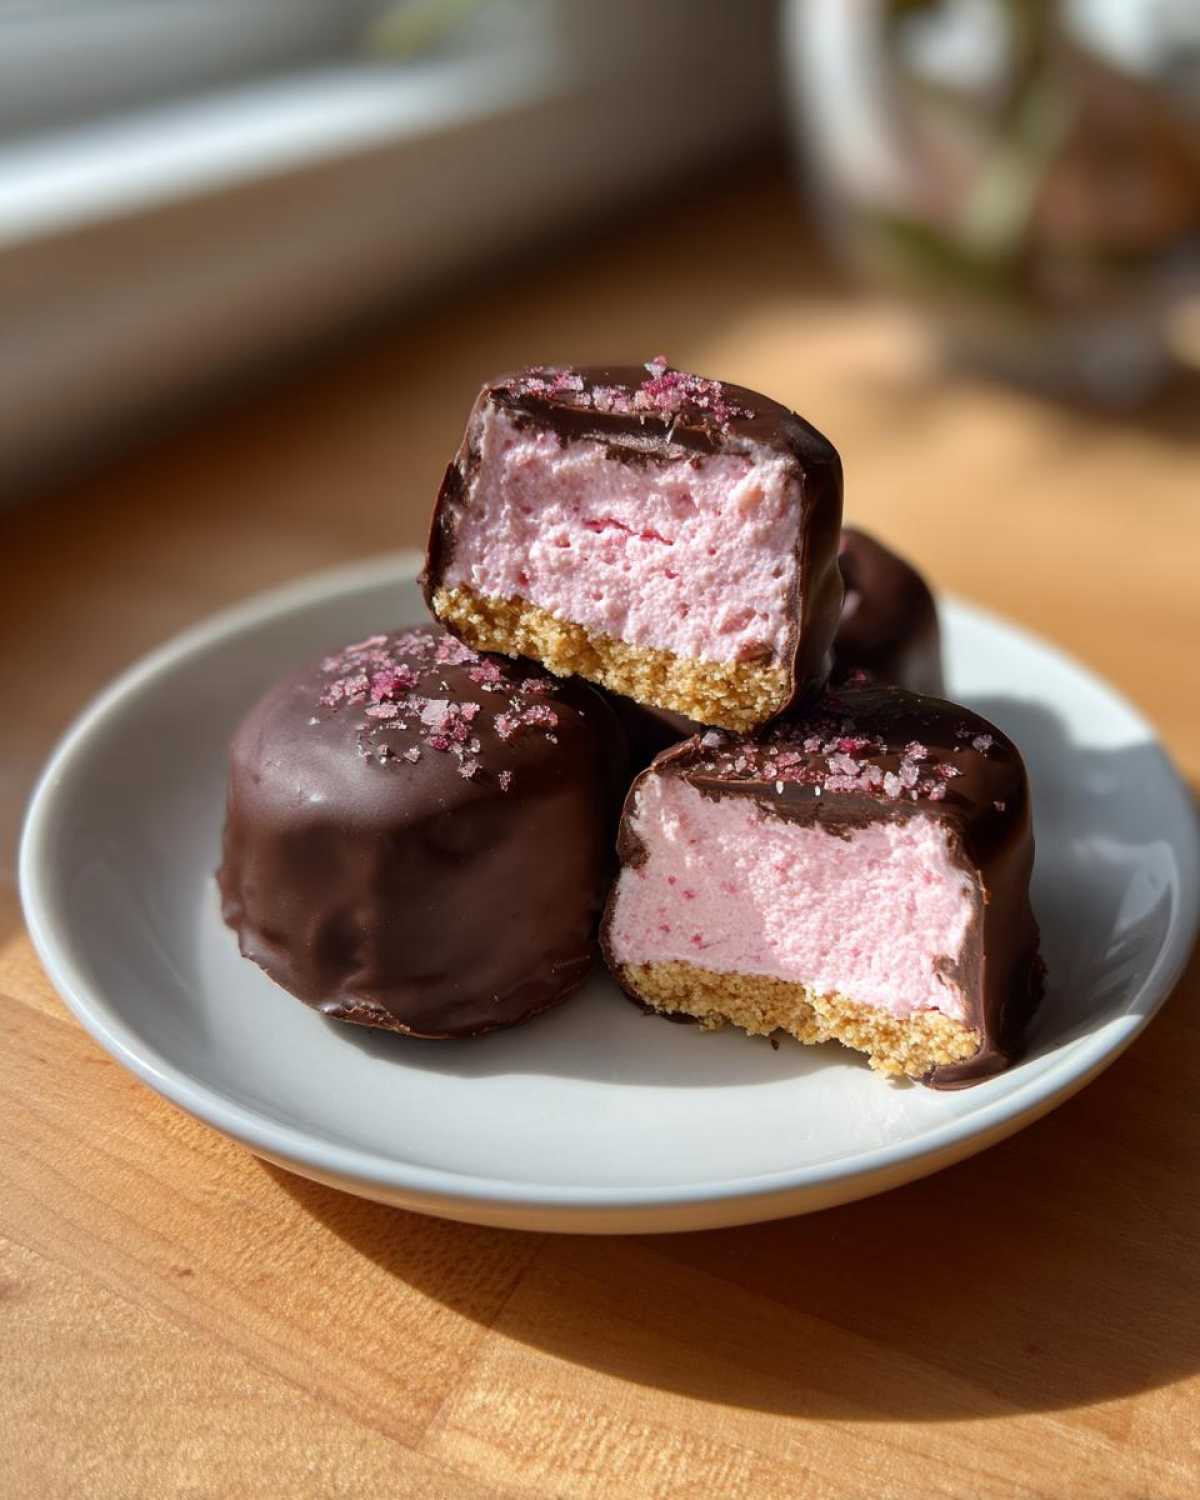
Once they are wonderfully firm, you can gently peel away the paper liners. Melt your white chocolate or candy melts according to the package directions—don’t burn them! If the coating is too thick, I add just a teaspoon of coconut oil to help it become more fluid for a thinner layer. Dip the top of each cheesecake bite (or dunk the whole thing if you’re feeling brave!) and place them back onto a parchment-lined tray. Pop them back in the fridge one last time until that coating snaps cleanly when touched. That little chocolate shell makes these no bake dessert bites for parties look professional!
Tips for the Best No-Bake Pink Velvet Cheesecake Bites
Even though this recipe is super straightforward—seriously, my favorite kind—there are a couple of little things that can trip you up if you’re rushing. Listen, I learned these the hard way during my very first attempt when I was prepping for a summer potluck. I thought I could skip softening the cream cheese, and let me tell you, it looked like cottage cheese went into the mixer! Never again!
Here are my top tips to ensure your no-bake pink velvet cheesecake bites come out perfectly every single time:
- Don’t Fear the Freeze on the Crust: When you press the graham cracker crumbs into the bottom, make them as solid as possible, and then seriously commit to that 15 minutes in the freezer. If that base is soft when you fill it, the whole bite ends up pulling away from the liner when you later try to remove it. A rock-hard crust means a clean bite!
- The Vinegar Trick is Not Optional: Seriously, don’t skip the white vinegar! It’s the tiny secret ingredient that mimics that slight buttermilk tang found in traditional red velvet cake. It just brightens up the flavor and keeps the cocoa from tasting flat. It’s just a half teaspoon, but man, does it make the difference in these mini pink velvet desserts.
- Temperature Control on the Coating: If your melted chocolate coating is too thick (like peanut butter consistency), your bites will end up looking lumpy and thick when dipped. If you find your melted candy melts or chocolate seizing up or just being too sluggish to dip evenly, take it off the heat immediately and stir in just a tiny dab—I mean half a teaspoon—of coconut oil or vegetable shortening. It loosens everything up instantly, giving those easy no bake cheesecake balls a gorgeous, thin, snappy shell.
- Go Easy on the Pink: Remember, we are aiming for a delicate pink tint, not Pepto-Bismol bright! That cocoa powder we fold in already darkens the mixture a bit. Start with just one drop of food coloring, mix it gently, and then add the second drop only if necessary.
Follow these little rules, and your no bake dessert bites will be absolutely flawless. Happy dipping!
Making Simple Velvet Dessert Variations
While I stand firmly by this classic combination that makes for the best no bake cheesecake bites recipe, I totally get that sometimes you want to shake things up! Having a few little ways to customize these individual no bake desserts means you can whip them up for different holidays or just whenever your mood strikes. I’ve played around with this recipe so much—I even have a separate post for my red velvet cake mix cookies! These little bites are so flexible, which is part of why I love them so much for entertaining.
Here are a couple of easy swaps you can try out when making your next batch of individual velvet cheesecake servings:
- Switch Up the Crust Flavor: Ditch the graham crackers if you’re feeling adventurous! Oreos are an absolute dream here—just use the whole cookie, crumbs and all, mixed with the melted butter. You’ll instantly get a gorgeous dark chocolate base that pairs incredibly well with the pink filling. Alternatively, use vanilla wafers or even gingersnaps if you want a little spicy kick with your quick pink dessert recipes.
- A Hint of Nutty Flavor: If you want to swap out that vanilla extract, try using just 1/4 teaspoon of pure almond extract instead. Almond and subtle chocolate flavors are a heavenly match, and it provides a unique almond-velvet note that nobody will be able to quite place! Just be careful not to overdo it, as almond extract is quite strong.
- Brighten the Coating: While the plain white chocolate is pretty, why not make your coating pop? If you use white chocolate wafers for dipping, try stirring in some finely chopped dried strawberries or freeze-dried raspberries right before dipping. It adds texture and brings another layer of fruitiness to the mini pink velvet desserts.
- The Zesty Edge: Since we’ve got a little tang from the vinegar, why not double down? Add the zest of half an orange to the cream cheese filling when you add the vanilla. The citrus zest brightens the whole flavor profile and makes these no oven cheesecake bites feel extra fresh and summery.
When you try one of these twists, I always recommend making a small test batch first. You don’t want to commit the whole recipe to a flavor combo you end up not loving, even though I really think these variations are winners for your next batch of simple velvet dessert!
Storage and Make-Ahead Instructions for Your No bake Cheesecake Bites Recipe
The beauty of these no bake cheesecake bites recipe is that they are practically built for planning ahead! Since we aren’t dealing with eggs or baked dairy, they actually keep wonderfully, which is a huge win when you are hosting a party or just want a stash of easy dessert bites no chilling time extended. I almost prefer them the day after I make them because the flavors have really settled into that graham cracker crust.
The key to keeping these no bake pink velvet cheesecake bites perfect is making sure they are fully set and coated before long-term storage. Once that chocolate shell is hard, it acts like a little protective shield around the creamy filling.
Refrigeration is Your Best Friend: For short-term storage, just keep them in an airtight container in the main part of your refrigerator. They stay fresh and delicious for about 4 to 5 days. I lay down a layer of parchment paper on the bottom of the container first, place the bites in a single layer if possible, and then add another piece of parchment on top before sealing the lid. This prevents any weird fridge smells from creeping in and keeps that pretty chocolate shell looking pristine.
Freezing for Future Fun: This is where these individual no bake desserts really shine! They freeze wonderfully—I mentioned this in the notes, but I want to emphasize it because it’s a game-changer. If you wrap them tightly in plastic wrap (or place them carefully in a freezer-safe container), these little velvet treasures can last up to a full month in your freezer. They are perfect for pulling out when you suddenly realize you need a last-minute treat for a work day or a spontaneous dessert craving hits!
Thawing Quickly: When you need them, just move the frozen bites directly onto a serving plate and let them thaw on the counter at room temperature for about 30 minutes. They thaw surprisingly fast because they are so small. Just make sure the chocolate coating has had a chance to soften just slightly before you bite into one of your stunning small batch pink cheesecake treats!
Serving Suggestions for Pink Dessert Party Food
Part of the fun of making something as cute as these no-bake pink velvet cheesecake bites is figuring out the prettiest way to serve them! These aren’t just desserts; they are tiny pieces of edible decoration, especially for a shower, Valentine’s gathering, or even just a fun Sunday tea party. Presentation is everything when they look this good, so we need to make sure the vessel matches the velvety contents!
Since these are individual servings, they are already designed for easy grabbing, but how you display them makes all the difference. Forget just piling them on a plain white plate, let’s make them shine!
- Tiered Stands are Your Best Friend: If you own one of those gorgeous three-tiered serving platters, this is the time to bring it out! Arrange your coated mini pink velvet desserts on the different levels. I like to use small paper doilies on each tier to really make the pink pop against an antique or white stand. It creates height and makes the spread look abundant and luxurious.
- The Mini Cupcake Liner Trick: If you are worried about the white chocolate coating smudging onto a platter, put each bite back into a fresh, crisp mini paper liner once the chocolate has set. Use a liner color that contrasts nicely—think shiny gold foil or maybe a dark brown to pull out that cocoa note. This keeps the serving clean and adds zip to a flat buffet table.
- Pairing with Warm Drinks: The richness of the cream cheese and the subtle chocolate in these simple velvet dessert bites needs something warm and comforting to balance it out. They are absolutely divine next to a rich, dark coffee. If you are serving them in the evening, I highly recommend making a pot of my favorite Mexican hot chocolate—the hint of spice is a wonderful counterpoint to the sweet velvet flavor!
- Punch Bowls and Bright Beverages: For daytime parties or brunches where you are serving these no oven cheesecake bites, presentation alongside a bright punch is key. Think about a simple lemonade with raspberries floating in it, or even just sparkling water with fresh mint. The tartness helps cut through the creaminess of the filling beautifully. We want balance on the table, darling!
- Dressing Up the Plate: If you are only serving a few bites per person, try placing them on small, elegant dessert plates. Place a garnish right next to the bite—a single fresh raspberry, a dusting of extra powdered sugar shaped through a tiny stencil, or even a small edible flower makes these individual pink dessert servings look like they came from a fancy bakery!
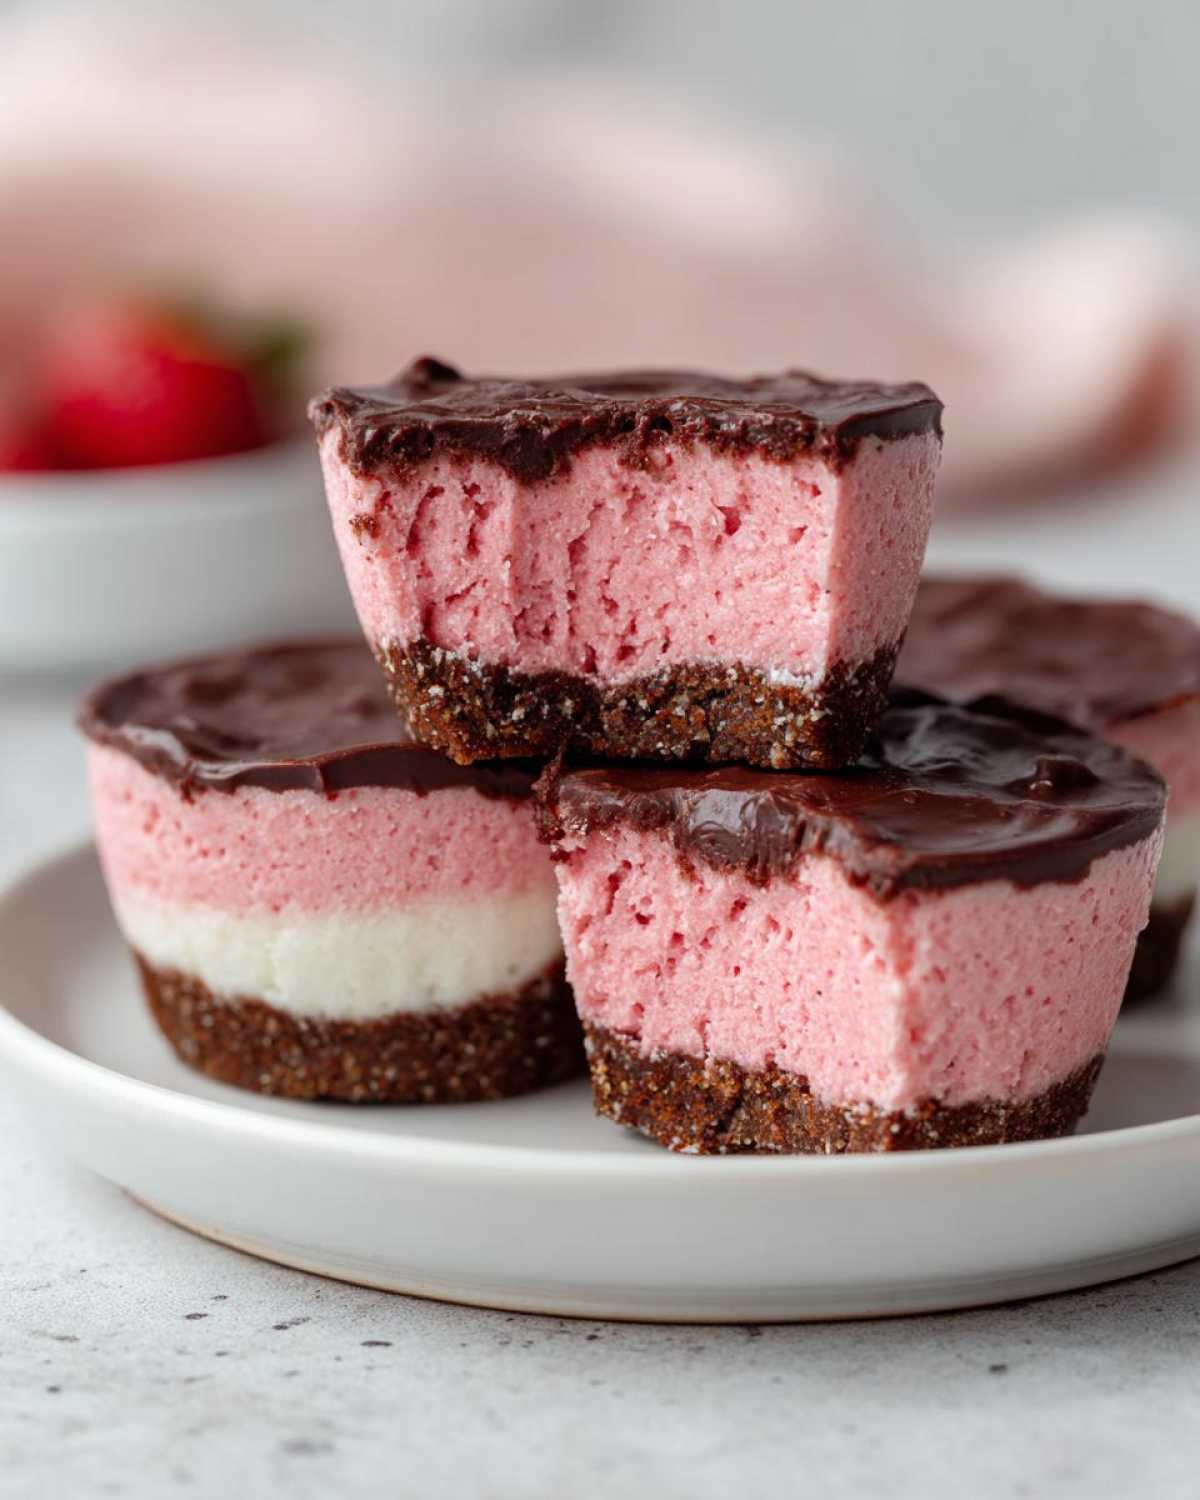
Honestly, these no bake pink velvet cheesecake bites are sturdy enough for almost any presentation you dream up. Just keep them chilled until the last possible second, and enjoy watching everyone grab two!
Frequently Asked Questions About No Bake Pink Velvet Cheesecake Bites
I always get so many questions when I post photos of these little gems because, let’s be honest, they look way more complicated than they are! Anyone who loves a good no bake pink velvet cheesecake bites recipe appreciates shortcuts, and these certainly deliver. I’ve gathered the most common things readers ask me about making these easy no bake cheesecake balls!
Can I make these no bake cheesecake bites ahead of time?
Oh, yes, please do! Making them ahead is ideal because they need that minimum four-hour chill time anyway. If you are planning for a party, you can prepare the entire coated batch of your individual velvet cheesecake servings and keep them sealed tightly in the refrigerator for up to 5 days. They actually taste even better on day two! If you need them even further out, they freeze beautifully for up to a month, which makes them one of the best no bake dessert bites for parties you can have ready to go.
What is the best way to get a smooth chocolate coating on my red velvet no bake treats?
Getting that coating smooth is key to looking professional! Whether you use the white chocolate wafers or candy melts, the issue is usually temperature. If the coating gets too hot or you add any water, it seizes up and becomes clumpy—which tastes fine, but looks terrible on your red velvet no bake treats. My trick, and this is crucial, is to melt them slowly in short bursts in the microwave, stirring after every 20 seconds. If it still seems a little thick right before dipping, take it off the heat entirely and stir in about half a teaspoon of coconut oil. That fat loosens everything up into a silky consistency that perfectly coats your no bake pink velvet cheesecake bites without making them greasy.
Can I skip the cocoa powder in this quick pink dessert recipe?
You certainly can skip it, but I highly advise against it if you want that classic “velvet” profile! The cocoa powder is what gives the filling that gorgeous, subtle, deep background note that makes people say, “Oh, what *is* that?” without being overly chocolatey. If you leave it out, you will definitely end up with a lovely, tangy pink cheesecake bite. They will still be delicious, but you’ll be missing that signature **simple velvet dessert** earthiness. So, for the true experience, keep that cocoa powder in there!
Nutritional Estimate for Individual No Bake Desserts
I always try to be transparent about what we are putting into our bodies, even when it comes to little treats like these individual no bake desserts. Since these bites are all about richness, they are definitely an indulgence, but the small serving size keeps things reasonable! Please remember that these values are an estimate based on the ingredients listed; if you use extra-rich butter or different coatings, things might shift slightly. Here is the breakdown for one of your yummy no bake pink velvet cheesecake bites:
- Serving Size: 1 bite
- Calories: 180
- Sugar: 15g
- Sodium: 110mg
- Fat: 12g
- Saturated Fat: 7g
- Unsaturated Fat: 5g
- Trans Fat: 0g
- Carbohydrates: 16g
- Fiber: 1g
- Protein: 3g
- Cholesterol: 35mg
See? Not too shabby for something this delicious—especially when you can pull them right out of the freezer for a low-calorie treat!
Share Your No-Bake Pink Velvet Cheesecake Bites Creations
This is the part I love the most! When you make these gorgeous no-bake pink velvet cheesecake bites, please come back here and leave a rating and some comments! Tell me if you tried one of the crust variations or if you went heavy on the pink coloring. Your feedback helps other bakers know how to make the best individual velvet cheesecake servings.
If you snap a picture of your perfectly coated pink dessert party food spread, tag me on social media! I love seeing how these recipes look in your kitchens. And hey, if you’re looking for even more sweet, easy ideas, you can always find inspiration for more quick pink dessert recipes over on our Pinterest account!
Happy snacking, everyone!
Nutritional Estimate for Individual No Bake Desserts
I always try to be transparent about what we are putting into our bodies, even when it comes to little treats like these individual no bake desserts. Since these bites are all about richness, they are definitely an indulgence, but the small serving size keeps things reasonable! Please remember that these values are an estimate based on the ingredients listed; if you use extra-rich butter or different coatings, things might shift slightly. Here is the breakdown for one of your yummy no bake pink velvet cheesecake bites:
- Serving Size: 1 bite
- Calories: 180
- Sugar: 15g
- Sodium: 110mg
- Fat: 12g
- Saturated Fat: 7g
- Unsaturated Fat: 5g
- Trans Fat: 0g
- Carbohydrates: 16g
- Fiber: 1g
- Protein: 3g
- Cholesterol: 35mg
See? Not too shabby for something this delicious—especially when you can pull them right out of the freezer for a low-calorie treat!
Share Your No-Bake Pink Velvet Cheesecake Bites Creations
This is the part I love the most! When you make these gorgeous no-bake pink velvet cheesecake bites, please come back here and leave a rating and some comments! Tell me if you tried one of the crust variations or if you went heavy on the pink coloring. Your feedback helps other bakers know how to make the best individual velvet cheesecake servings.
When I first started sharing recipes from my kitchen, the response was everything to me. Knowing that someone else tried my favorite ideas and loved them? That’s the best feeling! So, please, don’t be shy! Let me know how these quick pink dessert recipes turned out for you. Did the chocolate coating set nicely? Did your family devour them in five seconds flat? Spill the tea!
If you snap a picture of your perfectly coated pink dessert party food spread, tag me on social media! I love seeing how these recipes look in your kitchens. It’s inspiring to look through all your photos and real-life adaptations of my favorite easy no bake cheesecake balls. And hey, if you’re looking for even more sweet, easy ideas before you start your next batch, you can always find inspiration for more quick pink dessert recipes over on our Pinterest account!
Happy snacking, everyone! I’m already looking forward to reading your notes on these delightful no-bake treats!
PrintNo-Bake Pink Velvet Cheesecake Bites
Make these easy, individual no bake cheesecake bites featuring a fun pink velvet flavor. They require no oven time, making them perfect for quick party treats.
- Prep Time: 20 min
- Cook Time: 0 min
- Total Time: 4 hr 20 min
- Yield: 18 bites 1x
- Category: Dessert
- Method: No Bake
- Cuisine: American
- Diet: Vegetarian
Ingredients
- 8 ounces cream cheese, softened
- 1/2 cup powdered sugar
- 1/4 cup heavy cream
- 1 teaspoon vanilla extract
- 1/2 teaspoon white vinegar
- 1/4 teaspoon salt
- 1–2 drops red food coloring (for pink color)
- 1/4 cup cocoa powder (natural, unsweetened)
- 1 cup graham cracker crumbs
- 1/4 cup melted butter
- For topping: White chocolate melting wafers or pink candy melts
Instructions
- Prepare the crust: Mix graham cracker crumbs and melted butter in a small bowl until fully combined. Press about 1 tablespoon of the mixture into the bottom of each cavity of a mini muffin tin lined with paper liners. Place the tin in the freezer while you prepare the filling.
- Make the filling: In a large bowl, beat the softened cream cheese until smooth. Gradually beat in the powdered sugar until combined.
- Add the wet ingredients: Beat in the heavy cream, vanilla extract, white vinegar, and salt until the mixture is light and fluffy.
- Color and flavor: Add the red food coloring until you achieve a light pink shade. Gently fold in the cocoa powder until just incorporated, giving it that subtle velvet flavor.
- Fill the bites: Spoon or pipe the pink velvet filling over the chilled crusts in the muffin tin.
- Chill: Place the muffin tin in the refrigerator and chill for at least 4 hours, or until firm. This is crucial for easy handling.
- Coat the bites: Once firm, remove the bites from the liners. Melt the white chocolate or pink candy melts according to package directions. Dip the top or fully coat each cheesecake bite.
- Set the coating: Place the coated bites back on parchment paper and return them to the refrigerator until the coating is set.
Notes
- For a true red velvet look, use slightly more red food coloring.
- These individual no bake desserts freeze well; store them in an airtight container for up to one month.
- If you do not have a mini muffin tin, you can form these into small balls (easy no bake cheesecake balls) and roll them in the melted coating.
- Find more quick pink dessert recipes on our Pinterest page.
Nutrition
- Serving Size: 1 bite
- Calories: 180
- Sugar: 15
- Sodium: 110
- Fat: 12
- Saturated Fat: 7
- Unsaturated Fat: 5
- Trans Fat: 0
- Carbohydrates: 16
- Fiber: 1
- Protein: 3
- Cholesterol: 35