
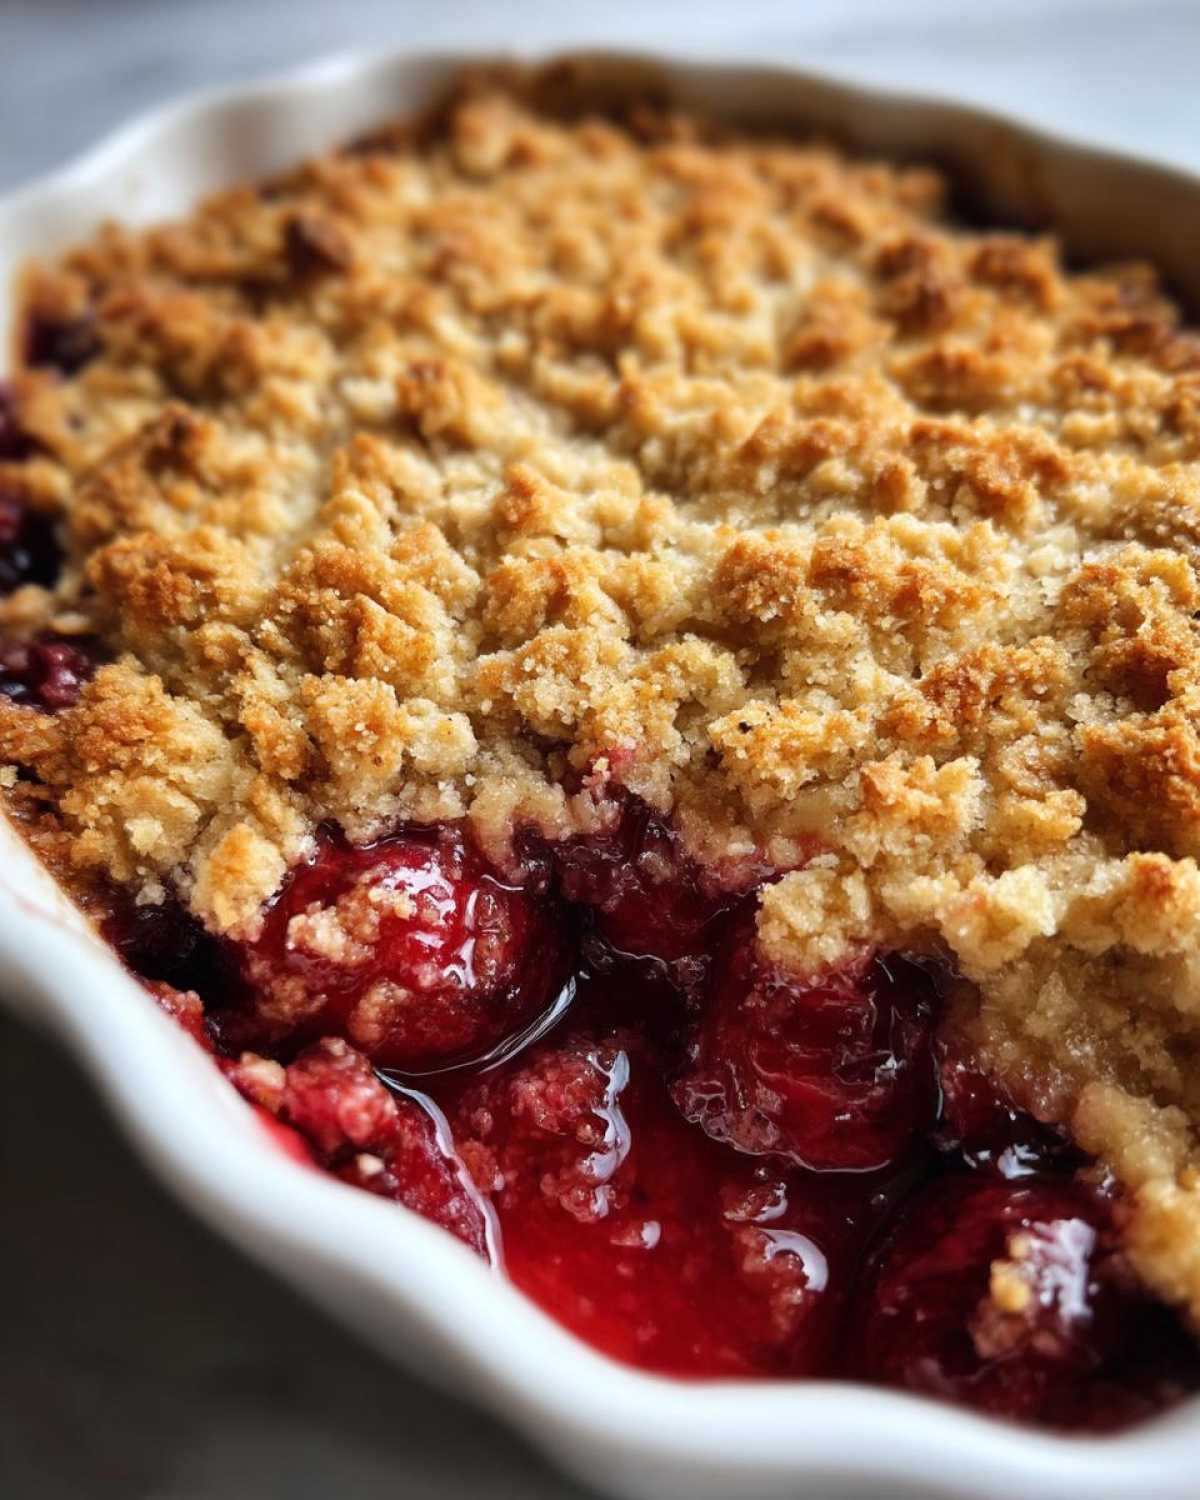
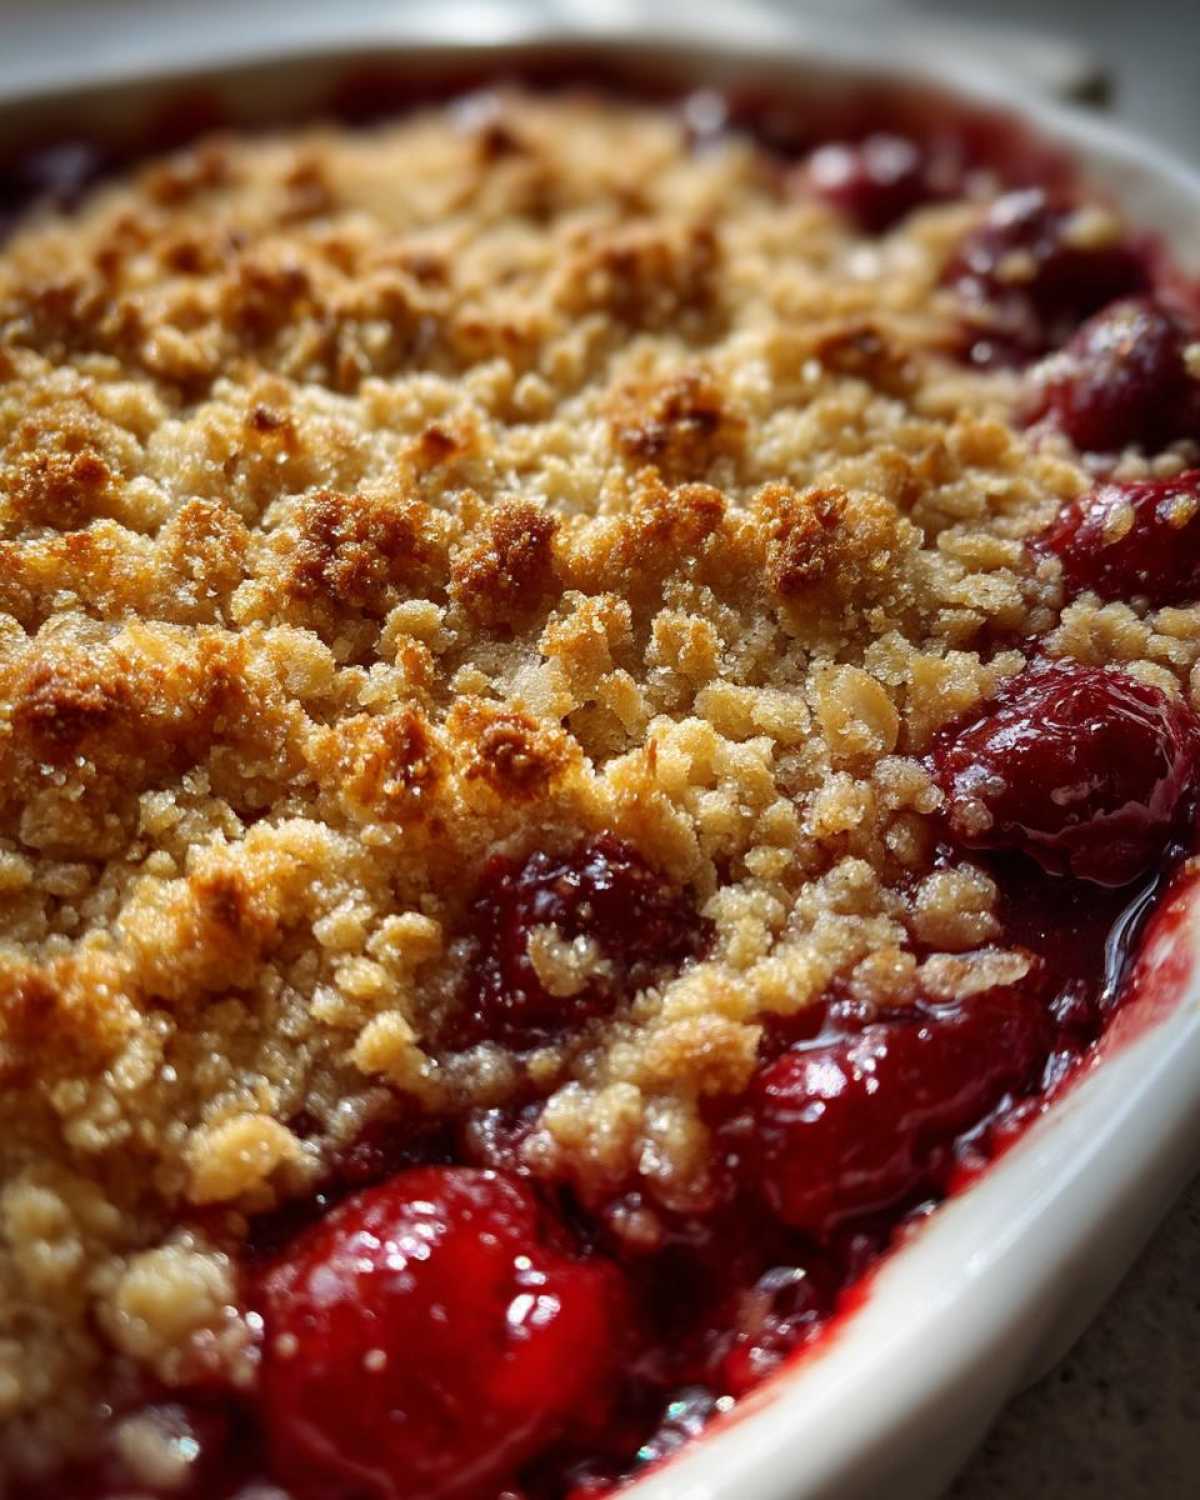
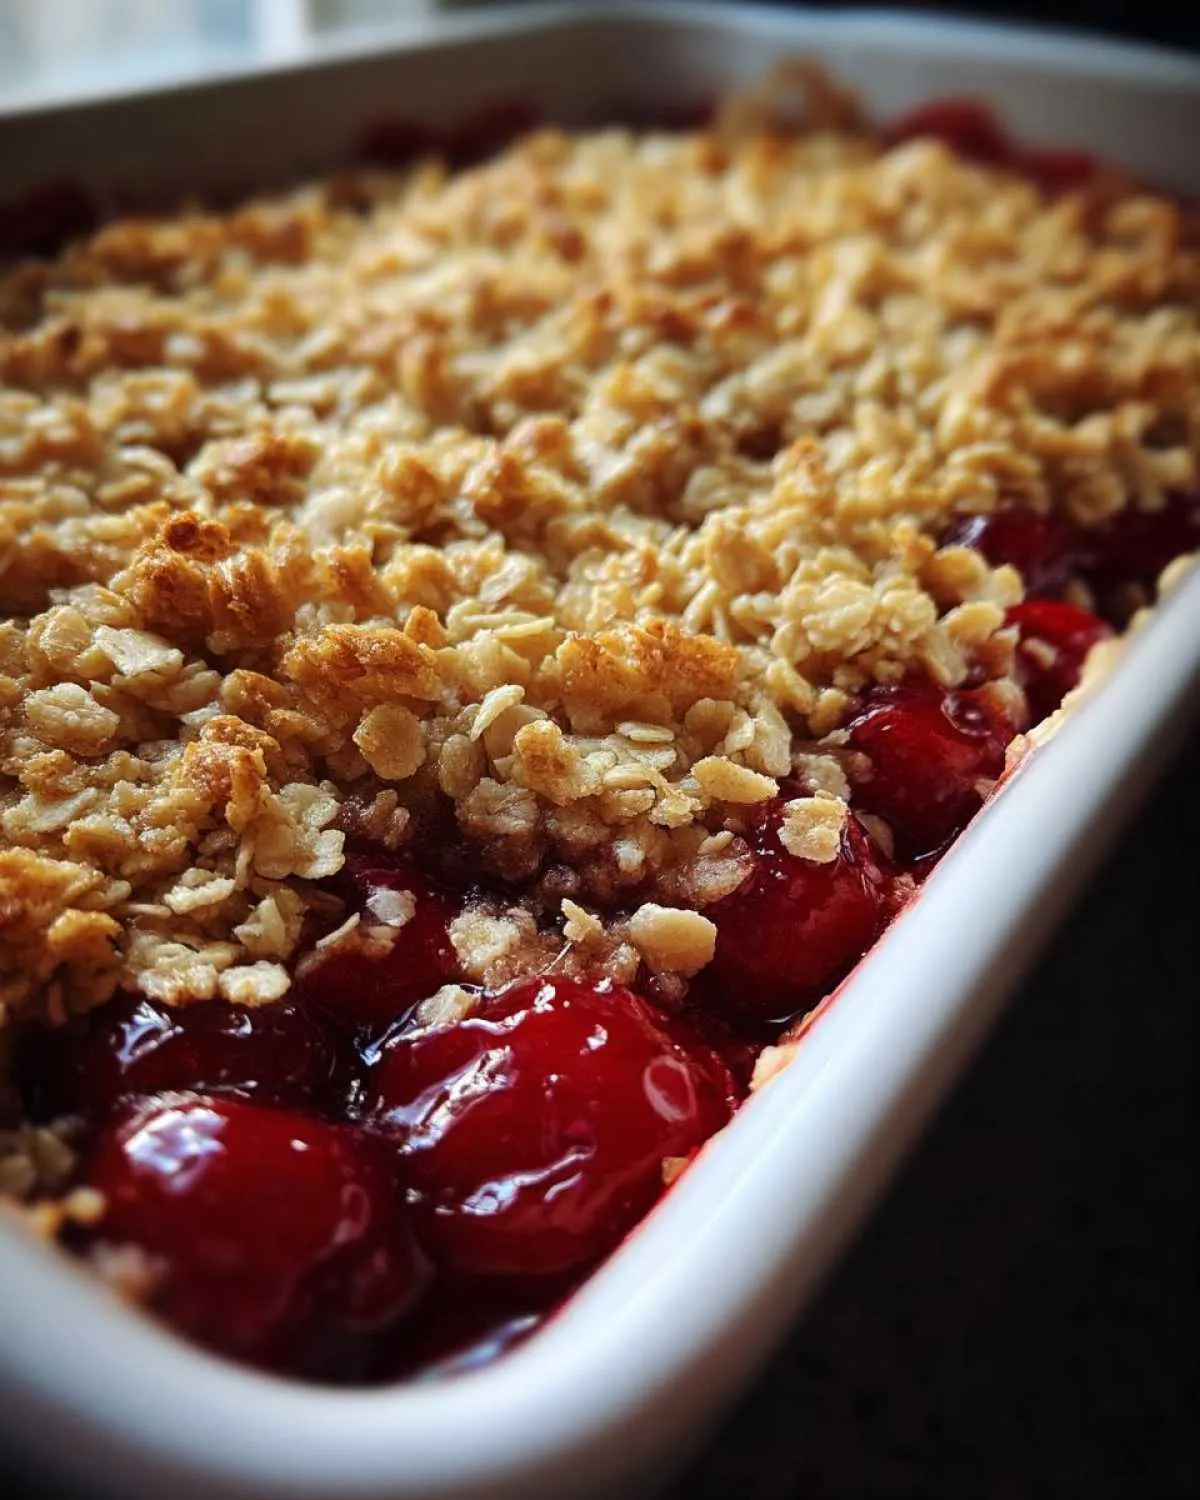
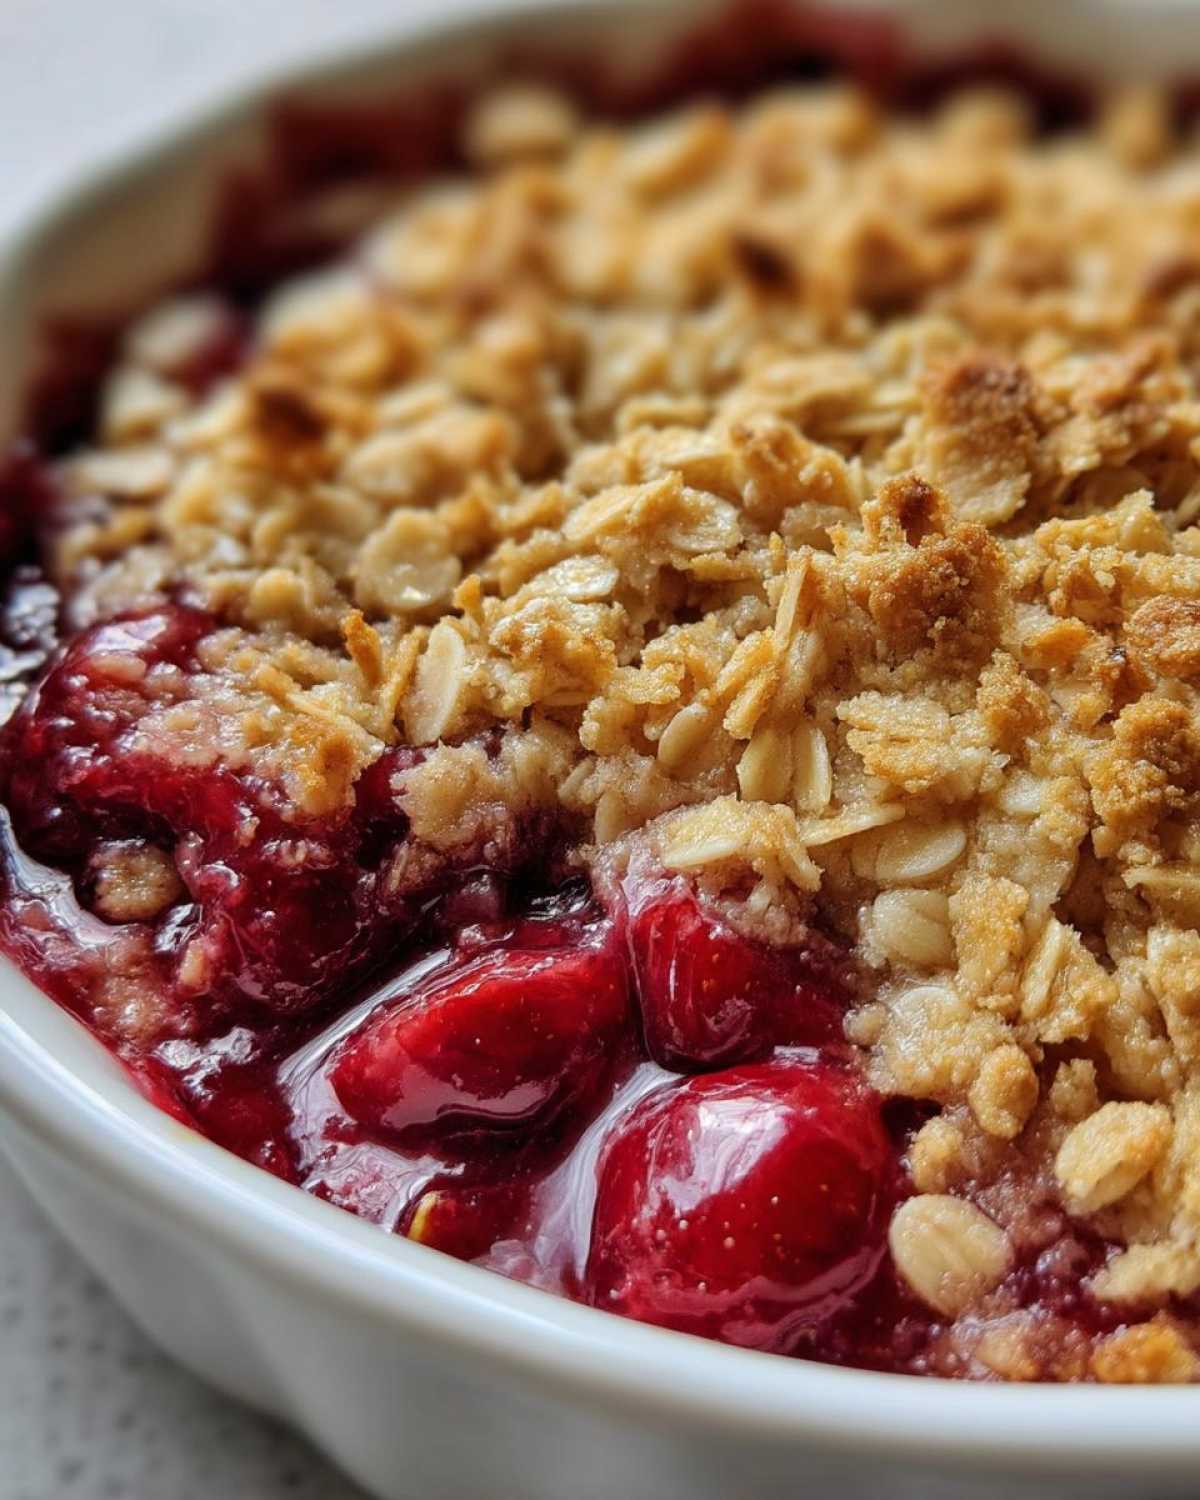
Nothing says summer quite like the smell of bubbling fruit and crispy oat topping wafting through the kitchen. My sour cherry crisp recipe takes me right back to my grandmother’s farmhouse, where we’d pick cherries straight from the tree and bake them into this simple, soul-warming dessert. The magic happens when tart cherries meet that buttery crumble topping – it’s the perfect balance of sweet and tangy that makes your taste buds sing. Trust me, once you try this old-fashioned sour cherry crisp with its golden, crunchy top and juicy fruit filling, it’ll become your go-to summer comfort food. Just like Grandma used to say: “Good things come to those who bake!”
- Why You'll Love This Sour Cherry Crisp
- Ingredients for Sour Cherry Crisp
- How to Make the Best Sour Cherry Crisp
- Expert Tips for Perfect Sour Cherry Crisp
- Sour Cherry Crisp Variations
- Serving Suggestions for Sour Cherry Crisp
- Storing and Reheating Your Sour Cherry Crisp
- Sour Cherry Crisp Nutrition Information
- Frequently Asked Questions
Why You’ll Love This Sour Cherry Crisp
This isn’t just any fruit crisp – it’s the kind of dessert that makes people ask for seconds (and the recipe!). Here’s why it’s special:
- Perfect balance – The tart cherries play beautifully against the sweet, buttery topping. It’s not too sugary, not too sour – just right!
- Easy summer baking – No fancy techniques here. Just mix, sprinkle, and bake while you enjoy the heavenly aroma filling your kitchen.
- Crowd-pleaser – Whether it’s a backyard BBQ or a cozy family dinner, this crisp disappears fast. Serve it warm with ice cream for maximum “wow” factor.
- Nostalgia in every bite – That crispy oat topping takes me right back to childhood summers. It’s comfort food at its finest.
Ingredients for Sour Cherry Crisp
Grab these simple ingredients – most are probably in your pantry already:
- 4 cups fresh sour cherries, pitted (or frozen if you can’t find fresh – no shame!)
- 1/2 cup granulated sugar – adjusts the tartness just right
- 1 tbsp cornstarch – keeps the juices from getting too runny
- 1 tsp lemon juice – brightens up the cherry flavor
- 1 cup old-fashioned oats – for that perfect crispy texture
- 1/2 cup all-purpose flour – the backbone of our crumble
- 1/2 cup packed brown sugar – packed means really packed!
- 1/2 tsp cinnamon – just enough warmth
- 1/4 tsp salt – balances all the sweetness
- 1/2 cup cold butter, cubed – cold is crucial for crispiness
Pro tip: If your cherries are super tart, keep an extra tablespoon of sugar handy to adjust to your taste.
How to Make the Best Sour Cherry Crisp
Okay, let’s get baking! This sour cherry crisp comes together in three simple parts – the filling, the topping, and the magical baking transformation. Follow these steps and you’ll have dessert perfection in no time.
Preparing the Cherry Filling
First things first – those gorgeous cherries! If you’re using fresh ones, pit them (I use a paperclip in a pinch – don’t tell the fancy chefs!). Frozen cherries work great just thaw just thaw and drain them first. Toss your cherries with the sugar, cornstarch, and lemon juice right in the baking dish. The cornstarch will thicken those ruby-red juices as it bakes. Pro tip: Let this mixture sit for 10 minutes while you make the topping – it helps draw out the juices.
Making the Crisp Topping
Now for the best part – that crispy, buttery topping! In a medium bowl, whisk together the oats, flour, brown sugar, cinnamon and salt. Here’s the key: your butter must be cold. I pop mine back in the fridge while I measure everything else. Cut the butter into the dry ingredients using a pastry cutter, two knives, or even your fingers until you get pea-sized crumbs. You want it to look like coarse sand with some bigger buttery bits – that’s what makes it crisp up beautifully.
Baking and Serving Tips
Preheat your oven to 375°F and sprinkle that glorious topping evenly over your cherries. No need to press it down – let it stay loose and craggy. Bake for 35-40 minutes until the filling is bubbling like crazy around the edges and the topping is golden brown. Resist the urge to dig in immediately! Let it cool for at least 15 minutes – this helps the juices thicken up perfectly. Serve warm (with vanilla ice cream, obviously) and watch the smiles appear.
Expert Tips for Perfect Sour Cherry Crisp
After making this crisp more times than I can count (and taste-testing every batch, of course!), I’ve picked up some tricks that take it from good to “can I have the recipe?” amazing:
- Taste your cherries first – Sour cherries vary in tartness. If they make your lips pucker, add an extra tablespoon of sugar to the filling.
- Keep that butter cold – I pop my mixing bowl in the freezer for 5 minutes before making the topping. Cold butter = crispier results!
- Don’t overmix the topping – Those buttery clumps are gold! They melt into crispy pockets of deliciousness.
- Bake until truly bubbly – Wait for those cherry juices to erupt around the edges – that’s when you know the cornstarch has worked its magic.
Trust me, these little details make all the difference between a good crisp and a great one!
Sour Cherry Crisp Variations
Once you’ve mastered the classic version, try these fun twists to keep things interesting:
- Nutty crunch – Add 1/4 cup chopped almonds or pecans to the topping mixture for extra texture and richness.
- Mixed berry magic – Swap half the cherries for raspberries or blackberries when you want a deeper, more complex fruit flavor.
- Gluten-free goodness – Use almond flour instead of all-purpose and certified gluten-free oats for a celiac-friendly version that’s just as delicious.
The beauty of this recipe is how easily it adapts – feel free to get creative with what’s in season or what you have on hand!
Serving Suggestions for Sour Cherry Crisp
Oh, the possibilities! This crisp practically begs to be served warm with a scoop of vanilla ice cream melting over the top – the hot-and-cold contrast is heavenly. For a lighter touch, try fresh whipped cream or even Greek yogurt at breakfast (no judgment here!). It’s perfect for summer picnics, Fourth of July parties, or anytime you need a cozy dessert that feels like a hug. Pro tip: Leftovers make an amazing next-day breakfast – just sayin’!
Storing and Reheating Your Sour Cherry Crisp
Here’s the good news – this crisp keeps beautifully! Let it cool completely, then cover tightly with foil or transfer to an airtight container. It’ll stay fresh in the fridge for 3 days (if it lasts that long!). To reheat, pop individual portions in the microwave for 30 seconds or warm the whole dish in a 350°F oven for 10-15 minutes until the topping crisps back up. The topping might soften a bit overnight, but that just means more excuses to eat it with ice cream – problem solved!
Sour Cherry Crisp Nutrition Information
Here’s the scoop on what’s in each delicious serving (based on 6 servings per batch): About 320 calories, with 12g fat (7g saturated), 52g carbs (3g fiber, 32g sugar), and 3g protein. But remember – these are estimates! Actual values can change depending on your exact ingredients and portion sizes. The real nutrition here? Pure joy in every bite!
Frequently Asked Questions
Can I use frozen cherries instead of fresh?
Absolutely! Frozen sour cherries work beautifully in this crisp. Just thaw and drain them well before using – you might need to reduce the sugar slightly since frozen cherries are often less tart than fresh-picked ones. No need to adjust the baking time either!
How can I adjust the sweetness level?
Taste your cherries first! If they’re mouth-puckeringly tart, add an extra tablespoon or two of sugar to the filling. For sweeter cherries, you can reduce the sugar by a couple tablespoons. The topping’s sweetness stays perfect as-is – that brown sugar and butter combo is magic!
What type of oats work best?
Old-fashioned rolled oats give the ideal texture – they stay nice and crisp. Quick oats will work in a pinch but may get a bit mushy. Whatever you do, don’t use steel-cut oats – they won’t soften properly during baking.
Can I make this ahead of time?
You bet! Assemble the crisp (unbaked) up to a day ahead and refrigerate. Just add 5-10 minutes to the baking time since it’ll be going in cold. The baked crisp also keeps wonderfully for 3 days in the fridge – if it lasts that long!
Why is my topping not crispy enough?
Two likely culprits: your butter wasn’t cold enough when making the topping, or you pressed it down too firmly over the filling. Remember – loose, crumbly topping equals maximum crispiness!
Sour Cherry Crisp

A classic baked fruit dessert with a tart cherry filling and crispy oat topping.
- Prep Time: 15 minutes
- Cook Time: 35 minutes
- Total Time: 50 minutes
- Yield: 6 servings 1x
- Category: Dessert
- Method: Baking
- Cuisine: American
- Diet: Vegetarian
Ingredients
- 4 cups fresh sour cherries, pitted
- 1/2 cup granulated sugar
- 1 tbsp cornstarch
- 1 tsp lemon juice
- 1 cup old-fashioned oats
- 1/2 cup all-purpose flour
- 1/2 cup brown sugar
- 1/2 tsp cinnamon
- 1/4 tsp salt
- 1/2 cup cold butter, cubed
Instructions
- Preheat oven to 375°F.
- Mix cherries, sugar, cornstarch and lemon juice in a bowl.
- Pour cherry mixture into a greased 8-inch baking dish.
- Combine oats, flour, brown sugar, cinnamon and salt in another bowl.
- Cut in butter until mixture resembles coarse crumbs.
- Sprinkle topping evenly over cherries.
- Bake for 35-40 minutes until bubbly and golden.
- Cool slightly before serving.
Notes
- Use frozen cherries if fresh aren’t available.
- Serve warm with vanilla ice cream.
- Leftovers keep well refrigerated for 3 days.
Nutrition
- Serving Size: 1/6 of recipe
- Calories: 320
- Sugar: 32g
- Sodium: 120mg
- Fat: 12g
- Saturated Fat: 7g
- Unsaturated Fat: 4g
- Trans Fat: 0g
- Carbohydrates: 52g
- Fiber: 3g
- Protein: 3g
- Cholesterol: 30mg
Can you freeze the leftover crisp?