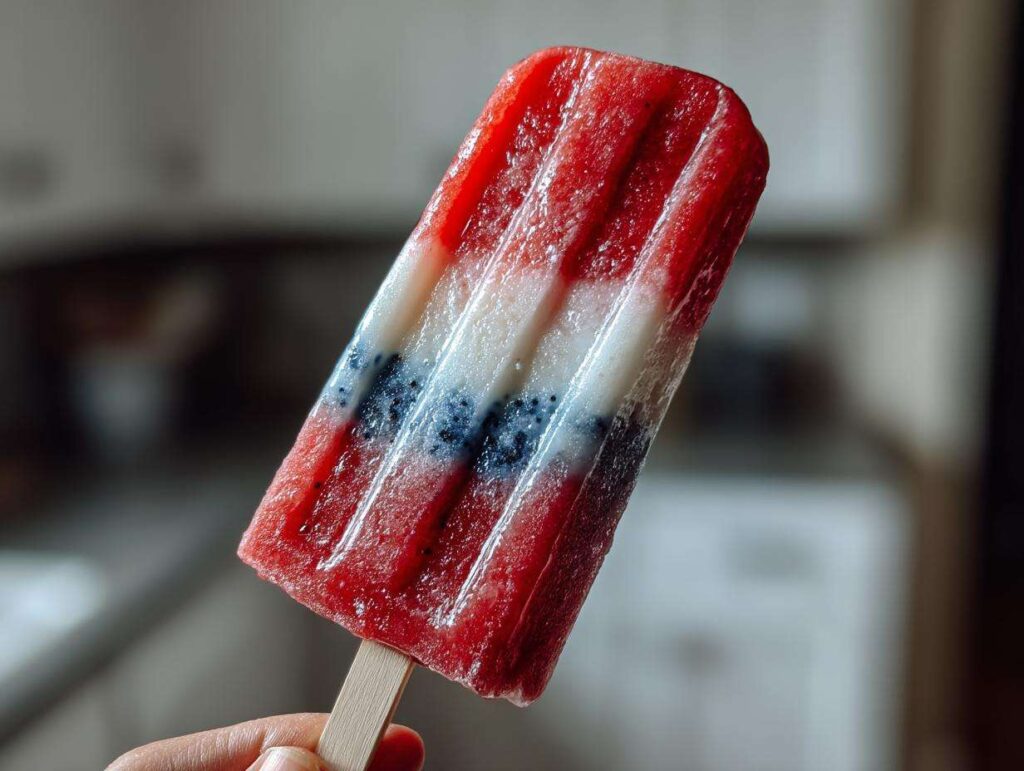
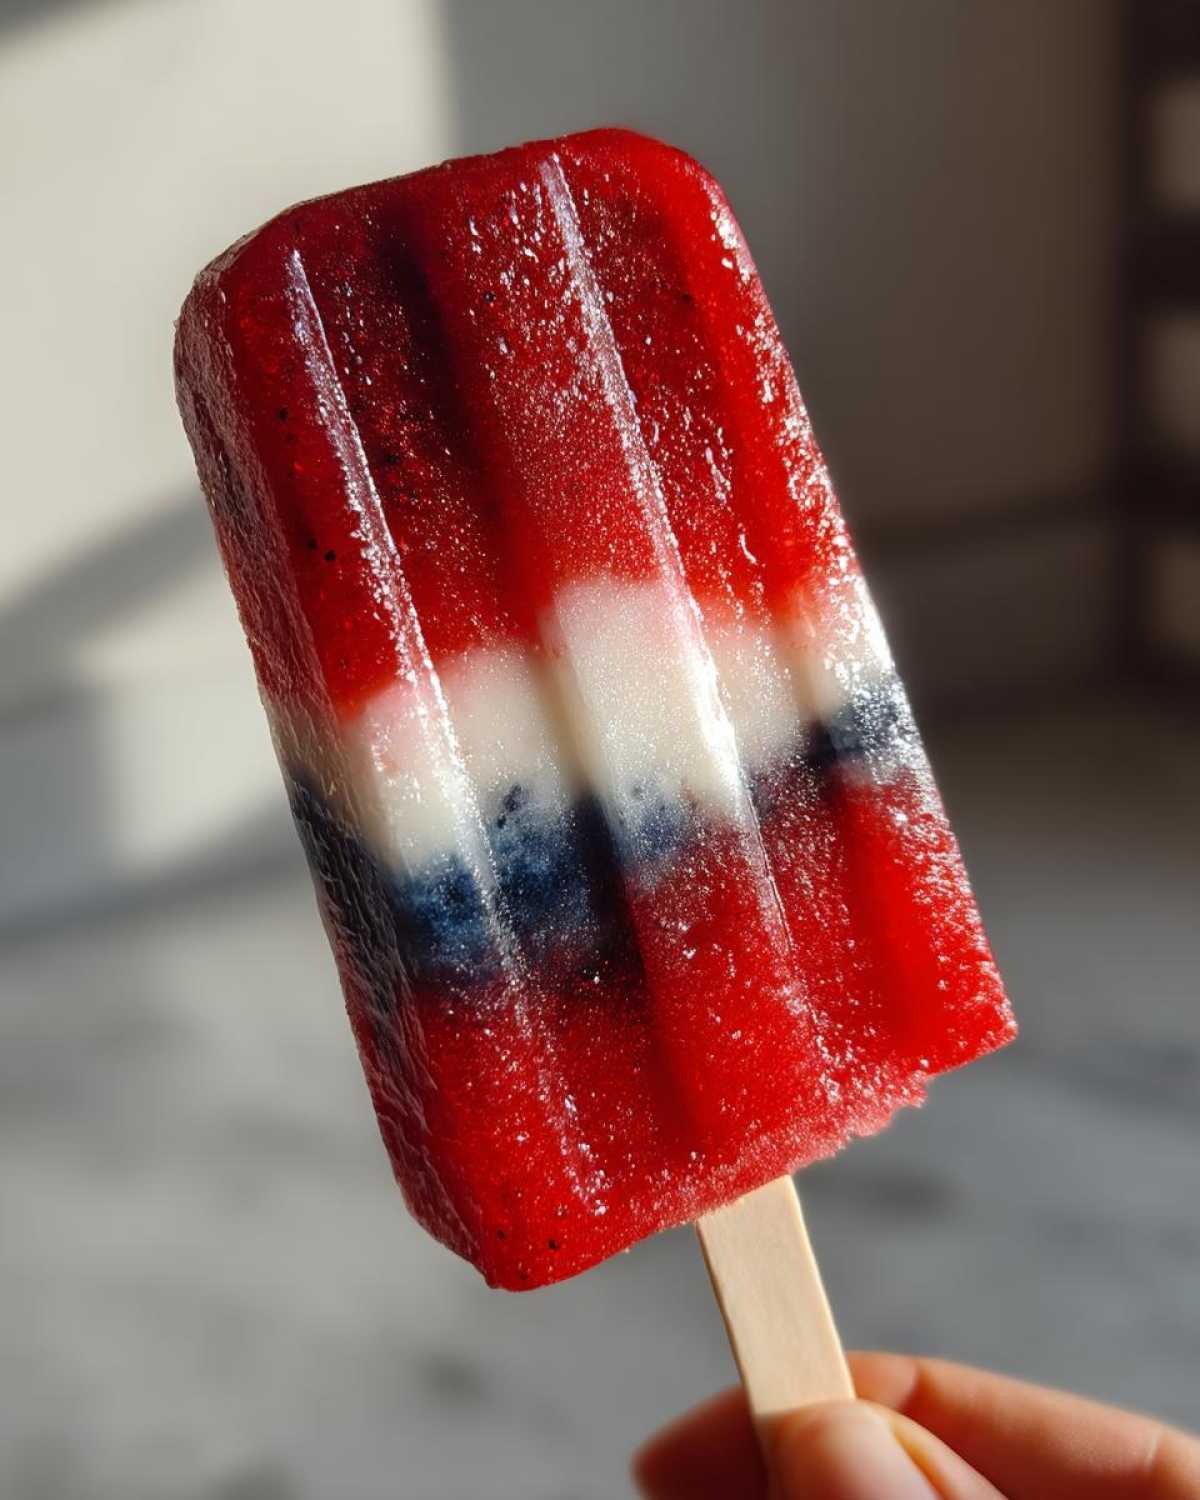
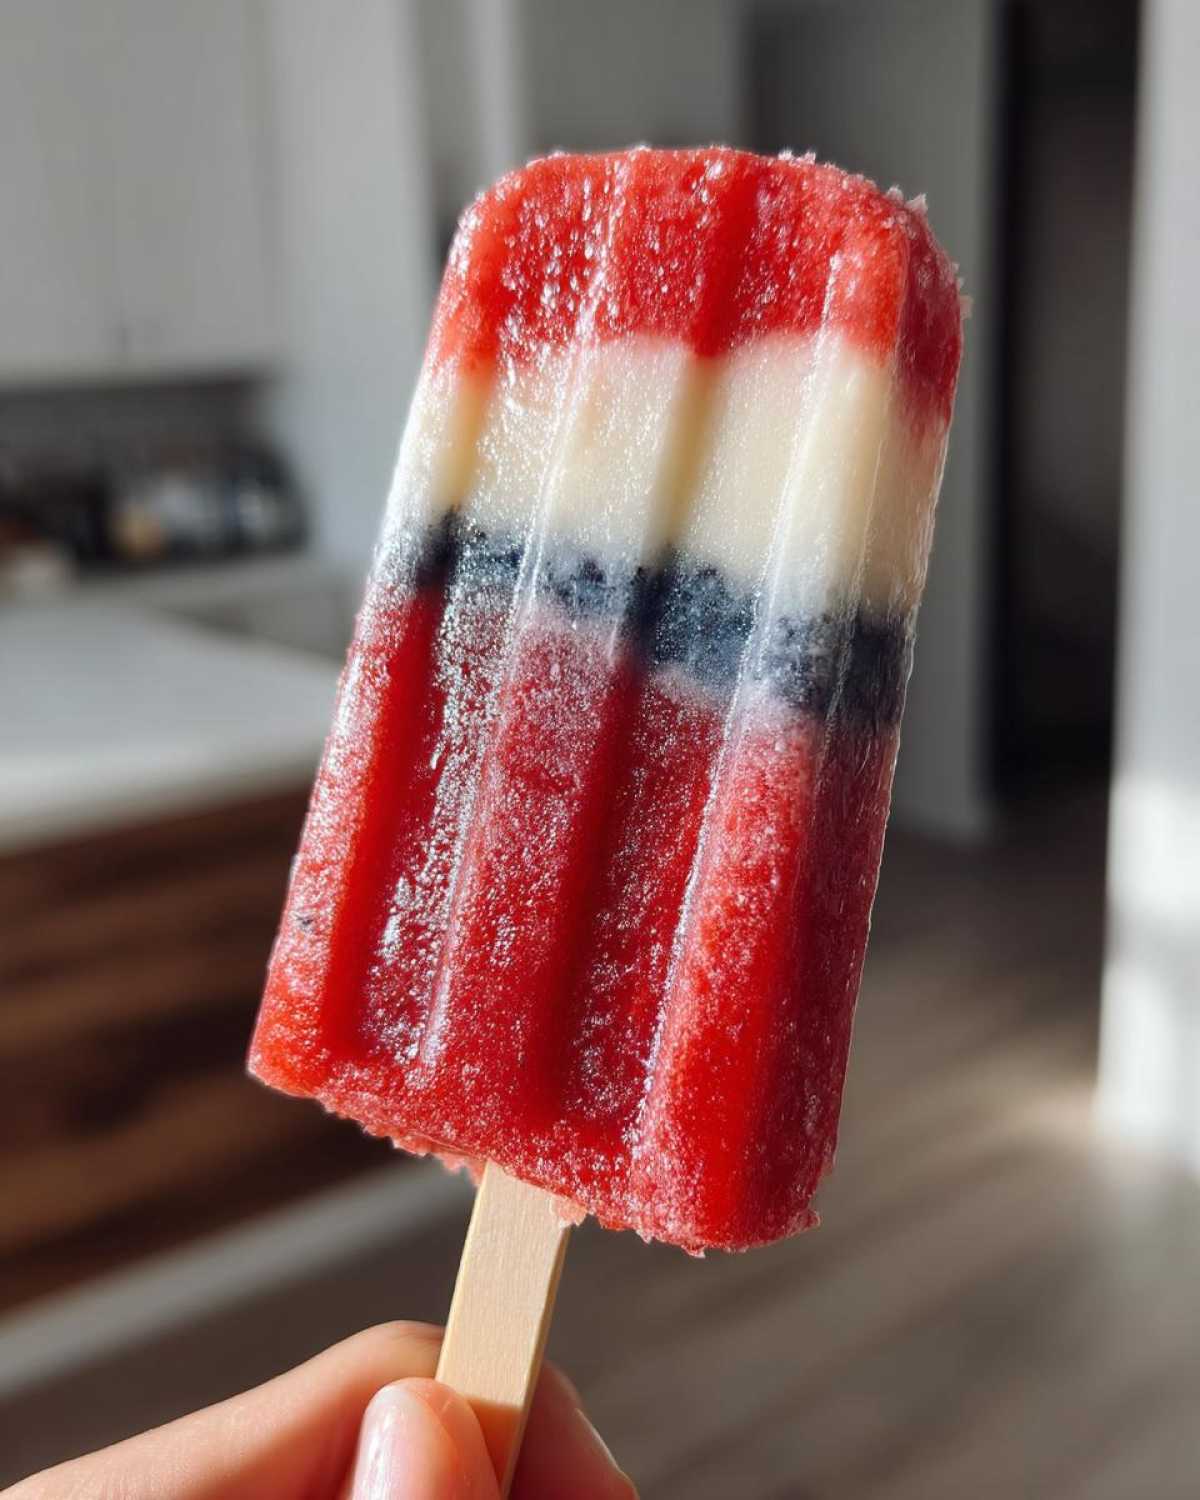
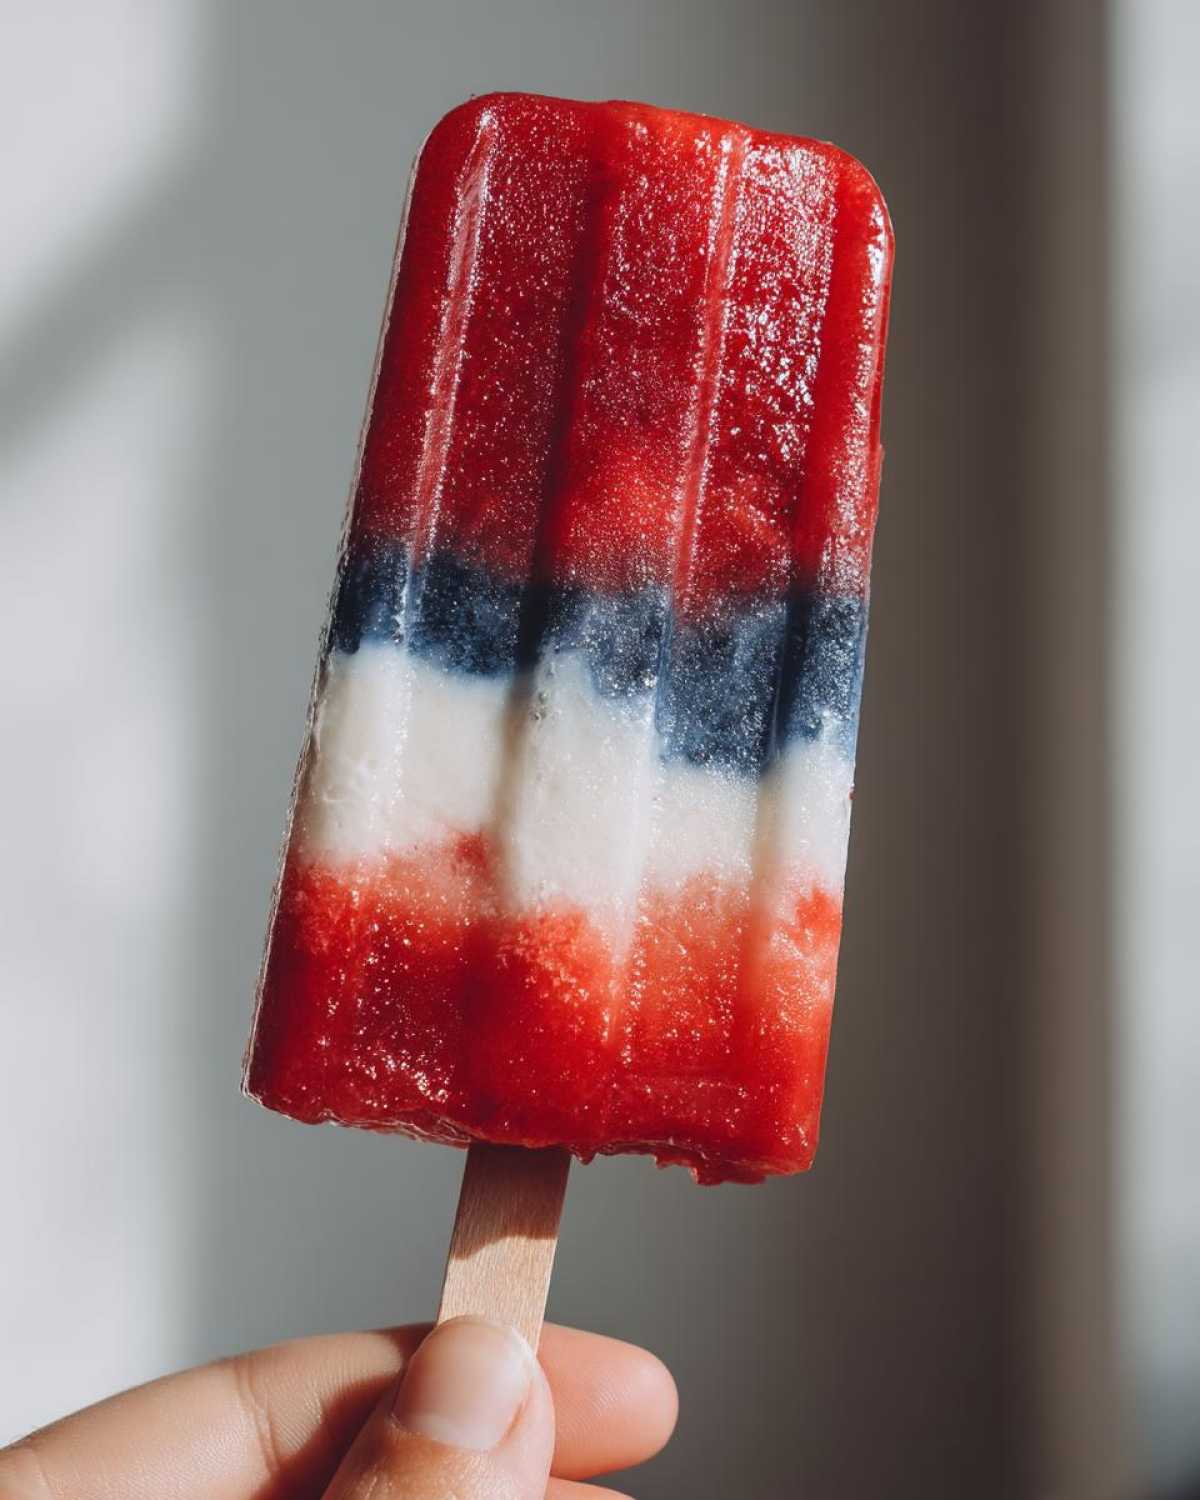
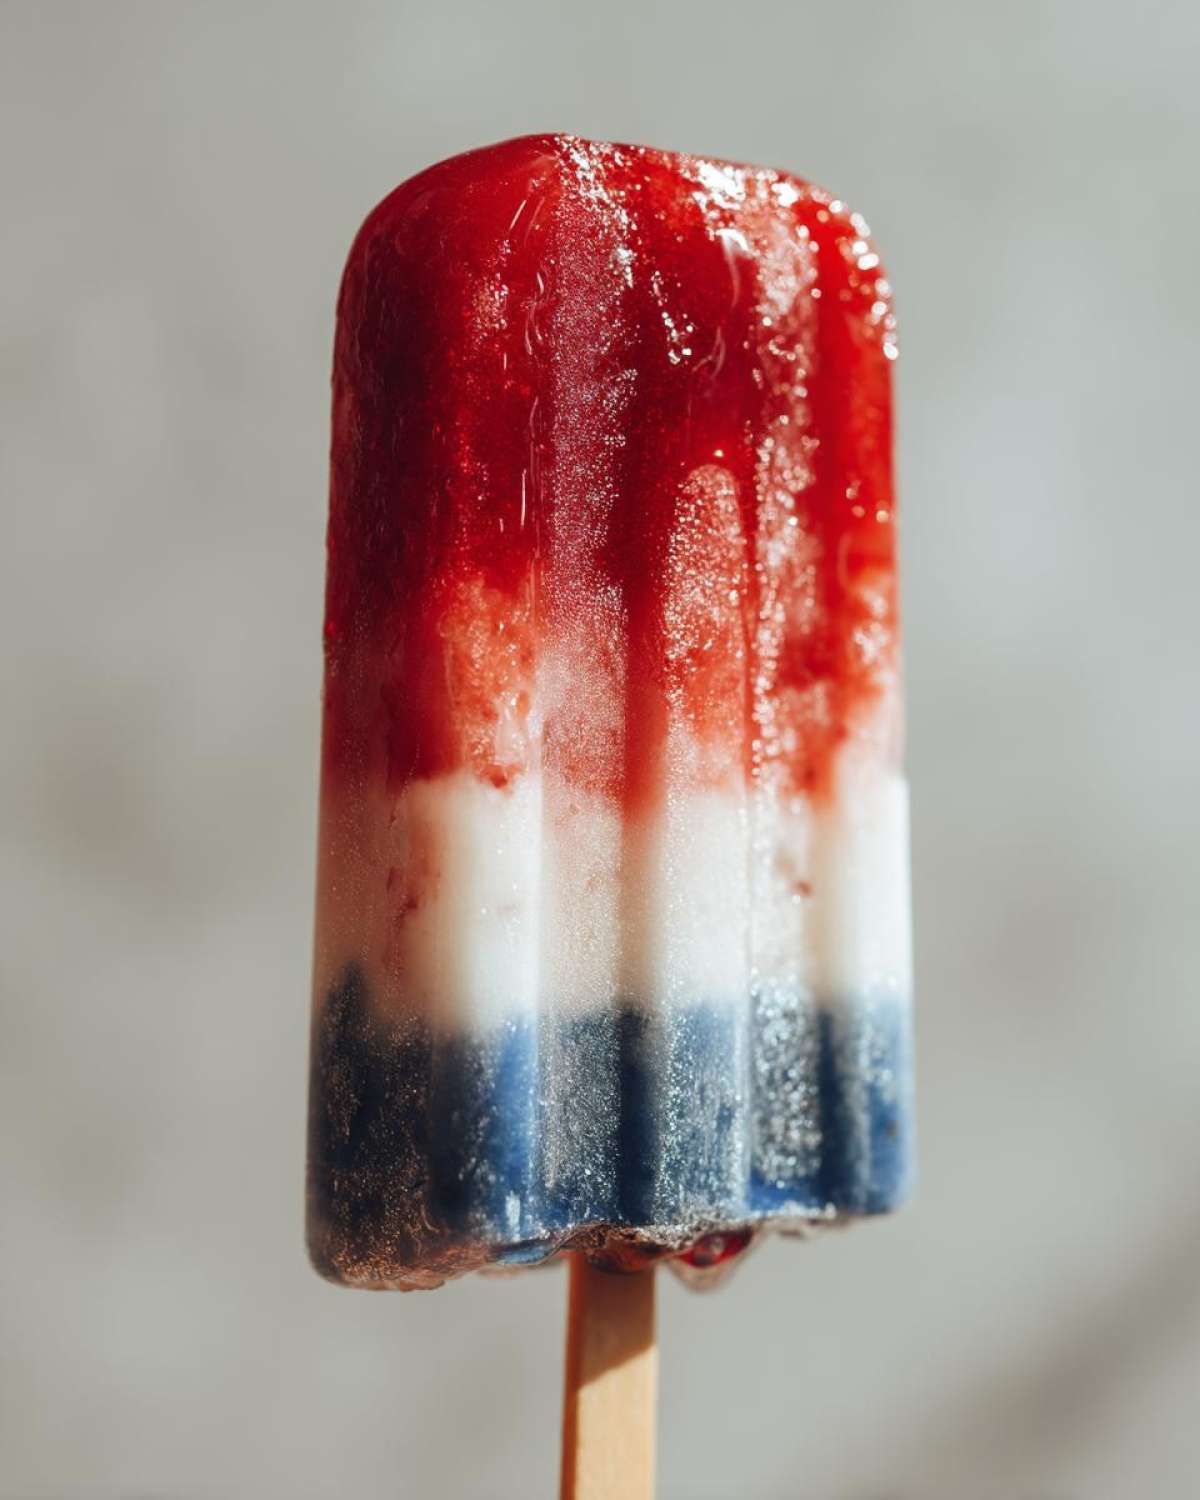
Nothing screams summer like the red, white, and blue popsicles my kids beg me to make every July 4th. Forget the store-bought versions packed with artificial colors—these homemade beauties are bursting with real fruit and creamy yogurt, and they’re so easy even the littlest helpers can join in. I’ll never forget the first time my niece, wide-eyed and sticky-fingered, declared them “way better than the ones from the ice cream truck!” Now, it’s our annual tradition—whipping up a batch before fireworks light up the sky. The best part? You probably already have everything you need in your kitchen right now.
- Why You’ll Love These Red White and Blue Popsicles
- Ingredients for Red White and Blue Popsicles
- Equipment You’ll Need
- How to Make Red White and Blue Popsicles
- Tips for Perfect Red White and Blue Popsicles
- Variations for Red White and Blue Popsicles
- Storage and Serving Suggestions
- Red White and Blue Popsicles FAQs
- Nutritional Information
Why You’ll Love These Red White and Blue Popsicles
Trust me, these popsicles are about to become your go-to summer treat—and here’s why:
- No oven required! Just blend, layer, and freeze—perfect for hot days when you can’t bear to turn on the stove.
- Real fruit magic: Strawberries and blueberries pack every bite with natural sweetness (and sneaky nutrients).
- Kid-approved fun: Little hands love helping layer the colors—just expect some messy giggles!
- Creamy dreamy middle: That yogurt layer? It’s like a fluffy cloud between fruity fireworks.
- Customizable sweetness: Add more or less honey depending on your crew’s taste buds.
Honestly? They’re almost too pretty to eat… almost.
Ingredients for Red White and Blue Popsicles
Grab these simple ingredients—I bet most are already in your kitchen! I’ve grouped them by layer so you can see how the patriotic magic happens:
- Strawberry Layer: 1 cup fresh strawberries (about 10 medium), hulled and pureed + 1 tbsp honey (optional, but oh-so-good)
- Yogurt Layer: 1 cup plain Greek yogurt (or coconut yogurt for dairy-free) + 1 tbsp honey + 1 tsp vanilla extract
- Blueberry Layer: 1 cup fresh blueberries (or frozen if that’s what you’ve got), pureed until smooth
Pro tip: Taste each layer as you go—sometimes I add an extra drizzle of honey to the blueberries if they’re tart!
Equipment You’ll Need
Don’t worry—you won’t need fancy gadgets for these popsicles! Here’s what I always grab:
- Silicone popsicle molds (trust me, they’re way easier to unmold than plastic ones!)
- Blender or food processor for turning fruit into velvety purees
- Small mixing bowls (one for each colorful layer)
- Optional but fun: A piping bag or squeeze bottle for picture-perfect layers—though a spoon works just fine!
That’s it! Now let’s make some magic.
How to Make Red White and Blue Popsicles
Ready to create some frozen magic? These popsicles come together like a patriotic parade—one colorful layer at a time. Follow these simple steps, and you’ll have fireworks in your freezer before you know it!
Step 1: Prepare the Strawberry Layer
First up—the star-spangled red! Toss your hulled strawberries and honey into the blender. Buzz it until it’s perfectly smooth—no chunks allowed here! Give it a quick taste test (my favorite part). Want it sweeter? Add another drizzle of honey. Too thick? A splash of water or lemon juice will thin it right out.
Step 2: Make the Yogurt Layer
Now for that dreamy white center. In a bowl, whisk together your yogurt, vanilla, and honey until it’s creamy and dreamy. If you’re going dairy-free, coconut yogurt works like a charm—just know it might be slightly thinner. No worries though—it’ll firm up beautifully in the freezer!
Step 3: Blend the Blueberry Layer
Time for the blue finale! Blend those blueberries until they’re completely smooth—I sometimes strain mine through a sieve if the skins are being stubborn. Pro tip: If your blueberries are tart, a little extra honey transforms them into sweet perfection.
Step 4: Layer and Freeze
Here comes the fun part! Pour your strawberry puree into the molds about 1/3 full. Gently tap the molds on the counter to remove air bubbles (this prevents weird gaps later). Pop them in the freezer for 30 minutes—just until set enough to hold the next layer. Repeat with the yogurt (use a spoon or piping bag for neat layers), freeze again, then finish with blueberry. Stick in the popsicle sticks, freeze for at least 4 hours (overnight is best), and voila—you’ve got edible patriotism!
Tips for Perfect Red White and Blue Popsicles
After making dozens of these popsicles (some more successful than others—oops!), here are my foolproof tricks:
- Ripe fruit is key: The sweeter your berries, the better the flavor—no need for extra sugar!
- Warm water rescue: If popsicles won’t budge from molds, dunk the bottom in warm water for 5 seconds.
- Layer patience: Freeze each layer just until set (about 30 mins) to prevent colors bleeding together.
- Honey hack: Mix honey into room-temperature yogurt—it blends way easier than cold!
- Berry boost: A squeeze of lemon juice in the fruit layers makes flavors pop.
Trust me—these little tweaks make all the difference between good and “wow, can I have another?”
Variations for Red White and Blue Popsicles
Mix it up with these fun twists—I’ve tried them all, and my kids can’t pick a favorite!
- Berry swap: Use raspberries instead of strawberries for a deeper red layer (bonus: no need to hull them!).
- Zesty twist: Add lemon zest to the yogurt layer for a bright, tangy surprise.
- Tropical vibe: Swap blueberries for mashed ripe bananas mixed with a handful of blitzed freeze-dried blueberries—so fun!
- Creamy dream: Blend a spoonful of whipped coconut cream into the yogurt for extra richness.
Get creative—these popsicles are your edible canvas!
Storage and Serving Suggestions
These popsicles keep their sparkle for up to 2 weeks in an airtight container in the freezer—if they last that long! I always make a double batch before July 4th BBQs. Serve them straight from the freezer on a hot day—the perfect patriotic dessert that cools everyone down. Pro tip: Lay parchment between layers if stacking to prevent sticky situations!
Red White and Blue Popsicles FAQs
Got questions? I’ve got answers! Here are the most common things folks ask me about these patriotic pops:
Can I use frozen fruit?
Absolutely! Thaw it first and drain any extra liquid—your layers will stay perfectly thick.
How do I prevent icy texture?
The yogurt layer is your secret weapon—its fat content keeps things creamy. No yogurt? A splash of orange juice in the fruit purees helps too!
Why did my colors bleed?
Patience, friend! Freeze each layer until firm (about 30 mins) before adding the next. Rushing = rainbow swirls (which are still delicious, just less flag-like!).
Can I make these vegan?
You bet! Use coconut yogurt and maple syrup instead of honey—they’re just as dreamy.
No popsicle molds?
Paper cups and wooden sticks work in a pinch—just peel the cup away after freezing.
Still stumped? Drop me a comment—I’m happy to help troubleshoot your popsicle adventures!
Nutritional Information
Here’s the scoop on these patriotic pops (pun intended!): Each popsicle clocks in at about 80 calories with 10g natural sugar from the fruit and honey. Remember—these numbers are estimates and will vary based on your exact ingredients. The best part? You’re getting 2g fiber and 3g protein thanks to all that real fruit and yogurt. Now that’s what I call a guilt-free celebration!
Try this recipe for your next backyard bash and tag us with your colorful creations—we love seeing your kitchen masterpieces! Find more inspiration on Pinterest.
PrintRed White and Blue Popsicles

A fun and healthy homemade version of bomb pops perfect for July 4th. These layered fruit and yogurt popsicles are kid-friendly and easy to make.
- Prep Time: 15 mins
- Cook Time: 0 mins
- Total Time: 4 hrs 15 mins
- Yield: 6 popsicles 1x
- Category: Dessert
- Method: No-Cook
- Cuisine: American
- Diet: Low Lactose
Ingredients
- 1 cup strawberries, pureed
- 1 cup plain Greek yogurt
- 1 cup blueberries, pureed
- 2 tbsp honey (optional)
- 1 tsp vanilla extract
Instructions
- Blend strawberries and half the honey until smooth.
- Mix yogurt, vanilla, and remaining honey in a bowl.
- Blend blueberries until smooth.
- Layer strawberry puree, yogurt, and blueberry puree in popsicle molds.
- Freeze for at least 4 hours or until solid.
Notes
- Use silicone molds for easy removal.
- Adjust honey to taste.
- Substitute coconut yogurt for a dairy-free option.
Nutrition
- Serving Size: 1 popsicle
- Calories: 80
- Sugar: 10g
- Sodium: 15mg
- Fat: 0.5g
- Saturated Fat: 0g
- Unsaturated Fat: 0g
- Trans Fat: 0g
- Carbohydrates: 15g
- Fiber: 2g
- Protein: 3g
- Cholesterol: 0mg