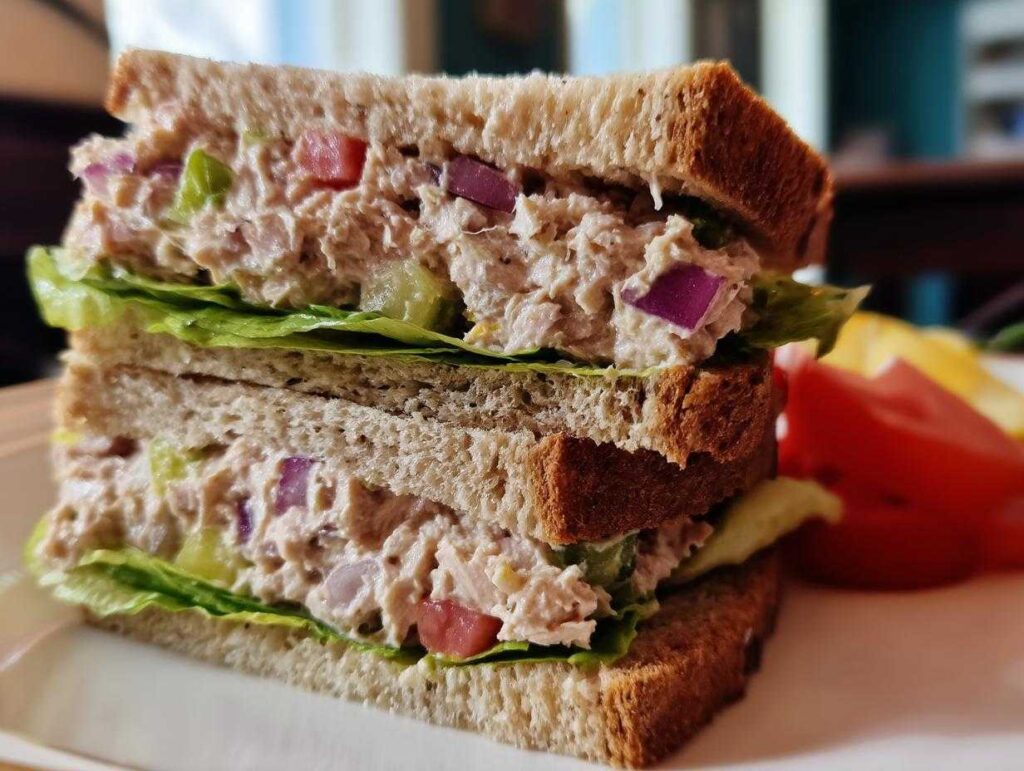
You know those days when you need lunch in a flash but still want something satisfying? That’s exactly why I fell in love with this tuna sandwich recipe. It’s my go-to when I’m racing between work calls or packing a quick meal for my kids. I remember my grandma whipping this up for me after school—simple, protein-packed, and always delicious. As a nutrition-focused home cook, I love how it balances flavor and health without skimping on convenience. Fresh lemon juice brightens the tuna, crisp veggies add crunch, and whole wheat bread keeps it hearty. Ten minutes is all you need for a lunch that actually tastes like you put effort into it!
Why You’ll Love This Tuna Sandwich
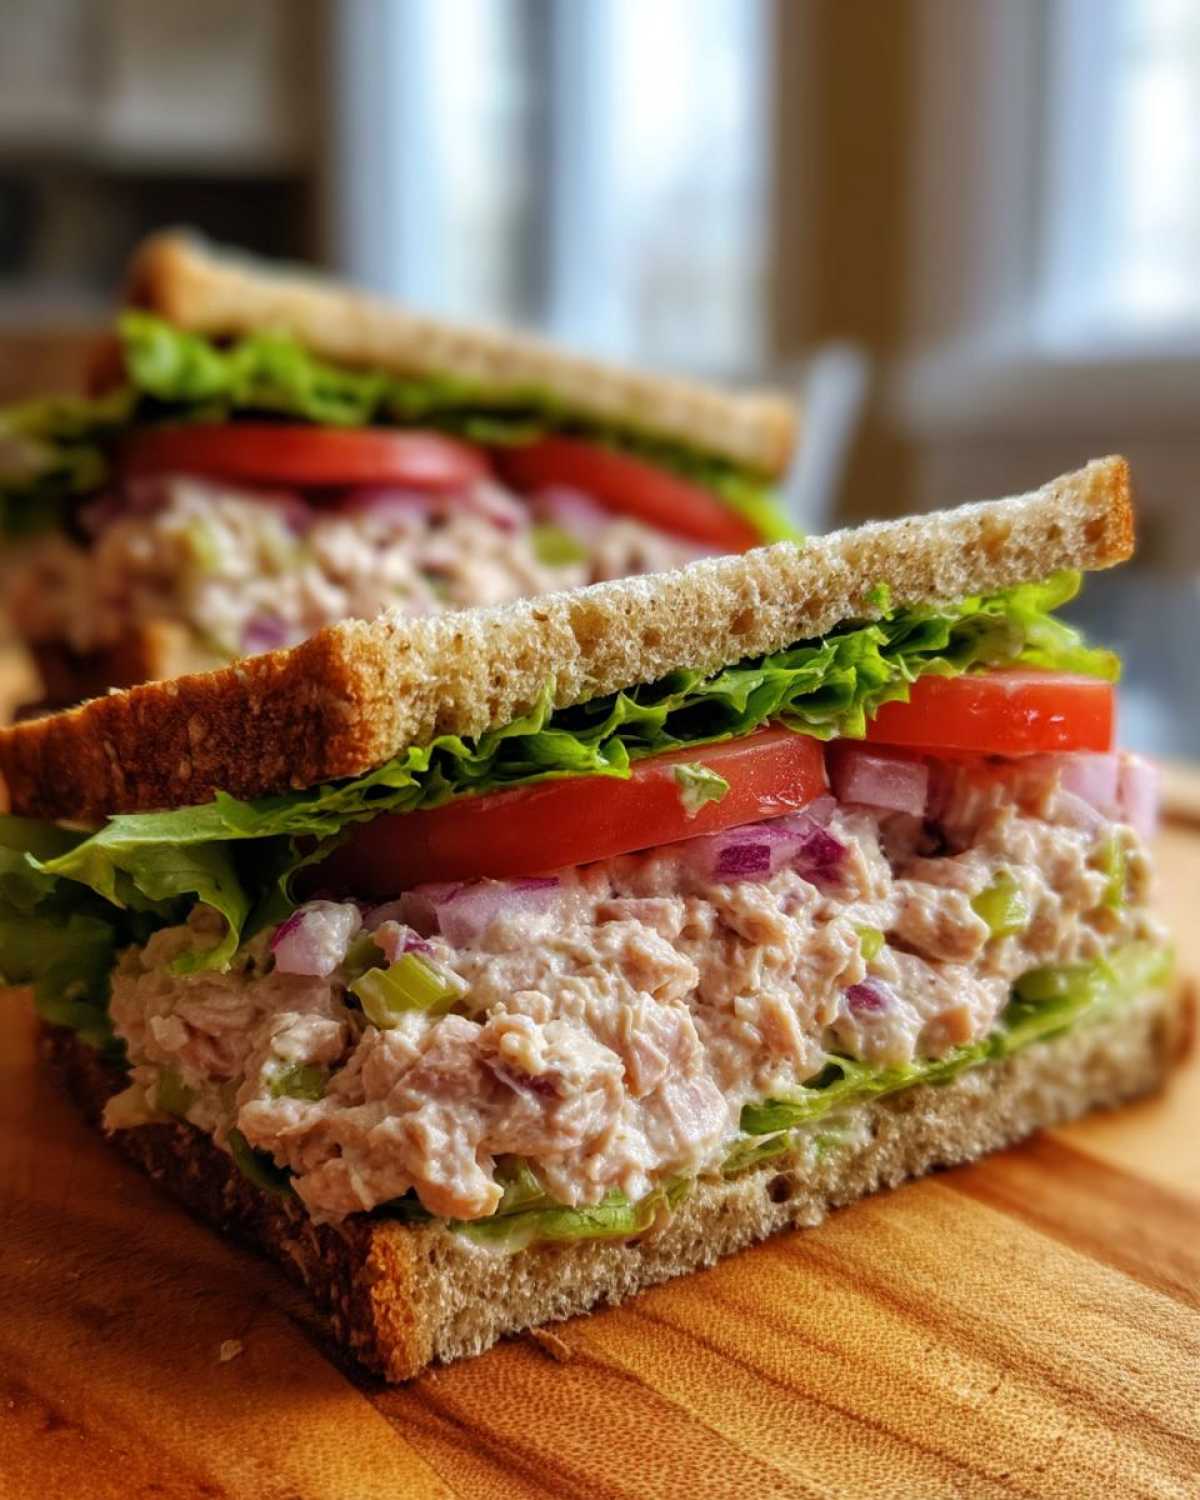
This isn’t just any tuna sandwich—it’s the kind of lunch that makes you actually excited to take a break. Here’s why it’s been my weekday hero for years:
- Faster than takeout: Ten minutes flat—that’s all it takes to go from “I’m starving” to happily munching. I’ve made this between Zoom meetings more times than I can count.
- Packed with good stuff: Between the protein from the tuna, fiber in the whole wheat bread, and all those fresh veggies, it keeps you full without the afternoon slump. (My nutritionist side approves!)
- No sad desk lunches here: The lemon juice and crunchy celery make it taste way fancier than your average sandwich. Bonus: it travels like a dream in lunchboxes.
- Endlessly adaptable: Out of mayo? Greek yogurt works. Want more zing? Throw in capers. It’s the Little Black Dress of lunches—always reliable, easy to dress up.
Trust me, once you try this version, you’ll never settle for dry, bland tuna sandwiches again. Even my picky kid asks for seconds!
Ingredients for the Perfect Tuna Sandwich
Here’s the magic lineup—simple ingredients that come together like they were meant to be. I’ve tested every one of these, and trust me, each plays a special role in making this sandwich shine. (But don’t stress if you need to swap something—I’ve got your back with alternatives!)
- 1 can (5 oz) tuna, drained – I prefer chunk light in water (less fishy taste!), but oil-packed works if you pat it dry. Pro tip: Save the drained liquid to water your plants—they love the nutrients!
- 2 tbsp mayonnaise – The glue that holds it all together. For a lighter twist, Greek yogurt adds tang while keeping it creamy.
- 1 tbsp lemon juice – Freshly squeezed is ideal—it cuts through the richness and keeps the tuna bright. No lemons? A dash of apple cider vinegar works in a pinch.
- 1/4 cup diced celery – Cut it small so you get crunch in every bite. No celery? Try cucumber or jicama for that fresh snap.
- 1/4 cup diced red onion – Soak them in cold water for 5 minutes if you want milder flavor. Green onions or chives are gentler options.
- Salt and pepper to taste – I start with 1/4 tsp salt and 5 cracks of black pepper, then adjust after mixing.
- 4 slices whole wheat bread – Toasted just until golden—it keeps the sandwich from getting soggy. Sourdough or rye add delicious depth too.
- 1/2 cup lettuce leaves – Butter lettuce stays crisp, but spinach or arugula add peppery notes. Pat them dry so they don’t make the bread weep!
- 1/2 tomato, sliced – Go for ripe but firm tomatoes. In winter, roasted red peppers from a jar add sweet acidity.
See? Nothing fancy—just good, honest ingredients that turn into something greater than the sum of their parts. Now let’s make some magic!
How to Make a Tuna Sandwich
Okay, let’s get to the fun part—turning those simple ingredients into the best tuna sandwich you’ve ever had! I’ve made this so many times I could do it in my sleep, but I’ll walk you through every step so yours turns out perfect on the first try. Promise, it’s foolproof!
Mixing the Tuna Filling
First things first: drain that tuna like your sandwich’s life depends on it (because it kinda does). I press the lid into the can to squeeze out every last drop—nobody wants a soggy sandwich! Then, into a bowl it goes with the mayo and lemon juice. Here’s where I get hands-on: I use a fork to flake the tuna while mixing, which gives it that perfect chunky-yet-creamy texture.
Now toss in the celery and red onion—those little pops of crunch are everything. Season with salt and pepper, but go easy at first! You can always add more after a taste test. Pro tip: Let the mixture sit for 5 minutes so the flavors get friendly. Sometimes I’ll sneak in an extra squeeze of lemon if it needs brightness.
Assembling the Sandwich
While the tuna chills out, toast your bread just until it’s golden—about 2 minutes in my toaster. You want it sturdy enough to hold the filling without turning into a crouton. Lay out two slices and pile on that glorious tuna mixture, spreading it edge-to-edge like you’re frosting a cake (but way less pressure).
Next comes the lettuce—I tuck it in like a little blanket over the tuna to create a moisture barrier. Then layer on those tomato slices (salt them lightly—it wakes up their flavor!). Top with the remaining bread and press down gently. For picture-perfect halves, use a serrated knife and saw lightly—no squishing allowed! If you’re packing it for later, wrap it in parchment paper like your favorite deli does. See? Easy as… well, a tuna sandwich!
Tips for the Best Tuna Sandwich
After making this sandwich more times than I can count, I’ve picked up some tricks that take it from good to “can I have the recipe?” level. These little touches make all the difference—try them and taste the magic!
- Chill out for better flavor: If you’ve got 10 extra minutes, let the tuna mixture hang out in the fridge before assembling. The flavors meld together beautifully, and the texture firms up just enough to stay put between the bread. (This is my secret for picnic sandwiches that still taste fresh hours later!)
- Tomato timing is everything: Add tomato slices right before eating to avoid soggy bread. If you’re packing lunch, tuck them in a separate baggie and assemble at mealtime. And always go for tomatoes at room temp—cold ones mute that gorgeous acidity.
- The squeeze test: When mixing, stop when you can pinch a bit of tuna filling and it holds its shape without dripping. Too dry? Add a teaspoon of mayo or lemon juice. Too wet? A sprinkle of breadcrumbs saves the day.
- Toast with purpose: Lightly butter the outside of your bread before toasting for a golden, crispy exterior that won’t get soggy. Learned this from my grandma’s grilled cheese technique—works like a charm here too!
One last thing: trust your taste buds! I always do a final seasoning check right before assembling—sometimes that extra pinch of salt or squeeze of lemon is what makes it sing. Now go make that perfect sandwich!
Tuna Sandwich Variations
Once you’ve mastered the basic version, it’s time to play! Here are my favorite ways to mix things up when I’m craving something different (or just using what’s in my fridge). These twists keep lunch exciting all week long!
- Avocado Lover’s Dream: Mash half a ripe avocado into the tuna mixture instead of mayo—it adds creaminess plus healthy fats. Top with extra slices and a sprinkle of everything bagel seasoning. (My post-yoga class favorite!)
- Mediterranean Style: Swap the mayo for olive oil and lemon, then add chopped Kalamata olives, roasted red peppers, and a pinch of oregano. Serve on crusty ciabatta with feta crumbles if you’re feeling fancy.
- Spicy Kick: Stir in 1 tsp sriracha or diced jalapeños to the filling, then layer with peppery arugula instead of lettuce. Sourdough bread stands up beautifully to these bold flavors.
- Crunch Time: Add 2 tbsp chopped toasted almonds or sunflower seeds for texture. This version with honey wheat bread and apple slices is my hiking sandwich go-to—it’s like a protein-packed party in your mouth!
See? One basic recipe, endless possibilities. The best part? You can tweak it based on your mood or what’s about to go bad in the veggie drawer. (We’ve all been there!)
Serving and Storage Tips
Here’s the thing about tuna sandwiches—they’re absolute champs when it comes to packing and storing, but a few simple tricks will keep them tasting fresh and delicious. I’ve learned these through years of lunchbox trial and error (and a few sad, soggy mistakes!).
For packed lunches: Wrap your sandwich tightly in parchment paper or wax paper—it breathes just enough to prevent sogginess. Tuck it in an insulated lunch bag with an ice pack, especially if you used mayo. Pro tip: Pack the tomato slices separately in a small container and add them right before eating to avoid bread mush.
Leftovers? The tuna mixture keeps beautifully in an airtight container for up to 2 days in the fridge. Just give it a quick stir before using—sometimes it needs a splash of lemon juice to wake up the flavors. But the assembled sandwich? Eat it within 4 hours for best texture.
Reheating? Honestly, I don’t recommend it—cold tuna salad is where it’s at! But if you must, remove the lettuce and tomato first, then warm just the tuna-toasted bread combo in a toaster oven for 2-3 minutes at 300°F. Anything hotter turns the mayo weirdly greasy (learned that the hard way!).
One last storage hack: If you’re meal prepping, keep the bread frozen and toast it fresh each morning—it makes all the difference between “meh” and “more please!”
Tuna Sandwich FAQs
I get asked about this recipe all the time—here are the questions that pop up most often in my kitchen and comments section. Consider this your tuna sandwich cheat sheet!
Can I use canned salmon instead of tuna?
Absolutely! The recipe works great with any flaky canned fish. Salmon makes it richer, while chunk light tuna keeps it mild. Just drain it well and adjust seasoning—salmon can handle extra lemon and dill.
How do I make this dairy-free?
Easy! Skip the mayo and use mashed avocado or vegan mayo (I love the olive oil kind). All other ingredients are naturally dairy-free—just check your bread label if you’re strict about it.
What’s the best way to pack this for a kid’s lunchbox?
I make “tuna pinwheels” for my picky eater—spread the mixture on a tortilla, roll it tight, and slice into spirals. Stays neater than sandwiches! Pack with veggie sticks and a frozen juice box to keep everything chilled.
Can I prep the tuna mixture ahead?
You bet—it actually tastes better after 1-2 hours in the fridge! Just store it airtight and give it a stir before using. The acid in the lemon juice keeps it fresh for up to 2 days.
Why does my sandwich get soggy?
Three culprits: 1) Not draining tuna enough, 2) Adding tomatoes too early, or 3) Using warm bread. Toast it lightly, pat your veggies dry, and assemble close to eating time—crisis averted!
Still have questions? Drop them in the comments—I answer every one while eating my latest tuna sandwich creation!
Nutritional Information
Okay, let’s talk numbers—because as much as I love flavor, I also geek out over nutrition facts! (Blame my background in nutrition.) These are estimates based on standard ingredients, but your exact counts might vary depending on brands and tweaks. Here’s the scoop per sandwich:
- Calories: 320 – Just right for a satisfying lunch that won’t weigh you down
- Protein: 22g – Thanks to that mighty tuna, it’s like a gym session in sandwich form
- Carbs: 30g – Mostly from the whole wheat bread (the good kind of carbs!)
- Fiber: 5g – Between the veggies and whole grains, your gut will thank you
- Sugar: 4g – All natural from the tomatoes and bread
- Fat: 12g – Mostly healthy unsaturated fats from the mayo and tuna
Want to lighten it up? Swap mayo for Greek yogurt and you’ll save about 50 calories and 5g fat per sandwich. But hey—life’s too short not to enjoy real mayo sometimes! As my grandma used to say while slathering it on thick: “A little joy in every bite keeps the doctor away.” (Okay, maybe not her exact words…)
Share Your Tuna Sandwich Creation
Now it’s your turn! I’d love to see what magic you create with this recipe. Did you add a special twist? Maybe some hot sauce for kick or avocado for creaminess? Snap a pic and tag me on Instagram—I feature my favorite reader creations every Thursday! (Nothing makes me happier than seeing your kitchen wins.)
Or drop a comment below telling me how it turned out. Was it a hit with your kids? Did your partner finally admit tuna sandwiches can be exciting? Every tip and tweak you share helps other readers too. And hey—if you’ve got a question I didn’t cover, ask away! I’m here cheering you on from my kitchen to yours.
Happy sandwich-making, friends! May your bread always be toasted just right and your tuna mixture perfectly seasoned. 🥪✨
Print10-Minute Tuna Sandwich Recipe That’s Irresistibly Delicious
A quick and healthy tuna sandwich perfect for lunch. Packed with protein and flavor, it’s an easy meal to prepare.
- Prep Time: 5 minutes
- Cook Time: 5 minutes
- Total Time: 10 minutes
- Yield: 2 sandwiches 1x
- Category: Lunch
- Method: No-Cook
- Cuisine: American
- Diet: Low Calorie
Ingredients
- 1 can (5 oz) tuna, drained
- 2 tbsp mayonnaise
- 1 tbsp lemon juice
- 1/4 cup diced celery
- 1/4 cup diced red onion
- Salt and pepper to taste
- 4 slices whole wheat bread
- 1/2 cup lettuce leaves
- 1/2 tomato, sliced
Instructions
- In a bowl, mix tuna, mayonnaise, lemon juice, celery, and red onion.
- Season with salt and pepper.
- Toast the bread slices lightly.
- Spread the tuna mixture on two slices.
- Top with lettuce and tomato slices.
- Cover with the remaining bread slices.
- Cut in half and serve.
Notes
- Use Greek yogurt instead of mayonnaise for a healthier option.
- Add avocado slices for extra creaminess.
- Store leftovers in an airtight container for up to 2 days.
Nutrition
- Serving Size: 1 sandwich
- Calories: 320
- Sugar: 4g
- Sodium: 480mg
- Fat: 12g
- Saturated Fat: 2g
- Unsaturated Fat: 8g
- Trans Fat: 0g
- Carbohydrates: 30g
- Fiber: 5g
- Protein: 22g
- Cholesterol: 30mg