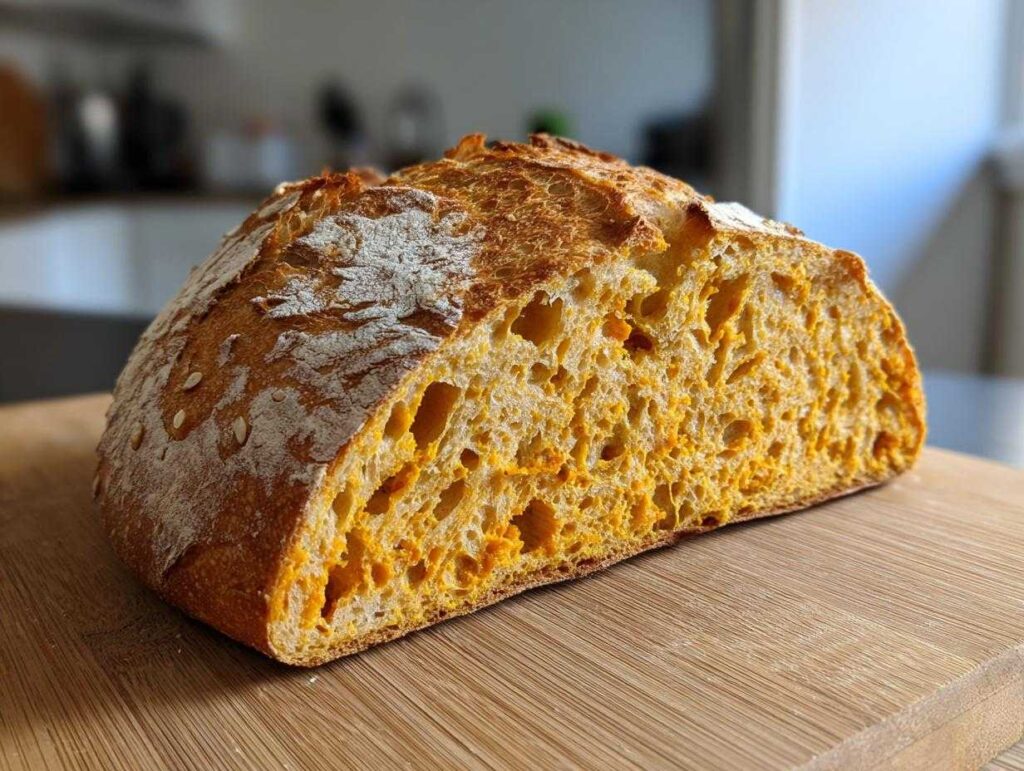
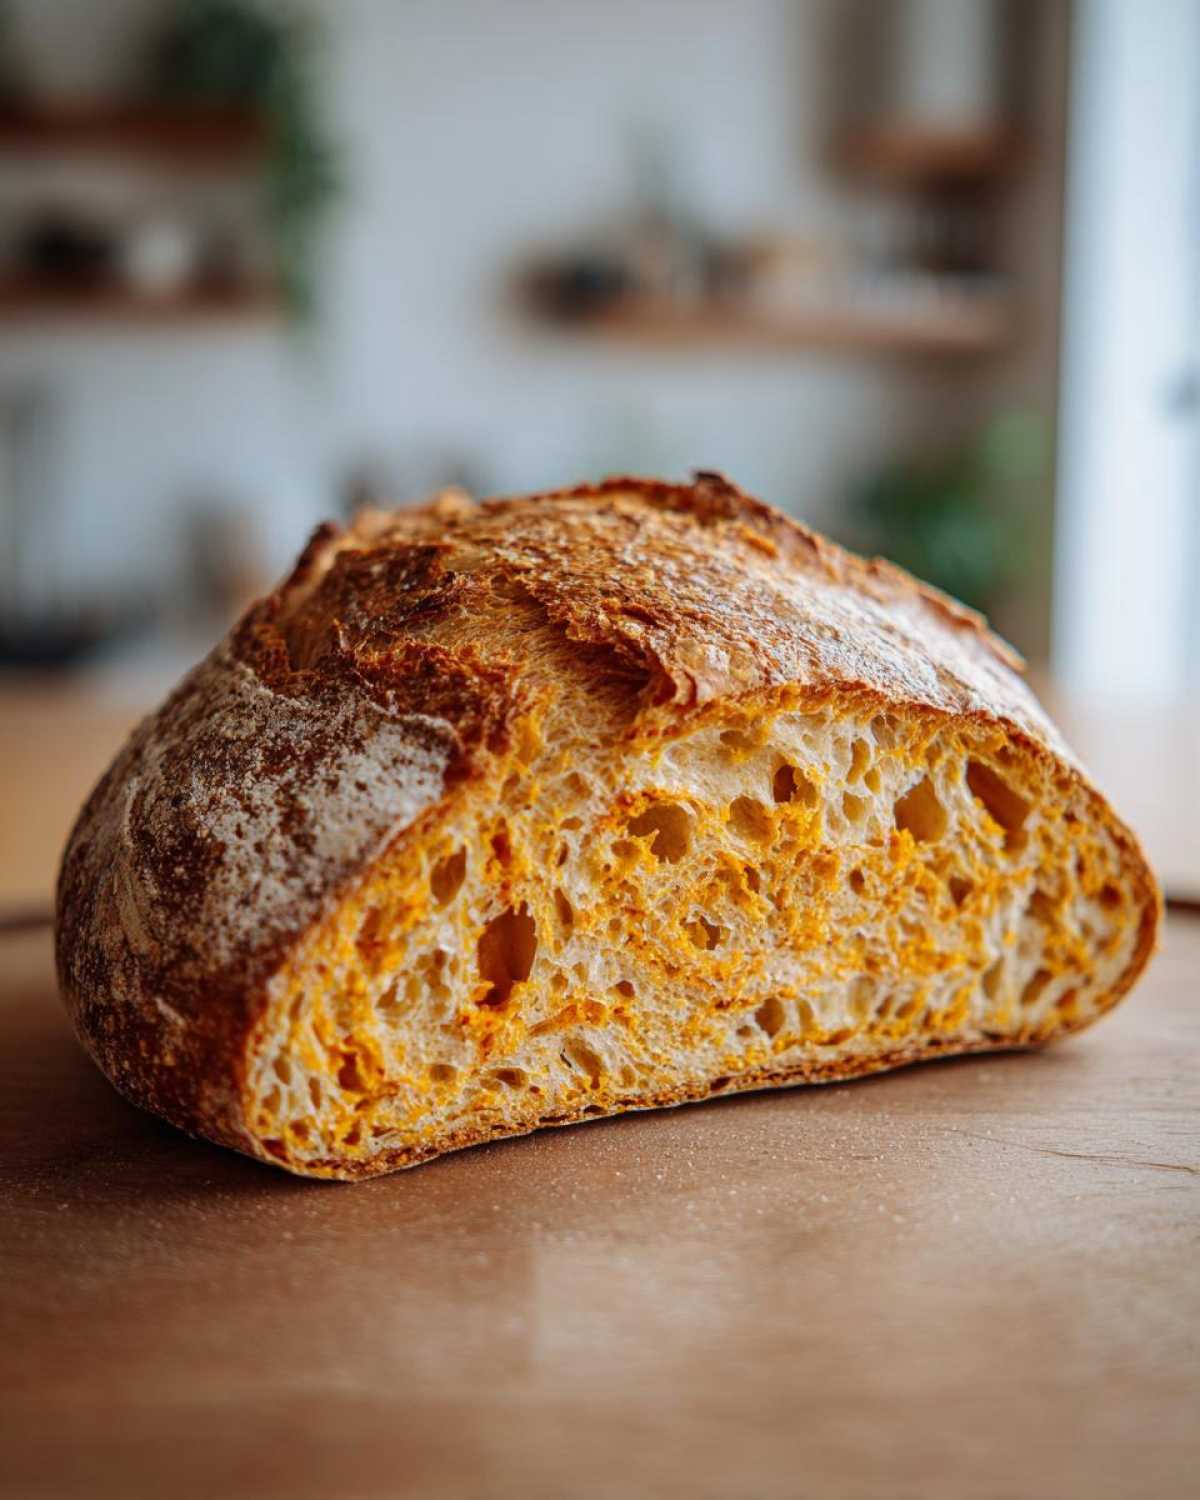
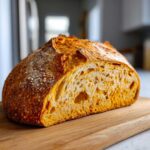
There’s something magical about walking into a warm kitchen on a crisp autumn morning, isn’t there? The moment cinnamon and nutmeg hit the air, you just know it’s baking time. That’s exactly how I felt when I pulled my first successful loaf of pumpkin sourdough bread from the oven – the earthy sweetness of pumpkin purée mingling with that signature sourdough tang, the crust crackling as it cooled. I’ll never forget that golden crumb shot I managed to capture (after three failed attempts!).
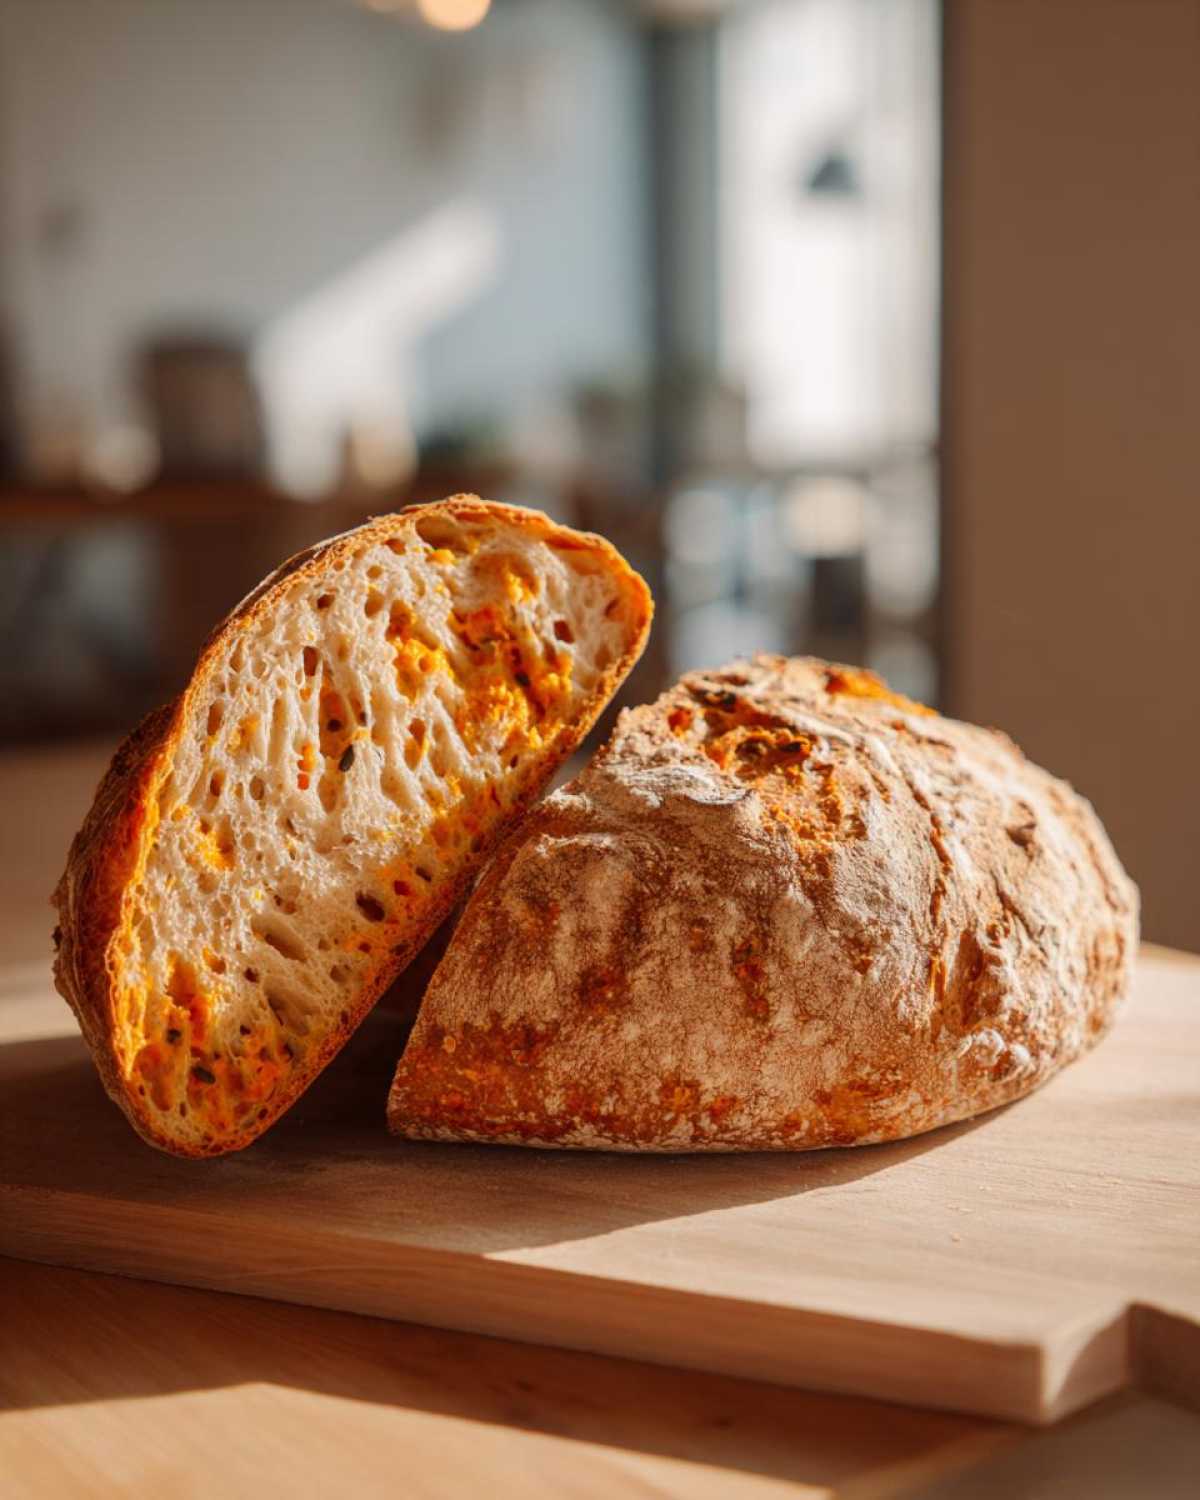
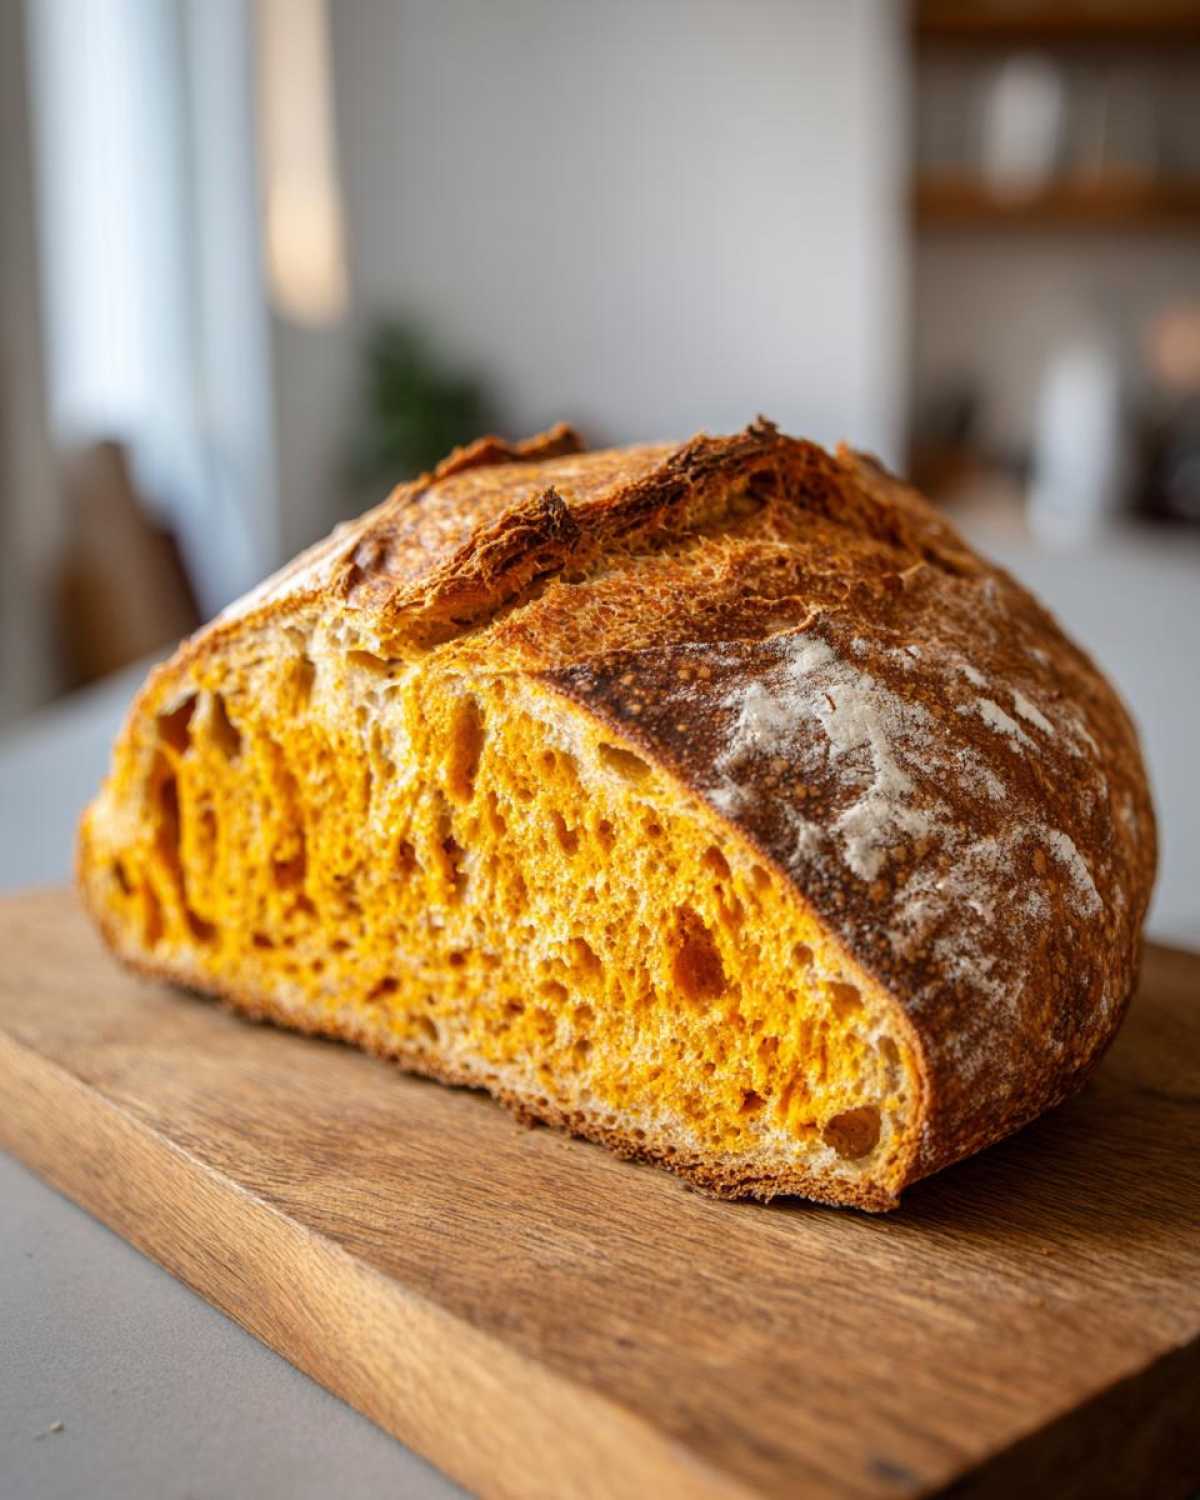
This pumpkin sourdough bread recipe became my obsession last fall when I had extra pumpkin purée from my weekly meal planning. I wanted something more special than quick bread – something with that perfect artisan crumb structure you only get from slow fermentation. After tweaking hydration levels (and learning the hard way that pumpkins add more moisture than you’d think!), I landed on this beautifully balanced loaf with its open, holey interior and blistered crust. It’s the kind of bread that makes you want to cancel all your plans – just so you can stay home, slice it warm, and watch the melted butter pool in all those pumpkin-flecked nooks.
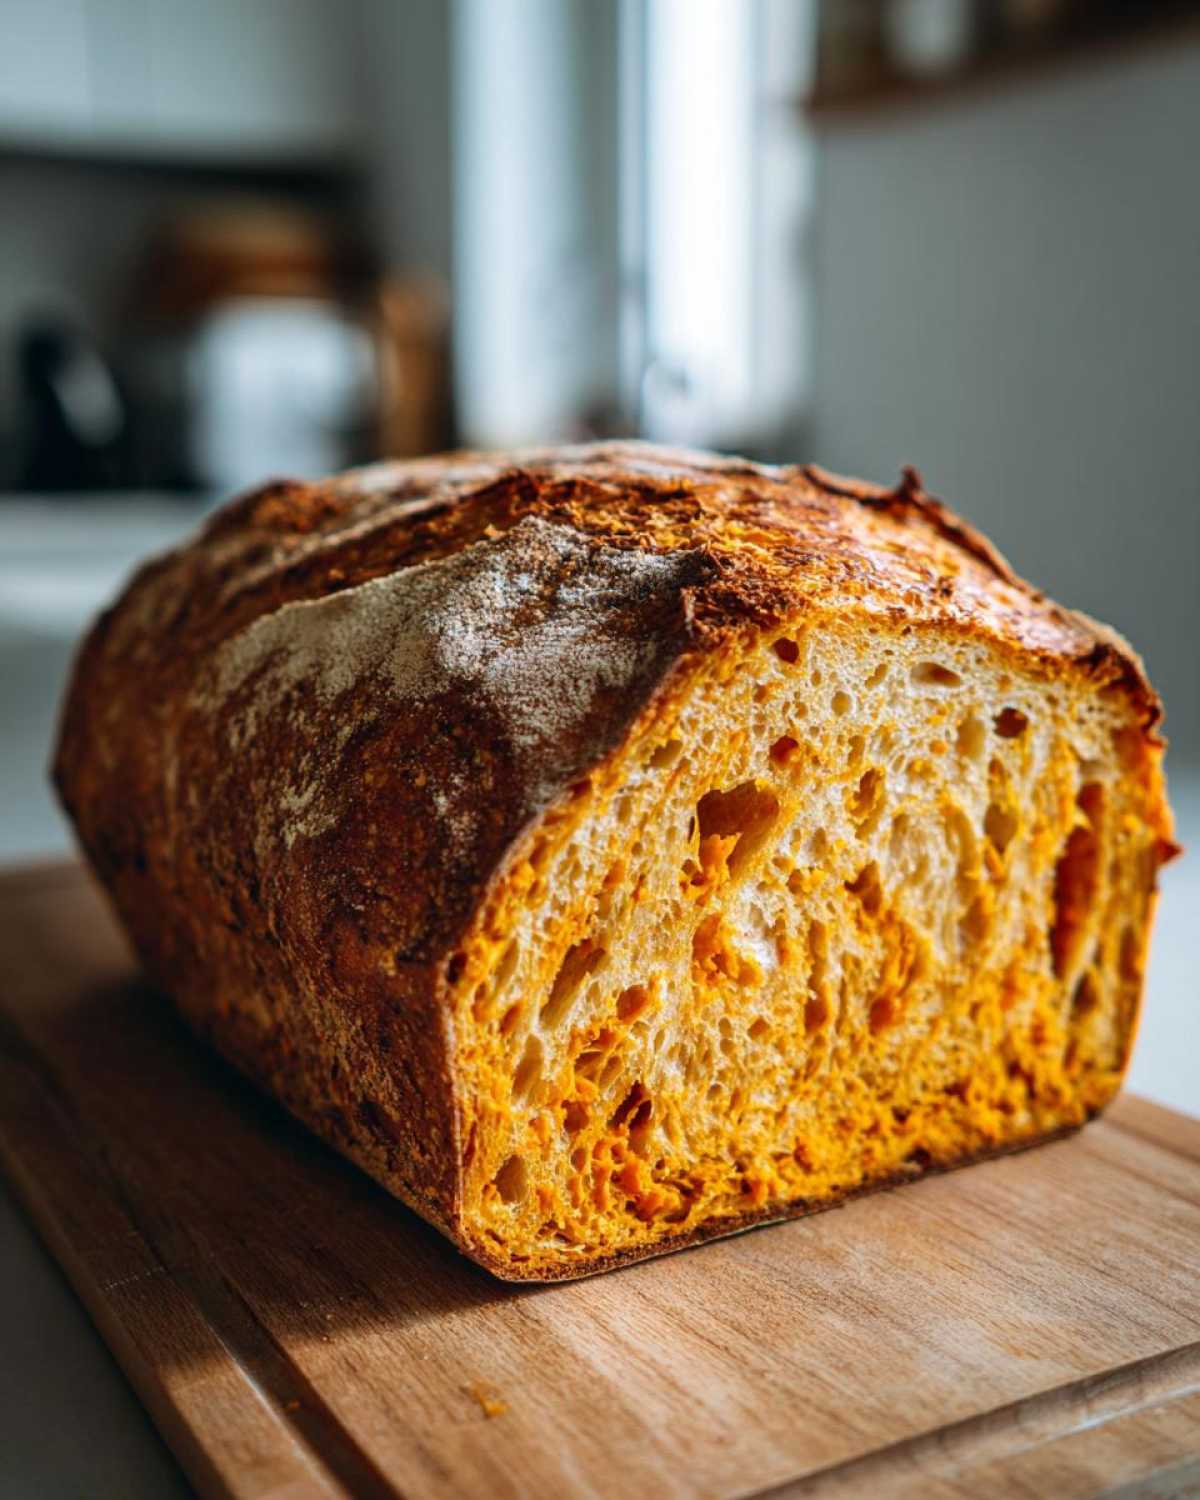
The secret? Treating the pumpkin purée like the star it is, while still respecting all those classic sourdough techniques I learned from my grandmother. You’ll get that gorgeous orange hue without sacrificing the chewy texture we all love in great bread. Trust me, your house will smell like a pumpkin spice latte crossed with the best bakery in town!
- Why You'll Love This Pumpkin Sourdough Bread
- Ingredients for Pumpkin Sourdough Loaf
- How to Make Pumpkin Sourdough Bread
- Expert Tips for Perfect Pumpkin Sourdough
- Pumpkin Sourdough Bread Variations
- Storing and Reheating Your Loaf
- Pumpkin Sourdough Bread FAQ
- Nutrition Information
- Share Your Pumpkin Sourdough Creation
Why You’ll Love This Pumpkin Sourdough Bread
Oh, where do I begin? This pumpkin sourdough bread is everything you crave when the leaves start turning. Just wait till you try it toasted with butter – the way those warm spices mingle with the tangy sourdough will make your whole kitchen smell like a cozy fall afternoon. Here’s why it’s my absolute favorite autumn bake:
- That artisan crust – crisp and blistered just like your favorite bakery loaf
- The heavenly balance of earthy pumpkin and cinnamon-spiced warmth that makes this spiced sourdough bread irresistible
- Natural fermentation creates incredible flavor depth (so much better than quick breads!)
- Perfect for meal planning – stays fresh for days and freezes beautifully
- Looks straight from a fall bakery bread case with its golden-orange crumb
Honestly? Slicing into this loaf is my favorite part of sweater weather. The way the knife reveals those pumpkin-flecked pockets… pure magic!
Ingredients for Pumpkin Sourdough Loaf
Gathering ingredients for pumpkin sourdough bread feels like assembling autumn in a bowl! Here’s what you’ll need – and trust me, every item plays a special role in creating that perfect loaf. Just like my grandmother taught me, baking is part science, part love, and I’ll share all her little secrets along the way.
Dry Ingredients
- 300g bread flour (the backbone of that gorgeous crumb!)
- 100g whole wheat flour (for nutty depth – King Arthur is my go-to)
- 8g fine sea salt (don’t skip this flavor booster)
Wet Ingredients
- 150g active sourdough starter (100% hydration, bubbly and happy)
- 200g pumpkin purée (canned or homemade both work beautifully)
- 150g water (adjust as needed – pumpkin adds moisture!)
- 10g honey (just a kiss of sweetness)
Spices
- 1 tsp cinnamon (the star of the show)
- ½ tsp nutmeg (freshly grated if you can)
- ¼ tsp cloves (go easy – they pack a punch)
Pro tip from my flop-to-success journey: Measure your flour correctly! I learned the hard way that spooning and leveling (instead of scooping) makes all the difference. Too much flour leads to dense bread – and nobody wants that pumpkin brick I made last November!
How to Make Pumpkin Sourdough Bread
Alright, let’s get our hands dirty and make some pumpkin sourdough magic! This isn’t just any bread – it’s an autumn symphony where every step matters. I’ll walk you through my foolproof method, including all the little tricks I’ve learned after (cough) several less-than-perfect loaves. You’ll be amazed how simple ingredients transform into artisan pumpkin bread with crispy edges and a moist, pumpkin-flecked interior.
Mixing and Autolyse
First things first – dump all your dry ingredients (flours, salt, spices) into a big bowl and give them a whisk. Don’t skip toasting your spices for 30 seconds in a dry pan first – it wakes up their flavors like nothing else! Now add the wet stuff: starter, pumpkin purée, honey, and most (not all!) of the water. Mix with a sturdy spoon until you’ve got a shaggy dough – it’ll look messy, that’s perfect.
Here’s where patience comes in. Cover the bowl and walk away for 30 minutes. This autolyse lets the flour absorb liquid. When you return, do the windowpane test: pinch and stretch a bit of dough. If you can see light through it without tearing, you’re golden!
Folding and Bulk Fermentation
Now the fun begins! Over the next 2 hours, you’ll do 4 rounds of stretch-and-folds every 30 minutes. Wet your hands, grab one side of the dough, pull it up and over like you’re tucking it in. Rotate the bowl and repeat. Between folds, let the dough rest covered with a damp towel.
Watch for these signs your autumn sourdough recipe is ready for shaping: it should look puffy with bubbles along the sides, and jiggle slightly when shaken. Mine usually takes 4-6 hours total bulk fermentation at room temp (about 72°F). Warmer kitchen? Check sooner. This isn’t clock-based – it’s dough-based!
Shaping and Cold Proof
Dust your counter lightly with flour and gently turn out the dough. Shape it into a tight round or oval – imagine you’re creating surface tension without tearing. This helps get that perfect oven spring! Place it seam-side up in a floured proofing basket (I use rice flour – never sticks).
Now, the fridge becomes your best friend. A 12-16 hour cold proof slows fermentation and develops incredible flavor. Make sure your fridge is around 38-42°F – too cold and nothing happens, too warm and you might overproof. Been there, had the flat loaf to prove it!
Baking Your Pumpkin Sourdough
Preheat your oven to 475°F with a Dutch oven or baking stone inside for at least 45 minutes. Here’s my steam trick: place a metal pan on the oven’s bottom rack while preheating. When you load the bread, toss in ½ cup ice cubes – instant steam!
Score your chilled dough with a razor (I love a simple pumpkin-shaped design) and bake covered for 20 minutes. Remove the lid, reduce heat to 450°F, and bake 25 more minutes until deeply golden. The real test? It should sound hollow when tapped on the bottom. Resist slicing immediately – that steamy interior needs time to set!
Expert Tips for Perfect Pumpkin Sourdough
After burning through way too much flour on dense pumpkin bricks (yes, it happened more than once!), I’ve learned a few golden rules for pumpkin sourdough success. These tips will save you from learning the hard way like I did! Last fall I nearly gave up after my third gummy loaf – turns out I was ignoring half these tricks. Don’t be like past me!
- Starter check: Your sourdough starter should double in 4-6 hours after feeding and pass the float test. I keep mine at 100% hydration (equal parts flour/water) for predictable results.
- Pumpkin paradox: That bright orange purée adds hidden moisture! Start with 80% of your water, then adjust. I learned this after a sticky dough disaster – now I add water gradually until it feels like warm playdough.
- Spice magic: Toast your cinnamon, nutmeg, and cloves in a dry pan for 30 seconds before adding. The aroma will tell you when they’re ready – it’s like a cozy spice shop explosion!
- Oven truth-teller: Your oven lies. Mine runs 25°F cold – discovered after three underbaked loaves. A $10 oven thermometer changed everything. Worth every penny!
- Cooling torture: I know it’s hard, but wait at least 2 hours before slicing. That steam keeps working inside – early cuts = gummy crumbs. My husband still laughs about the time I couldn’t wait and burned my fingers on half-baked bread!
These little tweaks took my pumpkin sourdough from sad and dense to bakery-worthy. The day I finally nailed that perfect open crumb? Pure pumpkin-fueled triumph!
Pumpkin Sourdough Bread Variations
Oh, the fun part! Once you’ve mastered the basic pumpkin sourdough loaf (brace yourself – you’ll want to bake it weekly), try these tasty twists that make perfect sense for meal planning. I’ve played with countless variations while testing this recipe – some winners, some “let’s never speak of this again” moments. Here are my top 3 family-approved ideas:
- Pepita crunch: Fold in ½ cup toasted pepitas during your final stretch-and-fold. They add the perfect crunch and look gorgeous peeking through the crust. My kids call this the “confetti bread”!
- Maple sweetness: Swap honey for pure maple syrup – just reduce other liquids slightly. The caramel-like depth pairs amazingly with pumpkin. Bonus? Your kitchen will smell like a Vermont autumn.
- Meal-prep boost: Add ⅓ cup dried cranberries for a tart pop. They’re pantry-stable (perfect for meal delivery staples) and turn each slice into a fiber-packed breakfast. I bake two loaves – one for now, one for the freezer!
Honestly? The cranberry version has become my go-to gift loaf during the holidays. Shh… don’t tell my neighbors how easy it is to make!
Storing and Reheating Your Loaf
Oh, the agony of watching your beautiful pumpkin sourdough go stale! Here’s how I keep mine tasting bakery-fresh for days (and make it part of my meal planning routine): First, wrap the cooled loaf in a clean linen towel – it breathes just enough to prevent sogginess while keeping the crust crisp. Need longer storage? Freeze pre-sliced portions! I pop individual slices in freezer bags, perfect for quick breakfasts that feel indulgent but fit right into my weight loss programs strategy (portion control is key!).
Now, the magic trick for reviving day-old sourdough: steam! Just spritz frozen or stale slices lightly with water, then toast or warm in a 350°F oven for 5 minutes. Brings back that just-baked aroma and texture every time. Trust me, this method saved many loaves when I first started baking – nobody could tell the difference between fresh and revived!
Pumpkin Sourdough Bread FAQ
You’ve got questions? I’ve got answers (and plenty of baking battle stories). Here are the most common pumpkin sourdough questions I get – the very same ones I asked when I first started making this homemade sourdough pumpkin bread. Believe me, learning from my mistakes is way more fun than repeating them!
Can I use instant yeast instead of sourdough starter?
Oh honey, this is where I messed up big time last year! While you technically could, you’d lose all that incredible tangy complexity that makes sourdough special. The slow fermentation develops flavors instant yeast just can’t match. Plus, that natural leavening gives the pumpkin bread its gorgeous open crumb structure. My advice? Take the extra time – your taste buds will thank you!
Help! My dough is way too sticky – what now?
Welcome to my pumpkin bread initiation! Pumpkin purée adds sneaky moisture. If your dough feels like glue, sprinkle in a tablespoon of flour at a time during the first stretch-and-fold. Next time? Start with 20% less water than the recipe suggests. I learned this the hard way with dough stuck to every surface – including my cat (don’t ask).
What’s the best pumpkin purée brand to use?
After testing way too many cans (my recycling bin was pumpkin-scented for weeks!), I swear by Libby’s for its consistent texture and sweetness. For homemade, roast sugar pie pumpkins until fork-tender – the flavor difference is incredible! Just strain excess liquid through cheesecloth so your dough doesn’t turn soupy.
Is there a good gluten-free version of this bread?
Oh sweet friend, I wish! I’ve tried every GF flour blend out there (my poor neighbors were guinea pigs), but none capture sourdough’s magic structure. The pumpkin needs gluten to hold its shape. Want autumn flavors without wheat? Try my gluten-free pumpkin muffins instead – same spices, zero heartbreak!
Nutrition Information
Let’s talk numbers – but remember these are estimates (my kitchen scale is good, but it’s not a lab!). What makes me proud about this pumpkin sourdough bread? Each slice packs 2g fiber with just 2g sugar naturally – way better than store-bought! Perfect for vegetarian meal plans, it delivers 120 calories and 4g protein per slice. That spicy-sweet comfort with actual nutrition? Now that’s what I call baking smart!
Share Your Pumpkin Sourdough Creation
Nothing makes me happier than seeing your beautiful pumpkin sourdough masterpieces! Snap a crumb shot and share it on Pinterest (find me at PumpkinPassionSourdough) – tag me so I can gush over your work. Tell me in the comments: how long did your bulk fermentation take? Every kitchen is different, and your experience helps fellow bakers! Don’t forget to rate the recipe if you loved it as much as I do.
PrintPumpkin Sourdough Bread
A spiced sourdough loaf with pumpkin purée, perfect for autumn baking.
- Prep Time: 30 min
- Cook Time: 45 min
- Total Time: 18 hours 15 min
- Yield: 1 loaf 1x
- Category: Baking
- Method: Sourdough
- Cuisine: American
- Diet: Vegetarian
Ingredients
- 150g active sourdough starter
- 300g bread flour
- 100g whole wheat flour
- 200g pumpkin purée
- 8g salt
- 10g honey
- 1 tsp cinnamon
- 1/2 tsp nutmeg
- 1/4 tsp cloves
- 150g water (adjust for hydration)
Instructions
- Mix all ingredients in a bowl until combined.
- Let the dough rest for 30 minutes.
- Perform stretch and folds every 30 minutes for 2 hours.
- Bulk ferment until doubled in size (4-6 hours).
- Shape the dough and place in a proofing basket.
- Cold-proof in the fridge for 12-16 hours.
- Preheat oven to 475°F with a baking stone and steam tray.
- Score and bake for 20 minutes with steam, then 25 minutes without.
- Cool completely before slicing.
Notes
- Adjust water based on starter hydration.
- Use canned or homemade pumpkin purée.
- For extra flavor, toast spices before adding.
Nutrition
- Serving Size: 1 slice
- Calories: 120
- Sugar: 2g
- Sodium: 200mg
- Fat: 0.5g
- Saturated Fat: 0.1g
- Unsaturated Fat: 0.3g
- Trans Fat: 0g
- Carbohydrates: 25g
- Fiber: 2g
- Protein: 4g
- Cholesterol: 0mg