- Introduction to Decorated Easter Cookies
- Ingredients for Decorated Easter Cookies
- How to Prepare Decorated Easter Cookies
- Equipment Needed for Decorated Easter Cookies
- Variations of Decorated Easter Cookies
- Cooking Notes for Decorated Easter Cookies
- Serving Suggestions for Decorated Easter Cookies
- Tips for Perfect Decorated Easter Cookies
- Breakdown of Time for Decorated Easter Cookies
- Nutritional Information for Decorated Easter Cookies
- Frequently Asked Questions (FAQs) about Decorated Easter Cookies
- Conclusion on Decorated Easter Cookies
Introduction to Decorated Easter Cookies
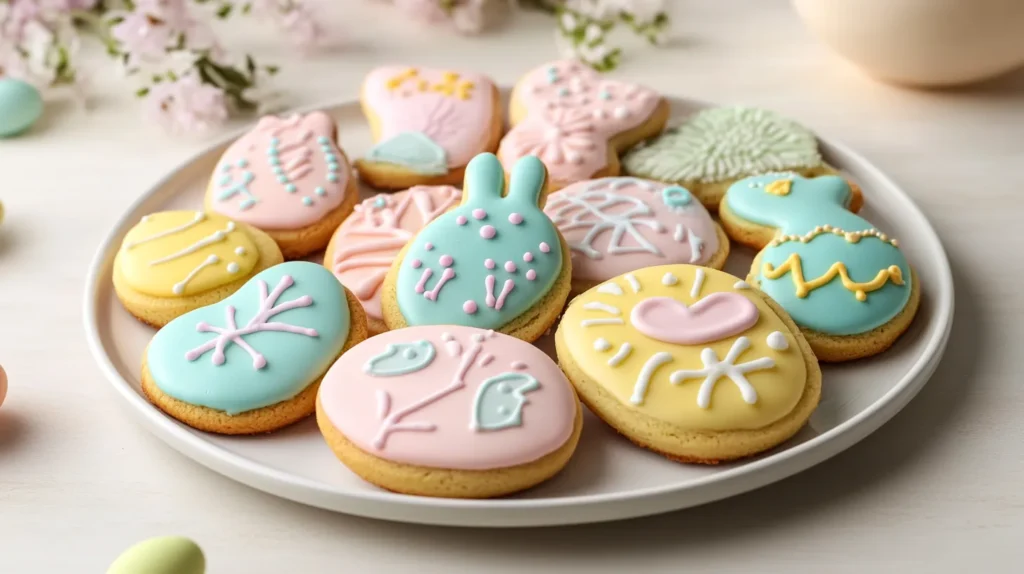
As a passionate home cook, I find that the joy of baking is often intertwined with the joy of sharing. When Easter rolls around, my kitchen transforms into a vibrant canvas of colors and creativity, all thanks to decorated Easter cookies. These delightful treats are not just about taste; they are a celebration of artistry and tradition. I remember the first time I attempted to decorate cookies for Easter. My kitchen was a whirlwind of flour, sugar, and laughter as my kids and I experimented with different shapes and colors. The excitement in their eyes as they piped icing onto the cookies was priceless.
Decorated Easter cookies have a special place in my heart. They remind me of family gatherings, where everyone comes together to create something beautiful. Each cookie tells a story, whether it’s a bunny with floppy ears or a colorful egg adorned with sprinkles. The process of baking and decorating these cookies is a wonderful way to bond with loved ones, creating memories that last long after the last crumb is gone.
In this article, I’ll guide you through the delightful journey of making your own decorated Easter cookies. From selecting the right ingredients to mastering the art of decoration, I’ll share my personal tips and tricks that have made my cookie adventures a success. So, roll up your sleeves, and let’s dive into the world of decorated Easter cookies, where every bite is a celebration of spring!
Ingredients for Decorated Easter Cookies
Before we embark on our cookie-making adventure, let’s gather our ingredients. Having everything ready makes the process smoother and more enjoyable. I always find that using high-quality ingredients elevates the flavor and texture of my cookies. So, let’s dive into the essentials!
Main Ingredients
- 2 ¾ cups all-purpose flour
- 1 teaspoon baking powder
- ½ teaspoon salt
- 1 cup unsalted butter, softened
- 1 cup granulated sugar
- 1 large egg
- 1 teaspoon vanilla extract
- 1 teaspoon almond extract (optional, but adds a lovely flavor)
When I choose flour, I always opt for unbleached all-purpose flour. It gives my cookies a richer taste and a beautiful texture. The butter should be at room temperature, as it blends better with the sugar, creating a creamy mixture that’s essential for the perfect cookie dough.
Optional Add-ons
- Food coloring (for vibrant icing)
- Sprinkles or edible glitter (for that extra sparkle)
- Flavored extracts (like lemon or peppermint for a twist)
- Chopped nuts or dried fruits (for added texture)
These optional ingredients can take your decorated Easter cookies to the next level. I love adding a few drops of food coloring to my royal icing, transforming it into a rainbow of hues. And who can resist a sprinkle of edible glitter? It’s like magic on a cookie! Feel free to get creative and personalize your cookies with flavors and decorations that resonate with you and your family.
Now that we have our ingredients lined up, we’re ready to start baking! The next step is to prepare our cookie dough, and I can’t wait to share my tips with you.
How to Prepare Decorated Easter Cookies
Now that we have our ingredients ready, it’s time to roll up our sleeves and dive into the fun part—preparing our decorated Easter cookies! I always find this process to be a delightful mix of science and art. Each step is crucial, and I’m excited to share my tips to help you create the perfect cookies.
Step 1: Making the Cookie Dough
To start, I cream together the softened butter and sugar in a large bowl. The mixture should become light and fluffy, which usually takes about 3-5 minutes. Then, I add in the egg and vanilla extract, mixing until everything is well combined. Next, I sift together the flour, baking powder, and salt in a separate bowl. Gradually, I add the dry ingredients to the wet mixture, stirring until a soft dough forms.
Tips for Perfect Dough Consistency
- Make sure your butter is at room temperature. Cold butter can lead to a dense dough.
- Don’t overmix the dough; just mix until the ingredients are combined. Overmixing can make the cookies tough.
- If the dough feels too sticky, add a little more flour, one tablespoon at a time.
Step 2: Chilling the Dough
Once the dough is ready, I wrap it in plastic wrap and refrigerate it for at least an hour. Chilling the dough is essential for achieving the right texture and shape when baking.
Importance of Chilling
- Chilling helps the butter solidify, which prevents the cookies from spreading too much in the oven.
- It also makes the dough easier to roll out, giving you cleaner edges when cutting shapes.
Step 3: Rolling and Cutting the Dough
After the dough has chilled, I dust my countertop with a little flour and roll it out to about ¼ inch thick. Using cookie cutters, I cut out fun shapes like bunnies, eggs, and flowers. The excitement of seeing those shapes come to life is one of my favorite parts!
Techniques for Even Rolling
- Use a rolling pin with guides to ensure an even thickness.
- Rotate the dough occasionally while rolling to prevent sticking.
- Keep extra flour on hand to dust the rolling pin and surface as needed.
Step 4: Baking the Cookies
Next, I preheat my oven to 350°F (175°C). I place the cut-out cookies on a baking sheet lined with parchment paper, leaving some space between them. Then, I pop them in the oven for about 8-10 minutes, or until the edges are lightly golden.
Oven Temperature Tips
- Always preheat your oven to ensure even baking.
- For best results, bake one tray at a time in the center of the oven.
- Keep an eye on the cookies; they can go from perfect to overbaked quickly!
Step 5: Preparing the Royal Icing
While the cookies cool, I prepare the royal icing. I whisk together powdered sugar, egg whites, and a splash of lemon juice until smooth. The icing should be thick enough to hold its shape but thin enough to pipe easily.
Consistency for Decorating
- For outlining, the icing should be thick. For flooding (filling in), it should be thinner.
- Test the consistency by running a spatula through the icing; it should hold a peak for a few seconds before settling.
Step 6: Decorating the Cookies
Finally, it’s time to unleash your creativity! I use piping bags fitted with different tips to decorate my cookies. I love to create intricate designs, but simple patterns can be just as beautiful. The joy of seeing my kids get involved in this step is heartwarming.
Creative Techniques for Decoration
- Use food coloring to create vibrant icing. Mix colors to achieve your desired shades.
- Experiment with sprinkles, edible glitter, or even small candies for added flair.
- Try using a toothpick to create swirls or marbling effects in the icing.
And there you have it! Each step brings us closer to those delightful decorated Easter cookies. I can’t wait for you to experience the joy of baking and decorating these treats. Let’s move on to the equipment needed for this fun adventure!
Equipment Needed for Decorated Easter Cookies
As I prepare to create my decorated Easter cookies, I find that having the right equipment makes all the difference. It’s like having the perfect paintbrush for a masterpiece! While some tools are essential, others can be substituted with items you might already have at home. Let’s take a look at what you’ll need for this delightful baking adventure.
Essential Tools
- Mixing Bowls: A set of mixing bowls in various sizes is crucial. I often use a large bowl for the dough and smaller ones for mixing icing colors.
- Measuring Cups and Spoons: Accurate measurements are key to baking success. I always keep a set of dry and liquid measuring cups handy.
- Rolling Pin: A good rolling pin helps achieve an even thickness for the dough. If you don’t have one, a clean wine bottle can work in a pinch!
- Cookie Cutters: These come in all shapes and sizes. I love using seasonal shapes like bunnies and eggs. If you don’t have cookie cutters, you can use a knife to cut out shapes freehand.
- Baking Sheets: A couple of sturdy baking sheets lined with parchment paper are essential for baking. If you don’t have parchment paper, greasing the sheets lightly will do.
- Cooling Rack: Once the cookies are baked, a cooling rack allows them to cool evenly. If you don’t have one, a plate will work, but be sure to space them out to avoid steaming.
Decorating Tools
- Piping Bags: These are perfect for decorating with royal icing. If you don’t have piping bags, you can use zip-top bags with a small corner snipped off.
- Piping Tips: Different tips create various designs. I love using round tips for outlines and star tips for filling. If you’re in a bind, a toothpick can help create simple designs.
- Food Coloring: Gel food coloring works best for vibrant icing. Liquid food coloring can also be used, but it may alter the icing’s consistency.
- Spatula: A small spatula is great for mixing icing and spreading it on cookies. If you don’t have one, a butter knife can serve the same purpose.
With these tools at your disposal, you’ll be well-equipped to create beautiful decorated Easter cookies. Remember, the most important ingredient is your enthusiasm! So gather your equipment, and let’s get ready to bake some sweet memories together.
Variations of Decorated Easter Cookies
As I dive deeper into the world of decorated Easter cookies, I find that the possibilities are as endless as the colors of spring! Each year, I love to experiment with different themes, flavors, and even dietary adaptations. This not only keeps things exciting but also allows me to cater to the diverse tastes of my family and friends. Let me share some of my favorite variations that you can try in your own kitchen!
Themed Cookies
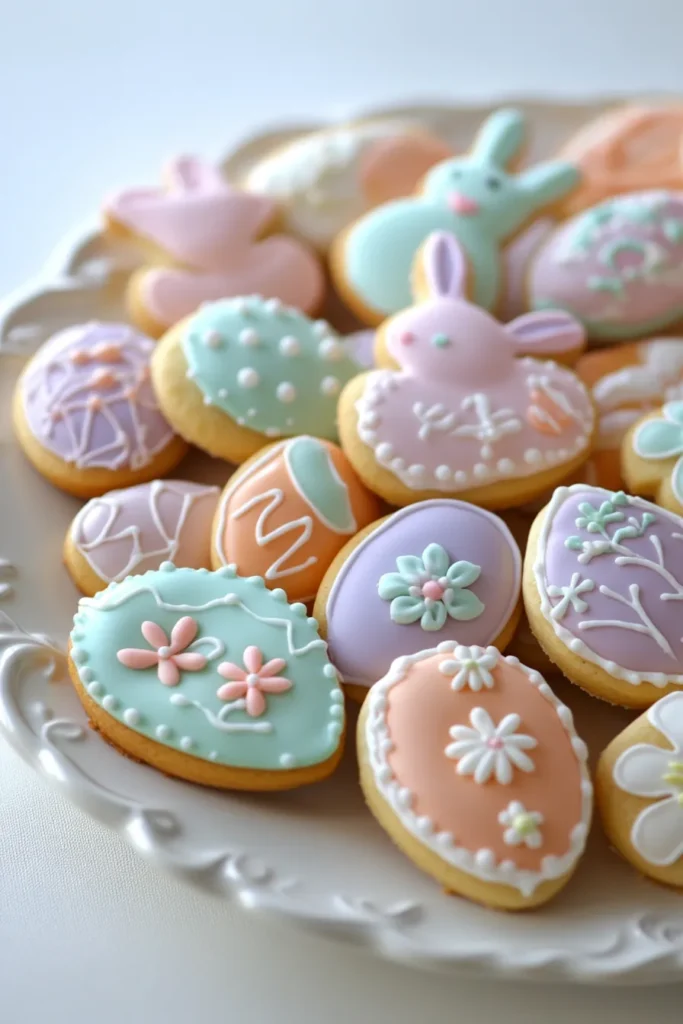
One of the most delightful aspects of decorated Easter cookies is the ability to create themed designs. For instance, I often choose a color palette that reflects the beauty of spring. Think pastel pinks, yellows, and greens! I love to make cookies shaped like flowers, chicks, and even Easter baskets. Each cookie can be decorated with matching icing and sprinkles, creating a cohesive and festive look.
Another fun theme I enjoy is a garden party. I use cookie cutters to create butterflies, ladybugs, and even garden tools. The kids love helping me decorate these cookies with bright colors and edible glitter, making them sparkle like a sunny day!
Flavor Variations
While classic sugar cookies are a favorite, I often like to switch things up with different flavors. For instance, I’ve experimented with lemon-flavored cookies that add a refreshing zing to the sweetness. Simply replace some of the vanilla extract with lemon extract and add a bit of lemon zest to the dough. The result is a delightful cookie that pairs perfectly with a cup of tea!
Another variation I adore is chocolate cookies. By adding cocoa powder to the dough, I create a rich, chocolatey base that’s perfect for decorating. I often pair these with white chocolate icing for a beautiful contrast. The combination of flavors is simply irresistible!
Dietary Adaptations
In our family, we have a few members with dietary restrictions, so I’ve learned to adapt my recipes to accommodate everyone. For gluten-free cookies, I use a blend of gluten-free all-purpose flour. The taste remains delicious, and no one can tell the difference!
For those who prefer a healthier option, I’ve made cookies using whole wheat flour and reduced sugar. I also love to incorporate natural sweeteners like honey or maple syrup. These cookies still taste delightful and are a great way to enjoy a treat without the guilt.
Lastly, for vegan friends, I’ve swapped out the butter and egg for coconut oil and flaxseed meal. The cookies turn out just as tasty, and everyone can join in on the fun!
With these variations, you can create a beautiful spread of decorated Easter cookies that cater to every taste and preference. The joy of baking is not just in the final product but in the creativity and love that goes into each cookie. So, let your imagination run wild, and let’s make this Easter a sweet celebration!
Cooking Notes for Decorated Easter Cookies
As I’ve spent countless hours in the kitchen baking decorated Easter cookies, I’ve learned a few valuable lessons along the way. Each baking adventure comes with its own set of challenges, but with a little knowledge, you can avoid common pitfalls and create cookies that are not only beautiful but also delicious. Here are some insights I’ve gathered from my experiences that I hope will help you on your cookie-making journey!
Common Pitfalls and How to Avoid Them
- Overmixing the Dough: One of the biggest mistakes I’ve made is overmixing the cookie dough. This can lead to tough cookies instead of the soft, tender ones we all love. To avoid this, mix just until the ingredients are combined. Remember, a little bit of flour showing is perfectly fine!
- Not Chilling the Dough: I can’t stress enough how important it is to chill the dough. If you skip this step, your cookies may spread too much while baking, losing their lovely shapes. So, be patient and let the dough chill for at least an hour. It’s worth the wait!
- Incorrect Oven Temperature: Every oven is different, and I’ve learned the hard way that relying solely on the dial can lead to surprises. I recommend using an oven thermometer to ensure your oven is at the right temperature. Baking at too high a temperature can cause the cookies to brown too quickly, while too low can lead to underbaked cookies.
- Royal Icing Consistency: Achieving the right consistency for royal icing can be tricky. If it’s too thick, it won’t spread well; if it’s too thin, it will run off the cookies. I recommend testing the icing by running a spatula through it. It should hold a peak for a few seconds before settling. Adjust with a little water or powdered sugar as needed.
- Not Using Parchment Paper: I’ve made the mistake of placing cookies directly on the baking sheet, and let me tell you, it’s not fun trying to pry them off! Using parchment paper not only prevents sticking but also makes cleanup a breeze. It’s a small step that saves a lot of hassle!
By keeping these common pitfalls in mind, you’ll be well on your way to creating stunning decorated Easter cookies. Remember, baking is as much about the journey as it is about the destination. Embrace the process, learn from any mishaps, and most importantly, have fun! Now that we’ve covered the cooking notes, let’s move on to some serving suggestions that will make your cookies shine during Easter celebrations.
Serving Suggestions for Decorated Easter Cookies
As I prepare to share my decorated Easter cookies with family and friends, I find that presentation is just as important as taste. After all, we eat with our eyes first! I love to get creative with how I serve these delightful treats, making them a centerpiece of our Easter celebrations. Here are some of my favorite serving suggestions that will surely impress your guests and add a festive touch to your table.
Cookie Platters
One of the simplest yet most effective ways to showcase your decorated Easter cookies is by arranging them on a beautiful platter. I often use a large, colorful plate or a wooden board to create a stunning display. I like to group cookies by shape or color, creating a visual feast that draws everyone in. Adding some greenery, like fresh mint or edible flowers, around the cookies can elevate the presentation even further.
Gift Boxes
Another delightful way to share the joy of decorated Easter cookies is by packaging them in cute gift boxes. I love to use clear cellophane bags tied with colorful ribbons or decorative boxes adorned with spring-themed designs. This not only makes for a lovely gift but also allows friends and family to take home a piece of your baking magic. It’s a sweet way to spread joy and share the love of baking!
Easter Baskets
Incorporating decorated cookies into Easter baskets is a tradition I cherish. I fill a basket with grass or shredded paper and nestle the cookies among colorful plastic eggs and small toys. The vibrant colors and playful arrangement create a festive atmosphere that kids and adults alike will adore. Plus, it’s a fun surprise for the little ones to discover delicious cookies hidden in their baskets!
Cookie Decorating Station
If you’re hosting an Easter gathering, consider setting up a cookie decorating station. I love to lay out plain cookies alongside various icing colors, sprinkles, and edible decorations. This interactive experience allows guests, especially kids, to unleash their creativity and decorate their own cookies. It’s a fantastic way to engage everyone and create lasting memories together!
Pairing with Beverages
To enhance the experience, I often serve my decorated Easter cookies alongside refreshing beverages. A lovely herbal tea or a fruity lemonade pairs beautifully with the sweetness of the cookies. For a festive touch, I like to serve a light sparkling drink, which adds a celebratory feel to the occasion. The combination of flavors makes for a delightful treat that everyone will enjoy!
With these serving suggestions, your decorated Easter cookies will not only taste amazing but also look stunning on your table. Remember, the joy of baking and sharing is what truly makes these cookies special. So, gather your loved ones, enjoy the festivities, and let the sweetness of your decorated Easter cookies shine bright this holiday season!
Tips for Perfect Decorated Easter Cookies
As I’ve navigated the delightful world of baking decorated Easter cookies, I’ve picked up a treasure trove of tips that can make all the difference. Each little nugget of wisdom has helped me elevate my cookie game, ensuring that my creations are not only beautiful but also delicious. Here are some of my favorite tips that I hope will inspire you on your cookie-making journey!
Use Quality Ingredients
One of the first lessons I learned is that the quality of your ingredients matters. I always choose fresh, high-quality butter, pure vanilla extract, and unbleached flour. These ingredients contribute to the flavor and texture of the cookies. Trust me, it’s worth the extra effort to source the best ingredients you can find!
Measure Accurately
Accurate measurements are crucial in baking. I always use dry measuring cups for flour and sugar, and liquid measuring cups for wet ingredients. When measuring flour, I spoon it into the cup and level it off with a knife. This prevents packing, which can lead to dry cookies. A kitchen scale can also be a great investment for precise measurements!
Don’t Skip the Chilling Step
Chilling the dough is a step I never skip. It’s essential for achieving the right texture and shape. If you’re short on time, you can even chill the dough in smaller portions. Just remember, the longer you chill, the better the results. I often prepare my dough the night before and let it chill overnight for the best outcome!
Experiment with Icing Consistency
When it comes to royal icing, finding the right consistency is key. I always start with a thicker icing for outlining and then thin it out for flooding. If you’re unsure, test the icing on a plate. It should spread smoothly but hold its shape. Don’t be afraid to adjust with a little water or powdered sugar until you achieve the perfect consistency!
Practice Your Decorating Skills
Decorating cookies is an art, and like any art form, practice makes perfect. I often spend time experimenting with different piping techniques and designs. If you’re new to decorating, start with simple patterns and gradually work your way up to more intricate designs. Remember, it’s all about having fun and expressing your creativity!
Keep Your Workspace Organized
A tidy workspace can make a world of difference. I always set out all my tools and ingredients before I start baking. This not only saves time but also helps me stay focused. Plus, it’s easier to clean up afterward! I like to keep a damp cloth nearby to wipe down surfaces as I go, ensuring everything stays neat and tidy.
Store Cookies Properly
Once your decorated Easter cookies are ready, proper storage is essential to keep them fresh. I usually store them in an airtight container at room temperature. If you’ve used royal icing, allow the icing to dry completely before stacking the cookies. For longer storage, you can freeze the cookies, but I recommend freezing them before decorating to maintain their texture.
With these tips in your back pocket, you’ll be well on your way to creating stunning decorated Easter cookies that will impress everyone. Remember, baking is a journey filled with joy, creativity, and a sprinkle of love. So, embrace the process, enjoy the little moments, and let your passion for baking shine through in every cookie you create!
Breakdown of Time for Decorated Easter Cookies
As I embark on the delightful journey of baking decorated Easter cookies, I find that having a clear timeline helps keep the process organized and enjoyable. Knowing how much time to allocate for each step allows me to savor the experience without feeling rushed. Here’s a breakdown of the time you can expect to spend on each part of the process:
Prep Time
Preparing the cookie dough is the first step, and it usually takes me about 20-30 minutes. This includes measuring and mixing the ingredients, as well as chilling the dough. I always find it helpful to set aside a little extra time for any unexpected hiccups, like a stubborn mixer or a missing ingredient!
Chilling Time
Once the dough is mixed, it needs to chill in the refrigerator for at least 1 hour. This step is crucial for achieving the perfect cookie texture, so I recommend not skipping it. If you have the time, chilling the dough overnight can yield even better results!
Baking Time
Baking the cookies typically takes about 8-10 minutes per batch. Depending on how many cookies you’re making, you might need to bake in multiple batches. I usually bake one tray at a time to ensure even cooking, which can add an additional 15-20 minutes if you have several trays to go through.
Cooling Time
After baking, I let the cookies cool on a wire rack for about 10-15 minutes. This step is essential before decorating, as warm cookies can lead to messy icing. I often use this time to prepare my royal icing and gather my decorating supplies.
Decorating Time
Now comes the fun part—decorating! Depending on how intricate your designs are, this can take anywhere from 30 minutes to a couple of hours. I love to take my time with this step, allowing my creativity to flow. Plus, it’s a great opportunity to involve my kids, making it a fun family activity!
Total Time
In total, you can expect to spend around 2.5 to 4 hours on the entire process, including prep, chilling, baking, cooling, and decorating. If you choose to chill the dough overnight, you can spread the time out over two days, making it even more manageable.
With this breakdown, you’ll have a clear idea of how to plan your baking day. Remember, the joy of creating decorated Easter cookies lies not just in the final product but in the moments spent in the kitchen. So, gather your ingredients, set aside some time, and let the magic of baking unfold!
Nutritional Information for Decorated Easter Cookies
As I whip up a batch of decorated Easter cookies, I often think about how to balance indulgence with nutrition. While these cookies are a delightful treat, it’s good to be aware of their nutritional content, especially if you’re sharing them with family and friends. Here’s a breakdown of the calories and nutritional information per cookie, based on a standard recipe that yields about 24 cookies.
Calories and Nutritional Breakdown
| Nutrient | Per Cookie (Approx.) |
|---|---|
| Calories | 120 |
| Total Fat | 6g |
| Saturated Fat | 3.5g |
| Cholesterol | 15mg |
| Sodium | 50mg |
| Total Carbohydrates | 16g |
| Dietary Fiber | 0.5g |
| Total Sugars | 8g |
| Protein | 1g |
These values can vary based on the specific ingredients you use and how you decorate your cookies. For instance, adding sprinkles or using flavored extracts can slightly alter the nutritional content. If you’re looking to make healthier choices, consider using less sugar or substituting some ingredients with healthier alternatives, like whole wheat flour or natural sweeteners.
While it’s easy to indulge during the holidays, I always remind myself that moderation is key. Enjoying a decorated Easter cookie as part of a balanced diet can be a delightful way to celebrate the season. So, as you gather around the table with loved ones, savor each bite and the sweet memories you’re creating together!
Frequently Asked Questions (FAQs) about Decorated Easter Cookies
As I’ve shared my love for decorated Easter cookies, I often receive questions from fellow baking enthusiasts. It’s wonderful to see so many people excited about creating these delightful treats! Here are some of the most common queries I’ve encountered, along with my answers to help you on your cookie-making journey.
Can I make the cookie dough ahead of time?
Absolutely! I often prepare the cookie dough a day in advance. After mixing, simply wrap it tightly in plastic wrap and refrigerate. This not only saves time but also allows the flavors to meld beautifully. Just remember to let it sit at room temperature for a few minutes before rolling it out, as it can be a bit firm after chilling.
What’s the best way to store decorated cookies?
Once your cookies are decorated and the icing has dried completely, store them in an airtight container at room temperature. I usually place parchment paper between layers to prevent sticking. If you want to keep them fresh for longer, you can freeze the undecorated cookies. Just make sure to wrap them well to avoid freezer burn!
How can I achieve vibrant colors in my icing?
Using gel food coloring is my secret weapon for achieving vibrant icing colors. Gel colors are more concentrated than liquid ones, so you need less to get the desired shade. Start with a small amount and gradually add more until you reach the perfect hue. Mixing colors can also create beautiful shades, so don’t hesitate to experiment!
What if my royal icing is too runny?
If you find that your royal icing is too runny, don’t worry! You can easily fix it by adding more powdered sugar. Start with a tablespoon at a time until you reach the desired consistency. If it’s too thick, you can thin it out with a few drops of water. Remember, the right consistency is key for both outlining and flooding your cookies!
Can I use alternative sweeteners in the cookie dough?
Yes, you can! I’ve experimented with natural sweeteners like honey or maple syrup, and they work well in cookie dough. However, keep in mind that these alternatives can change the texture and flavor slightly. If you’re using liquid sweeteners, you may need to adjust the amount of flour to maintain the right dough consistency.
How do I prevent my cookies from spreading too much while baking?
To prevent spreading, make sure to chill your dough before rolling it out. This solidifies the butter, helping the cookies maintain their shape. Additionally, avoid overmixing the dough, as this can lead to a softer texture. Lastly, ensure your oven is at the correct temperature; an oven thermometer can be a great tool for this!
What are some creative decorating ideas for Easter cookies?
The possibilities are endless! I love using different piping techniques to create intricate designs. You can also use edible glitter, sprinkles, or even small candies to add flair. For a fun twist, try marbling colors together or using a toothpick to create swirls in the icing. Let your imagination run wild, and don’t be afraid to try new things!
With these FAQs, I hope to inspire you to dive into the world of decorated Easter cookies with confidence. Remember, baking is all about having fun and creating sweet memories. So gather your loved ones, roll up your sleeves, and let the cookie magic begin!
Conclusion on Decorated Easter Cookies
As I reflect on the delightful journey of creating decorated Easter cookies, I can’t help but feel a sense of joy and fulfillment. These cookies are more than just sweet treats; they are a canvas for creativity, a way to express love, and a means to bring family and friends together. The process of baking and decorating is filled with laughter, experimentation, and the sweet aroma of freshly baked cookies wafting through the air.
What I love most about decorated Easter cookies is their versatility. Whether you’re crafting intricate designs or simple patterns, each cookie tells a story. They can be tailored to fit any theme, flavor, or dietary need, making them a perfect addition to any celebration. Plus, the smiles on my loved ones’ faces when they see the colorful creations are priceless. It’s a reminder that the best moments in life are often shared over a plate of cookies.
Moreover, the act of baking together fosters connections and creates lasting memories. I cherish the times spent in the kitchen with my kids, teaching them the art of cookie decorating. It’s a beautiful way to pass down traditions and inspire the next generation of home cooks. Each cookie we create becomes a cherished memory, a sweet reminder of our time spent together.
So, as you embark on your own cookie-making adventure, remember that the true magic lies not just in the final product but in the love and creativity you pour into each step. Decorated Easter cookies are a celebration of spring, family, and the joy of baking. I encourage you to gather your ingredients, invite your loved ones into the kitchen, and let your imaginations run wild. Happy baking, and may your decorated Easter cookies bring sweetness and joy to your celebrations!
PrintDecorated Easter cookies bring joy and creativity to baking!

A delightful guide to making decorated Easter cookies, celebrating creativity and family bonding through baking.
- Prep Time: 30 minutes
- Cook Time: 10 minutes per batch
- Total Time: 2.5 to 4 hours
- Yield: 24 cookies 1x
- Category: Dessert
- Method: Baking
- Cuisine: American
- Diet: Vegetarian
Ingredients
- 2 ¾ cups all-purpose flour
- 1 teaspoon baking powder
- ½ teaspoon salt
- 1 cup unsalted butter, softened
- 1 cup granulated sugar
- 1 large egg
- 1 teaspoon vanilla extract
- 1 teaspoon almond extract (optional)
- Food coloring (for vibrant icing)
- Sprinkles or edible glitter (for decoration)
- Flavored extracts (like lemon or peppermint)
- Chopped nuts or dried fruits (optional)
Instructions
- Make the cookie dough by creaming together softened butter and sugar until light and fluffy.
- Add the egg and vanilla extract, mixing until well combined.
- Sift together flour, baking powder, and salt in a separate bowl, then gradually add to the wet mixture.
- Wrap the dough in plastic wrap and refrigerate for at least 1 hour.
- Roll out the chilled dough to about ¼ inch thick and cut out shapes using cookie cutters.
- Preheat the oven to 350°F (175°C) and bake the cookies for 8-10 minutes until edges are lightly golden.
- Prepare royal icing by whisking together powdered sugar, egg whites, and lemon juice until smooth.
- Decorate the cooled cookies using piping bags and various icing colors.
Notes
- Use high-quality ingredients for better flavor.
- Chill the dough to prevent spreading during baking.
- Let cookies cool completely before decorating.
- Experiment with different flavors and decorations.
Nutrition
- Serving Size: 1 cookie
- Calories: 120
- Sugar: 8g
- Sodium: 50mg
- Fat: 6g
- Saturated Fat: 3.5g
- Carbohydrates: 16g
- Fiber: 0.5g
- Protein: 1g
- Cholesterol: 15mg