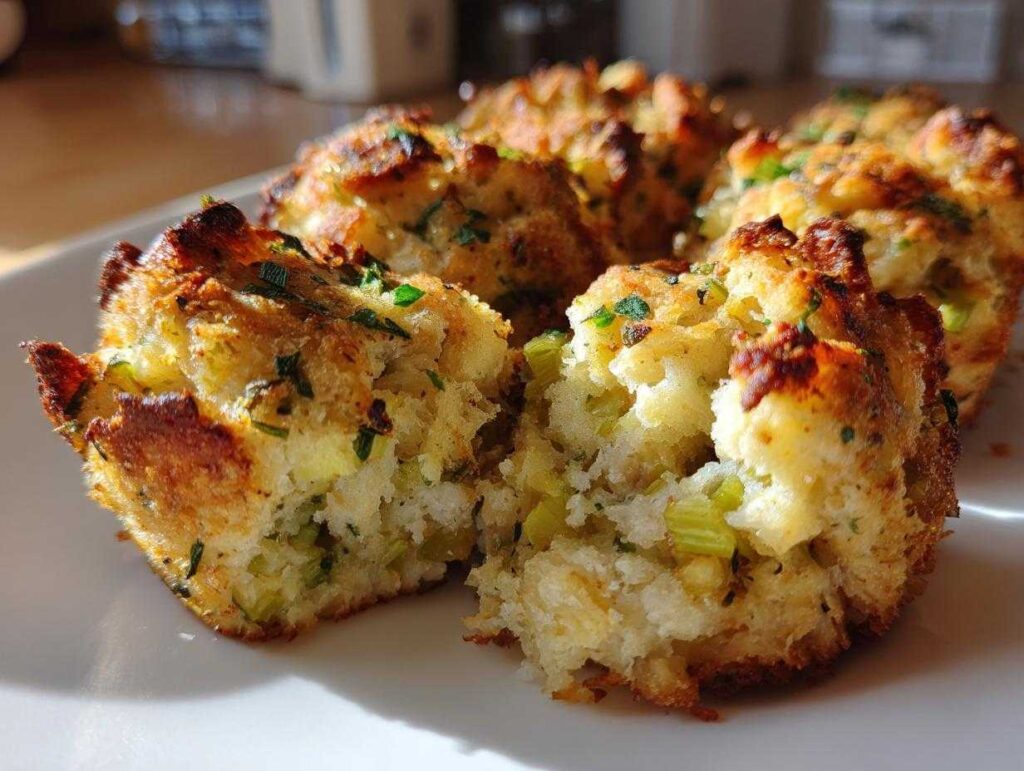
There’s something magical about holiday meals – the delicious chaos, the family crowding around the table, and of course, the moment that big roast turkey comes out. But you know what I love even more? Those perfectly portioned stuffing balls that take center stage on my Thanksgiving buffet. I’ll never forget the first time I served these golden little flavor bombs at our family feast – my uncle kept sneaking them off the platter before we even sat down!

What makes my stuffing balls so special? They’re the ultimate make-ahead side dish that actually gets better when reheated, which is a lifesaver when you’re juggling a dozen dishes. The sage and onion fragrance fills your kitchen long before the turkey’s done, giving everyone that classic holiday scent we all love. And let’s be honest – they’re just more fun to eat than regular stuffing! I love how they hold together perfectly when you smother them with gravy the next day from all that leftover turkey.
These little guys have become our family tradition because they solve three holiday problems at once: portion control (goodbye fighting over the last scoop!), effortless reheating (just pop them in the oven when guests arrive), and the perfect vehicle for enjoying leftovers (try them with cranberry sauce too!). Once you make stuffing balls for your holiday table, you’ll never go back to that casserole dish of crumbles again.
- Why You'll Love These Stuffing Balls
- Ingredients for Classic Herb Stuffing Balls
- How to Make Stuffing Balls Step by Step
- Tips for Perfect Stuffing Balls Every Time
- Make-Ahead and Storage Tips for Stuffing Balls
- Serving Suggestions for Stuffing Balls
- Stuffing Balls FAQs
- Nutritional Information
- Share Your Stuffing Balls Experience
Why You’ll Love These Stuffing Balls
Let me tell you why these little gems have become my go-to holiday lifesaver:
- Portion perfection: No more serving spoon battles! Each stuffing ball is a perfect bite-sized package of Thanksgiving goodness.
- Make-ahead magic: I prep them Wednesday night so on Thursday I’m not that frazzled host crying over a stove (we’ve all been there).
- That classic holiday flavor: The rosemary and sage combo smells like childhood Thanksgivings at Grandma’s when you walk in the door.
- Leftover superhero: Next-day turkey sandwiches? Please. These stuffing balls steal the show with gravy or cranberry sauce.
Trust me, once you swap your usual stuffing pan for these flavorful little domes, you’ll wonder why you ever did it differently!
Ingredients for Classic Herb Stuffing Balls
Gathering the right ingredients is the secret to stuffing balls that hold their shape but stay wonderfully moist inside. Here’s what you’ll need to make about a dozen perfect little bundles of holiday joy:
- The bread base: 4 cups dried bread cubes (I like using day-old sourdough or French bread)
- Aromatic veggies: 1 cup finely diced onion + 1/2 cup chopped celery (measure after chopping!)
- Fresh herbs: 2 tbsp chopped fresh sage (don’t even think about dried – the flavor won’t be the same!)
- Spice cabinet staples: 1 tsp dried thyme + 1/2 tsp salt + 1/4 tsp black pepper
- Binding magic: 1/2 cup melted butter (real butter only!) + 1 cup chicken or vegetable broth + 1 beaten egg
Quick kitchen note: If you’re making these for gluten-free friends, simply swap in your favorite gluten-free bread cubes – I’ve had great success with gluten-free sourdough in this recipe. The key is making sure your bread is properly dried out so it absorbs all that buttery goodness without turning mushy!
How to Make Stuffing Balls Step by Step
Okay, let’s get these golden beauties in the oven! Making stuffing balls is actually way easier than you might think – I promise even my 10-year-old niece can handle this recipe (though she does make a hilarious mess shaping them). Here’s exactly how I do it:
-
- Preheat and prep: Crank that oven to 375°F (190°C) – this gives it time to come up to temp while you mix everything. Pro tip: line your baking sheet with parchment or a silicone mat so you don’t have to scrub later!
- The dry mix: In your biggest bowl (trust me, go bigger than you think), toss together those bread cubes, onion, celery, sage, thyme, salt and pepper. Watch how the fresh herbs make tiny green flecks through the bread – that’s how you know the flavor will be everywhere!
-
- Get saucy: Pour the melted butter and broth over your dry mix. Here’s where things get fun – dig in with clean hands and mush it all together until every bit of bread is coated. You want it damp but not soggy (if it seems dry, add broth 1 tbsp at a time).
- Egg time: Drizzle in that beaten egg and mix like crazy! This is what makes our stuffing balls hold their perfect round shape later. I usually mix, let it sit 2 minutes, then mix again to make sure the egg is evenly distributed.
- Scoop and roll: Grab about 1/4 cup of mixture and gently press it into a ball – don’t squeeze too hard or they’ll get dense. Space them about an inch apart on your baking sheet. If they’re sticky, wet your hands slightly between shaping.
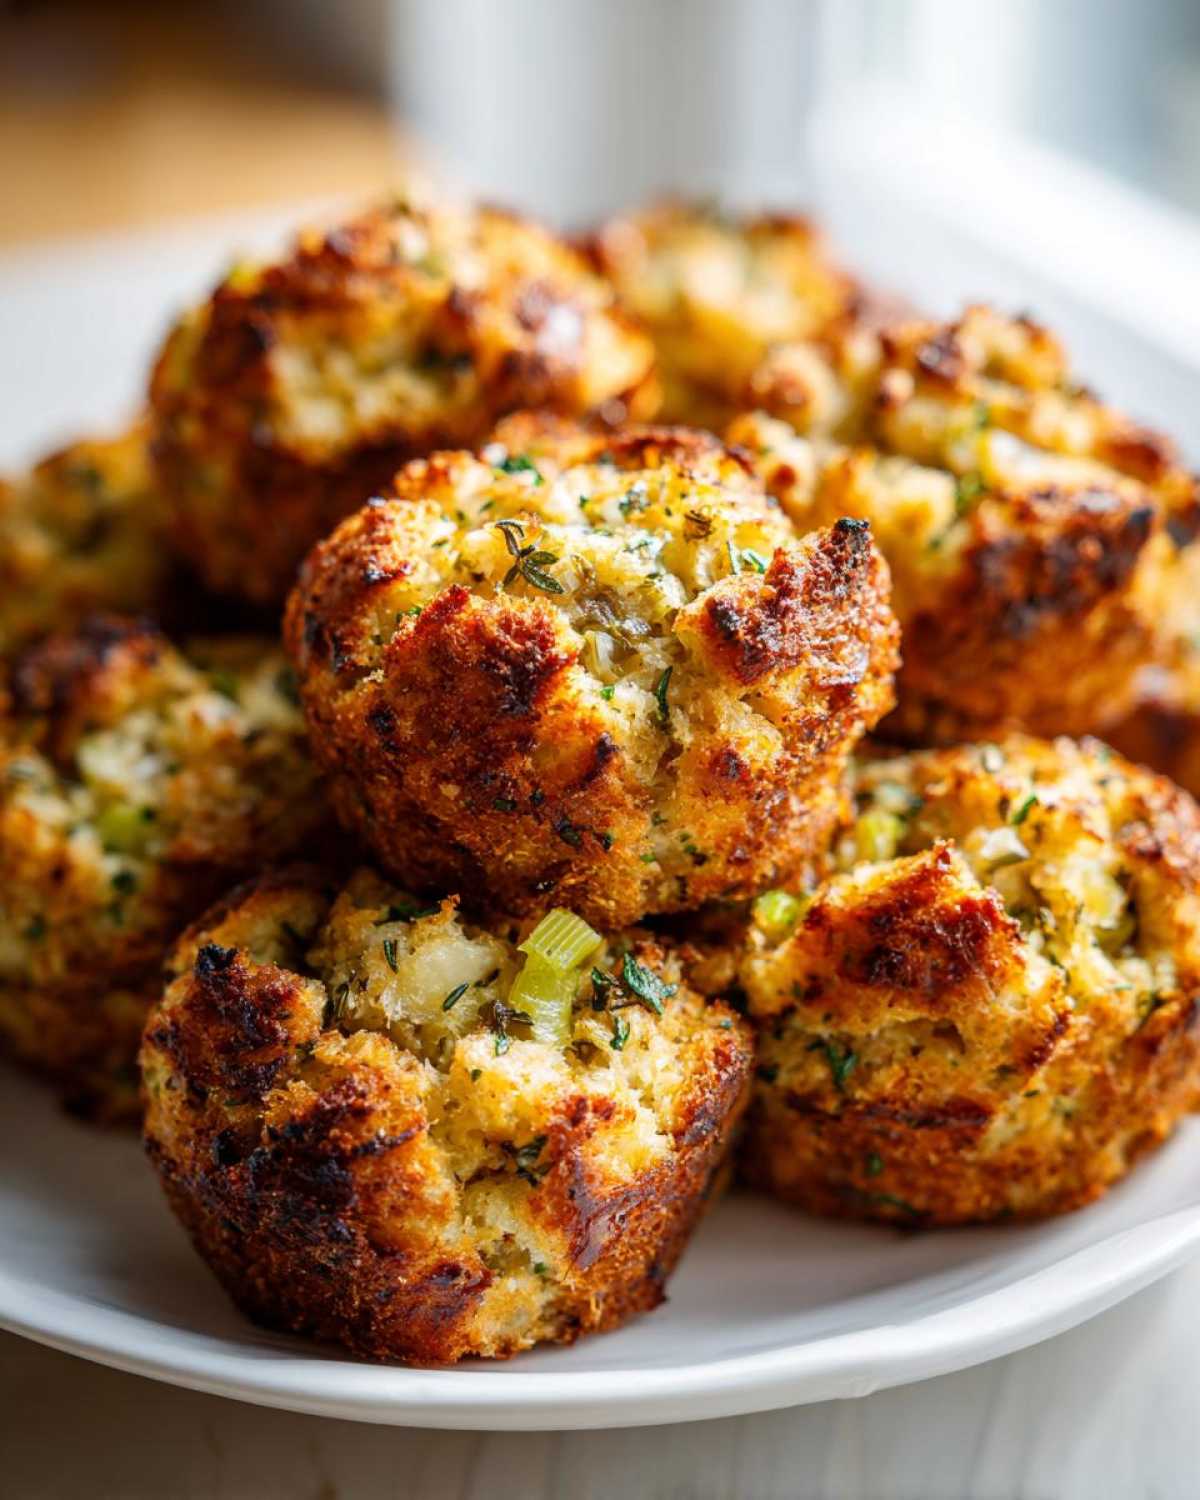
- Bake to golden perfection: Slide them into the oven for 20-25 minutes until they’re beautifully browned on top. The smell will hit you around minute 15 and drive you crazy with anticipation!
Want to take these to the next level? Right when they come out, brush them with a bit of melted butter and sprinkle with flaky salt. I sometimes add these to a tray of my favorite creamy soups for the ultimate comfort meal. See? Easy peasy stuffing balls that’ll have everyone asking for your recipe!
Tips for Perfect Stuffing Balls Every Time
After making these stuffing balls countless times (and eating way too many test batches), I’ve picked up some foolproof tricks to make sure they turn out perfect every single time. These little nuggets of wisdom have saved me from dry disasters and crumbly catastrophes!
The moisture magic: If your mixture seems too dry when you’re mixing, add broth just 1 tablespoon at a time – you want it damp like a wrung-out sponge, not soggy. Too wet? Sprinkle in some extra bread crumbs (I keep a stash of dried ones just for this!).
Shaping secrets: Wet your hands slightly before rolling each stuffing ball – it keeps the mixture from sticking to your fingers and gives you smooth little domes. Don’t press too hard though! Gentle shaping makes for fluffier texture inside.
Herb hacks: Out of fresh sage? Try 1 tbsp dried sage plus 1 tsp poultry seasoning for that classic holiday flavor. For something different, I sometimes use rosemary and thyme for an earthy twist (my husband goes crazy for this version).
My favorite “oops” turned happy accident? Once I accidentally doubled the butter – best mistake ever! Those stuffing balls came out extra rich and stayed moist for days. Now I sometimes do it on purpose for special occasions!
Make-Ahead and Storage Tips for Stuffing Balls
Listen, between the turkey, the pies, and Aunt Martha’s mystery green bean casserole, Thanksgiving prep can feel overwhelming. That’s why I always make my stuffing balls ahead of time! Here’s how I keep them fresh and fabulous:
Fridge-friendly magic: Shape those beautiful stuffing balls and arrange them on a baking sheet (don’t bake yet!). Cover tightly with plastic wrap and they’ll happily chill in your fridge for up to 2 days. When the turkey hits the oven on Thanksgiving morning, just pop your cold stuffing balls right in along with it – no thawing needed!
Freezer hack for next-level meal planning: Did your family gobble them all up? Make a double batch! Flash-freeze unbaked stuffing balls on a parchment-lined tray for 1 hour, then transfer to freezer bags. They’ll keep for 3 months! Bake from frozen (just add 5 extra minutes) whenever you need a festive side in a hurry.
Leftover love: Store baked stuffing balls in an airtight container for up to 4 days in the fridge. Reheat at 350°F for 10-12 minutes until piping hot. Pro tip: Place them in your air fryer at 375°F for 5 minutes to get that perfect crispy exterior revival!
Serving Suggestions for Stuffing Balls
Now for the best part – how to serve these little flavor bombs! My family goes wild when I arrange them around the turkey like edible Christmas ornaments, with a bowl of gravy for dipping right in the center. For holiday appetizers, spear them on toothpicks with a cube of leftover turkey and a dab of cranberry sauce – instant crowd pleasers!
After Thanksgiving, I love tossing them into my Waldorf-style salads for crunch, or crumbling them over creamy soups for texture. Meal planning tip: Make extra to freeze, then pop a few in the toaster oven with eggs for a quick holiday breakfast. Honestly, they’re so versatile I’ve even used them as “stuffing meatballs” in turkey sandwiches!
Stuffing Balls FAQs
I get questions all the time about these little holiday gems, so let me answer the most common ones I hear from friends and readers. Trust me, I’ve made every mistake possible with stuffing balls so you don’t have to!
Can I use gluten-free bread for stuffing balls?
Absolutely! I’ve had great success with gluten-free sourdough or French bread cubes – just make sure they’re properly dried out first. The trick is to toast your gluten-free bread pieces in a 250°F oven for about 20 minutes before using them in the recipe. This helps them absorb the liquids without turning mushy.
How do I keep my stuffing balls from drying out?
Three simple rules: 1) Don’t overbake them (pull them when they’re golden brown, not dark brown), 2) Use real butter (margarine won’t give you that rich moisture), and 3) Let them sit for 5 minutes after mixing so the bread fully absorbs the liquids. If you’re really worried, I sometimes add an extra tablespoon of broth to the mix!
Can I freeze stuffing balls to use later?
Oh honey, this is my secret weapon for holiday meal planning! You can freeze them either before or after baking. For unbaked, flash freeze first on a sheet pan, then store in freezer bags. Baked ones reheat beautifully in a 350°F oven for about 15 minutes straight from frozen – they’ll taste just-made.
What’s the best way to serve stuffing balls as Thanksgiving sides?
I love arranging them in a rustic basket lined with a tea towel, or skimming them with a bit of extra butter and fresh herbs right before serving. They’re fantastic with gravy, but also amazing paired with cranberry sauce or even apple butter. For Pinterest-worthy presentation (I get so many saves with this!), arrange them around a small bowl of homemade sage gravy for dipping.
Nutritional Information
Now, I’m no nutritionist (though I play one in my kitchen), so take these numbers as friendly estimates – your exact counts might vary based on your ingredient brands and how generous you are with that butter! Here’s what one tasty stuffing ball typically offers:
- Calories: About 120 per ball
- Fat: 7g (that’s the butter doing its delicious work)
- Carbs: 12g (mostly from the bread and veggie goodness)
- Protein: 3g (thanks to the egg and bread)
Psst – if you’re meal planning for specific dietary needs, you can lighten them up with less butter and low-sodium broth. But let’s be honest… holidays are for indulging in that rich, buttery flavor!
Share Your Stuffing Balls Experience
I’d love to hear how your stuffing balls turned out! Did your family gobble them up like mine does? Drop a comment below with your favorite variation or any genius tips you discovered. And if you snapped a photo (I always forget until they’re half eaten!), I’d be thrilled if you shared it. This recipe keeps evolving thanks to all your brilliant ideas!
PrintClassic Herb Stuffing Balls
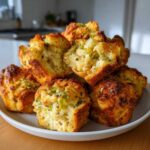
Pre-portioned stuffing balls with sage and onion, perfect for Thanksgiving or holiday gatherings. Make ahead and reheat for easy serving.
- Prep Time: 15 min
- Cook Time: 25 min
- Total Time: 40 min
- Yield: 12 stuffing balls 1x
- Category: Holiday
- Method: Baking
- Cuisine: American
- Diet: Vegetarian
Ingredients
- 4 cups dried bread cubes
- 1 cup diced onion
- 1/2 cup chopped celery
- 2 tbsp fresh sage, chopped
- 1 tsp dried thyme
- 1/2 tsp salt
- 1/4 tsp black pepper
- 1/2 cup melted butter
- 1 cup chicken or vegetable broth
- 1 egg, beaten
Instructions
- Preheat oven to 375°F (190°C).
- In a large bowl, mix bread cubes, onion, celery, sage, thyme, salt, and pepper.
- Pour melted butter and broth over the mixture. Stir to combine.
- Add beaten egg and mix until evenly moistened.
- Shape into 2-inch balls and place on a baking sheet.
- Bake for 20-25 minutes until golden brown.
Notes
- Make ahead: Prepare and refrigerate unbaked stuffing balls for up to 2 days before baking.
- Serve with leftover turkey and gravy for a quick meal.
- For a gluten-free option, use gluten-free bread cubes.
Nutrition
- Serving Size: 1 stuffing ball
- Calories: 120
- Sugar: 1g
- Sodium: 250mg
- Fat: 7g
- Saturated Fat: 4g
- Unsaturated Fat: 2g
- Trans Fat: 0g
- Carbohydrates: 12g
- Fiber: 1g
- Protein: 3g
- Cholesterol: 30mg