Oh, have I got the perfect fall treat for you! These caramel apple slices are my absolute go-to when I need a crowd-pleasing dessert that’s equal parts delicious and fun. Picture this: crisp apple wedges dipped in gooey caramel, rolled in your favorite toppings, and served on sticks for easy munching. I first made these for our annual Halloween party years ago, and now my nieces and nephews won’t let me show up without them! What I love most is how you can turn it into an interactive dessert bar – just set out bowls of different toppings and let everyone customize their own. Trust me, whether you’re hosting a cozy autumn gathering or need festive treats for school parties, these caramel apple slices will be the talk of the event. And the best part? They come together in under 20 minutes with hardly any cleanup – my kind of party prep!
- Why You'll Love These Caramel Apple Slices
- Ingredients for Caramel Apple Slices
- How to Make Caramel Apple Slices
- Tips for Perfect Caramel Apple Slices
- Toppings Bar Ideas for Caramel Apple Slices
- Storage and Serving Suggestions
- Nutritional Information
- Frequently Asked Questions
- Share Your Caramel Apple Slices
Why You’ll Love These Caramel Apple Slices
Let me tell you why these little caramel-dipped gems have become my secret weapon for effortless entertaining:
- Crazy quick to make – You can whip up two dozen slices in the time it takes to peel and core the apples. Perfect for those “Oh no, the party starts in an hour!” moments.
- Kid-approved magic – Watching children light up when they get to decorate their own slices? Priceless. No fighting over the last piece either – everyone gets exactly what they want.
- Fall party perfection – These scream autumn more than pumpkin spice lattes! I always bring them to harvest festivals and Halloween get-togethers. They disappear faster than ghosts at sunrise.
- Customizable like crazy – Set up a toppings bar and let imaginations run wild. I’ve seen everything from crushed pretzels to bacon bits on these babies (don’t knock it till you’ve tried it!).
- No-bake bliss – When your oven’s already stuffed with casseroles and pies, these no-bake treats are absolute lifesavers. No heat, no mess, all deliciousness.
Honestly, I don’t know why I ever bothered with whole caramel apples after discovering how much easier (and less messy) these slices are!
Ingredients for Caramel Apple Slices
Okay, let’s gather our goodies! Here’s what you’ll need to make these irresistible caramel apple slices. I like to divide everything into essentials and toppings because honestly, half the fun is in the decorating:
The Must-Haves
- 4 medium apples – Washed and sliced into wedges (I like Honeycrisp for sweetness or Granny Smith if you want tartness)
- 1 tablespoon lemon juice – This little lifesaver keeps your apples from turning brown before you can say “autumn gathering”
- 1 cup caramel sauce – Warmed until it’s perfectly dippable (homemade or store-bought both work great!)
- 12 wooden sticks – The short dessert kind that won’t poke through your apple slices
The Fun Stuff (Toppings Galore!)
- Crushed nuts – Pecans, peanuts, or almonds add the perfect crunch
- Mini chocolate chips – Because chocolate makes everything better, right?
- Sprinkles – For when you want that festive party look
- Crushed cookies – Try graham crackers or Oreos for extra decadence
- Shredded coconut – Adds a tropical twist that’s surprisingly delicious
See? Nothing fussy here – just simple ingredients that transform into something magical. Now let’s get to the fun part!
How to Make Caramel Apple Slices
Alright, let’s dive into the fun part – making these irresistible caramel apple slices! I promise, it’s easier than carving a pumpkin. Just follow these simple steps and you’ll have perfect party-ready treats in no time.
Step 1: Prep Those Apples
First things first – grab your apples, give them a good wash, and slice them into wedges. I aim for about 8-10 wedges per apple, depending on size. Here’s my pro tip: immediately toss them in that lemon juice we talked about. This keeps them looking fresh and prevents that sad, brown discoloration. Spread them out on a clean towel and gently pat dry – moisture is caramel’s enemy!
Step 2: Stick It To ‘Em
Now for the most satisfying part – inserting those wooden sticks! Push them about halfway into the rounded side of each apple wedge. Make sure they’re secure but not poking through the other side. If your sticks are being stubborn, give them a little twist as you push. Works like a charm!
Step 3: Caramel Time!
Warm your caramel sauce until it’s smooth and dippable (about 30 seconds in the microwave usually does it). Here’s where I learned a game-changing trick from my perfect caramel apples guide: dip the apple slice halfway, then hold it upside down for a few seconds to let excess caramel drip off. This prevents that annoying “caramel puddle” at the bottom later.
Step 4: Toppings Extravaganza
While the caramel’s still warm and sticky, roll or sprinkle on your toppings. I like to do this over a baking sheet to catch any mess. Pro tip: if you’re using multiple toppings, press them gently into the caramel with your fingers so they really stick.

Step 5: Let Them Set
Finally, place your decorated slices on parchment paper and let them set for about 10 minutes. This gives the caramel time to firm up just enough so the toppings won’t slide off, but stays soft enough for that perfect bite. And voila! You’ve just made the easiest, most impressive fall treat ever.
See? I told you it was simple. Now let’s talk about how to make them absolutely foolproof!
Tips for Perfect Caramel Apple Slices
Alright, let me share all my hard-earned tricks for perfect caramel apple slices every single time. These little tips make all the difference between “oh that’s nice” and “WOW, these are amazing!”
First up – use cold apples straight from the fridge. I know it sounds weird, but trust me, the chill helps the caramel set faster so it doesn’t slide right off. While we’re talking apples, pat them absolutely dry before dipping – any water droplets will make the caramel separate before you can say “autumn harvest”.
If your caramel starts sliding down the apples (we’ve all been there!), pop those babies in the fridge for 5 minutes to firm up. And speaking of fridges – store any leftovers there too in an airtight container. They’ll stay fresh for about 2 days (though let’s be real, they never last that long at my house).
One last pro tip? If you’re prepping ahead, keep your naked apple slices in cold water with a splash of lemon juice until showtime. They’ll stay fresh and crisp for hours before dipping!
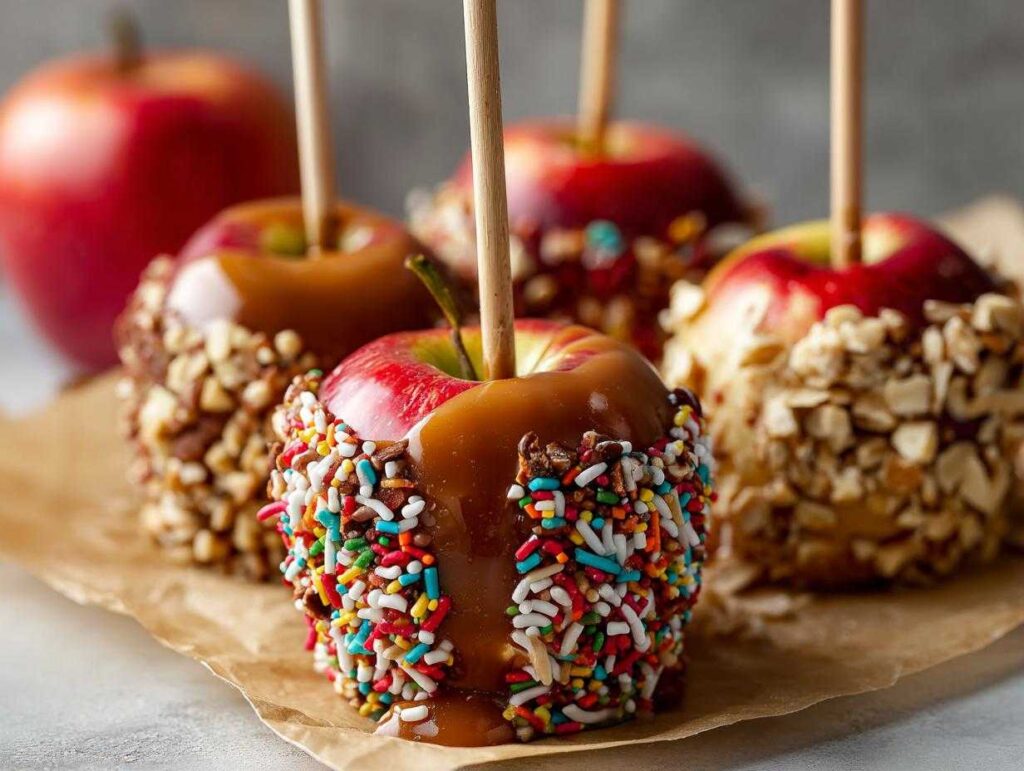
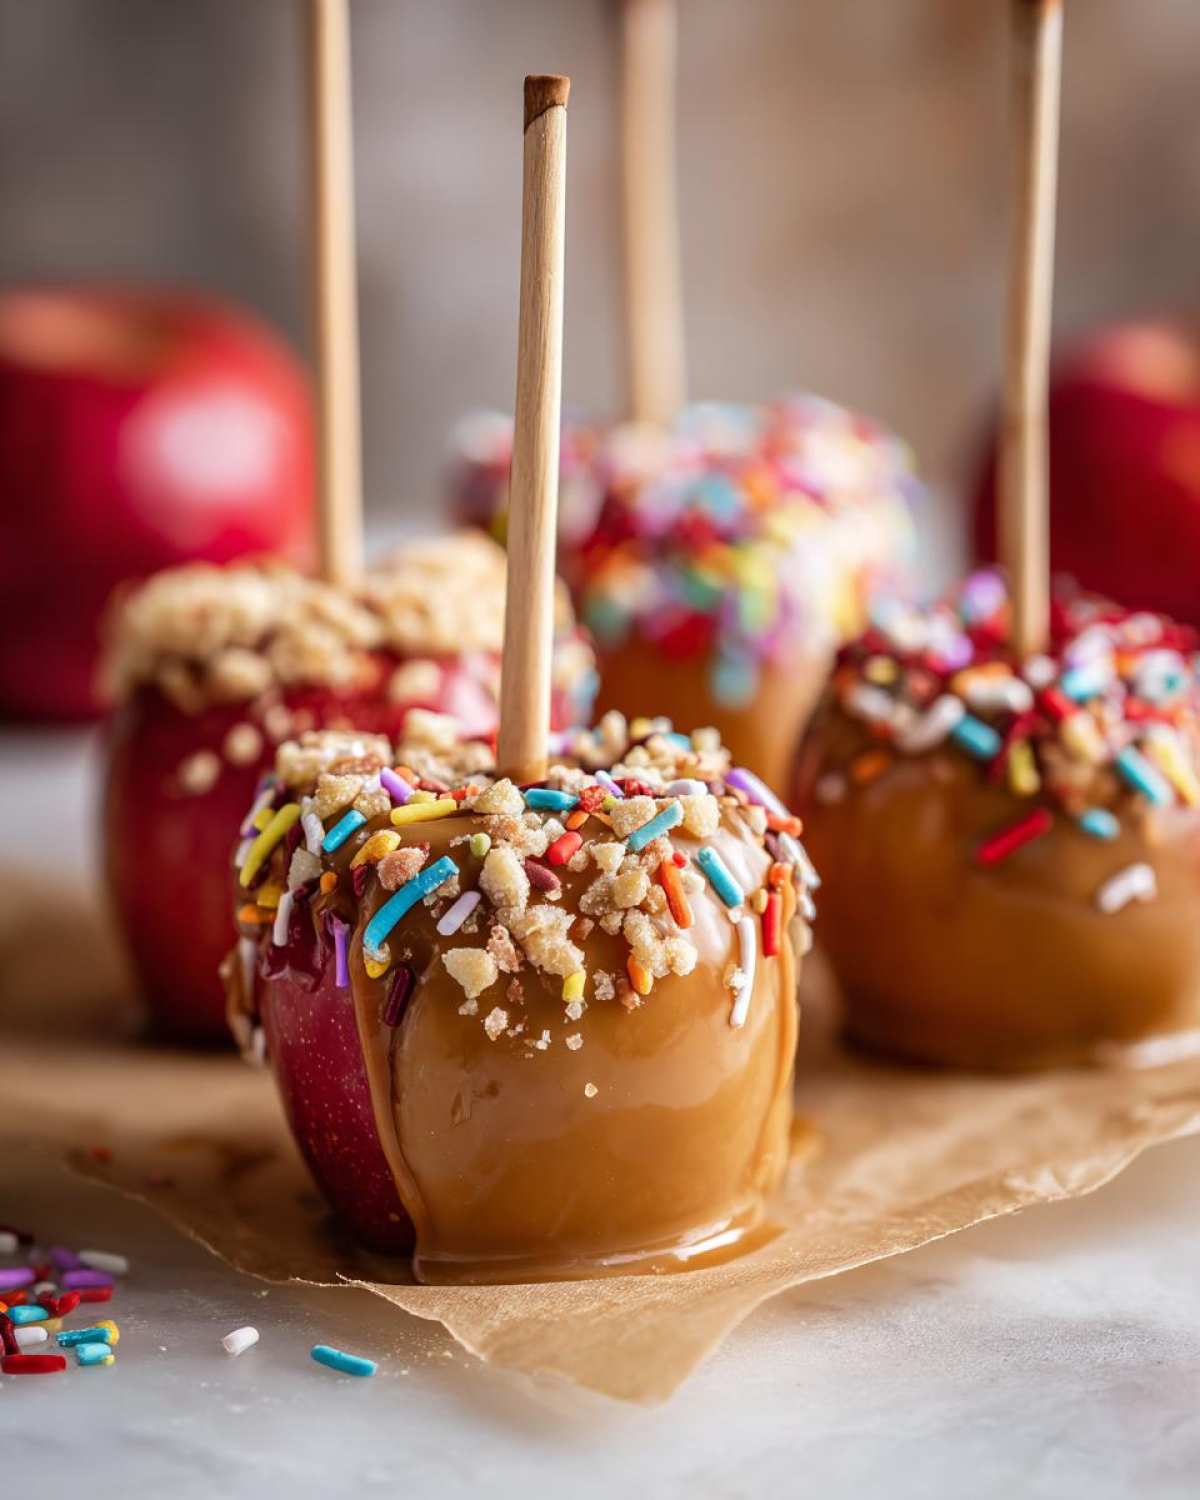
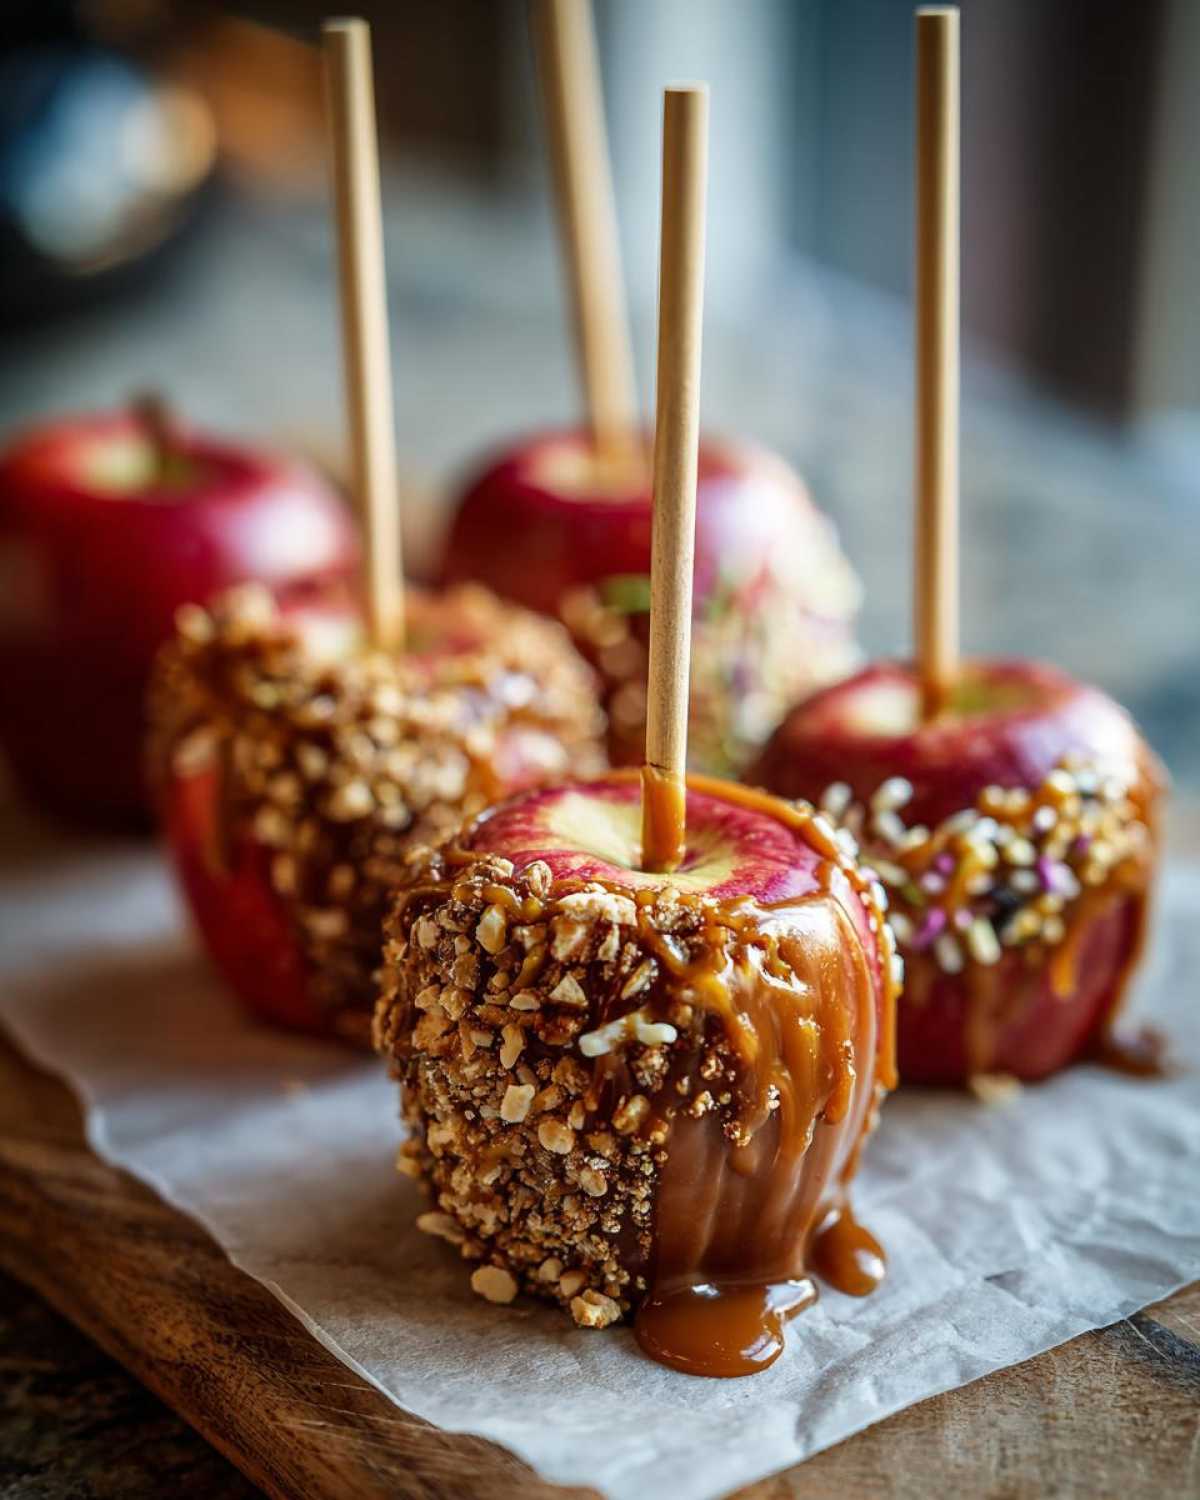
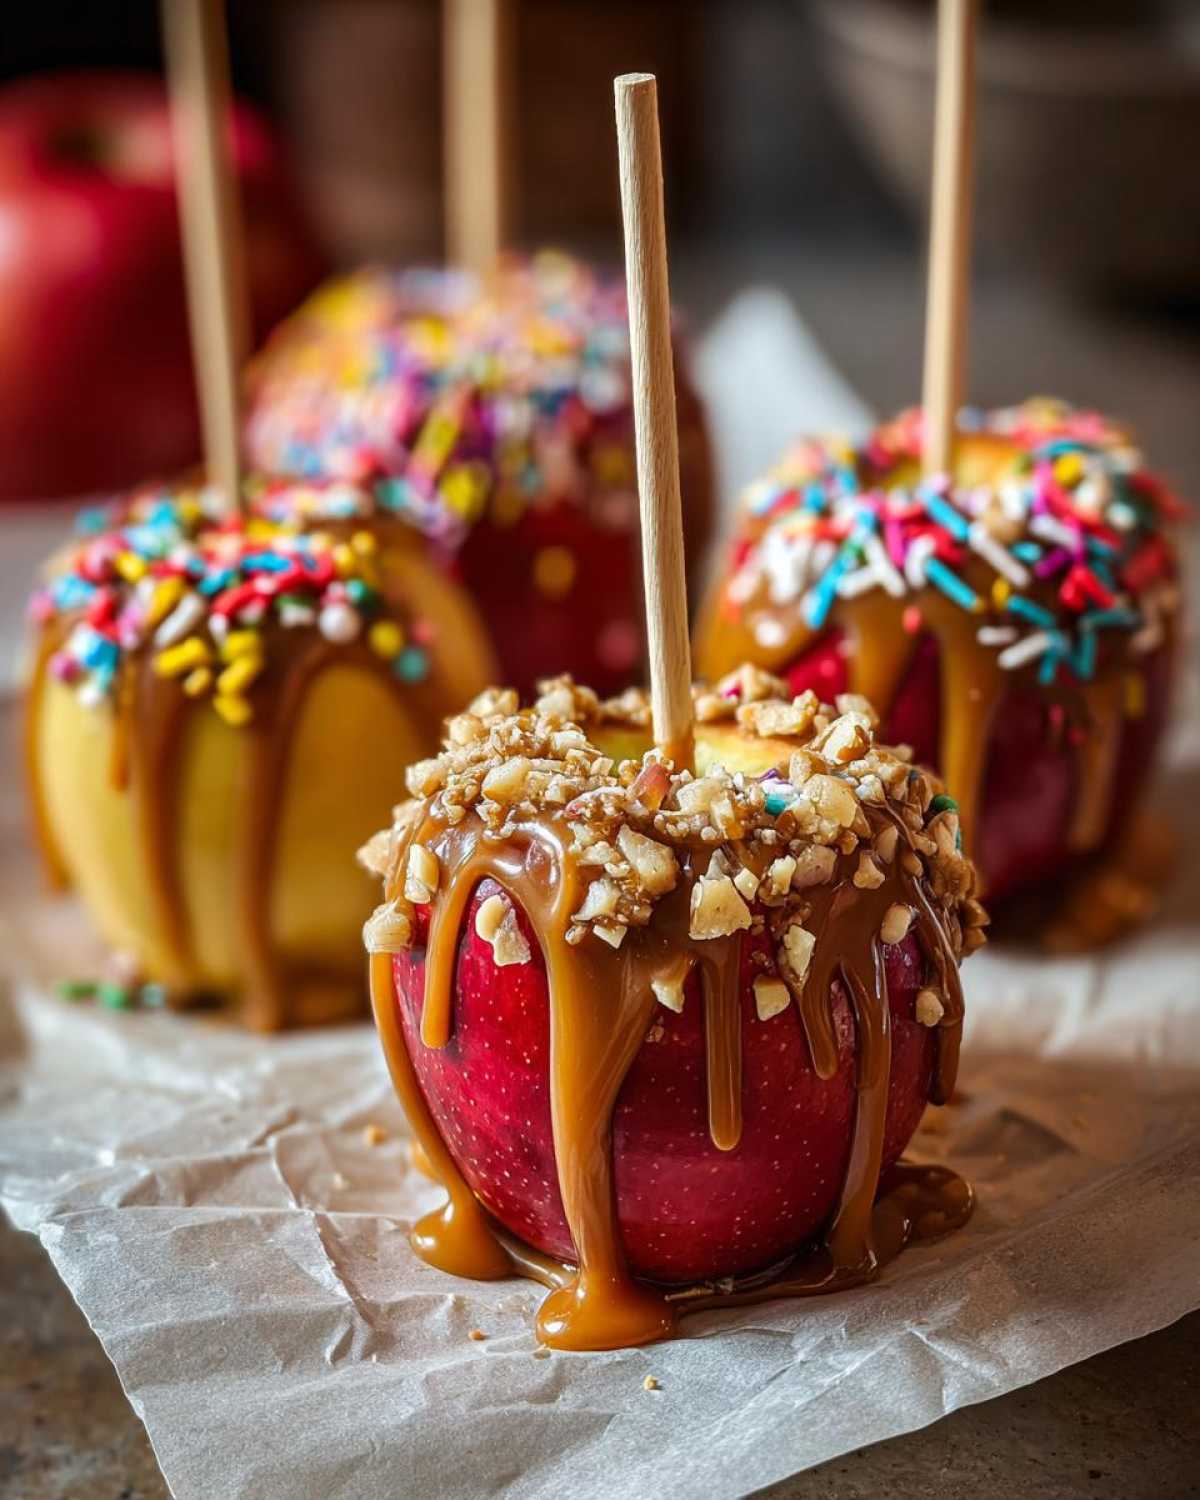
Toppings Bar Ideas for Caramel Apple Slices
Alright, let’s get creative with toppings! The best part about these caramel apple slices is how you can turn them into your own edible art project. Here’s my must-try combo list that’s always a hit at parties:
Classic Crunch: Chopped peanuts, toffee bits, and a sprinkle of sea salt – simple but oh-so-perfect!
Festive Fun: Rainbow sprinkles plus mini chocolate chips for that birthday-cake-meets-autumn vibe (kids go nuts for this one).
Cookie Monster Special: Crushed Oreos or graham crackers pressed into the caramel – sweet with just the right texture. Check out my caramel apple bar inspiration for more cookie combos!
Extra Indulgent: Melted chocolate drizzle over your toppings, then another sprinkle of whatever you used – double the flavor, double the fun!
The secret? Mix textures and flavors – sweet with salty, smooth with crunchy. Let your guests go wild and create their own masterpieces. I usually set out small bowls with 5-6 topping options, and watch the magic happen!
Storage and Serving Suggestions
Here’s the good news – if by some miracle you have leftovers (which rarely happens at my parties!), these caramel apple slices keep beautifully in the fridge for about 2 days. Just pop them in an airtight container with parchment between layers so they don’t stick together.
For serving, I love arranging them on a rustic wooden board for fall gatherings or lining them up on a spooky platter for Halloween. They make perfect finger food for everything from harvest festivals to tailgate parties – just watch them disappear! Pro tip: Label different topping combinations so guests know what flavor explosions they’re in for.
Nutritional Information
Now, let’s talk numbers – but don’t worry, we’re keeping it real simple! Each caramel apple slice packs about 120 calories with 18g of sugar (hey, it’s a treat!). You’re looking at 3g fat, 25g carbs, and 1g protein per slice. Of course, these values can change depending on your toppings – sprinkle lovers, I’m looking at you! These estimates are based on using store-bought caramel and a light coating of chopped nuts. Just remember – it’s all about balance! One of these slices makes a perfect sweet ending to a healthy meal.
Frequently Asked Questions
Can I use store-bought caramel sauce?
Absolutely! I’ve used both homemade and store-bought caramel with great results. The key is warming it just until it’s smooth and dippable – about 30 seconds in the microwave usually does the trick. My secret? Give it a quick stir halfway through heating to prevent hotspots. Honestly, those little caramel bits in the baking aisle work perfectly when you’re in a pinch for time during all that fall party planning!
How do I prevent my apple slices from browning?
That lemon juice is your best friend here! Just toss your apple wedges in a bowl with 1 tablespoon lemon juice and 1 cup cold water – it creates a protective layer that keeps them fresh-looking for hours. I’ve even left prepped slices this way overnight (stored in the fridge) and they still looked perfect for dipping the next day. Pro tip: Dunk them just before guests arrive if you want that picture-perfect fresh look for your Halloween snacks!
Can I make these caramel apple slices ahead of time?
You sure can, but there’s a catch. The caramel holds up beautifully for 2 days in the fridge, but the apples might soften slightly. Here’s my game plan: prep all components separately (store apples in lemon water, caramel in a container), then assemble about an hour before serving. Quick assembly means fresh, crisp results – though I won’t judge if you sneak a few “test” slices! For more make-ahead dessert ideas, check out my favorite fall party hacks.
What’s the best way to serve these at parties?
The toppings bar is half the fun! I like to arrange the undecorated slices on a platter with small bowls of toppings in between – it becomes an interactive dessert station that keeps guests entertained. For school parties, I pre-dip half in caramel and set up a “decorate your own” table with kid-friendly toppings like sprinkles and mini M&Ms. They disappear faster than ghosts on Halloween night!
Share Your Caramel Apple Slices
I’d love to see your caramel apple slice creations! Snap a pic of your masterpiece (or that adorable moment when your kids go wild with the toppings) and share it with me – it makes my day to see everyone’s sweet inventions. Don’t forget to rate the recipe below if you loved it as much as my family does. Trust me, your ratings help more people discover these easy party treats. Now go make some fall memories and let’s get this caramel apple party started!
PrintCaramel Apple Slices

Easy party-friendly caramel-dipped apple wedges with a toppings bar. Perfect for fall festivals and Halloween treats.
- Prep Time: 15 min
- Cook Time: 5 min
- Total Time: 20 min
- Yield: 12 slices 1x
- Category: Dessert
- Method: No-Bake
- Cuisine: American
- Diet: Vegetarian
Ingredients
- 4 medium apples
- 1 cup caramel sauce
- 12 wooden sticks
- Assorted toppings (sprinkles, crushed nuts, mini chocolate chips)
- 1 tbsp lemon juice (to prevent browning)
Instructions
- Wash and slice apples into wedges. Dip in lemon juice to prevent browning.
- Insert a wooden stick into each apple wedge.
- Heat caramel sauce until smooth. Dip each apple slice halfway into caramel.
- Roll in toppings while caramel is still warm.
- Place on parchment paper to set for 10 minutes.
Notes
- Use cold apples for better caramel adhesion.
- Pat apples dry before dipping to prevent caramel from sliding.
- Store in the fridge if not serving immediately.
Nutrition
- Serving Size: 1 slice
- Calories: 120
- Sugar: 18g
- Sodium: 45mg
- Fat: 3g
- Saturated Fat: 1g
- Unsaturated Fat: 2g
- Trans Fat: 0g
- Carbohydrates: 25g
- Fiber: 2g
- Protein: 1g
- Cholesterol: 5mg