
The minute the first snowflake falls, my kitchen turns into Santa’s workshop, and nothing says Christmas quite like candy cane cookies. I remember being five years old, standing on a stool next to my grandma, our hands sticky with red and white dough as we twisted them into crooked little canes. She’d always let me sneak a pinch of peppermint-scented dough while the grownups weren’t looking. Now, decades later, I still make these every December—that perfect swirl of snowy white and cherry red never fails to make my cookie trays the star of holiday parties. The peppermint zing? Absolute magic—like Christmas morning in every bite.

Why You’ll Love These Candy Cane Cookies
These candy cane cookies aren’t just pretty faces—they pack a whole lot of holiday joy into every bite! Here’s why they’ll become your new Christmas staple:
- Festive showstoppers: Those perfect red-and-white swirls look like they jumped straight off a holiday card onto your cookie tray
- Peppermint perfection: Just enough cool, refreshing flavor to make your taste buds dance—without tasting like toothpaste!
- Surprisingly simple: No fancy piping skills needed—just twist and shape the dough like playdough (but way tastier)
- Cookie exchange gold: These beauties always disappear first at holiday swaps (pro tip: make extra for your secret stash)
- Kid-approved magic: Little hands love helping shape the dough—makes for sweet family memories and adorable lopsided canes
Honestly? I start craving these the moment I unpack my Christmas decorations. That pepperminty aroma filling the kitchen? Pure holiday happiness.
Ingredients for Candy Cane Cookies
Gathering the right ingredients is half the magic when making these festive candy cane cookies! I’ve learned through years of holiday baking that quality matters – especially with peppermint flavor. Here’s everything you’ll need to create these showstopping treats:

- Dough Base:
- 1 cup unsalted butter, softened (seriously, take it out at least an hour before – I learned this the hard way!)
- 1 cup granulated sugar
- 1 large egg (room temperature blends better)
- 1 tsp vanilla extract
- 1/2 tsp peppermint extract (get the good stuff – it makes all the difference)
- Dry Ingredients:
- 3 cups all-purpose flour (I scoop and level for perfect results every time)
- 1/2 tsp salt
- 1/2 tsp baking powder
- For Color:
- Red gel food coloring (trust me, gel gives that vibrant holiday red without watering down your dough – my go-to Christmas cookie hack)
See? Nothing too fancy! With simple pantry staples and smart meal planning, you can whip up several batches of these beauties for all your holiday gatherings. I always double the recipe – they disappear faster than snowflakes on a warm roof!
How to Make Candy Cane Cookies
Roll up your sleeves – we’re making magic! I’ve shaped hundreds of these candy cane cookies over the years, and I’ve discovered all the little tricks to getting that perfect swirl. Follow these steps, and you’ll have cookie tray superstars in no time:
- Cream like you mean it: Beat that softened butter and sugar together until it’s light and fluffy – about 3 minutes with a mixer. This creates air pockets for the perfect tender bite. Scrape the bowl halfway through; don’t let any lumps hide in the corners!
- Flavor party: Crack in the egg (make sure it’s room temp!) and add both extracts. The vanilla rounds out the peppermint beautifully – you’ll smell Christmas in that bowl.
- Dry team assembles: Whisk together flour, salt, and baking powder in another bowl. Gradually add it to the wet ingredients, mixing just until combined. Overmixing makes tough cookies, and we want melt-in-your-mouth tender, just like these whipped shortbread cookies.
- Color divide: Split the dough in half. Leave one plain (our snowy white) and knead in red gel coloring to the other half. Wear gloves unless you want Rudolph-red fingers for days!
- Twist and shout: Pinch off teaspoon-sized bits of each color, roll them into 4-inch ropes, then twist together gently. Curve into canes – they’ll firm up as they bake, so don’t stress perfection.
- Bake it up: 350°F for 10-12 minutes does the trick. The edges should just barely golden, but the centers stay soft. Let them cool completely before adding any icing drizzle – patience makes pretty cookies!
See? Not scary at all! The hardest part is waiting for them to cool before sneaking a taste. Pro tip: Make a double batch while you’re at it – these disappear faster than wrapping paper on Christmas morning!
Tips for Perfect Candy Cane Cookies
After years of making these peppermint treasures (and a few hilarious dough disasters), I’ve gathered all the secrets to candy cane cookie perfection. These little tricks will take your holiday baking from “oh no” to “ho ho ho!” in no time:
- Chill out: If your dough feels sticky after coloring, pop it in the fridge for 30 minutes. Cold dough holds its shape better when twisting – no floppy canes allowed!
- Go gel: Liquid food coloring makes dough too wet. Gel gives that vibrant holiday red without messing up your dough’s consistency (plus you’ll use way less!).
- Gentle hands: When twisting those red and white ropes, don’t squeeze too tight – you want defined swirls, not muddy pink dough. I pretend I’m handling fragile ornaments.
- Spread out: Give your candy cane cookies about 2 inches of breathing room on the baking sheet. They won’t spread much, but nobody wants conjoined Christmas canes!
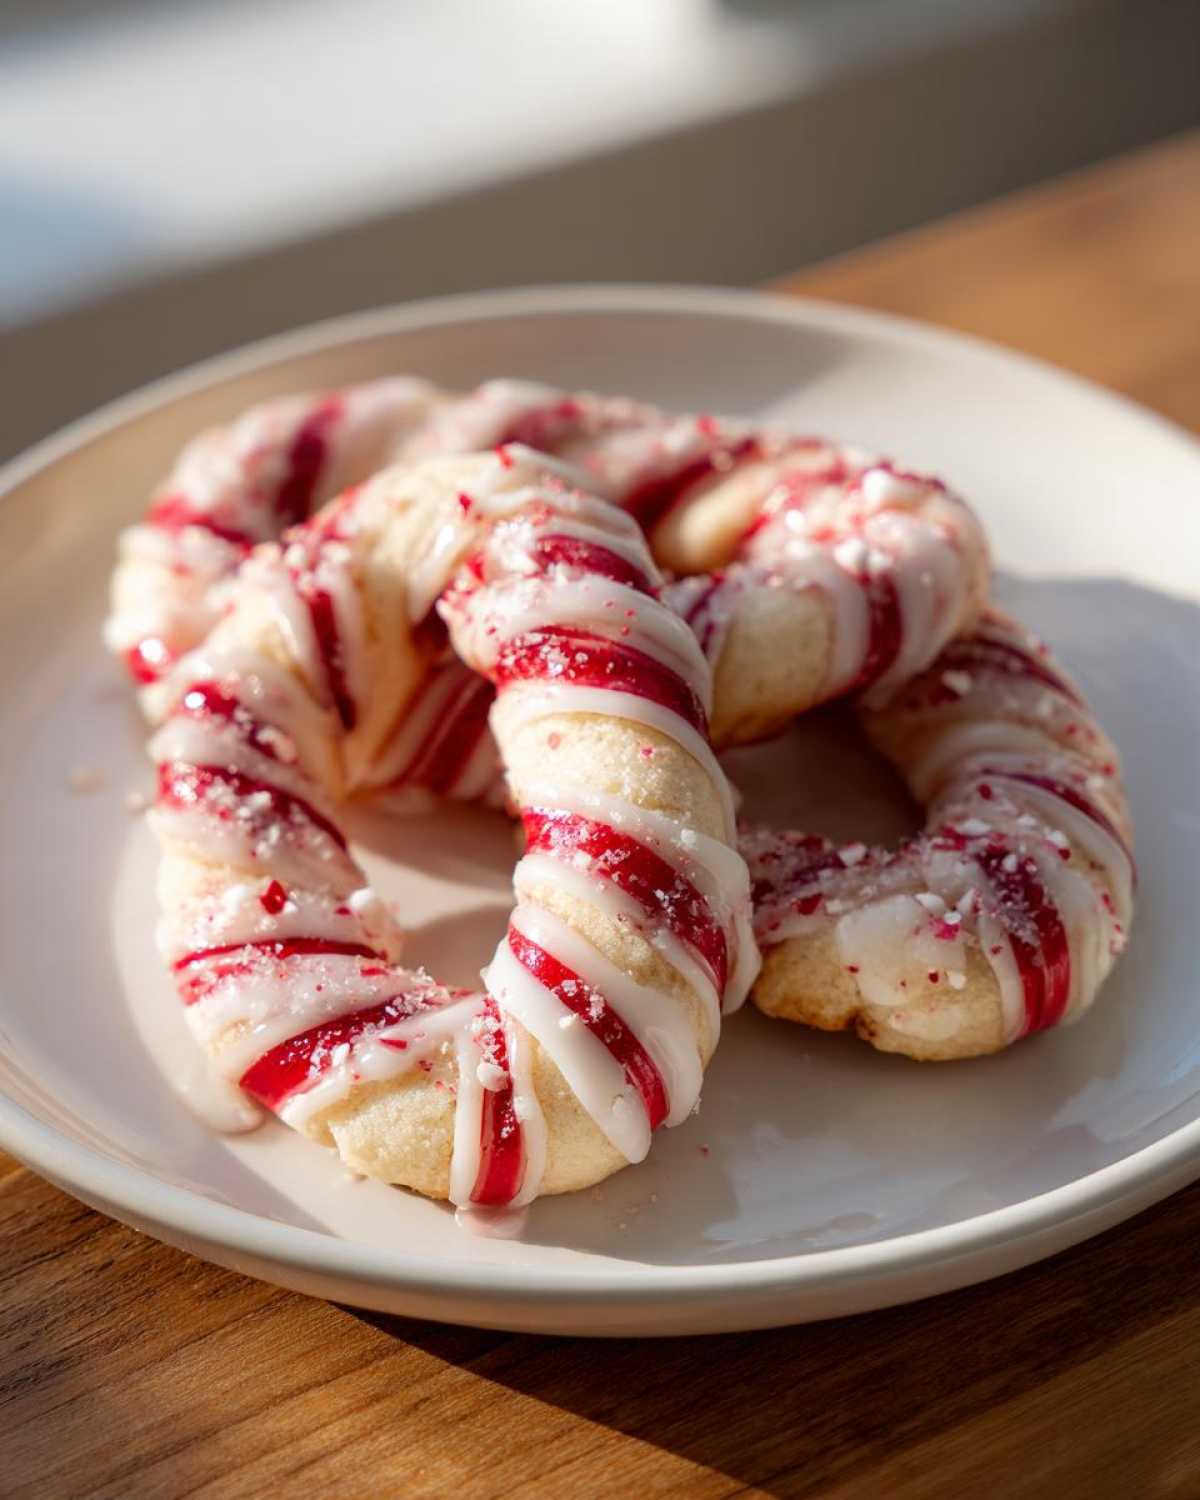
- Drizzle magic: For extra holiday sparkle, dip a fork in thin powdered sugar icing and zigzag it over cooled cookies. The glossy finish makes them look straight from a bakery window.

Remember – even the wonkiest candy cane cookies taste amazing! The real magic is in making them with someone you love. Now go forth and bake up some Christmas joy!
FAQs About Candy Cane Cookies
Can I freeze the dough for these peppermint cookies?
Absolutely! These candy cane cookie dough portions freeze beautifully. After dividing and coloring, wrap both the red and white doughs tightly in plastic wrap, then pop them in a freezer bag. They’ll keep for up to 3 months – perfect for holiday meal planning! Thaw in the fridge overnight when you’re ready to bake (no countertop thawing or the dough gets too sticky).
What’s the best way to store these Christmas cookies?
My grandma taught me to layer the cooled cookies between sheets of parchment in an airtight container. They’ll stay fresh and soft for up to a week at room temperature! If you added icing drizzle, let it set completely before stacking. For gifting, pretty tins with wax paper separators keep them looking bakery-fresh.
Can I use natural food coloring for these red and white cookies?
You sure can, though the color won’t be as vibrant. Beet powder works surprisingly well – start with 2 teaspoons kneaded into half the dough. Just know your candy canes will have a softer pink hue rather than that classic Christmas red. The peppermint flavor still shines through beautifully though!
How do I prevent my festive cookies from spreading?
Two secrets: First, make sure your butter is softened but still cool (not melty). Second, if your kitchen’s warm, chill your shaped cookies for 10 minutes before baking. My dough sometimes gets sticky during marathon cookie-baking sessions – a quick fridge visit fixes everything! These cookies spread less than most, but proper dough temp keeps those swirls picture-perfect.
Can I make these ahead for a cookie exchange?
These are my go-to for holiday swaps! Bake them up to 3 days before your event – the peppermint flavor actually deepens over time. Store properly and they’ll still taste fresh. Pro tip: Add the icing drizzle the morning of your exchange so it stays glossy. Nobody will believe you didn’t slave over them that day!
Nutritional Information
Just a quick note – these numbers are estimates based on standard ingredients. Your exact counts might vary slightly depending on brands and tweaks to the recipe. Each adorable candy cane cookie comes to about:
- 120 calories
- 8g sugar
- 6g fat
Perfectly reasonable for a holiday treat! (Says me as I eat my fourth one while wrapping presents…)
More Festive Cookie Ideas
If you loved these candy cane cookies, wait until you try my other holiday favorites! Our soft apple cider cookies with cinnamon glaze are pure autumnal bliss, while these candied orange slices make stunning edible decorations. For more festive inspiration, check out my cookie boards on Pinterest – I’m always adding new holiday baking ideas!
PrintCandy Cane Cookies

Festive red and white peppermint cookies shaped like candy canes, perfect for holiday trays and cookie exchanges.
- Prep Time: 20 min
- Cook Time: 12 min
- Total Time: 32 min
- Yield: 24 cookies 1x
- Category: Dessert
- Method: Baking
- Cuisine: American
- Diet: Vegetarian
Ingredients
- 1 cup unsalted butter, softened
- 1 cup granulated sugar
- 1 large egg
- 1 tsp vanilla extract
- 1/2 tsp peppermint extract
- 3 cups all-purpose flour
- 1/2 tsp salt
- 1/2 tsp baking powder
- Red food coloring
Instructions
- Preheat oven to 350°F (175°C). Line baking sheets with parchment paper.
- In a large bowl, cream butter and sugar until light and fluffy. Beat in egg, vanilla, and peppermint extract.
- In another bowl, whisk flour, salt, and baking powder. Gradually add to the butter mixture, mixing until combined.
- Divide dough in half. Tint one half red with food coloring.
- Roll small pieces of each dough into ropes. Twist red and white ropes together and shape into candy canes.
- Bake for 10-12 minutes or until edges are lightly golden. Cool on wire racks.
Notes
- Chill dough for 30 minutes if it’s too soft to shape.
- Use gel food coloring for vibrant color.
- Drizzle with icing for extra shine.
Nutrition
- Serving Size: 1 cookie
- Calories: 120
- Sugar: 8g
- Sodium: 50mg
- Fat: 6g
- Saturated Fat: 4g
- Unsaturated Fat: 2g
- Trans Fat: 0g
- Carbohydrates: 15g
- Fiber: 0g
- Protein: 1g
- Cholesterol: 20mg