Nothing says “holiday magic” quite like seeing those glossy, jewel-toned candied orange slices piled high on a cake stand or twinkling on a cookie tray. I still remember my first Christmas helping my grandmother make these sugared citrus wonders – the way the kitchen filled with that sweet citrus perfume while we lovingly turned each slice in the simmering syrup. Those candied orange slices became more than just garnish in our family – they decorated our gingerbread houses, dangled from ribbon on the tree, and even found their way into my Aunt Margie’s famous homemade fudge.
These little edible gems are perfect for so many reasons. Their slightly chewy texture and delicate citrusy sweetness make them ideal cake toppers, cocktail garnishes, or simply nibbles straight from the jar. And when dipped in dark chocolate? Oh my – suddenly you’ve got the most elegant homemade food gift that looks like it came from an expensive chocolatier. What I love most is how these versatile slices bridge the gap between decoration and dessert. One batch can adorn your holiday table and satisfy sweet cravings all season long.
The process couldn’t be simpler – just oranges, sugar syrup, and patience while they dry into those perfect translucent slices. But the results? Absolute holiday magic every time.
Why You’ll Love These Candied Orange Slices
Let me tell you why these little citrus gems will become your new holiday obsession:
- That gorgeous glass-like shine – When light hits these candied slices just right, they glow like stained glass! The syrup creates this magical translucent effect that makes every bite special.
- Total two-in-one magic – They’re dessert and decoration in one! Top cakes, float them in cocktails, or string them for edible ornaments.
- Impressively simple – Just simmer, dry, and voilà! No fancy skills needed – I taught my 8-year-old niece to make these last Christmas.
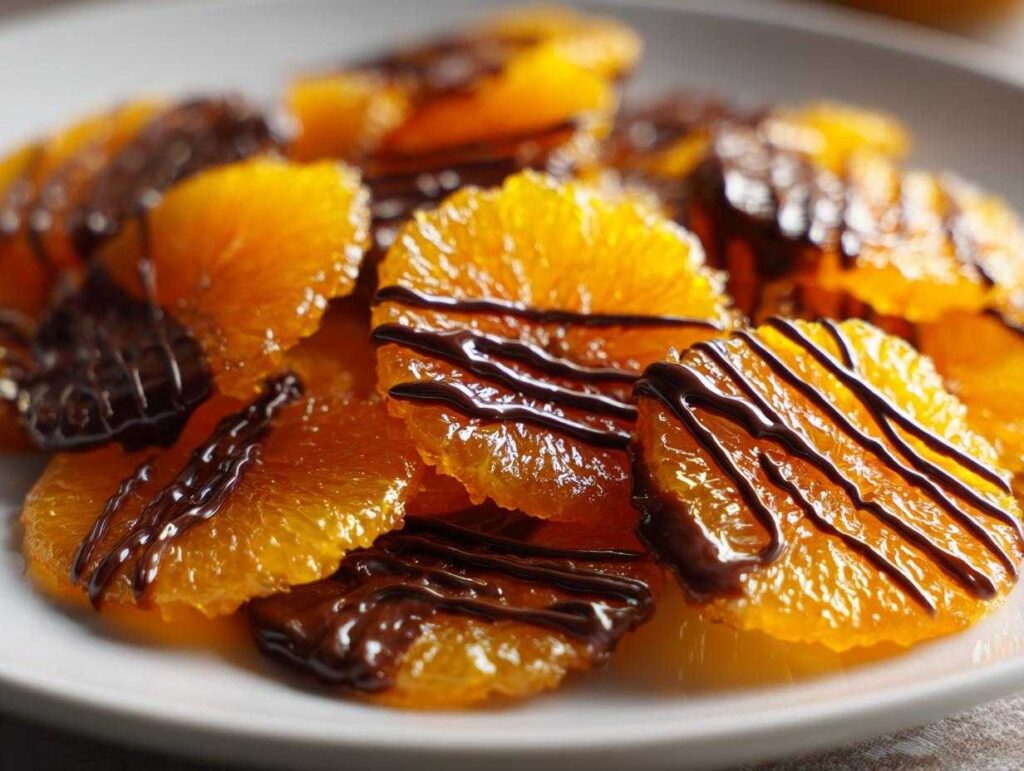
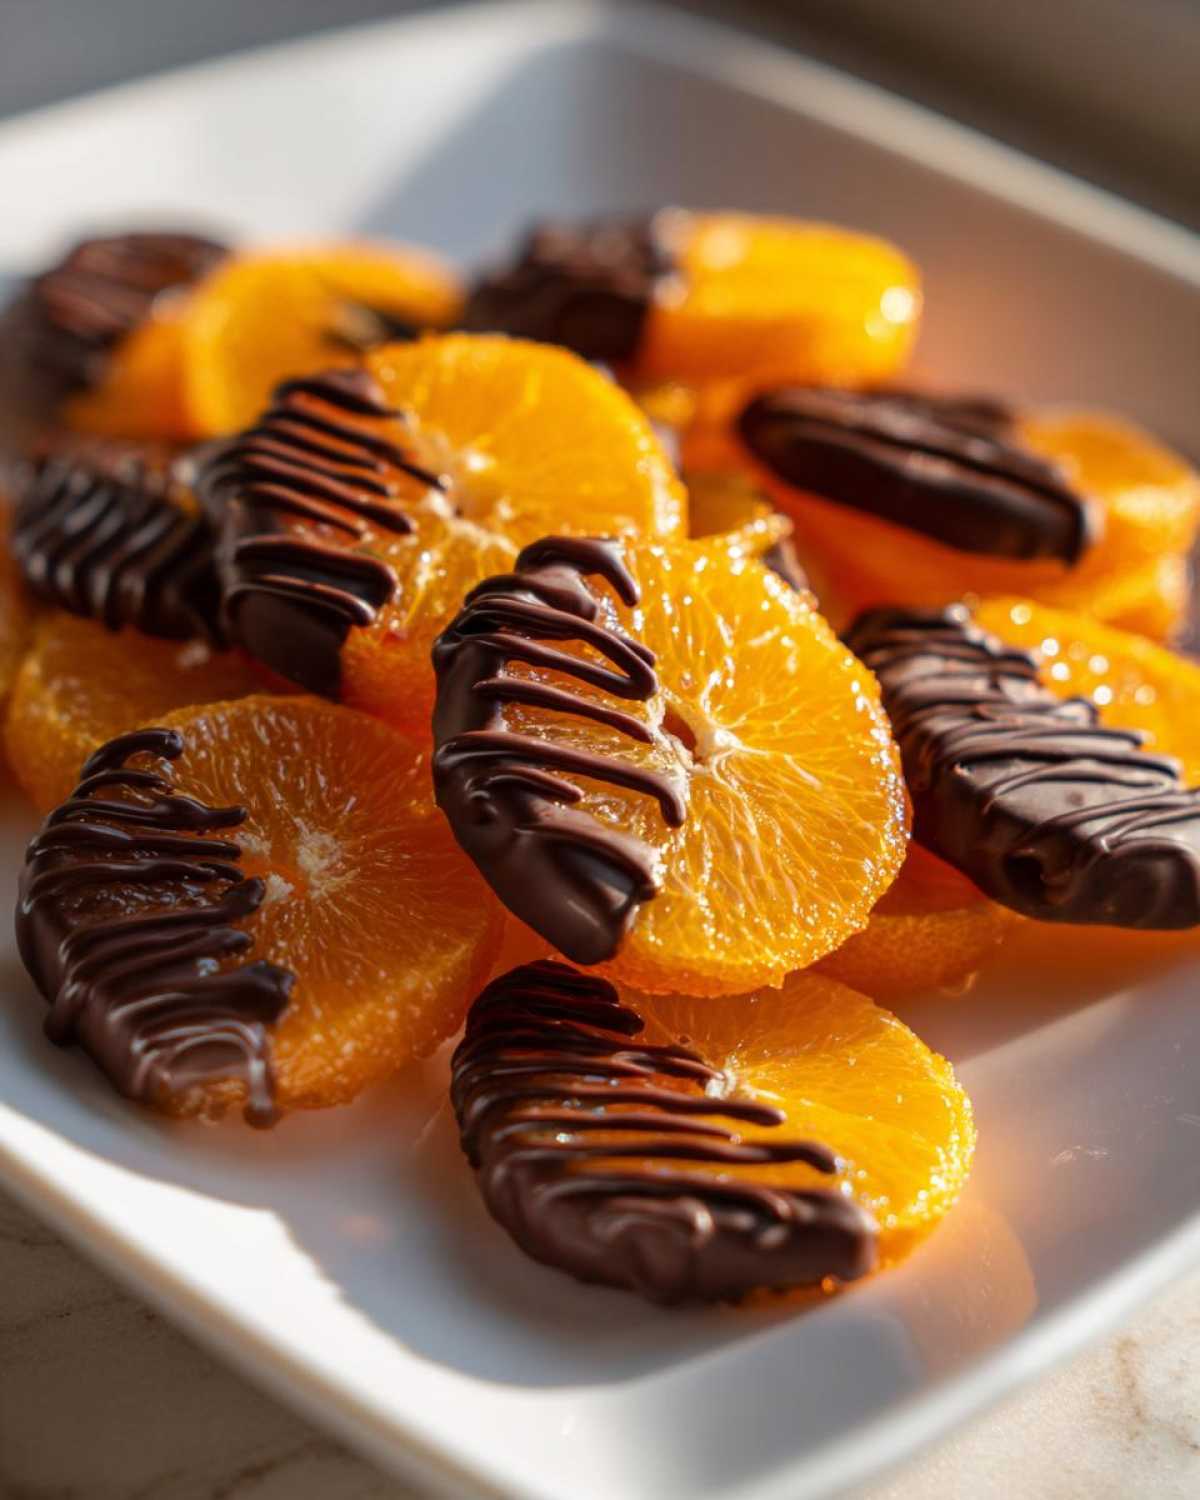
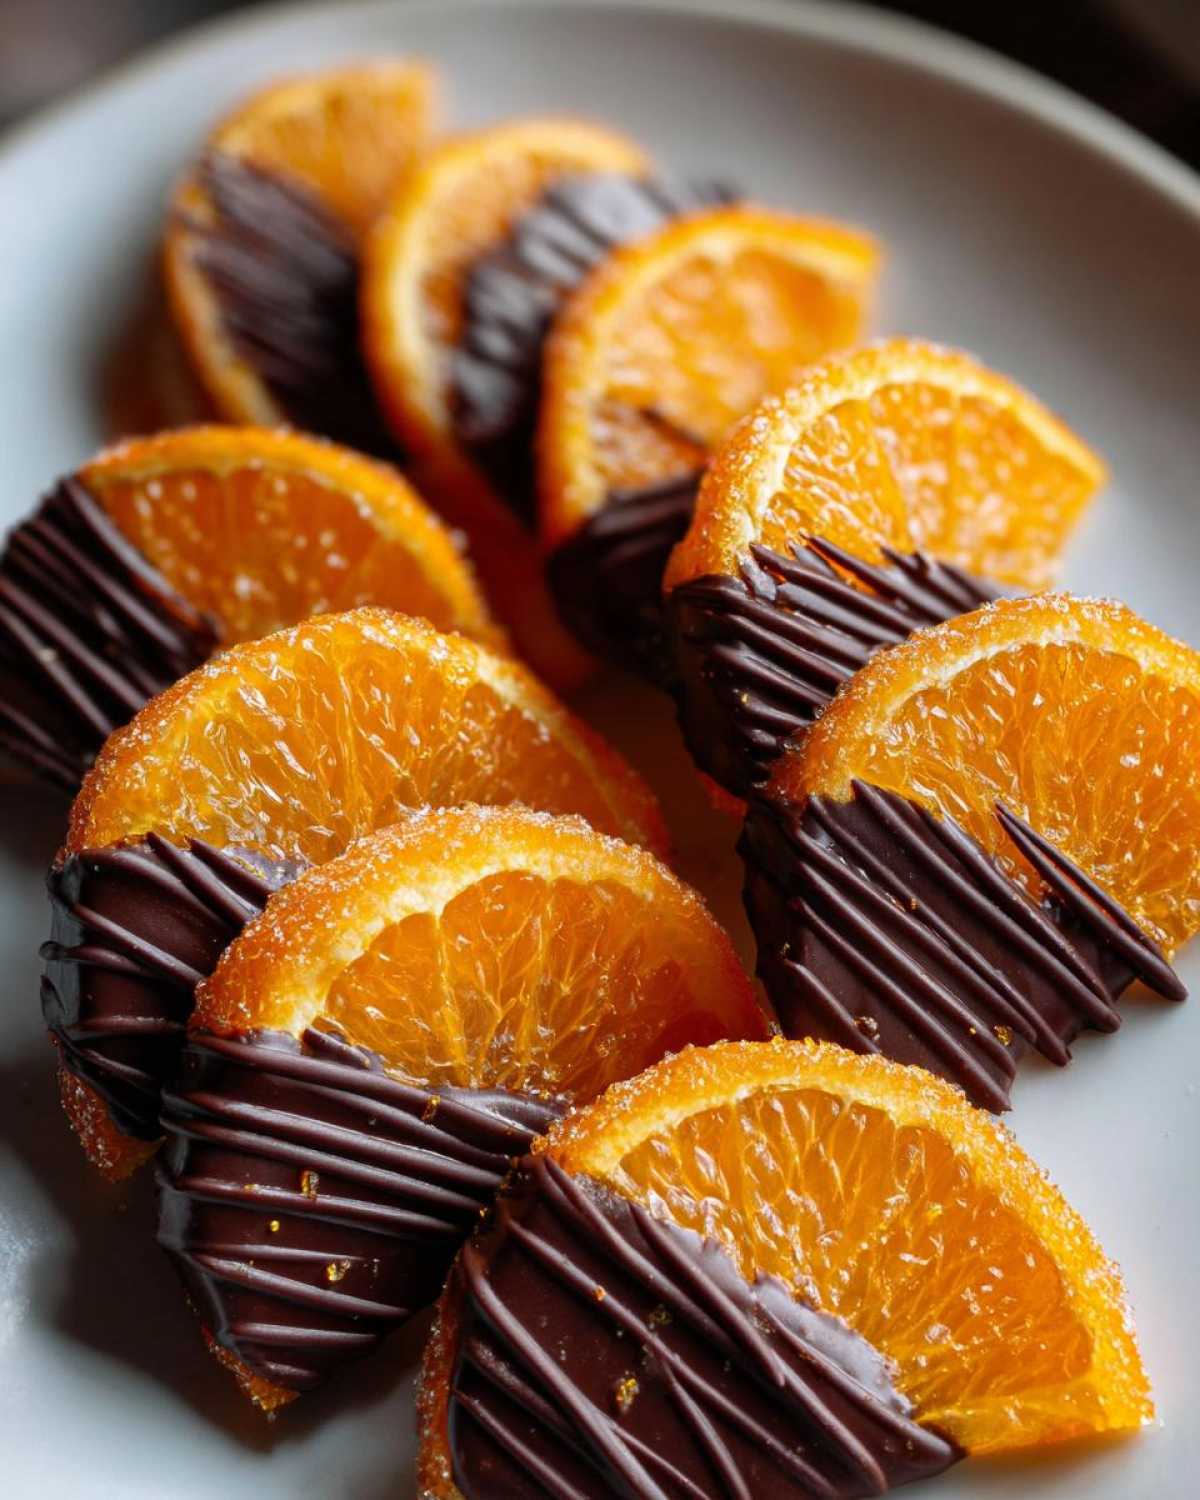
- Gift-giving gold – Pack them in pretty boxes with our homemade fudge and watch everyone swoon. (Pro tip: chocolate-dipped slices look extra fancy!)
- Endless creativity – Roll some in sparkling sugar for holiday sparkle, leave others au naturel, or go wild with dark chocolate drizzles!
Trust me, once you see how these bright, chewy treats transform ordinary desserts into something extraordinary, you’ll be hooked just like I am!
Ingredients for Candied Orange Slices
You’re going to love how simple this ingredient list is! Here’s everything you’ll need to create those gorgeous glossy slices (plus a few fun extras if you want to get fancy):
- 2 large oranges – Look for ones with unblemished skins since we’re using the whole slice (trust me, organic tastes best here)
- 1 cup granulated sugar – Plain white sugar works perfectly to create that glass-like syrup
- 1 cup water – Just regular tap water is fine
For decorating (optional but oh-so-pretty):
- 1/2 cup sanding sugar – The chunky sparkling kind that makes them look like frosted glass
- 4 oz dark chocolate, melted – About one standard chocolate bar for dipping (use your favorite brand!)
See? Even with the optional add-ons, we’re only working with 5 simple ingredients. The magic really happens in the technique – just wait until you see how these basics transform!
How to Make Candied Orange Slices
Okay friends, get ready to make some magical citrus gems! This process is easier than you think, and I’ll walk you through each step. Just imagine – in about an afternoon, you’ll have gorgeous, glossy slices perfect for decorating or dunking in chocolate. (Warning: Your kitchen is about to smell amazing!)
Preparing the Orange Slices
First things first – let’s get those oranges sliced perfectly. I always use a mandoline for paper-thin, even slices (about 1/4-inch thick). It makes all the difference! No mandoline? No worries – just slice carefully with your sharpest knife. Either way, don’t forget to pick out any seeds with the tip of a knife – we want smooth, flawless slices. Pro tip: Thicker slices hold their shape better for decorating cakes!
Simmering in Syrup
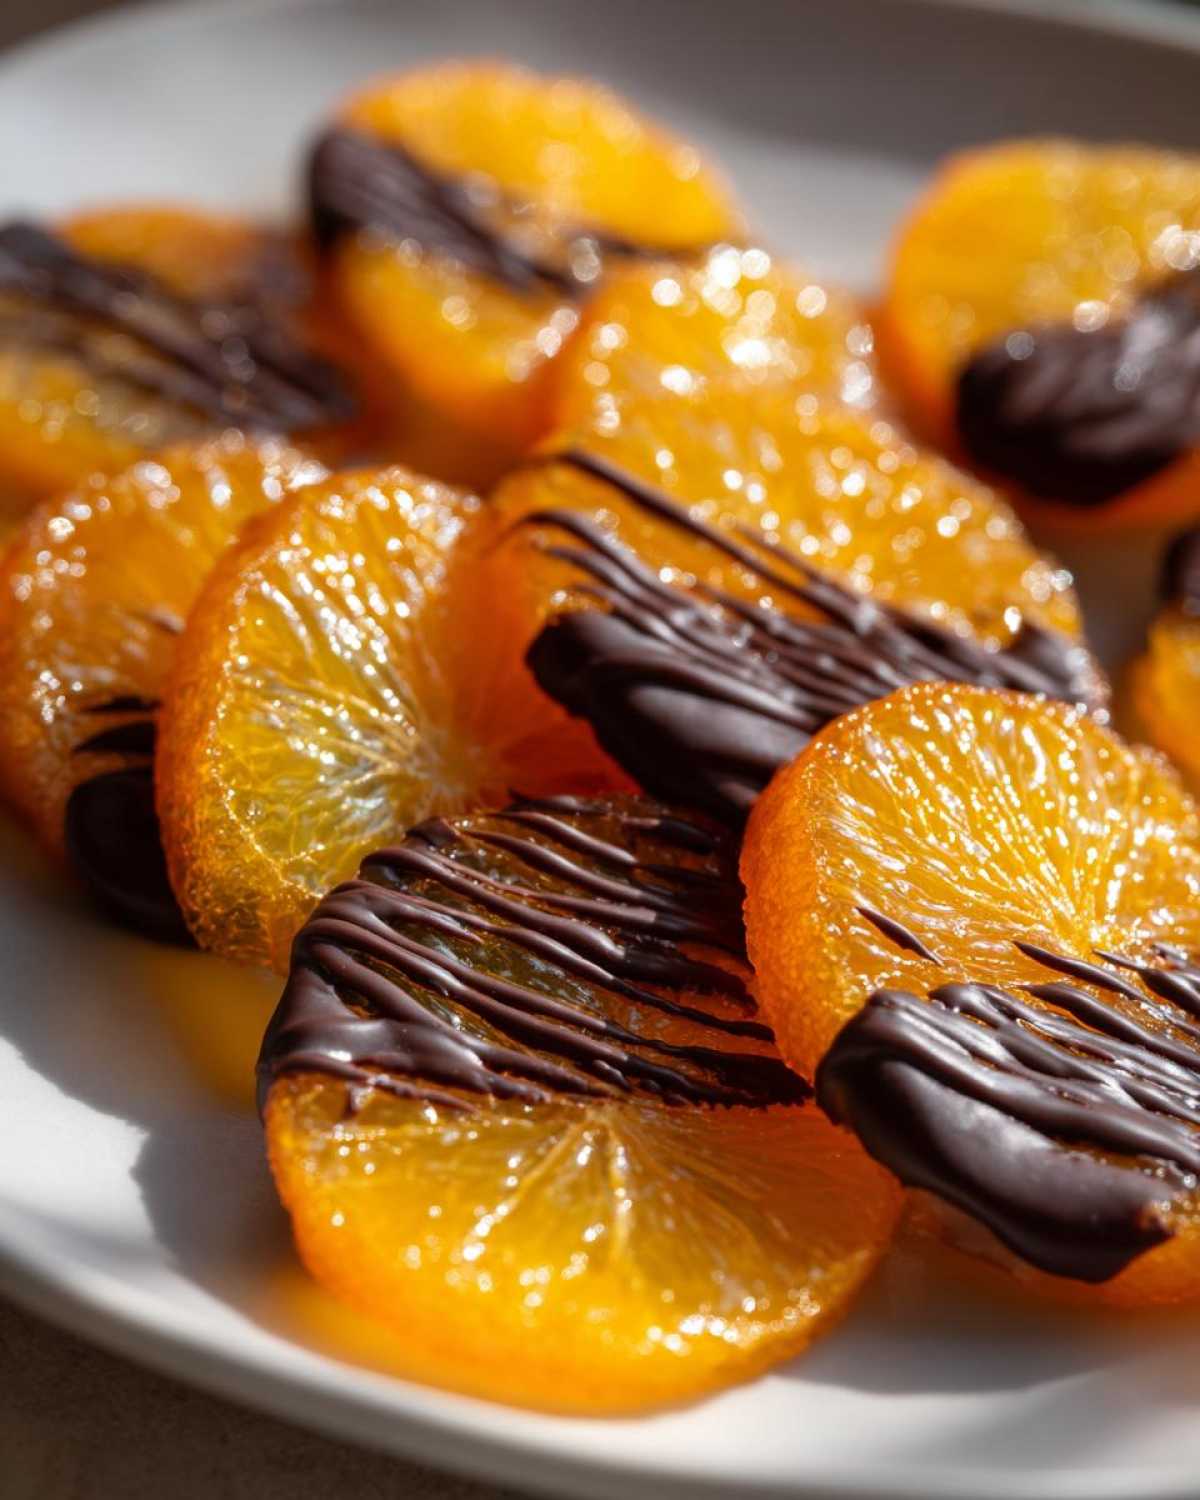
Now for the sweet transformation! Combine your sugar and water in a saucepan over medium-low heat (low and slow is key here). When the syrup starts bubbling gently, carefully add your orange slices in a single layer. Let them simmer for about 45 minutes, flipping each slice halfway through with tongs. You’ll know they’re ready when they turn slightly translucent – like little stained glass windows! Just watch that syrup doesn’t boil too hard – we don’t want burnt citrus.
Drying and Decorating
Here comes the patience part – carefully transfer your candied slices to a wire rack using tongs. Let them dry for 4-6 hours (overnight is even better!). Once dry, the fun begins! Dip some in melted dark chocolate for a decadent treat, or roll others in sparkling sanding sugar for holiday sparkle. Chocolate-dipped ones need about 30 minutes to set. Pro tip: these pair beautifully with our easy chocolate fudge for gift boxes!

Tips for Perfect Candied Orange Slices
Over the years, I’ve picked up some tricks that make candied oranges foolproof – here are my can’t-live-without tips!
Mandoline magic: That kitchen gadget you never use? Pull it out for this! Uniform 1/4-inch slices mean even cooking. No fancy equipment? Just take your time slicing – thicker is better than too thin.
Syrup watch: Keep your heat at medium-low – you want gentle bubbles, not a rolling boil. If your syrup starts darkening, immediately reduce the heat. Burnt sugar smells delicious at first, but trust me, it ruins the delicate orange flavor.
Storage smarts: Layer dried slices between parchment in an airtight container. They’ll keep beautifully for 2 weeks… if they last that long! For gifting, pair them with our holiday cookies in cute boxes.
Holiday hack: Make these ahead during your meal planning prep! They’re perfect for decorating gingerbread houses or garnishing holiday cocktails when you’re rushing to host.
Creative Ways to Use Candied Orange Slices
Oh, the possibilities with these sweet citrus gems! I’ve lost count of all the fabulous ways I’ve used candied orange slices over the years. Here are my absolute favorite ways to show them off:
Cake crowns: Place them artistically atop cheesecakes or chocolate tortes – the glossy slices make any dessert look professionally decorated!
Holiday sparkle: String them with cranberries and cinnamon sticks for edible garlands, or nestle them into wreaths for pop of citrusy color.
Gift box gold: Layer chocolate-dipped slices with homemade candy in cellophane bags – seriously impressive gifts that cost pennies to make!
Cocktail hour: Float a slice in mulled wine or citrus cocktails – the syrup sweetens your drink while the slice becomes an edible stirrer.
Don’t be afraid to get creative! I’m constantly finding new ways to use these versatile treats – follow me on Pinterest for more delicious inspiration!
Storage and Shelf Life
Here’s my secret for keeping candied orange slices perfect for weeks – store them in an airtight container with parchment paper between layers! Moisture is their enemy, so make sure they’re completely dry before packing them up. In a cool, dry spot, they’ll stay glossy and delicious for up to 2 weeks… though in my house, they rarely last that long!
Nutritional Information
Just a quick note – these nutrition estimates can vary based on the oranges you use and how much syrup they absorb. Like most treats, enjoy them in moderation as part of your meal planning for balanced holidays!
Frequently Asked Questions
I get asked about these candied orange slices all the time – here are the most common questions that pop up in my kitchen and inbox!
Can I use lemons or grapefruit instead of oranges?
Absolutely! Pretty much any citrus fruit works beautifully. My grandmother actually preferred candied lemon slices in her holiday baking decor – they’re extra tart and make stunning cake toppers. Grapefruit gets wonderfully bitter-sweet (just slice thinner since it’s bigger). Blood oranges create these gorgeous ruby-red slices around Christmas!
Help! My slices are sticking to the rack – what gives?
Oh honey, I’ve been there! The trick is waiting until they’re completely cool before moving them. Also, give your wire rack a quick spritz with cooking spray first. If they still stick? Gently peel them off with a butter knife – those little tears just add “rustic charm” (that’s what I tell myself anyway).
Is there a way to speed up drying time?
If you’re in a Christmas sweets crunch, pop them in the oven at 170°F for about an hour after simmering. But – and this is important! – let them cool completely before trying to decorate. Otherwise, your chocolate dipping will turn into a melty mess (learned that the messy way).
Are these candied orange slices gluten-free?
You bet! Since we’re only using sugar, water, and oranges (plus optional chocolate), they’re naturally gluten-free. Just double-check your chocolate if dipping – some brands add sneaky ingredients. These make perfect edible gifts for friends with dietary restrictions!
Share Your Creations
I’d love to see your gorgeous candied orange slices! Snap a photo of how you use them—whether it’s decking out a cake, garnishing cocktails, or gifting them with our no-bake protein bars—and tag me in your creations. Drop a comment below with your favorite way to enjoy them, or explore more festive recipes here on the blog. Happy candying, friends!
PrintCandied Orange Slices

Glossy, slice-through candied oranges perfect for dessert garnishes and holiday decor. Great for chocolate-dipped gifts.
- Prep Time: 15 min
- Cook Time: 45 min
- Total Time: 6 hours
- Yield: 12 slices 1x
- Category: Dessert
- Method: Stovetop
- Cuisine: American
- Diet: Vegetarian
Ingredients
- 2 large oranges
- 1 cup granulated sugar
- 1 cup water
- 1/2 cup sanding sugar (optional)
- 4 oz dark chocolate (optional)
Instructions
- Slice oranges into 1/4-inch rounds, removing seeds.
- In a saucepan, combine sugar and water. Bring to a simmer.
- Add orange slices, simmer for 45 minutes, flipping occasionally.
- Remove slices and let dry on a wire rack for 4-6 hours.
- Optional: Dip in melted chocolate or roll in sanding sugar.
Notes
- Use a mandoline for even slices.
- Store in an airtight container for up to 2 weeks.
- Perfect for cake toppers or holiday gifts.
Nutrition
- Serving Size: 1 slice
- Calories: 60
- Sugar: 14
- Sodium: 0
- Fat: 0
- Saturated Fat: 0
- Unsaturated Fat: 0
- Trans Fat: 0
- Carbohydrates: 15
- Fiber: 1
- Protein: 0
- Cholesterol: 0